Additional Support - RV Enthusiast Magazine

Additional Support

by | Jun 9, 2023 | Pro Tip, RVEXPERT

Photos by the author
Extra-long awnings provide great shade for any RV — but can quickly develop sagging in the middle that can damage the roller tube. Installing a cradle automatically rotates to support the weight and keep the awning straight and tidy when retracted.
Just about all RVs are equipped with patio awnings these days — and for good reason: No one wants to bake in the sun and a patio awning provides the requisite shade. Most owners want as big an awning as possible — and that’s the rub. While a big, expansive awning is nice to have, in most cases longer models sag in the middle when retracted. Over time, the bow in the roller tube can become more pronounced. We’ve all seen rolled-up awnings bouncing up and down when an RV is on the road, and the added stress usually leads to damage, impeding the operation of the awning.

More to the point, it becomes unsightly.

Taking preemptive measures can protect your investment, and the best way to mitigate sagging is to install a cradle support in the middle of the roller tube. Fortunately, it’s easy to do.

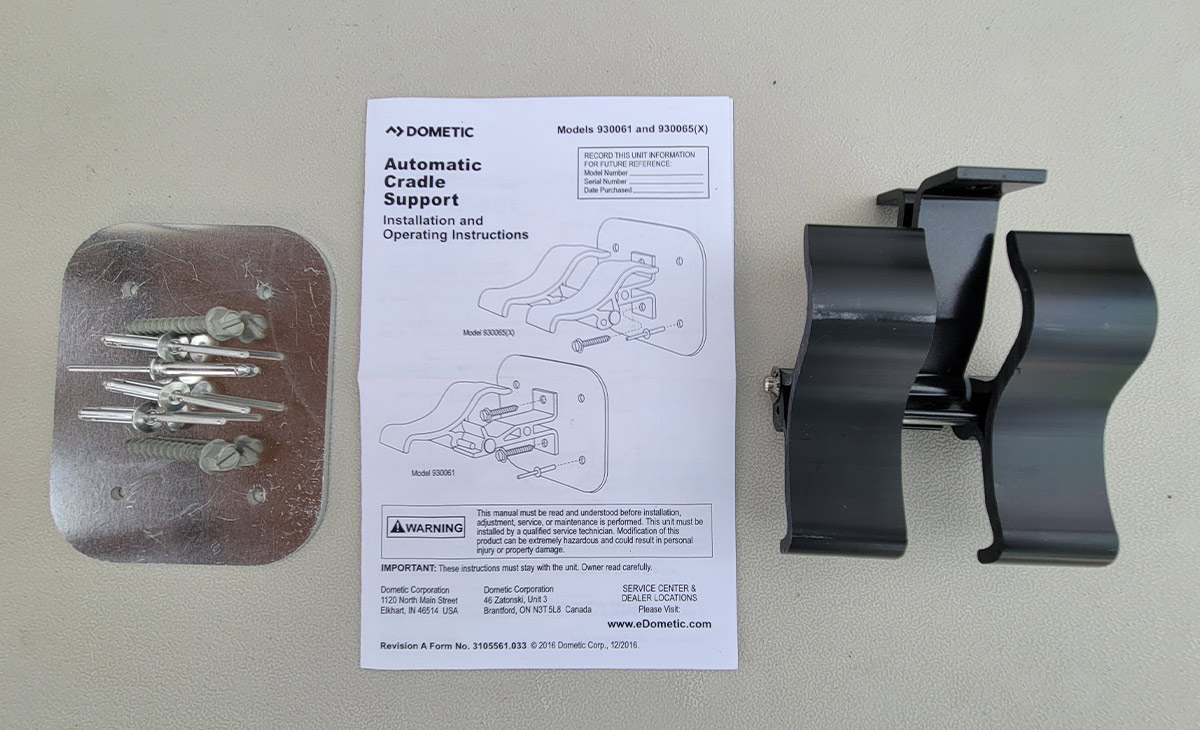
Dometic is a big supplier of patio awnings to the RV industry and offers an Automatic Cradle Support assembly to prevent sagging (while the fabric is stored against the sidewall) that can be installed below any brand awning that uses a roller tube to extend and retract the fabric. There are two kits available; one has a single cradle (part #930061) while the other uses dual cradles to support longer awnings (part #930065). For this project, the dual cradle kit was installed since the awning spanned nearly the entire length of the trailer and was sagging after just a few trips. Kits are available in black or silver colors; the black looks better, in my opinion. The dual cradle kit can be found on Amazon for $79.28, which is a bargain when compared to replacing a damaged roller tube and fabric. My experience with awning repairs suggests that all awnings longer than 17 feet should have a support.

Dometic’s Automatic Cradle Support kit including a double rotating cradle, a reinforcement (backing) plate, the necessary hardware and instructions
Dometic’s Automatic Cradle Support kit (#930065) includes a double rotating cradle, a reinforcement (backing) plate and the necessary hardware. Instructions are clearly presented and simple to follow. The cradle assembly can used to support all patio awnings that have a roller tube.

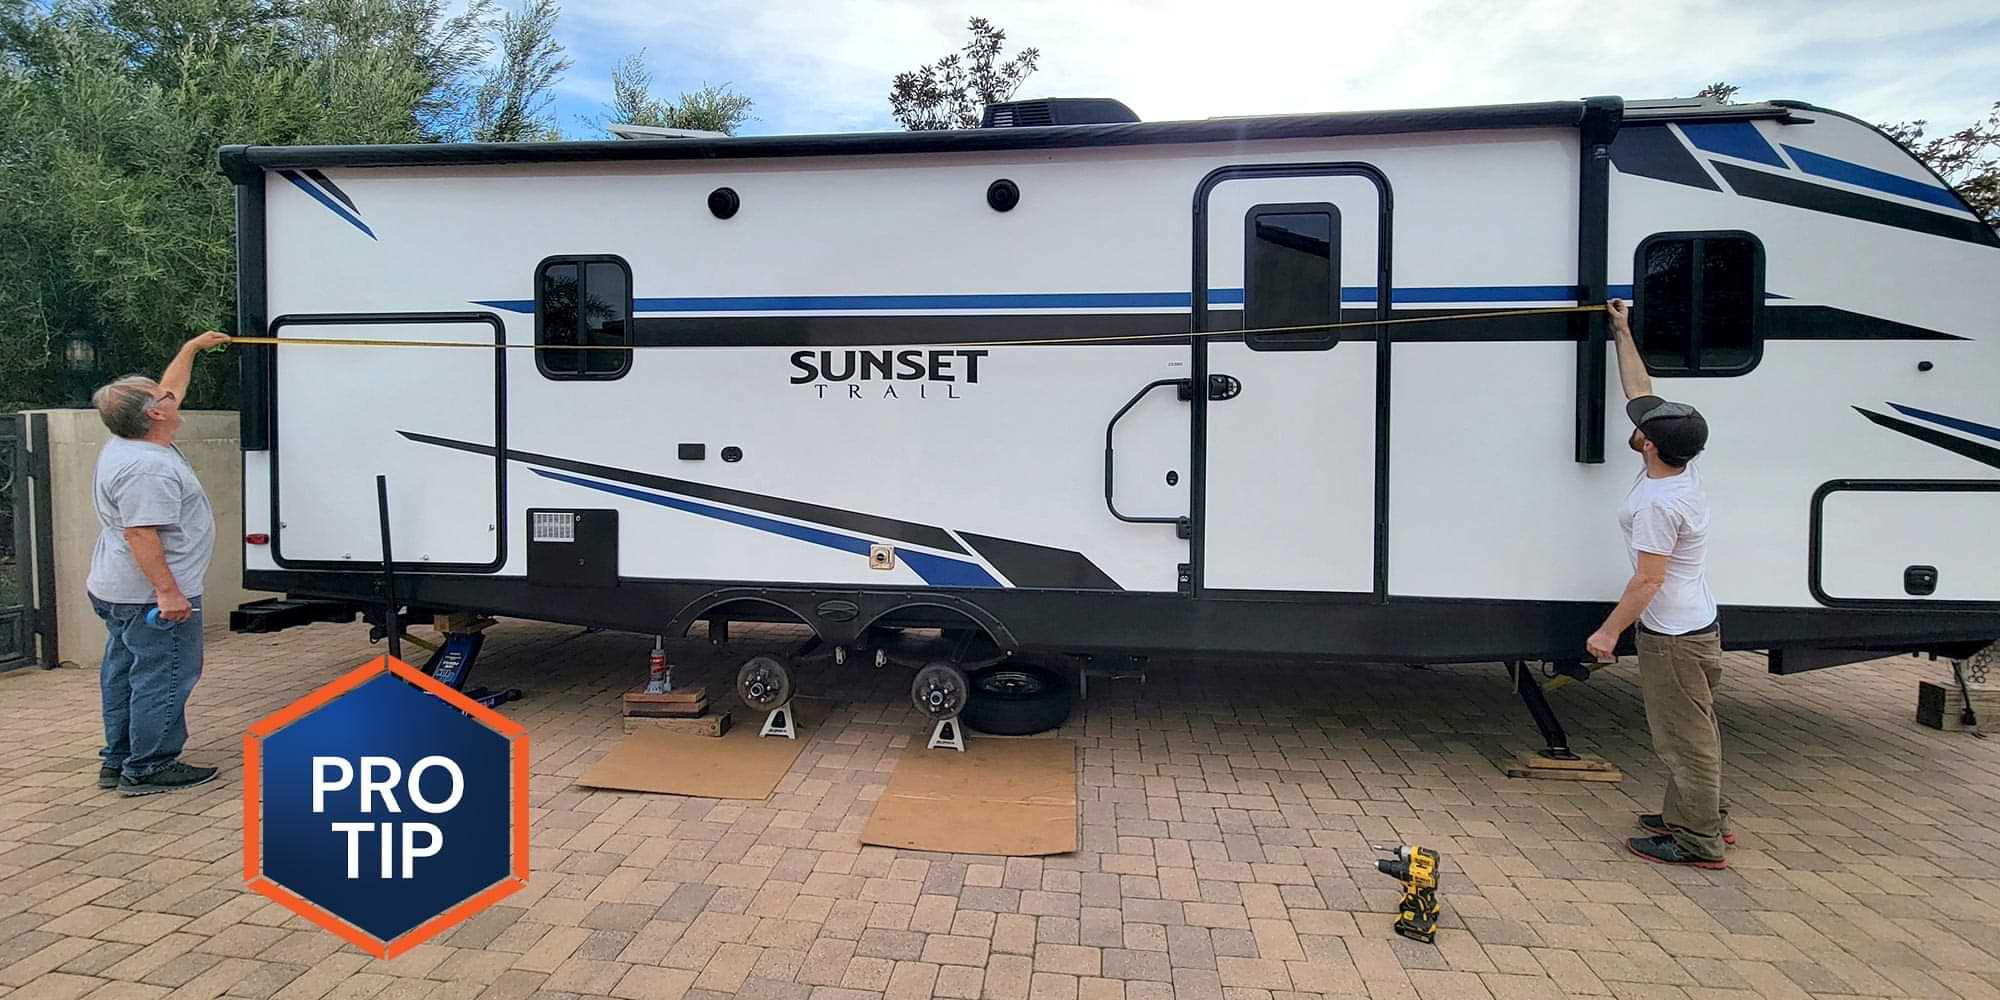
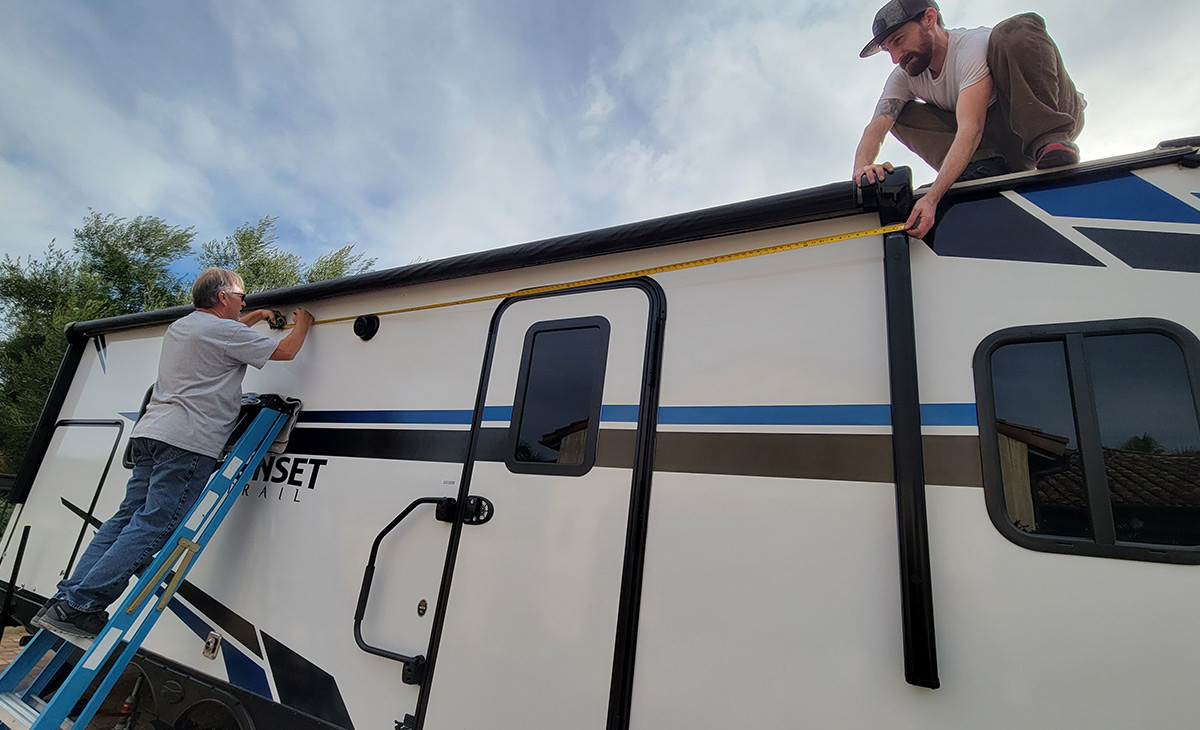
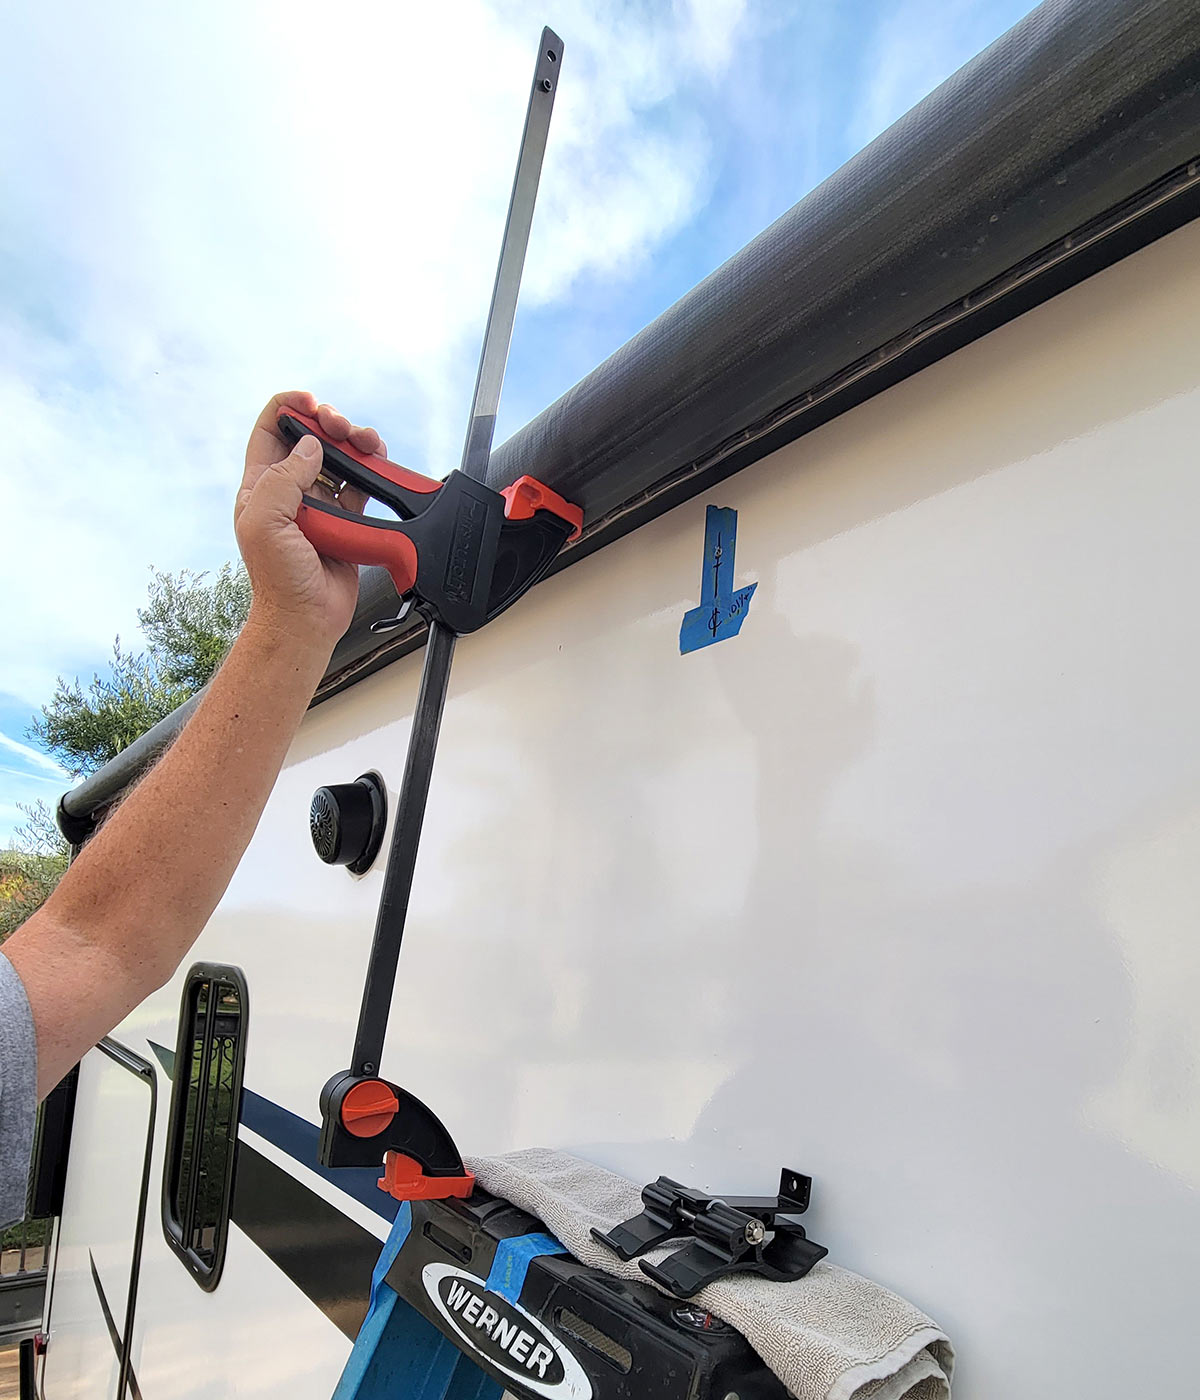
There’s not much to the installation — only common hand tools are required — but you will need one or two helpers and a ladder tall enough to reach the bottom of the rolled-up awning. You will also need a long length of 2×4 or 2×6 lumber to support the awning in the middle while you’re trying to perform the install unless you’ve got somebody who can hold it up to provide access to the area when the holes are drilled. We improvised with a Pittsburgh 36-inch Ratcheting Bar Clamp/Spreader procured at Harbor Freight (harborfreight.com; $19.99) rather than chase the lumber. The clamp was wedged between the roller tube and top of the ladder that was leaned against the trailer.

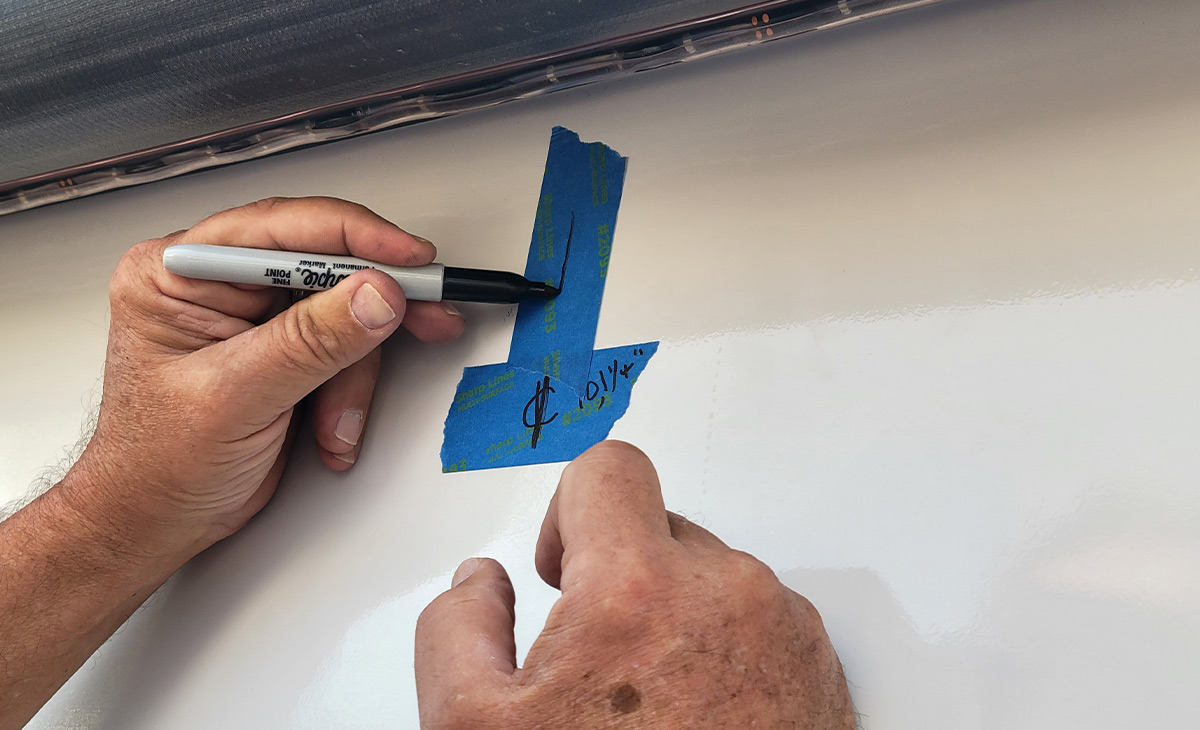
Start the installation by measuring the center of the awning roller tube. If there’s a light fixture or some other obstruction in the way, the support can be moved to either immediate side without affecting performance. Once the location was determined, painter’s tape was stuck on the sidewall on which a black felt pen was used to mark the place where the cradle assembly would be mounted — and be clearly visible.

TechnoRV Advertisement
two men use measuring tape to locate the center of the awning tube
The first step is to locate the center of the awning tube. Here the awning spans almost the entire length of the trailer, making the cradle assembly necessary to prevent sagging.
painter's tape and a sharpie mark the center of the awning tube
a cradle assembly piece is used to mark the pilot hole location
Once the center point was established, painter’s tape was used to mark the proper location of the cradle assembly. Any marks made directly to the sidewall will likely be permanent. The cradle must be a minimum of 3 inches from the awning rail, with no obstructions. If a light fixture or other obstruction is blocking the center point, the cradle assembly can be moved to either side without impacting performance.

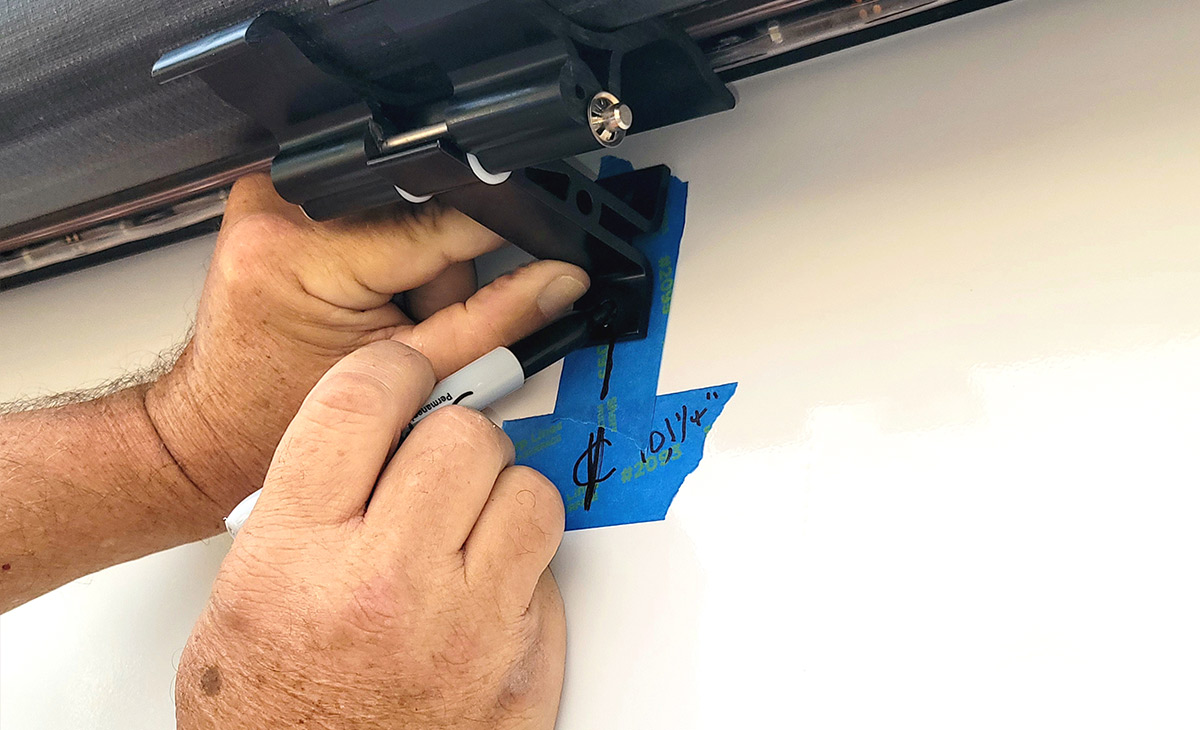
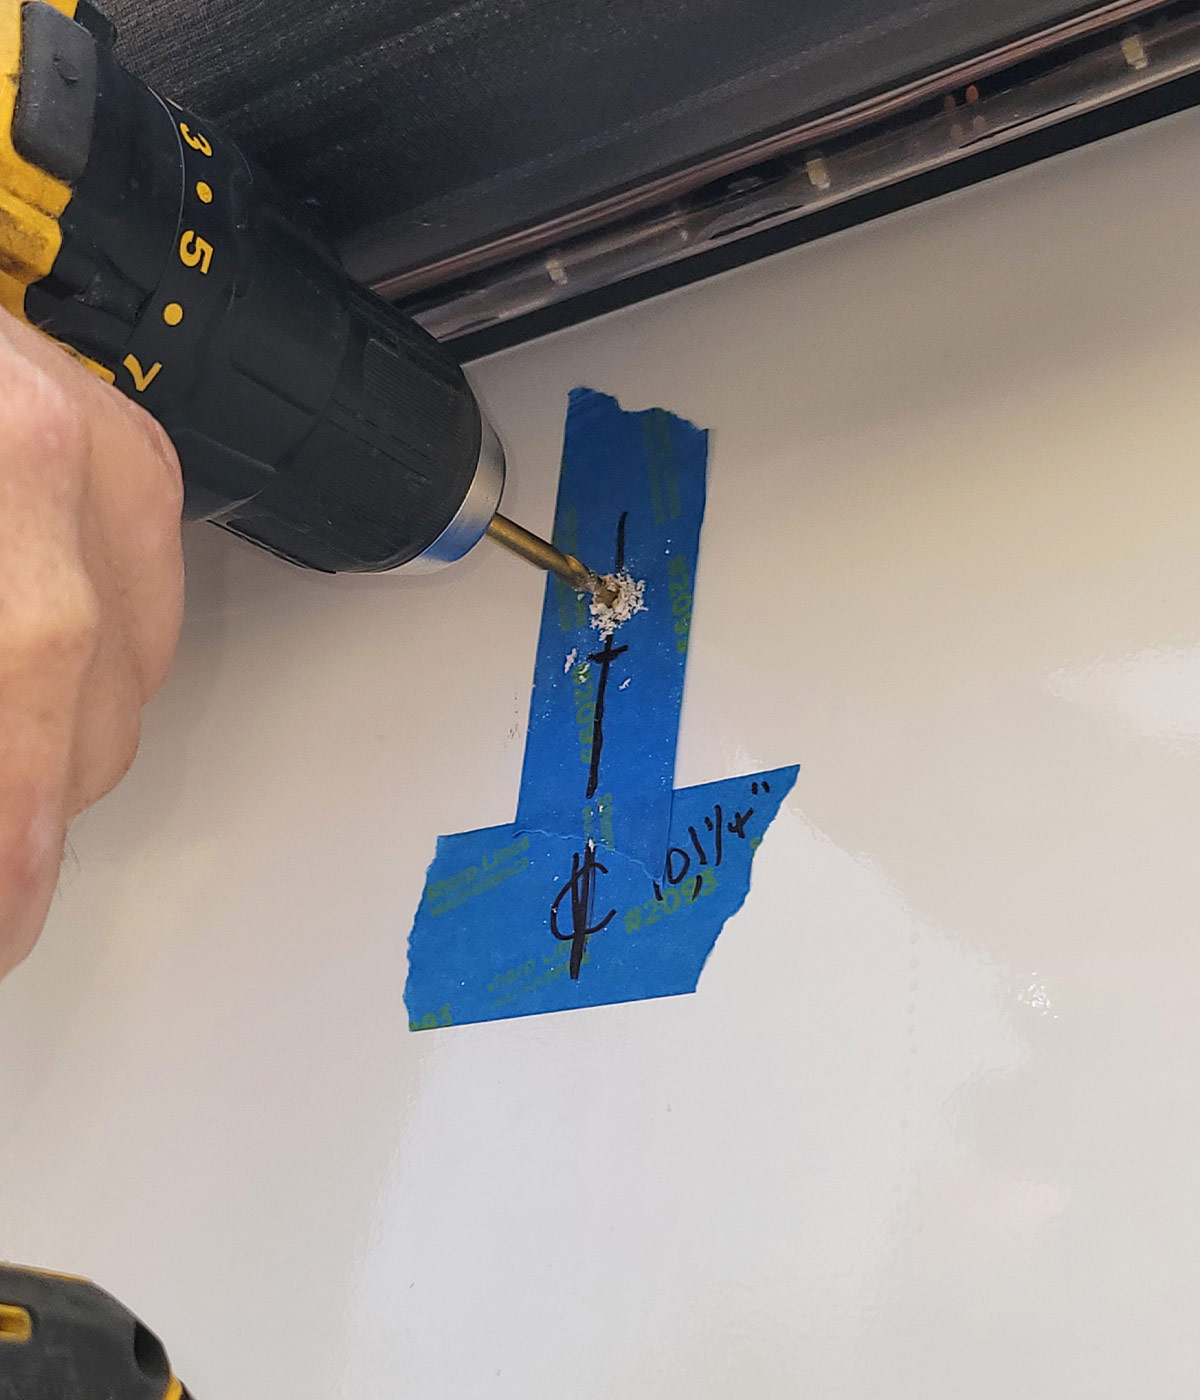
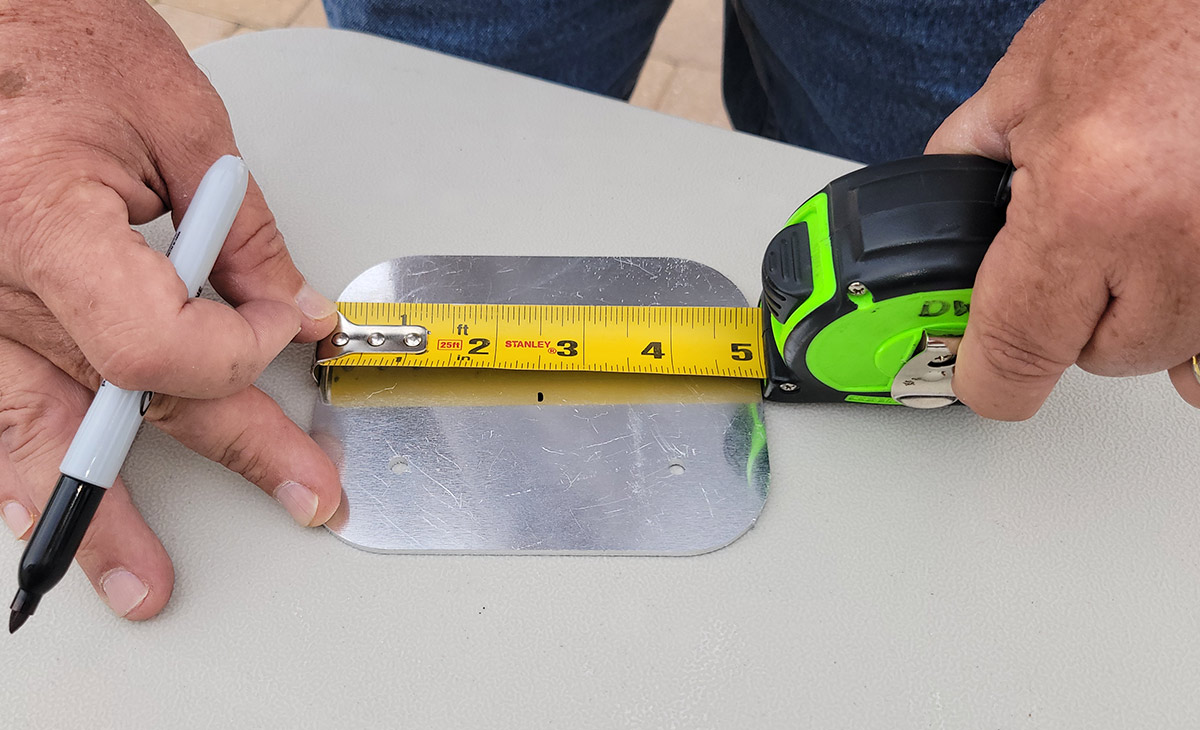
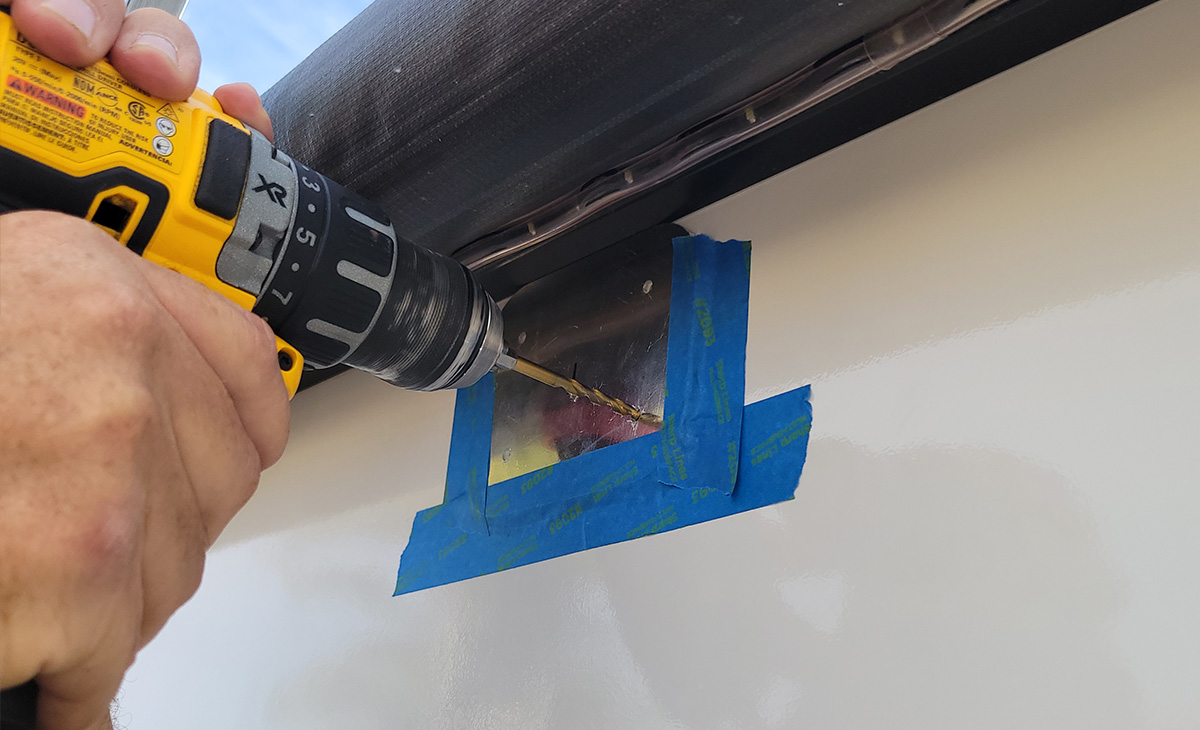
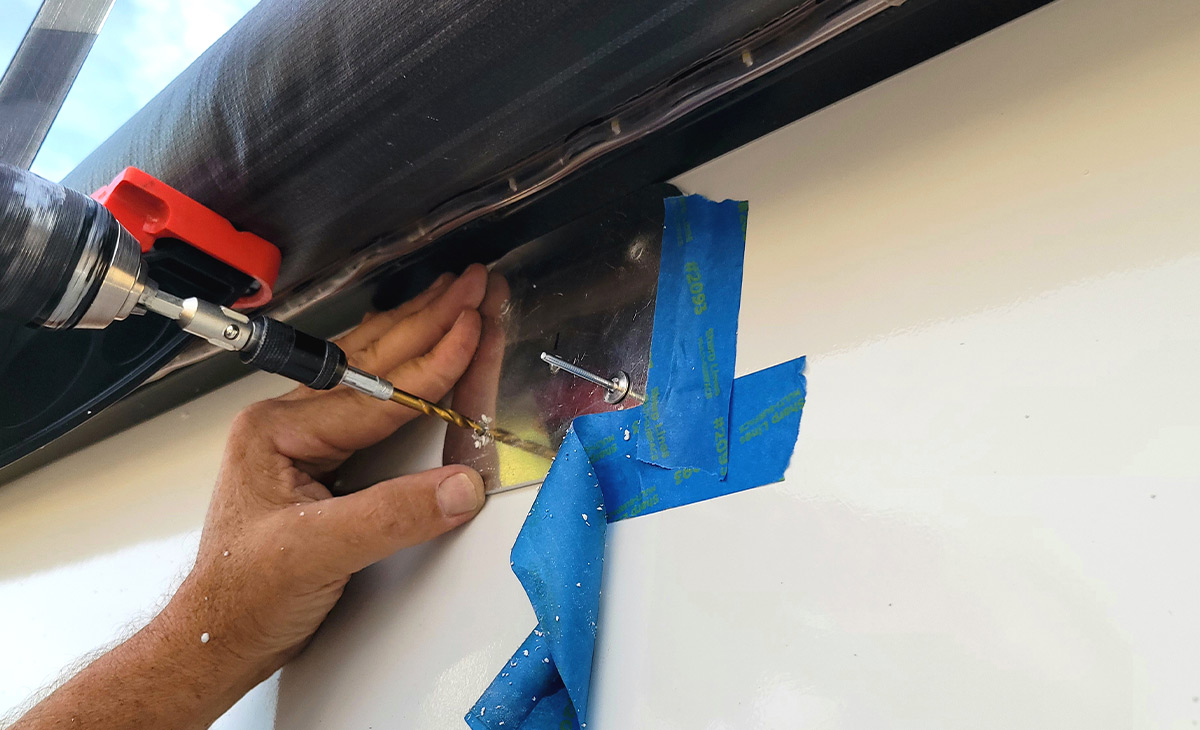
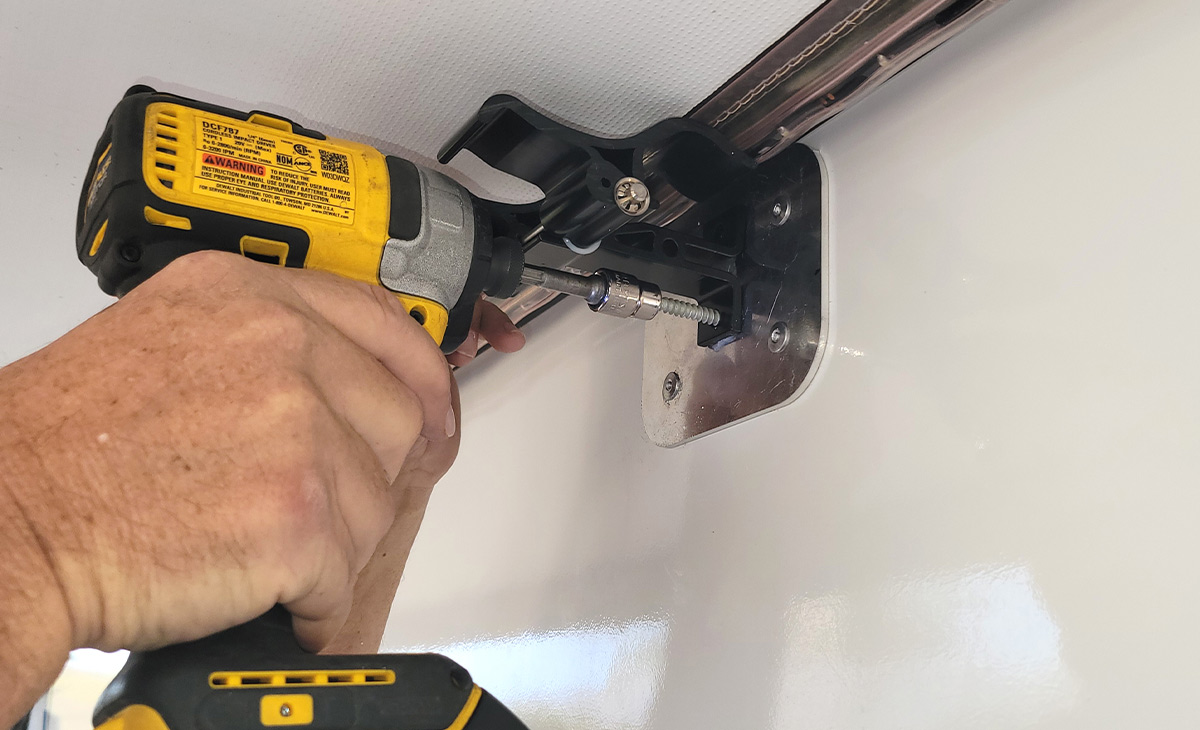
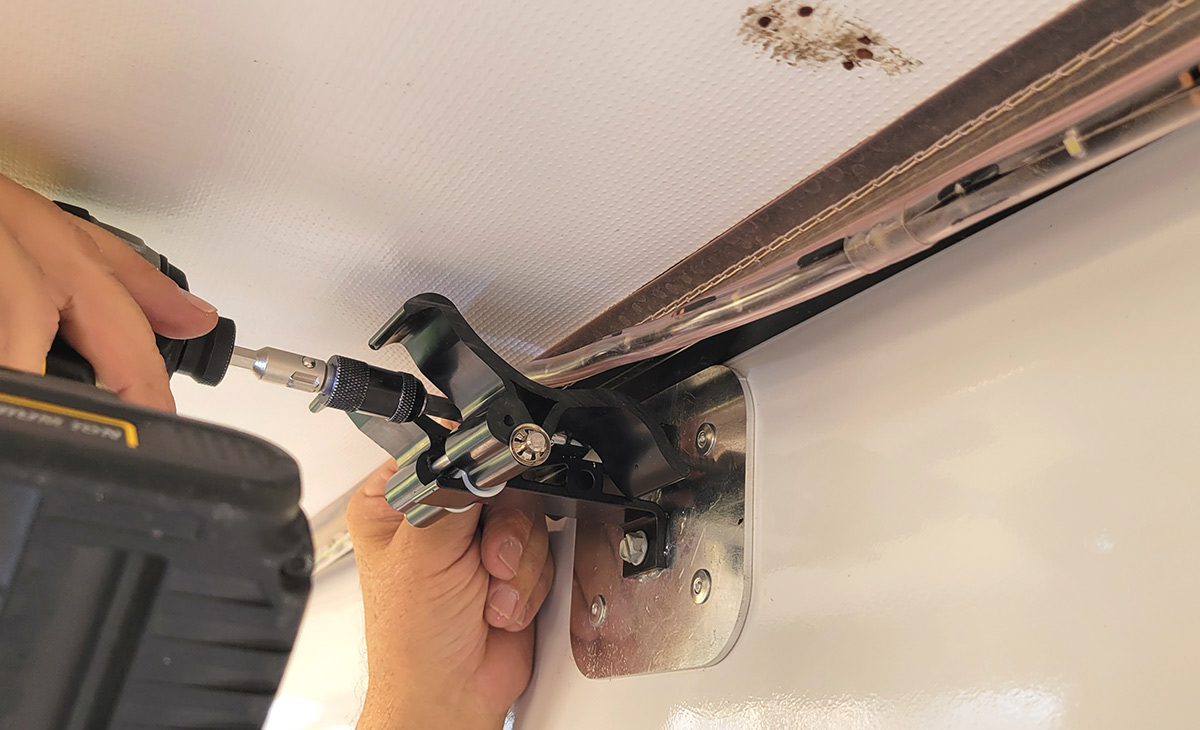
If you know there’s adequate backing at the point where the cradle assembly will be installed, it can be affixed using lag screws directly through the wall. The cradle assembly must be positioned so it has a minimum of three inches of clearance below the awning rail. If you are unsure as to any support behind the sidewall (which is probably the case), the backing plate supplied with the kit must be installed first. I found it easier to mark the position of the cradle assembly on the plate, which was predrilled while it was secured in a vice instead of trying to do it on the sidewall. The plate was then taped to the sidewall and the appropriate pilot holes for the two lag screws were drilled through the previously made holes and into the wall. Two of the rivets that came with the kit were pushed temporarily through the holes in the plate and wall. Doing so kept the plate aligned when drilling the four 3/16-inch holes for the rivets that secure the plate to the sidewall.

a pilot hole is drilled into the sidewall
A pilot hole was drilled into the sidewall to establish the final location of the backing plate, which must be used if you are not sure there’s adequate support behind the sidewall. Most owners will not know this and should plan on using the backing plate.
a sharpie and measuring tape are used to mark the respective holes for the cradle assembly on the backing plate
The respective holes for the cradle assembly were marked and drilled through the backing plate before placing on the sidewall. Here, the plate was marked on the bench and then moved to a vice for drilling (not shown).
a Pittsburgh 36-inch Ratcheting Bar Clamp/Spreader along with a ladder hold the sagging roller tube out of the way in order to mount the cradle
A long piece of 2 x 4-inch lumber (not shown) can be rigged up to hold the sagging roller tube out of the way when mounting the plate and cradle assembly. Rather than chase lumber, a Pittsburgh 36-inch Ratcheting Bar Clamp/Spreader, purchased at Harbor Freight for $19.99, was wedged between the top of the ladder and roller tube to support it during the project.
a supplied rivet holds the backing plate in place
The rivets that are supplied with the kit were put into double duty during the installation by inserting one temporarily through each lag-screw hole in the backing plate. Doing this held the plate securely while drilling the other holes.
with a pre-punched hole on the backing plate used as a template, holes are drilled into the RV sidewall
continuing with the pre-punched holes on the backing plate used as a template, holes are drilled into the RV sidewall
Holes (3/16-inch) for the rivets that hold the backing plate to the sidewall were drilled through all four pre-punched holes. Again, a rivet was placed through another hole to keep the plate square during the drilling process.

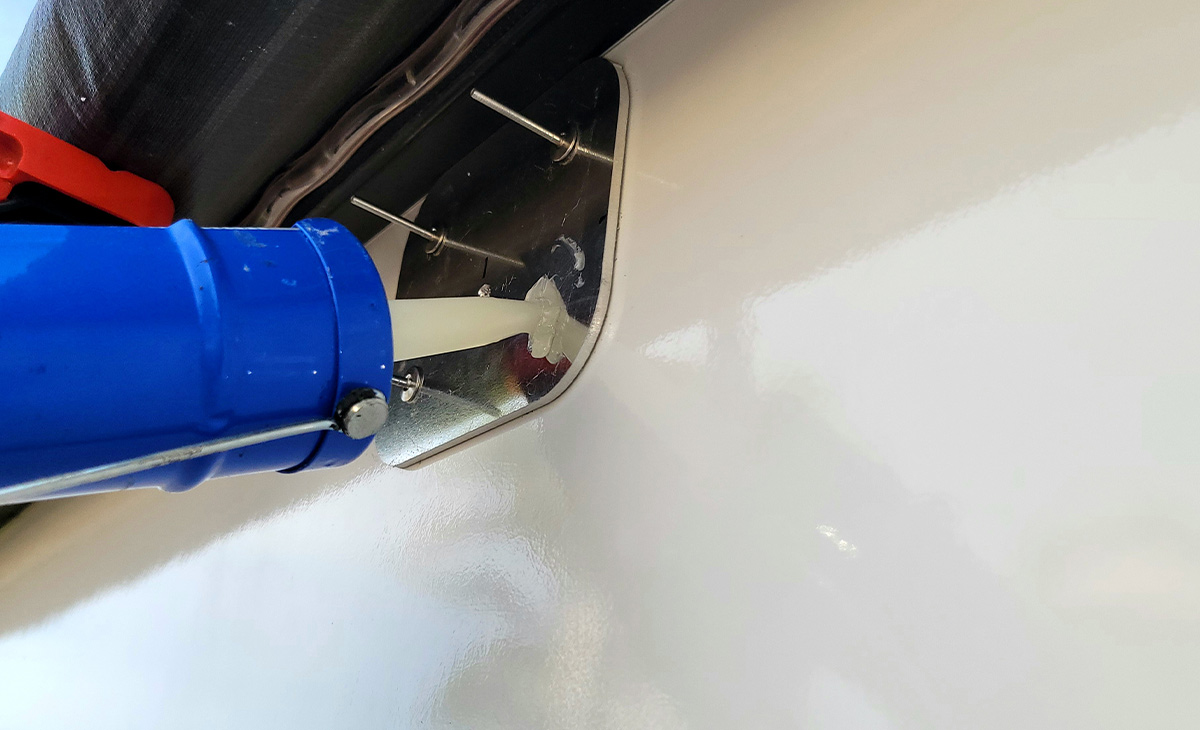
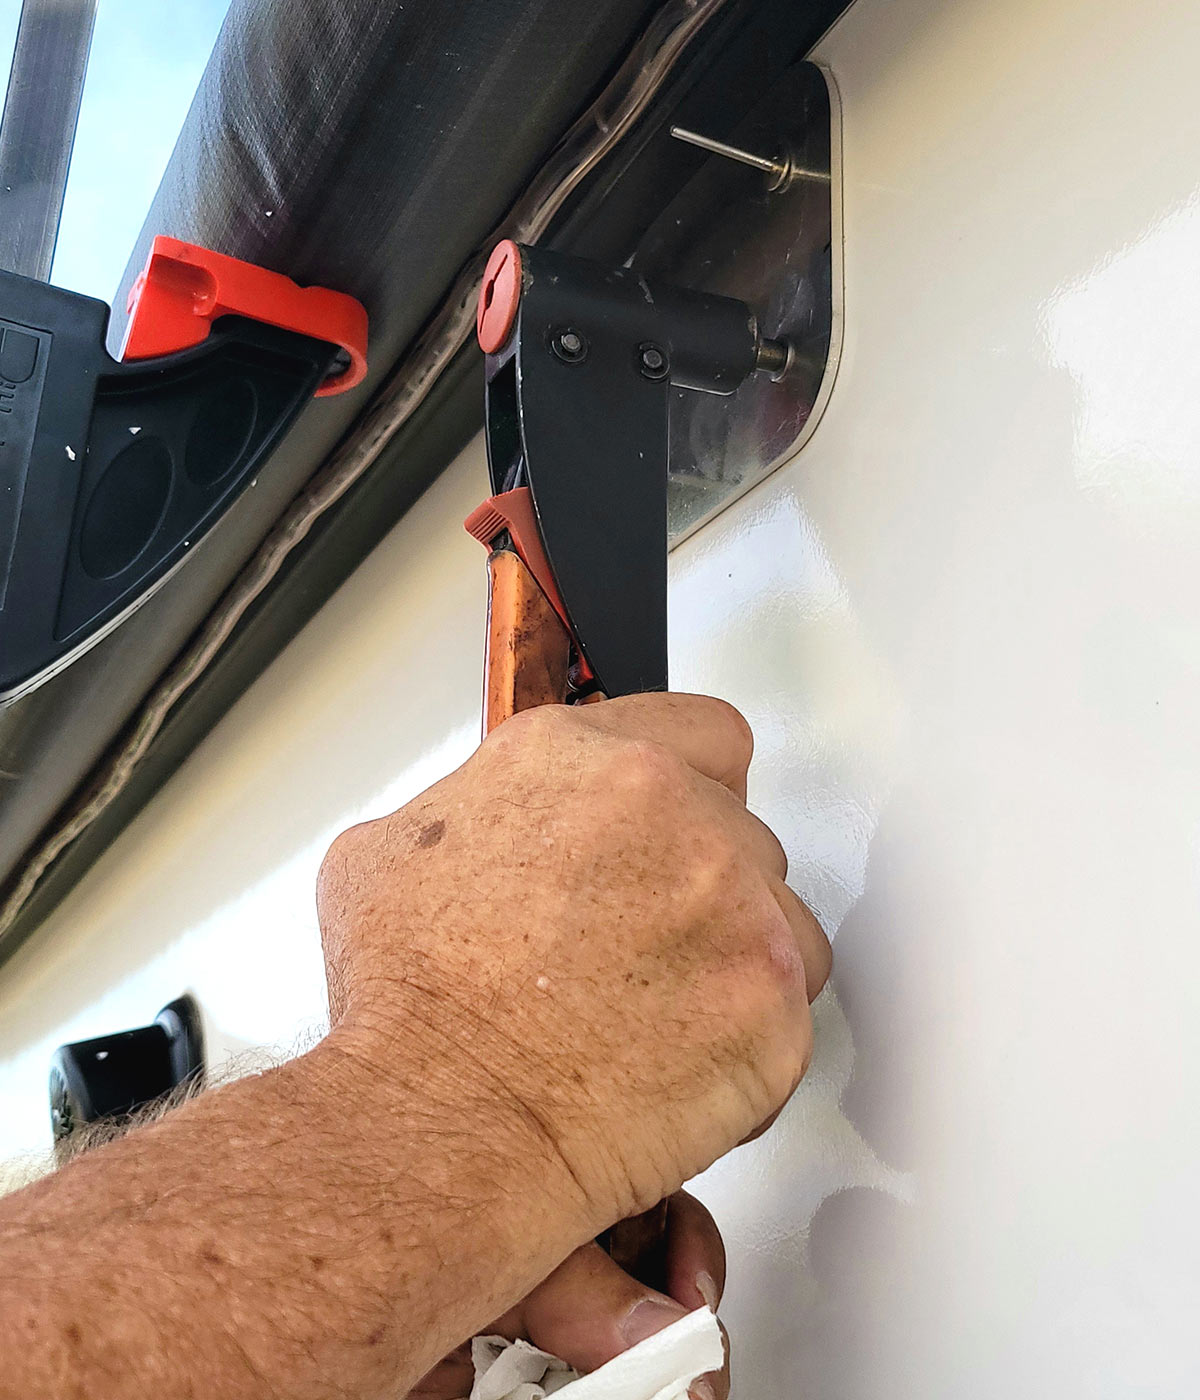
Silicone sealant was then pushed into the holes before installing the four rivets and again before driving the lag screws through the cradle assembly and completing the job.

silicone sealant is injected into one of the holes made on the RV sidewall
It’s important to inject silicone sealant into any hole made in the sidewall before setting the rivets or driving the lag screws. Failure to add the sealant can lead to water leakage and sidewall structure damage.
a rivet tool punches an aluminum rivet into one of the backing plate holes
A simple rivet tool made short work out of setting the aluminum rivets in all four corners of the backing plate.
a cradle mounting lag screw is tightened with a drill
a second cradle mounting lag screw is tightened with a drill
The last step was to drive the two lag screws to mount the cradle assembly to the sidewall. It might be necessary to use a nut-driver extension to reach the top lag screw, as it was during this installation.
the cradle assembly in place and holding a once sagging awning tube
With the cradle assembly in place, roller tube sagging, which was pronounced on this trailer, was prevented. The cradles automatically rotate into position as the fabric is retracted against the sidewall.
Get Updates
Subscribe today and never miss an issue!
Get all the latest tips and news to keep you moving on that open road!
RV Enthusiast January/March 2024 Issue
Current Issue
January/March 2024
Spring is back in bloom and with it we are proud to present our latest issue of RV Enthusiast! The January/March issue covers furnace failures and how to fix them, the best batteries for boondocking, quick and easy weekend projects, PLUS so much more!

Already a Subscriber? Click here for Access to the Full Issues.

Share This