Mildew Mitigation - RV Enthusiast Magazine

Mildew Mitigation

by | Jul 5, 2024 | Pro Tip, RVEXPERT

Photos by author
Any time moisture is allowed to concentrate in dark areas, there’s bound to be the onset of mold and mildew, which leads to an unhealthy environment. Adding two louvered vents to the bedroom mattress platform is a really simple way to improve airflow.
Moisture is an RVer’s enemy, and it can build up in many places inside an RV — even in some places not usually considered to be vulnerable. One of these places where condensation can be lurking is under the bedroom mattress platform, where I discovered mildew growing among my stored items. The best solution was to provide ventilation to allow fresh air to circulate among the stored linens and other items in this area. This is one place where vents, like those in the kitchen island, are typically omitted, even though the use of the furnace and human breath lead to condensation build-up, especially at the head of the bed.

I first tried running a dehumidifier that was supposed to treat 600 square feet of space, but I still had to fight mildew under the mattress platform — even after leaving the platform propped open for a while, which was terribly inconvenient. After fighting this problem for months, I added simple vents, which did the trick.

air vent at bottom of island
Air vents are typically installed in areas subject to moisture like this island in the galley. Here, two vents were placed in the back and side of the island that serve double duty as furnace ducts. This type of ventilation was omitted in the bedroom mattress platform.
tools and air vent covers
The vents for this project were purchased on Amazon. They are made of aluminum alloy and sell for only $8.99 for two. Only common hand tools are needed for the installation except for an oscillating tool for cutting the holes. A small hand saw will also work.
There’s nothing exotic about the louvered vents that were chosen for this job, nor the installation process. These vents were bought on Amazon in a 2-pack for $8.99 (“Aluminum Alloy Rectangular Air Vent Cover ULIFESTAR Louvered Grille for Wardrobe Shoe Cabinet Closet”). The vents, which are 3.15 x 12 inches, were mounted into opposing sides of the bed platform, toward the head of the bed. I originally wanted to install the vents even closer to the front because the mildew mostly occurred at the head of the bed, but that wasn’t possible since the platform was hinged about two feet from the front wall of the slideout room and the area wasn’t immediately accessible.
tape measure showing length of air vent
tape measure showing width of air vent
In order to determine hole size, the flanges on each side of the vent were measured. These 3.15- x 12-inch louvered vents were perfect for the job. I chose aluminum rather than plastic to resist inevitable kicks from shoes (big feet) while working around the mattress.
After looking at dozens of louvered vents on Amazon, I decided to use the aluminum version rather than plastic, figuring that at some point the vents would get kicked and crushed.

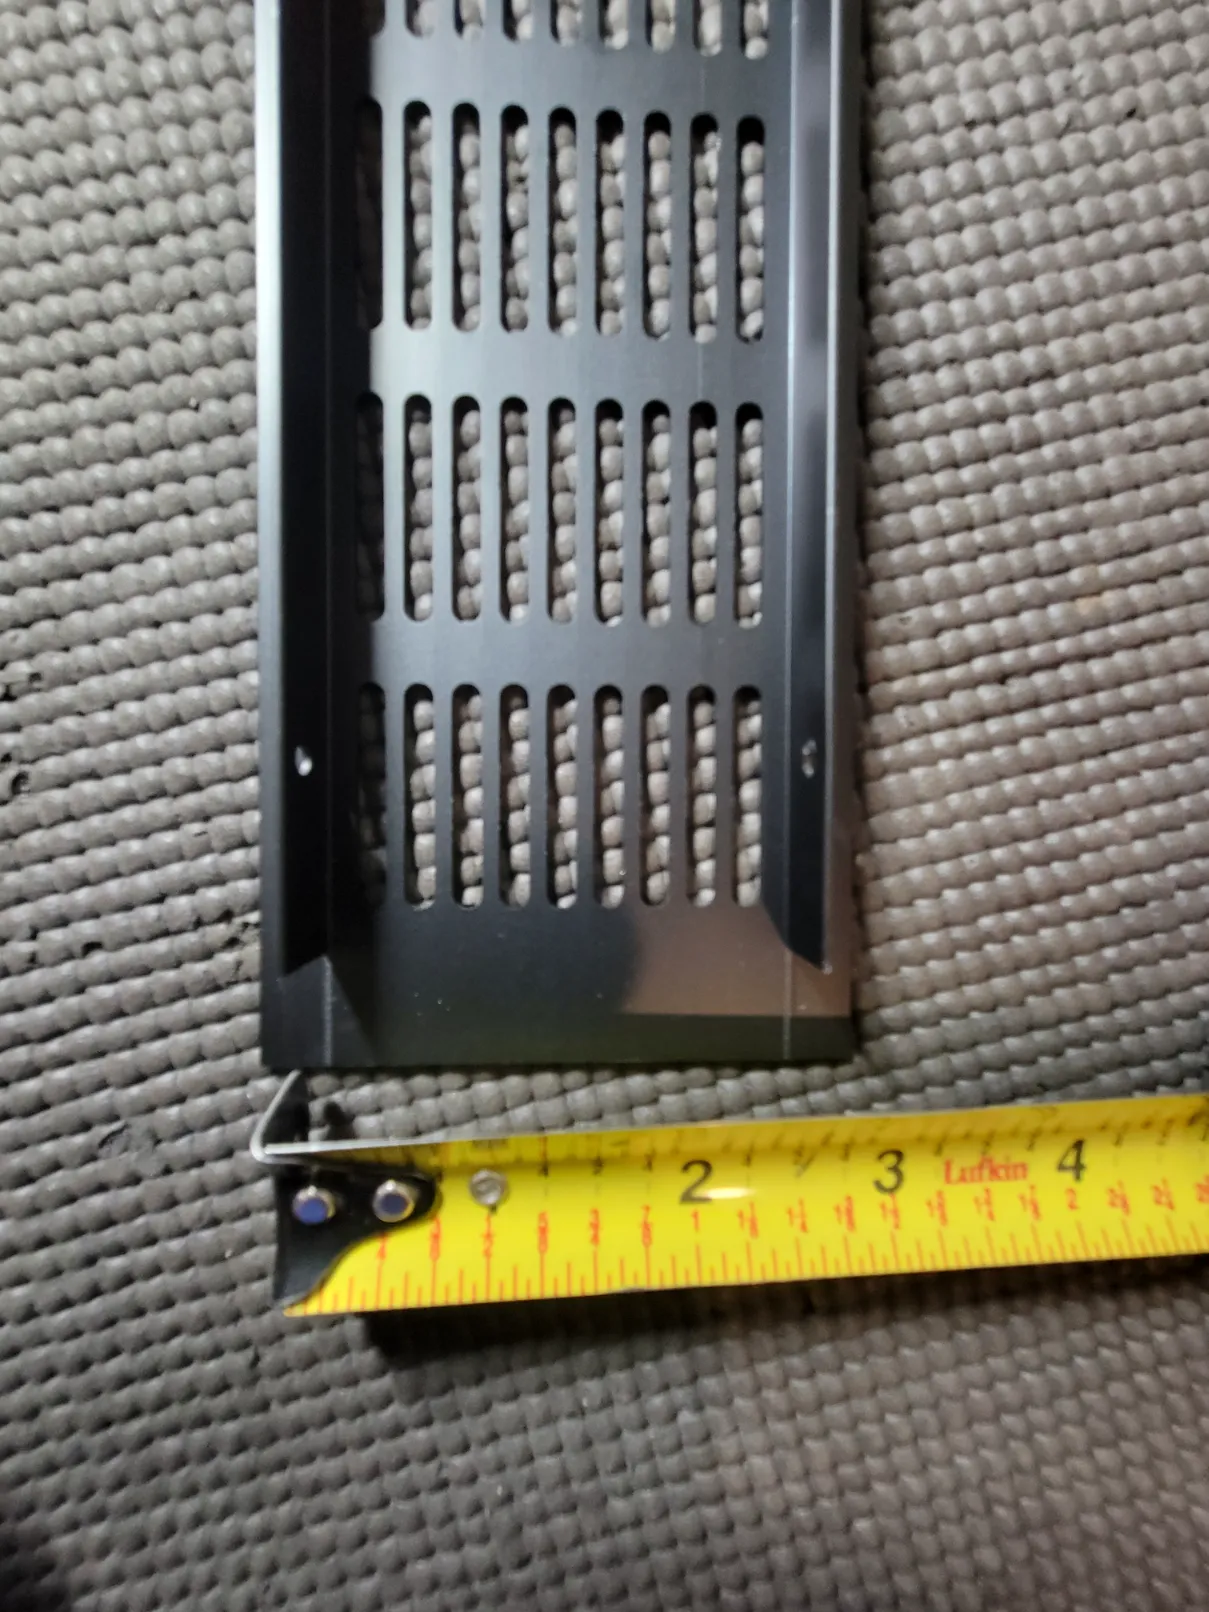
Although the location where I mounted the vents provided good ventilation, at some point I may remove the heavy mattress that I installed and disassemble the bed platform and see what’s under that section. It might be possible to add two more vents, which will provide even better airflow. So far, the mildew has been mitigated, so the two vents installed for this project seem to be working fine — and are even improving the effectiveness of the dehumidifier.

cut marks where air vent will go
The size of the vent flanges was transferred to the sidewall of the mattress platform and marked for cutting close to the head of the bed. This cutout must be precise for a good fit.
drilling air vent
These vents are actually designed to snap into the hole, but I opted to drill out the ends of the vents and drive screws to ensure a more permanent installation.
Installing the vents was fairly easy using basic tools that most owners carry, with the exception of maybe the oscillating tool to cut the rectangular hole. These holes can be cut by hand but will take longer. I measured back about 5 inches from the partitioned section of the platform and made the first marks based on the size of the vents. A unibit was used to drill four large holes in each corner of the rectangular cutout area and the oscillating tool made short work out of cutting the holes.
tape measure showing length of air vent
using saw to cut out air vent
The corners of the marked cutout area were then drilled with a unibit. Although an oscillating saw was used to cut out the area for the vent, the holes helped control the oscillating blade since the working area was too tight to plunge cut the wood without accidentally damaging adjacent areas in the structure.
Holes were drilled on each side of the vents along with pilot holes in the platform structure and screws were set to secure the vents. The job was done in less than an hour.

I’ll have to wait until winter sets in to really test the value of the new vents, but I’m confident that the improved ventilation will make a difference in moisture build-up. If not, two more vents are waiting in the wings.

drilling air vent in
Pilot holes were drilled in the wood to make it easier to install the wood screws (painted black to match) easily in the restricted space and to prevent splitting the wood.
finished air vent
The installed vent has a clean look, and the black color matches the moldings in the bedroom. So far, there’s been no sign of moisture in the mattress platform structure. The true test will be during long, cold winter nights. If needed, addition vents will be installed.
Get Updates
Subscribe today and never miss an issue!
Get all the latest tips and news to keep you moving on that open road!
RV Enthusiast July/August 2024 cover mockup
Current Issue
Check it out!
As the summer days linger on, escape the heat with the newest edition of RV Enthusiast! The July/August issue covers Improving RV A/C Efficiency, Rear- and Side-View Cameras, Truck shock Repair, PLUS so much more!

Already a Subscriber? Click here for Access to the Full Issues.

Share This