Technically Speaking – Q&A: May 2022

Damage from a Falling Tree Branch Creates Roof Holes
On our last camping trip a big branch fell on the top of our motorhome, resulting in several holes that damaged the rubber membrane, structure and insulation. I took it to my local repair shop and the personnel said it would take several thousand dollars to replace the rubber roof membrane. I was a bit taken aback at the price and I’m afraid that it’s going to drive my insurance premium sky-high. The holes are not that big — the biggest one maybe an inch in diameter. Is there some kind of a caulking that I can squirt down in the holes to prevent leaks?
— Jean Robertson
Unfortunately, this is a common occurrence when parking under trees — especially when camping in beautiful places where tree maintenance is non-existent . Seems like it’s only a matter of time before an RV gets hit with a big branch or even a tree that has fallen down. I know; it happened to me a few years back in the middle of the night. Quite an awakening!
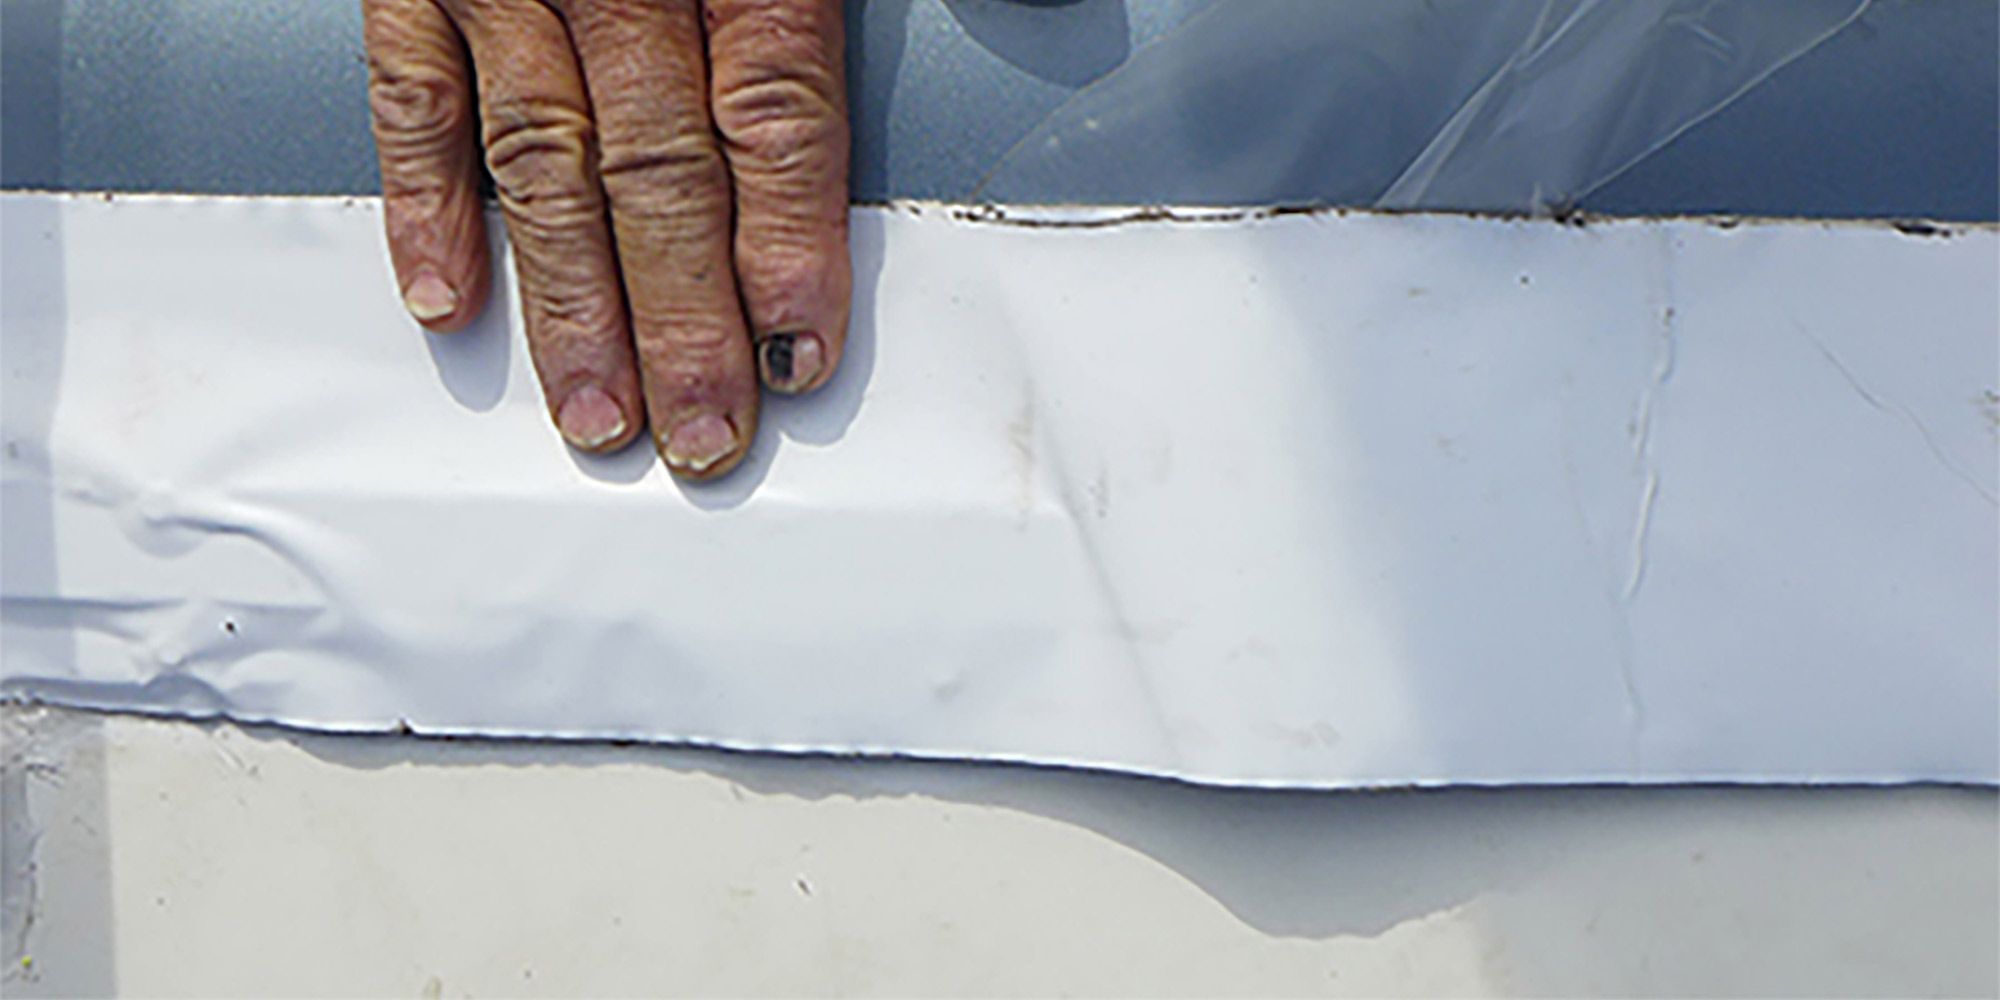
Sealant would not be my first choice; just trying to keep it from sinking down through the hole and into the insulation alone would be a challenge. Go online and pick up a product called Eternabond tape. This repair tape, which looks like rubber roof material, comes in different colors (the most common is white) and is sold in different widths and lengths. I used Eternabond to seal the seams where the front and rear caps meet the rubber roof on my fifth wheel and it’s been on there for 12 years — and is still in perfect condition.
As always, preparation is the key to success. Follow the instructions carefully for cleaning the roof material around the hole before applying the Eternabond tape. You should be able to cover multiple holes with one piece of tape, but this tape is incredibly sticky so once you touch the surface, it’s there for good. Therefore, take your time and apply the tape in small sections and with great care. Once the tape is set in place it needs to be rolled with a heavy object; in a pinch, use the palms of your hands to put pressure against the tape until you’re certain that it is completely seated.
I carry a small roll of Eternabond tape with me at all times; you never know when you’re going to need it. As a bonus, it can be used for making repairs in other places where surface integrity has been compromised.
Patio Awning Line-up
I have a Carefree Travel’r awning that has been giving us fits for months — maybe even a couple of years; I can’t remember. The awning never seems to line up when it closes against the trailer. One side of the hardware doesn’t mate completely with the sidewall and the other seems to be sticking out after we retract the awning. As it starts to extend, the other end follows only after the awning moves away from the sidewall about two feet — then the other end lets go with a bang that’s a bit unnerving. I’ve had the RV into the shop two or three times and all the mechanics tell me is that the mechanism seems to be pretty good and there was nothing they can do. Please help.
— John Sinclair
John, I am familiar with the Carefree Travel’r awning; it’s a good high-quality awning and designed to last for many years. Like any awning, however, it can have glitches here and there — and possibly your awning was never lined up correctly after the factory installation. These awnings do not tend to shift.
First, you need to check the set screws that go through the awning rail and into the fabric to make sure there’s still one at each end. If not, the fabric will shift back-and-forth when the awning is extended — causing an incorrect alignment when the awning is retracted. If both screws are in the correct position, you will need to reset the front and back hardware; more than likely the culprit will be the outer pieces of the hardware.
The flat section of the hardware that’s bolted to the side of the RV has two or three lag bolts inside. This hardware is slotted, so if the screw is in the middle of the slot you should have a small amount of adjustment side-to-side. If the bolt is up against one of the slots and you are unable to move it, you will need to remove that lag bolt, move the hardware to a better position and then re-drill. It’s important that sealant is applied to prevent any moisture intrusion at the sidewall, which may not show up for years. Keep in mind you may need two or three people to hold the hardware in place while you are making the adjustments.
Old Age Setting In

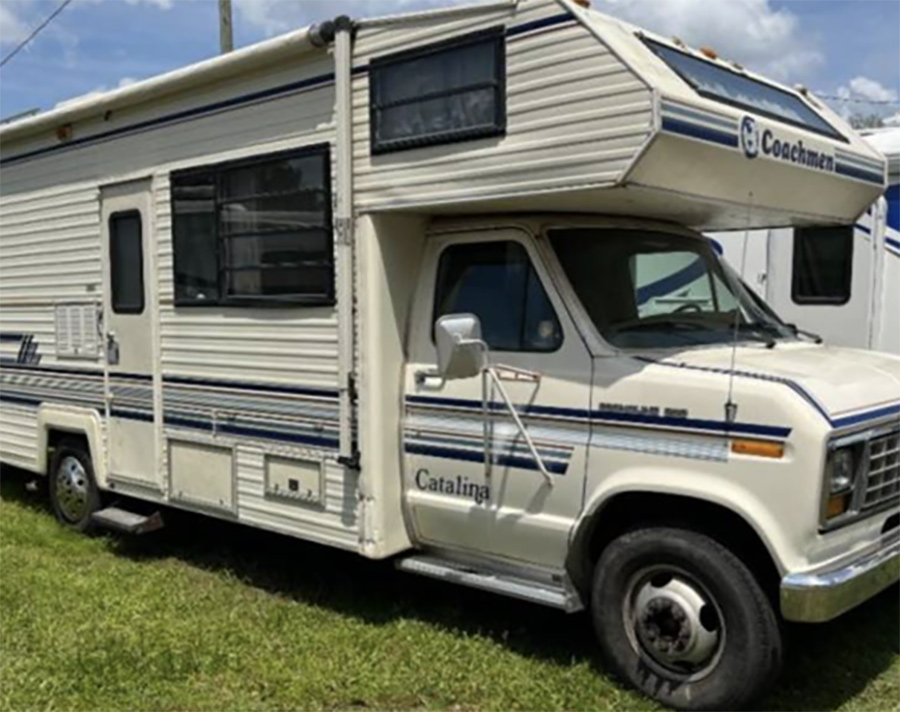
Ford-based vintage RVs such as this 1989 Coachmen Catalina have a lot to offer — but may also represent a lot of problems.
I’m thinking about buying a 1989 Class C motorhome on a Ford Chassis. The motorhome seems to be in good condition and it’s only got a little more than 49,000 miles on the odometer. The outside is admittedly not great after being exposed to the elements for that many years, but the interior is very nice. I’m a little bit leery about the age the motorhome, however. I don’t want to start sinking thousands of dollars into it only to have things start breaking. What are your suggestions when buying an older used motorhome?
— Robert Salazar
It’s valid to be concerned about the condition of a motorhome that’s been around for more than 30 years — you don’t want to purchase a can of worms. At the very least, I would take the motorhome to a certified mechanic and have the engine, drivetrain and brakes checked out thoroughly. Ask the owners if they have any invoices from past repairs or service. Check the age of the tires. If they are older than seven years or have sidewall damage and/or little tread left, don’t even consider moving it very far without an inspection. Of course, make sure the air pressure is right.
Carrying all that weight over many years can result in a lot of wear and tear on the suspension components. I suggest going online to determine if there were any inherent problems with that particular motorhome, both the chassis and the living quarters. It goes without saying that all the systems should be checked out by a qualified inspector; you can contact places such as the National RV Inspectors Association (nrvia.org) or the National RV Training Academy (nrvta.com) and ask if they have an inspector in your area.
Be prepared, too, for certain appliances to have simply aged out. Another thing to keep in mind is that older parts may be obsolete and hard to find, though they can sometimes be located by dealing with an RV surplus outlet such as Bontrager’s Surplus (bontragers.com).
Most of all, do not get in a hurry and wind up with a subpar motorhome that you will regret later on. One last thought: If you are not handy or willing to consider this motorhome a project, it can end up costing you a tremendous amount of money to keep it on the road.
Carrier Air-Conditioner Replacement

RecPro offers a replacement air-conditioning unit that uses a remote control rather than a wall-mounted thermostat.
Bill, I have a 2008 Carriage Cameo with a Carrier roof air-conditioner, which I discovered is no longer available. I believe that the air-conditioner is pretty much at the end of its life, so finding parts will probably be a waste of time. I’ve contacted several dealers and they all say that there’s not much they can do. I’ve researched Carrier on the Internet and it’s possible that Airxcel (Coleman) offers a certain model that can be retrofitted without major modifications. I’m not willing to buy a very expensive air-conditioner and find out later that it won’t work. I’m hoping that you have a suggestion.
— Joe Lawson
Unfortunately, Carriage stopped using Carrier air-conditioners in 2010. Carrier simply vacated the RV air-conditioner market, likely due to a lack of profitability. The Carrier unit used a remote control/thermostat, so there are no wires routed to the wall where a thermostat would likely be mounted. Truma recently introduced the Aventa air-conditioner, which uses a remote control that also functions as a thermostat, so routing wires is not necessary. Check with Truma (truma.com); at this point the company is concentrating on OEM installations, but it does have mobile service personnel located in various locations in the U.S.
The other choice is an air-conditioner marketed by RecPro (recpro.com), which also uses a remote control rather than a wall-mounted thermostat. The RecPro unit has a 15,000-Btu rating (SKU number IS RP -AC 3800) and is available in white or black ducted or non-ducted configurations.
Are you stymied by a technical problem with your RV? Write to RV Enthusiast Technical Director Bill Gehr at [email protected]. Bill will answer inquiries as space permits.

Bill started his 50-year career in the RV industry when he went to work for an Airstream dealership. After the gas shortages in the 1970s, Bill decided to start his own business and opened up Bill’s RV Service in Ventura, California. After several years in business, he met Bob Livingston, and together they worked on hundreds of technical editorial projects at his shop while becoming great friends. Bill eventually joined Bob on the TV show “RVtoday,” filming a number of hands-on projects. After retiring, Bill headed out full-time in his fifth wheel and toured 39 states while writing technical articles for Trailer Life and MotorHome magazines. He now is Technical Director for RV Enthusiast.
Already a Subscriber? Click here for Access to the Full Issues.

