A Cooling Trend - RV Enthusiast Magazine

A Cooling Trend

by | Oct 6, 2022 | Pending Approval

Photos by Lori Swaffer and author
Electric components in a closed compartment are susceptible to heat damage. Removing the glass or wood and replacing it with a decorative screen will provide the necessary ventilation without having to leave the door open.

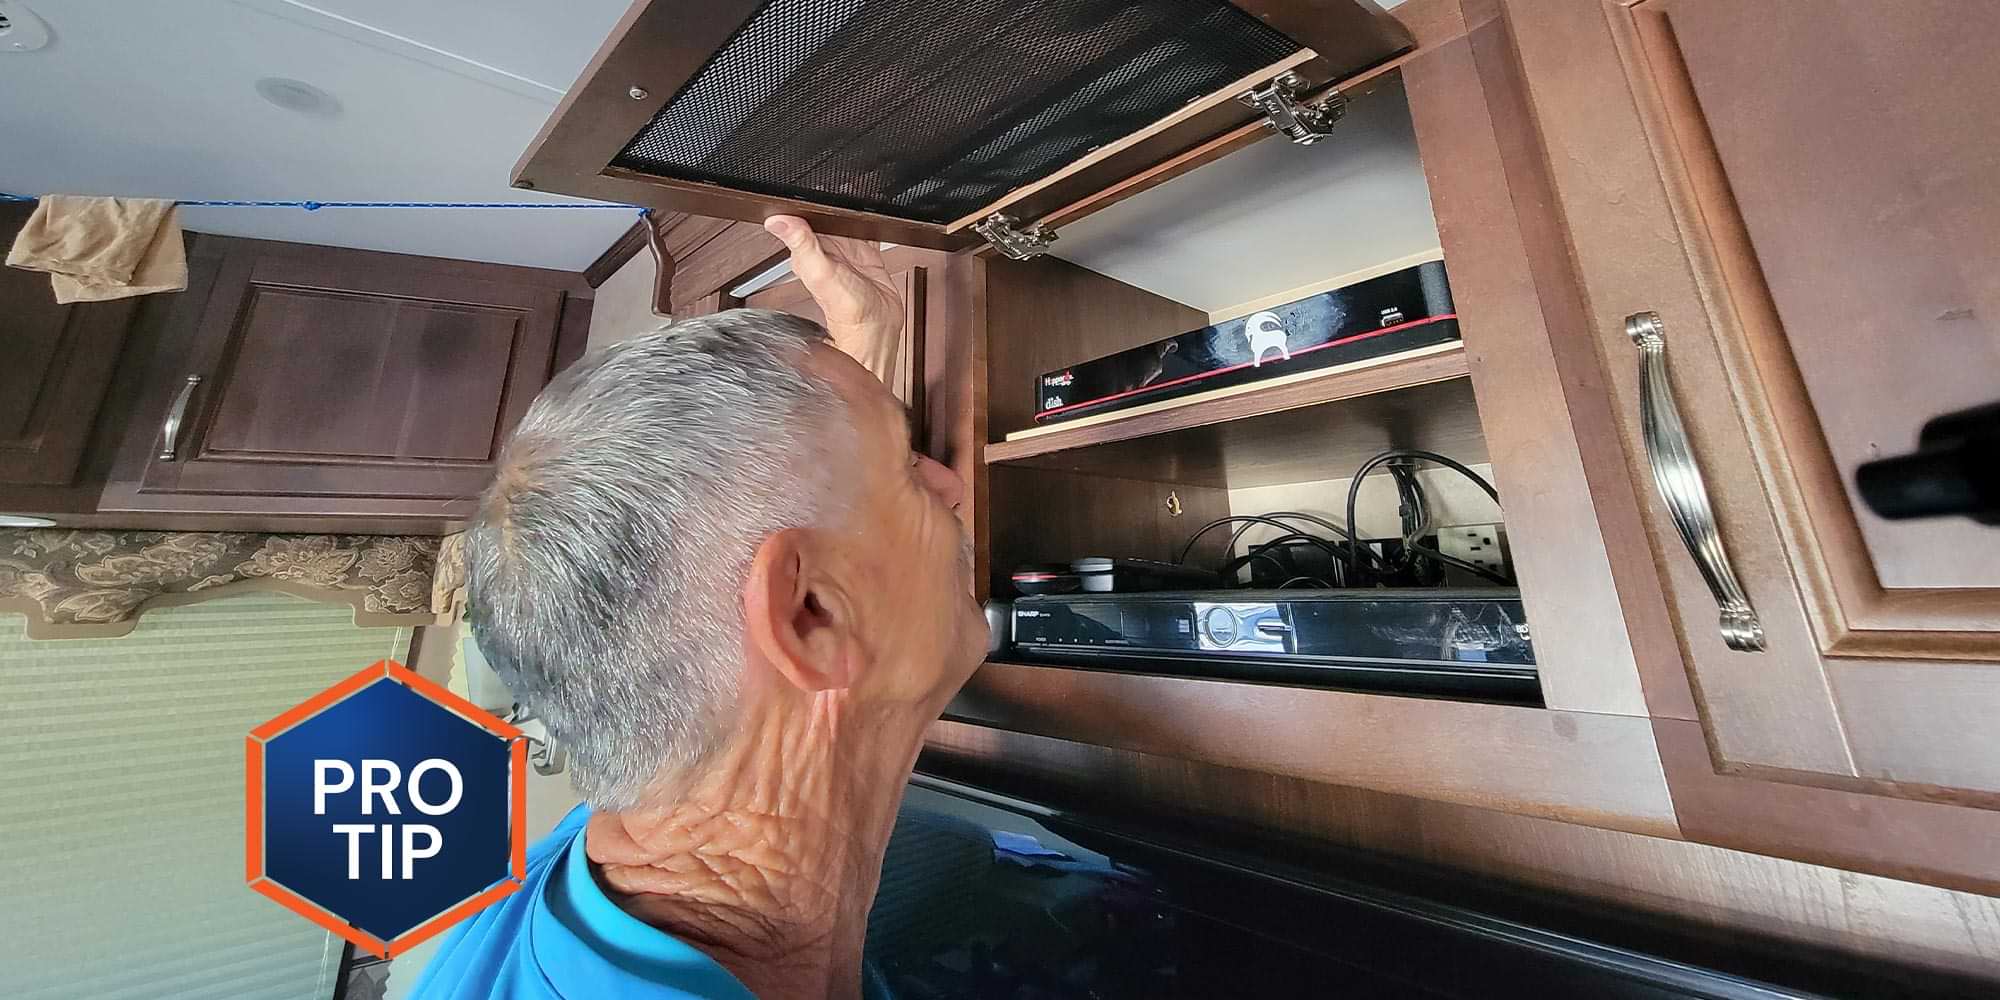
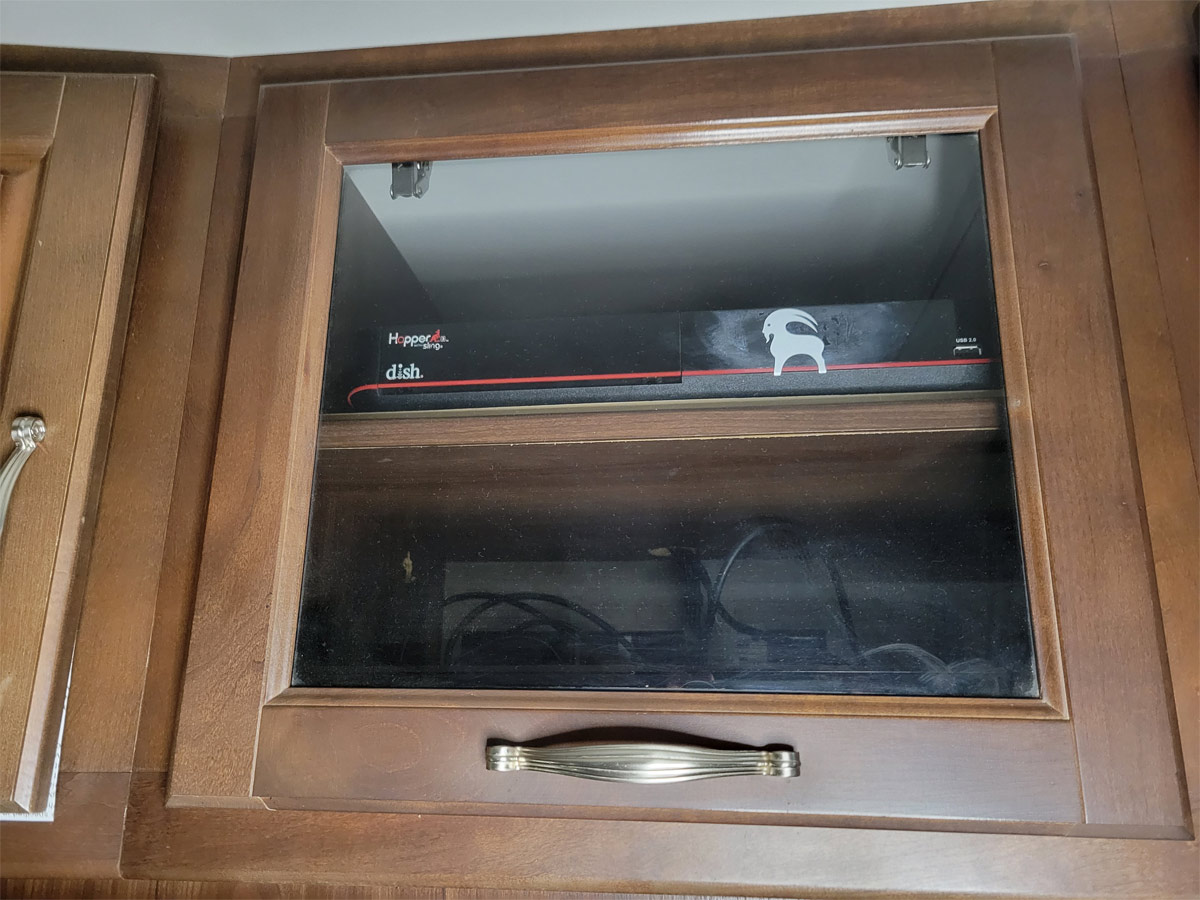
It is common knowledge that electronic devices do not bode well in a high-temperature environment; many even have internal fans to prevent overheating and possible failure. When components like a DVD player, digital video recorder, satellite receiver and stereo systems are stuffed into a cabinet with a glass or wood door that is closed all the time, the temperatures inside can soar to unacceptable levels. Obviously, you can open the door while any of the components are in use, but most people just leave them closed because modern remote controls will function right through a glass window or door. Leaving a door open is also a head-banging hazard for taller occupants.

There are some RV manufacturers that install a black-painted aluminum screen material in lieu of glass or wood — which looks nice and allows for proper air circulation around the components — but in the case of my fifth wheel, I had to contend with glass surrounded by a hardwood frame. Kicking myself for not figuring out a solution sooner, I started searching for some type of decorative aluminum screen material that looks nice (and preferably painted black) to replace the glass. I quickly found aluminum screen material typically used to protect debris from entering engine compartments through front grilles on Amazon (just search for “AGGAuto Universal 40” x 13” Car Grill Mesh). And, as a bonus, it’s already painted black.

an overhead electronic component compartment with an aluminum mesh screen mounted in the door
an overhead electronic component compartment with a glass window mounted in the door
All the entertainment components were placed in one compartment that heated up when the glass cabinet door was closed. This required keeping the door open when using the components. To circumvent that issue, aluminum mesh screen was mounted in place of the glass. After removing the glass and replacing it with the black aluminum mesh, it blended in with the TV and contrasted nicely with the cabinetry. Now the components don’t stick out visually when the door is closed.
all of the tools for the aluminum mesh screen upgrade lay on a table
The aluminum mesh comes in a roll that’s 40 inches long, which provided more than enough coverage. Tools and materials required to get the job done included tin snips, staple gun, razor knife, screw gun (or screwdriver), heavy duty gloves, masking tape, putty knife, pliers, stiff-bristle brush and, of course, a hammer.
All the entertainment components were placed in one compartment that heated up when the glass cabinet door was closed. This required keeping the door open when using the components. To circumvent that issue, aluminum mesh screen was mounted in place of the glass. After removing the glass and replacing it with the black aluminum mesh, it blended in with the TV and contrasted nicely with the cabinetry. Now the components don’t stick out visually when the door is closed.
The aluminum mesh comes in a roll that’s 40 inches long, which provided more than enough coverage. Tools and materials required to get the job done included tin snips, staple gun, razor knife, screw gun (or screwdriver), heavy duty gloves, masking tape, putty knife, pliers, stiff-bristle brush and, of course, a hammer.

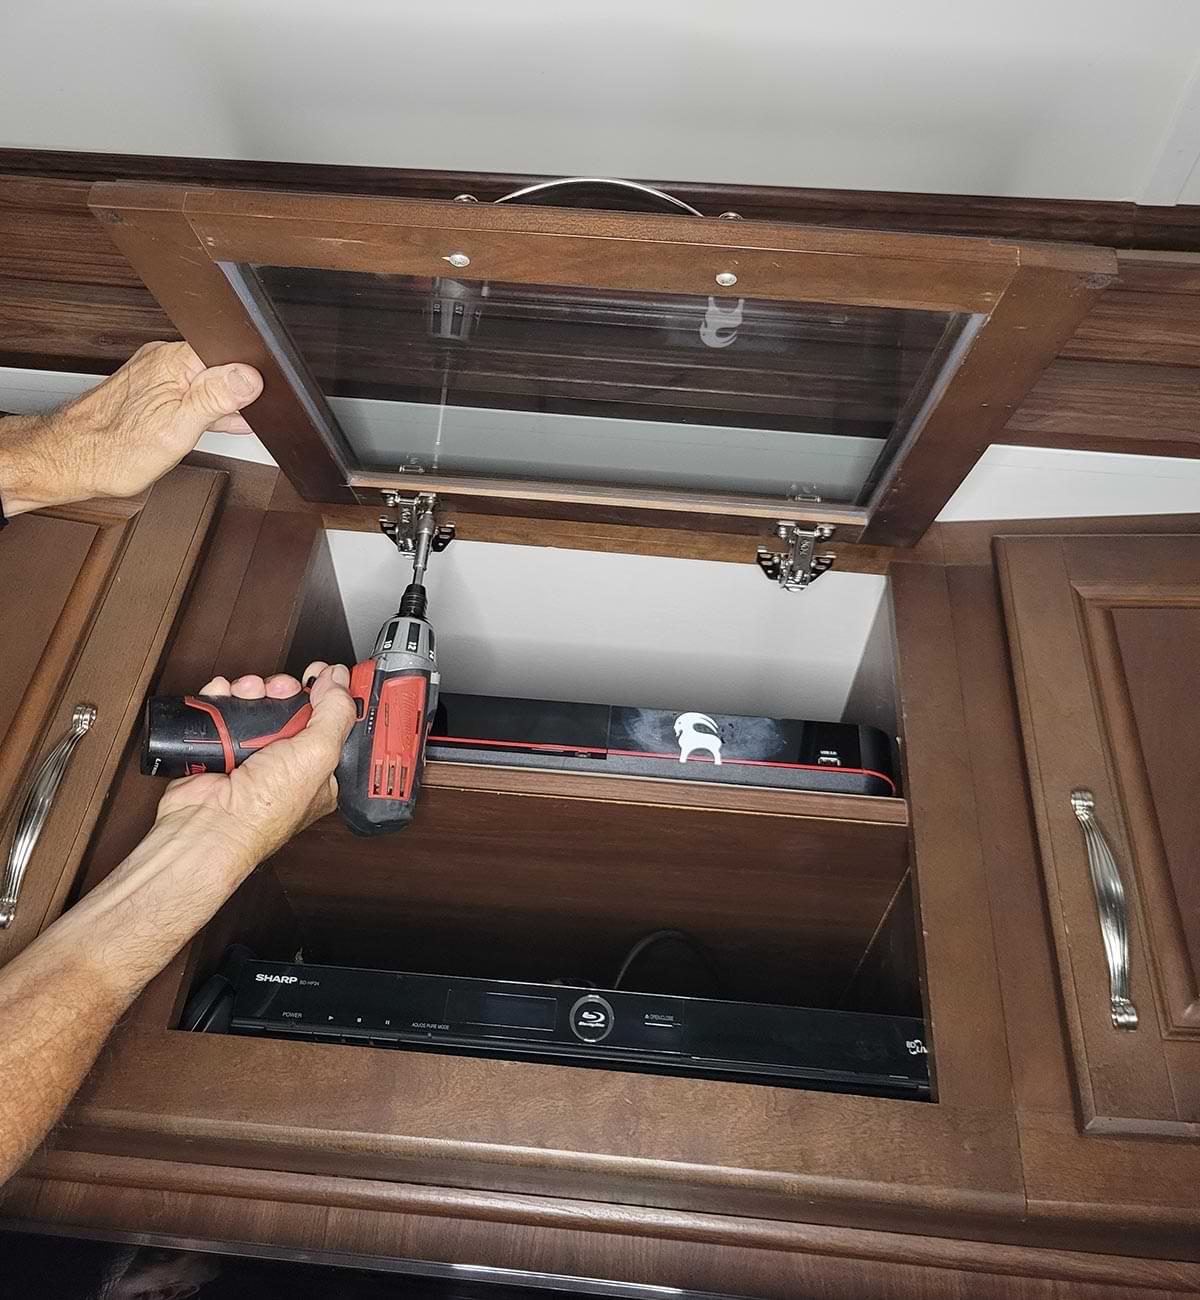
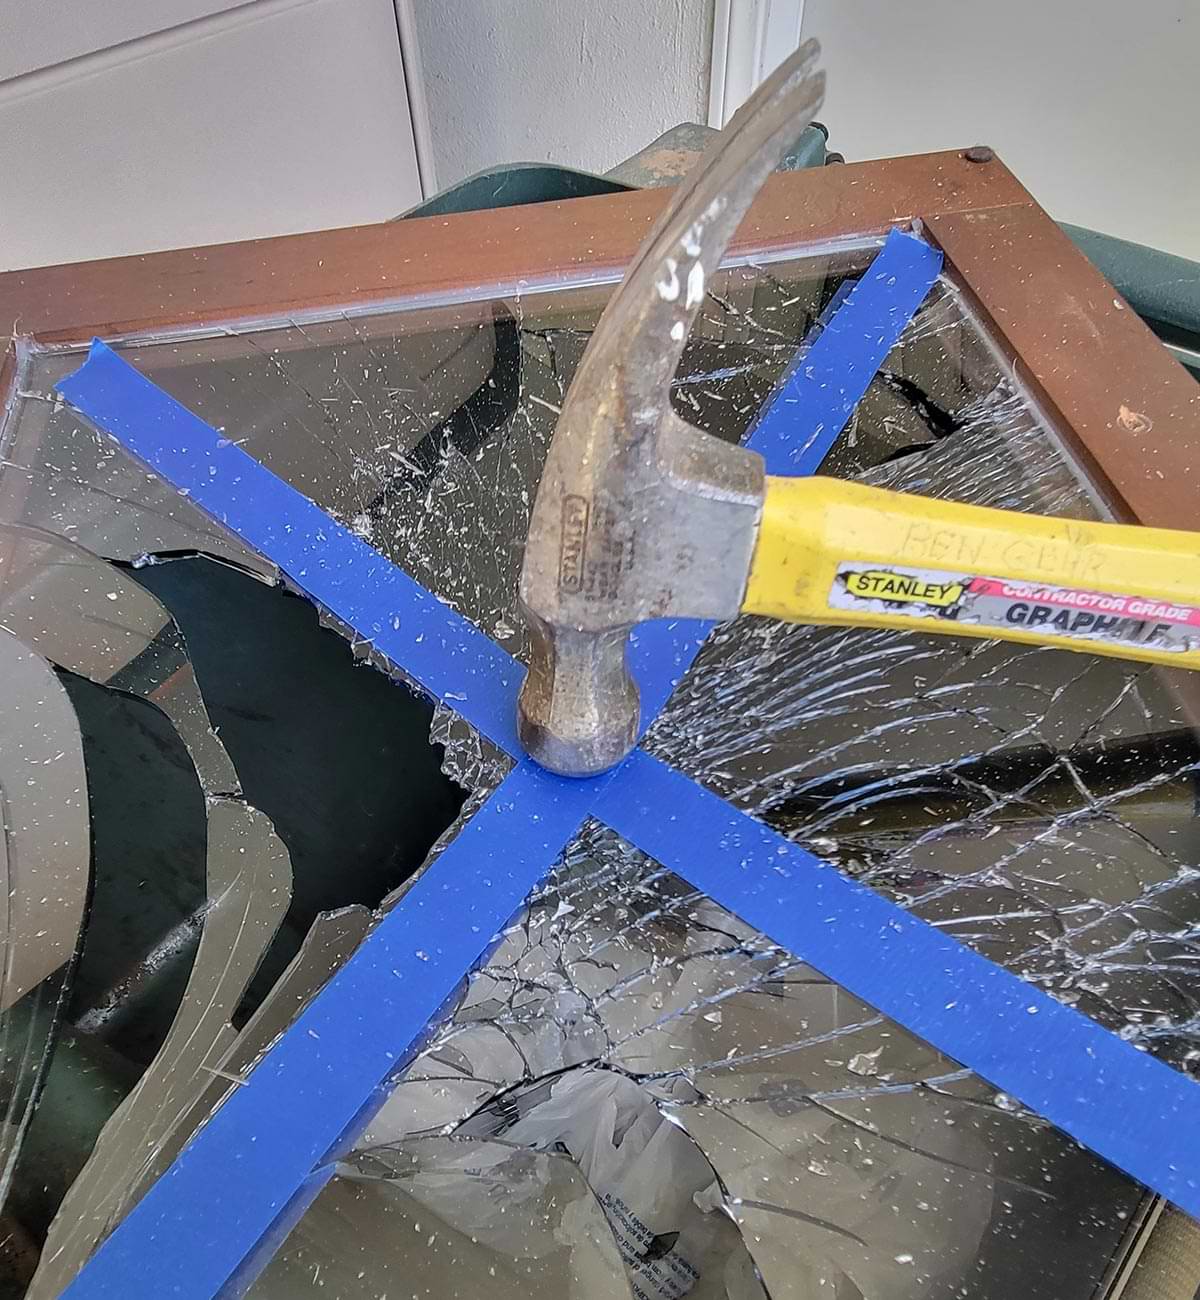
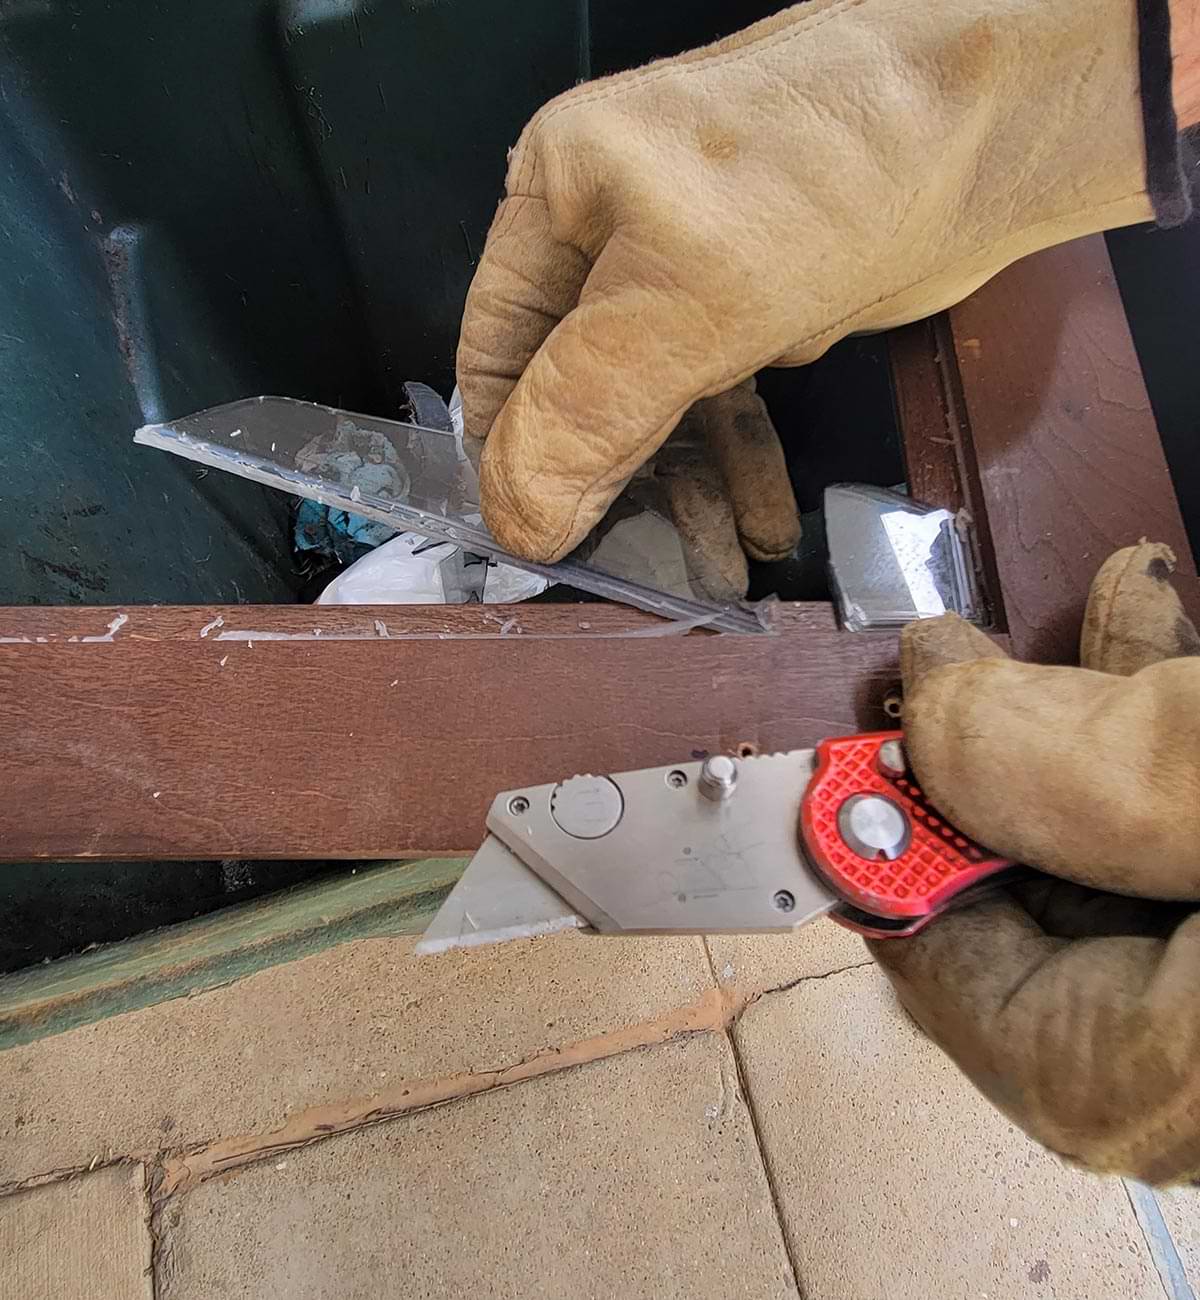
To install it, I removed the cabinet door and set it on a table (with a towel under it to prevent the wood from being damaged). The next step was to remove the handle so that the door would sit flat for installation of the screen material. As I contemplated how to get rid of the glass safely, I decided to run a utility blade around the glass to see if it would come loose — and, of course, it did not. Large beads of silicone rubber applied at the factory all the way around the glass got under it as well, gluing the glass in place. My only choice was to take a hammer to the glass, which was done while wearing safety glasses, heavy-duty gloves and an apron. I covered the glass with masking tape to contain the broken pieces, which worked well; using a healthy amount of tape will allow the glass to come out in almost one piece.

a screw gun is used to remove the door from the hinges
A screw gun was used to remove the door from the hinges, which were left on the cabinet structure. The handle was removed next.
the silicone sealant holding the glass in place on the compartment door is carefully sliced with a razor knife

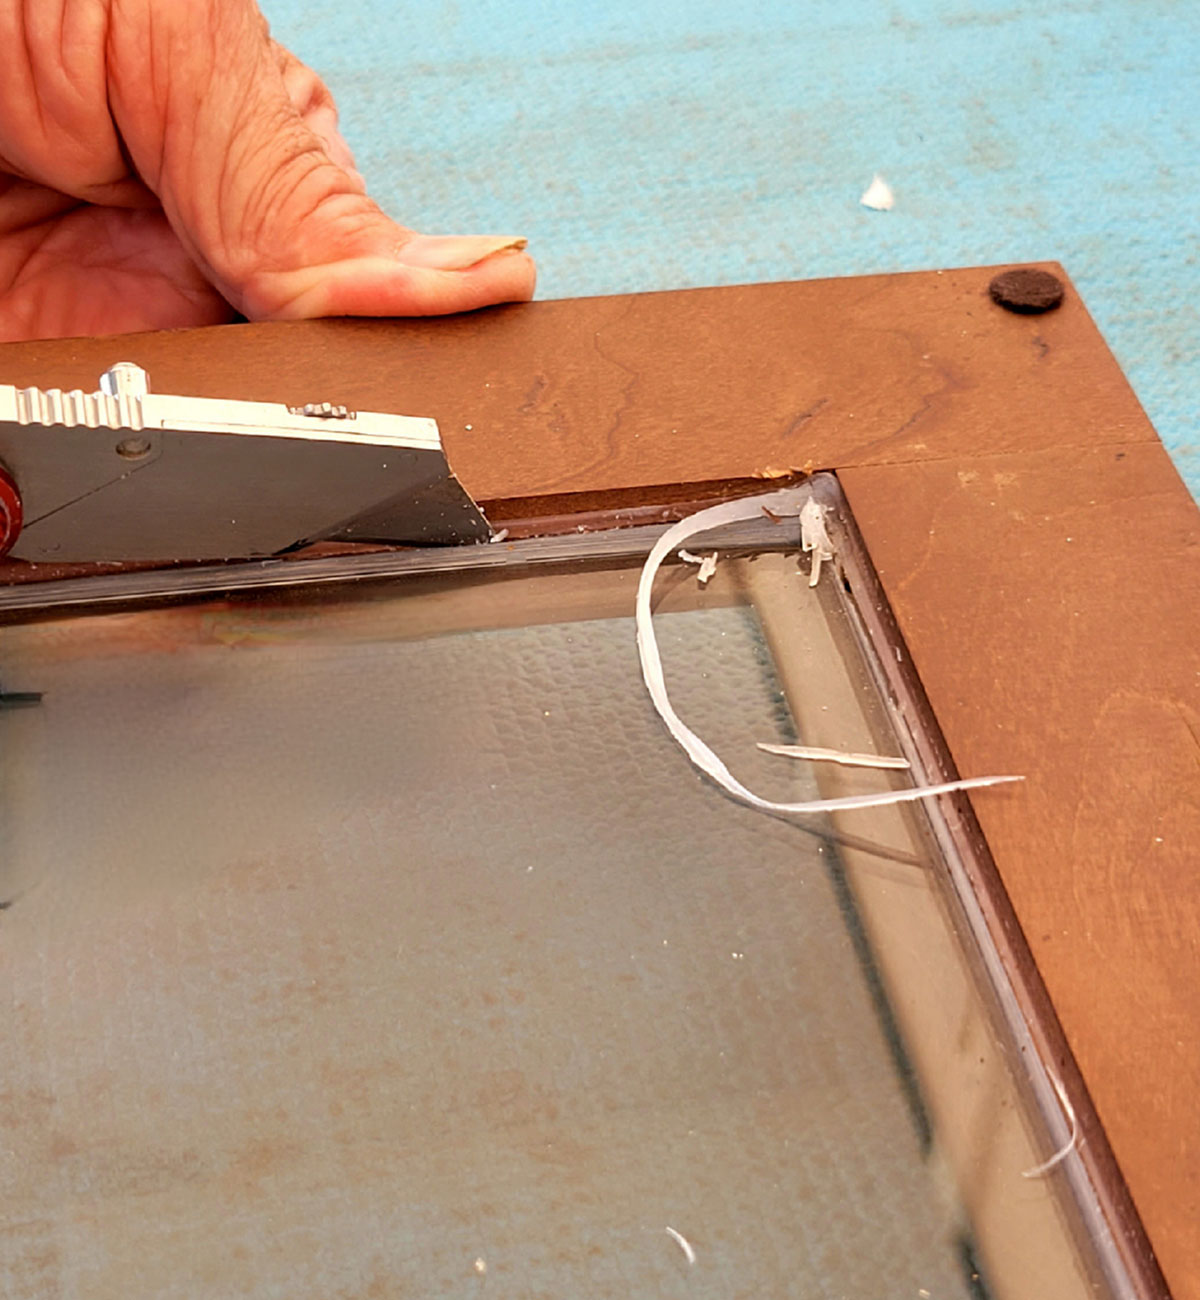
The factory applied a copious amount of silicone sealant to hold the glass in place. This silicone was carefully sliced with a razor knife. Ultimately, however, the sealant that seeped under the glass prevented the glass from popping out of the frame.

with masking tape on the glass a hammer is used to break the glass apart for removal
Masking tape was placed on the glass to prevent the pieces from flying all over the place when the hammer persuaded the glass to break. Make sure you’re using eye protection.
wearing heavy duty gloves, the RV technician removes the remaining pieces of glass from the frame
a stiff-bristle brush is used to clean the remaining silicone sealant and any glass chards that were sticking to the frame
Once the glass was broken, the remaining pieces were lifted off the frame by hand (be sure to wear heavy-duty gloves). A stiff-bristle brush was used to clean the remaining silicone sealant and any glass shards that were sticking to the frame. Use an old towel or doggy training pad (see Containing a Mess tip) under the door to capture all the pieces of glass and sealant.
with a strong staple gun, the aluminum mesh screen is affixed to the inside of the compartment door
The aluminum mesh was cut to size with tin snips and stapled to the inside of the door. Don’t try this with a cheap staple gun, which may not have enough power to hold the mesh material firmly. Eight or 10 staples will suffice.
Once the glass was broken, the remaining pieces were lifted off the frame by hand (be sure to wear heavy-duty gloves). A stiff-bristle brush was used to clean the remaining silicone sealant and any glass shards that were sticking to the frame. Use an old towel or doggy training pad (see Containing a Mess tip) under the door to capture all the pieces of glass and sealant.
The aluminum mesh was cut to size with tin snips and stapled to the inside of the door. Don’t try this with a cheap staple gun, which may not have enough power to hold the mesh material firmly. Eight or 10 staples will suffice.

I then set the door on the aforementioned towel and table and unrolled the aluminum screen material to establish the cut size. You’ll also need to give the screen some time to stay flat after having been rolled up for packaging. Unable to mark the black screen with a felt pen, I used masking tape while setting the screen into one corner and taping in both directions. Tin snips were used to cut along the outside of the masking tape and, voila! — the screen was ready to install.

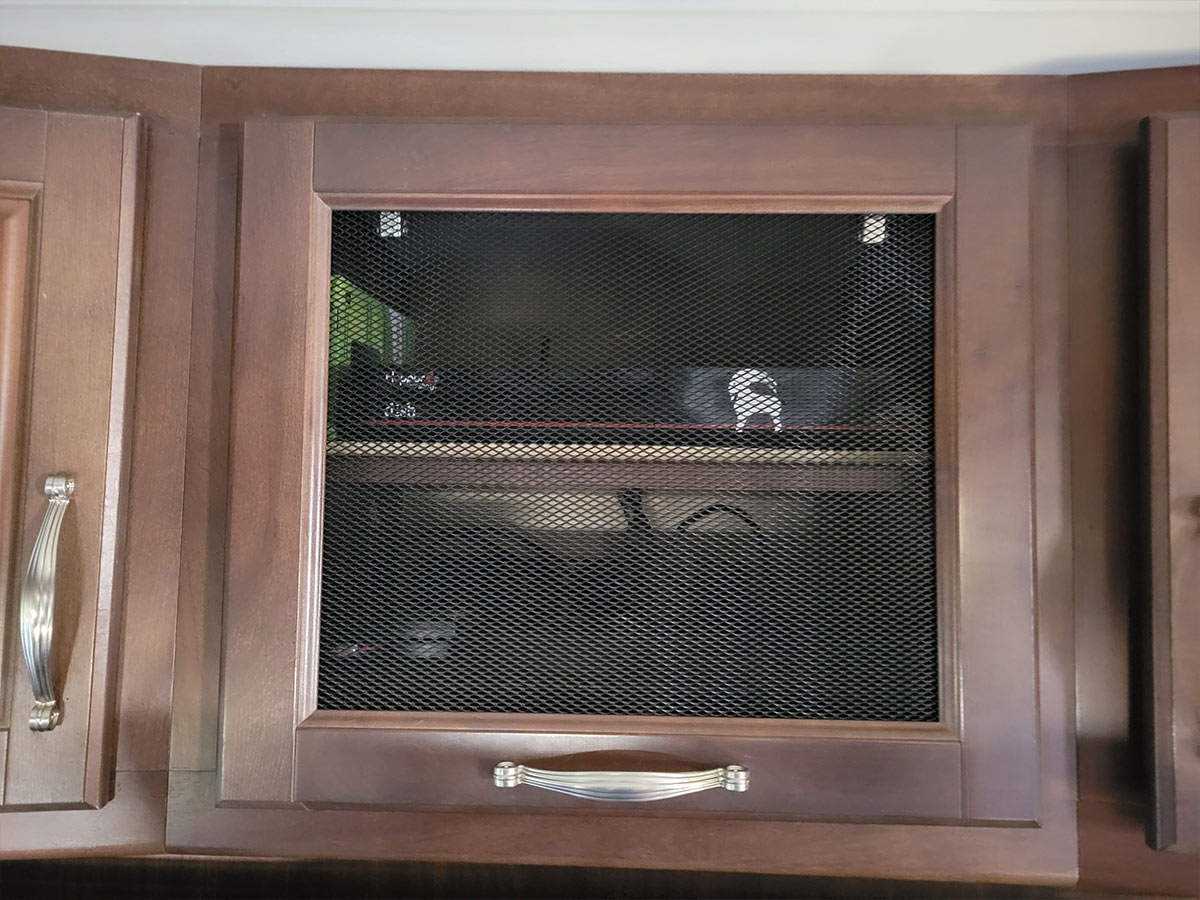
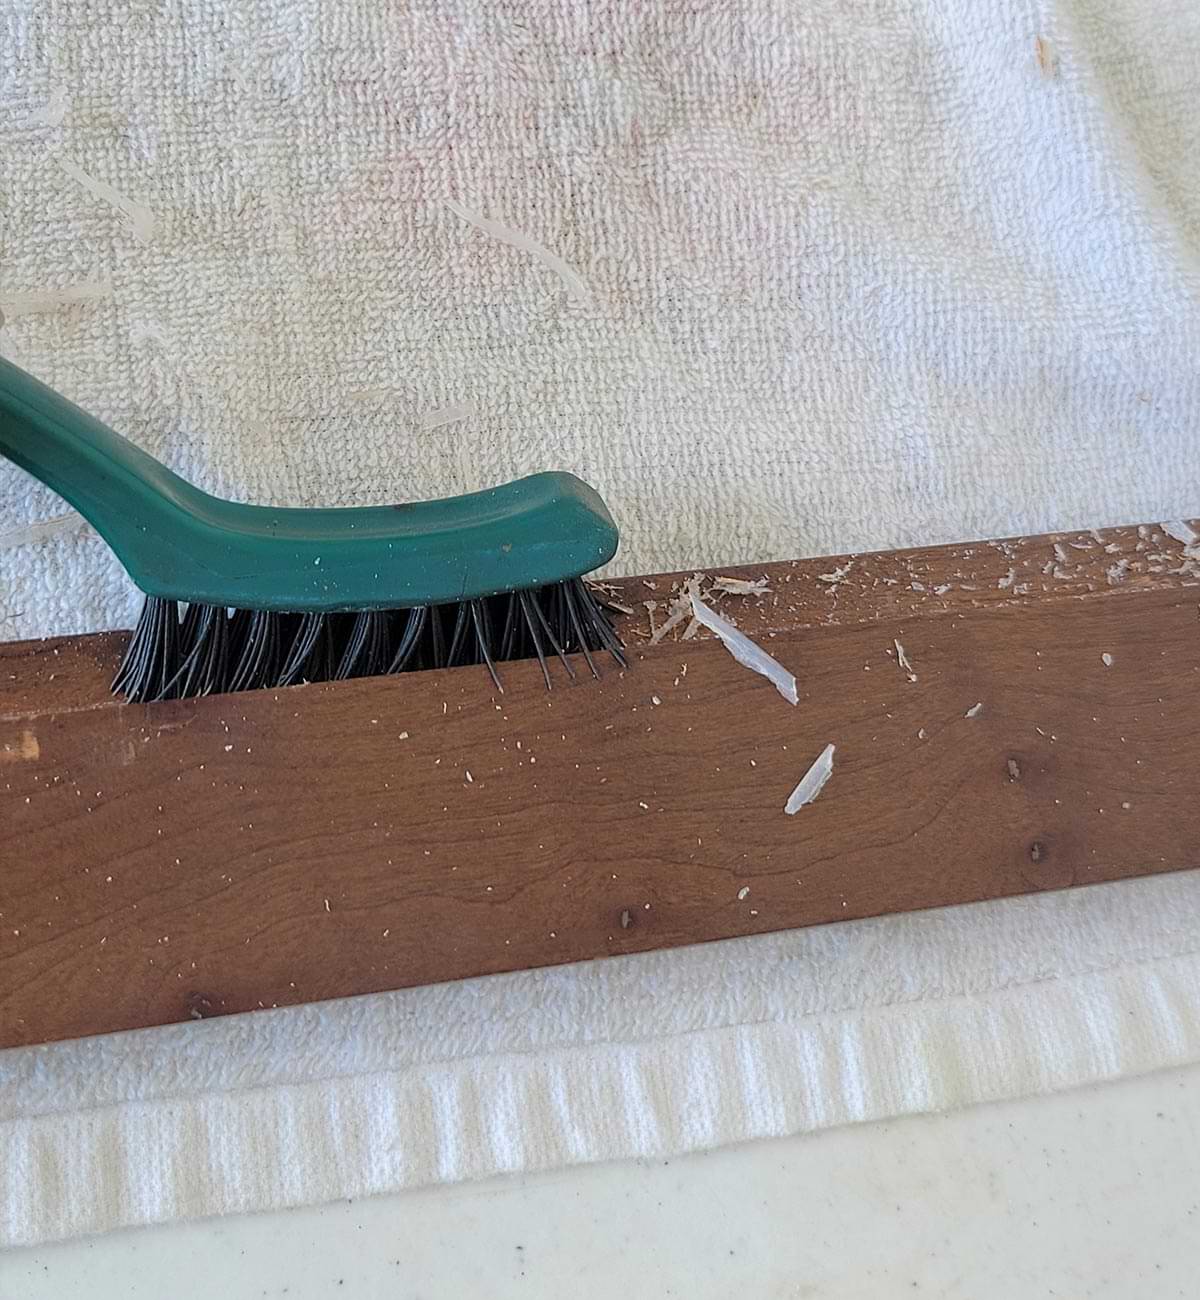
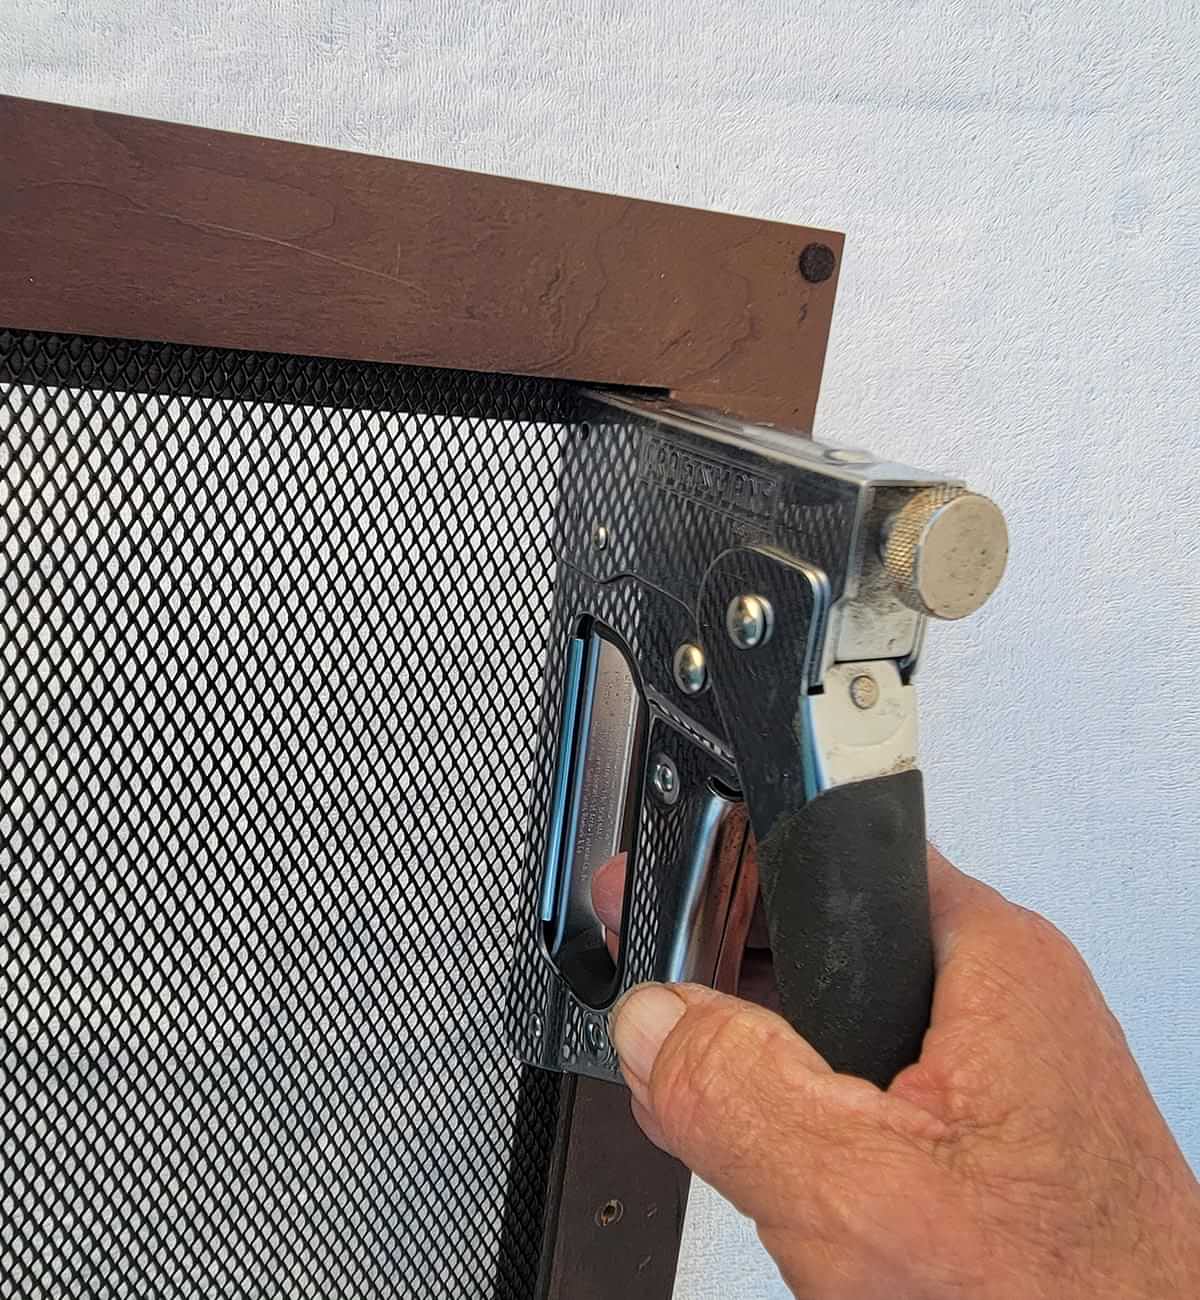
The door frame had a pretty good size lip on the inside, which allowed me to staple the screen material on all four sides; be sure to use ¼-inch staples in your gun to prevent going through the other side of the frame. Fortunately, the wood was soft enough so that the staples provided a tight fit. I put the handle back on and installed the door on the hinges that were still attached to the cabinet frame and shut the door. Mission accomplished.

Get Updates
Subscribe today and never miss an issue!
Get all the latest tips and news to keep you moving on that open road!
RV Enthusiast January/March 2024 Issue
Current Issue
January/March 2024
Spring is back in bloom and with it we are proud to present our latest issue of RV Enthusiast! The January/March issue covers furnace failures and how to fix them, the best batteries for boondocking, quick and easy weekend projects, PLUS so much more!

Already a Subscriber? Click here for Access to the Full Issues.

Share This