A Sanitary Seal - RV Enthusiast Magazine

A Sanitary Seal

by | Dec 22, 2023 | Pro Tip, RVEXPERT

Replacing and maintaining the valve seal in a Dometic 310 or 320 RV toilet assures that noxious odors will stay in the holding tank. The process is simple, but you have to get over the “icky” factor.
Maintaining an RV toilet is not the most desirable chore — but let it go too long and you’ll find yourself searching for the nearest bush. Beyond basic cleaning, the most common malady is a dried-out or damaged valve seal, which prevents fresh water from standing in the bowl, ready for the next use. When operating properly, after flushing the toilet water is allowed to flow into the bowl, providing a natural seal against odors coming out of the holding tank. When it doesn’t happen, the lack of water can lead to obnoxious odors seeping past the valve seal — and it doesn’t take a lot to fill the relatively small quarters in an RV.

Over time — sometimes shorter than expected — the valve seal in the Dometic 310/320 toilet will become damaged from hard water deposits and crud that was not flushed properly, not to mention paper becoming stuck in the valve. It also can become abraded from hard-water deposits that have been allowed to build up on the valve.

Fortunately, this seal can be replaced without removing the toilet, although it’s not a pretty job. Replacement seals can usually be found at RV supply stores and online. They are not cheap; a Dometic-branded seal will cost upwards of $37 off the shelf (around $29 at Amazon). Generic seals are available for less than half price, but we prefer to stick with the Dometic seals, which have always fit in the opening without undue effort.

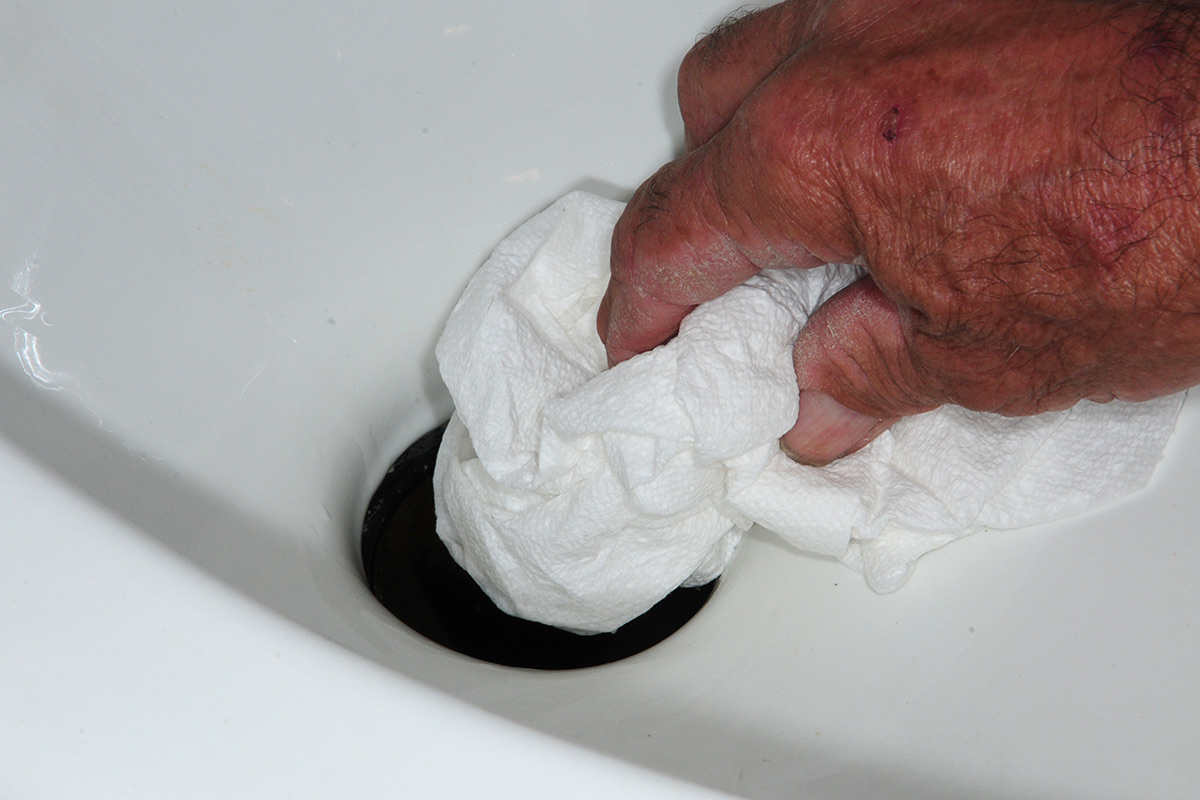
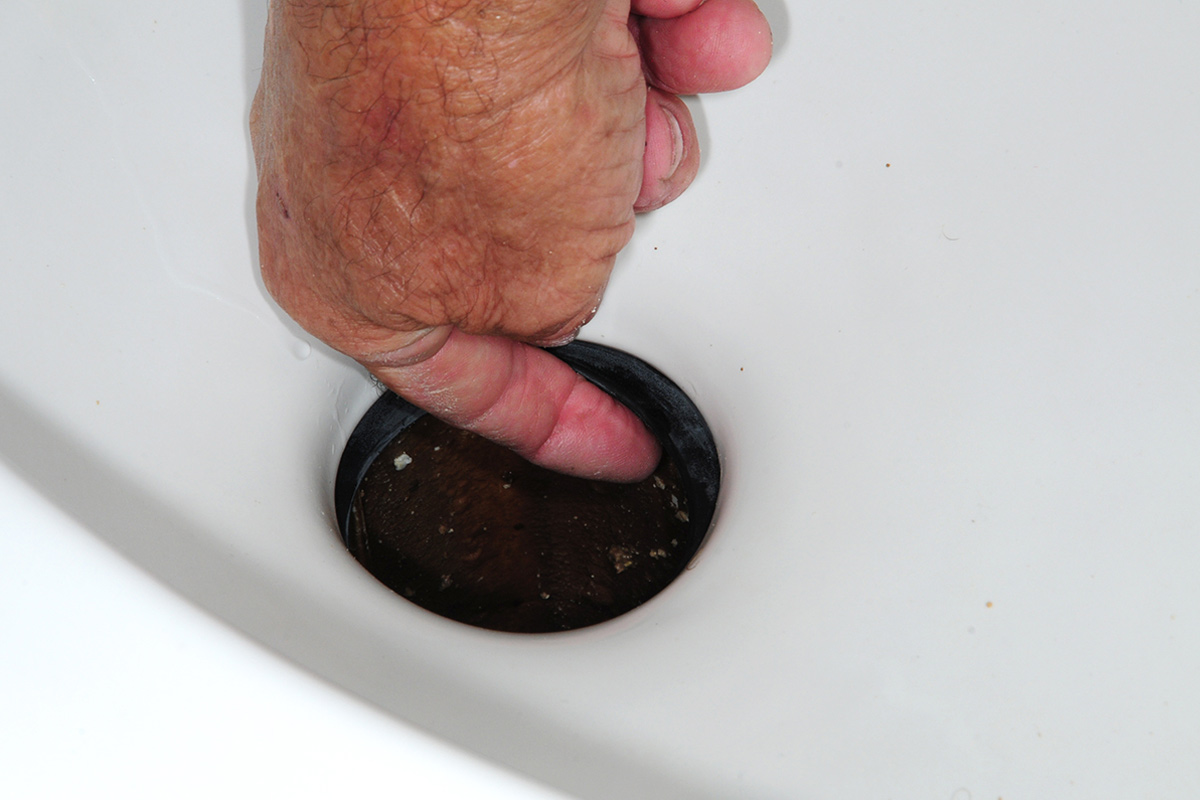
There are two ways to accomplish a seal replacement: You can simply pull out the old one and put in the new seal — or you can take the time to do it right. We subscribe to the latter. The first step is to turn off the water source and clean the valve thoroughly. A good dose of Lime-A-Way will dissolve most hard-water calcium deposits. Once the valve surface is smooth to the touch, hold the flush lever down and stuff some paper towels or bunched toilet paper into the hole to catch anything that is accidentally dropped (unlike a cloth rag, paper will eventually dissolve if it accidentally makes its way into the holding tank).

a hand sprays Lime-A-Way into an RV toilet bowl
Turn off the water source and clean the bowl before starting the process to replace the valve seal. Hard water deposits can be removed with Lime-A-Way. Allow the Lime-A-Way to sit in the bowl for 15 minutes or so and clean vigorously with a toilet brush. Scrubbing the ports in the rim of the bowl will also loosen calcium deposits and restore the flow of water while flushing.
a wad of paper towels is stuffed into the valve hole
Stuff paper towels down the hole before removing the old seal. The towels will catch the seal if you accidentally let it go during the removal process. If it falls into the holding tank, paper towels will eventually dissolve somewhat where a rag will just clog up the system. Clean around the valve opening with a microfiber rag to remove most of the crud that has built up over time. Loosened deposits will be captured by the paper towels.
Harvest Hosts Advertisement

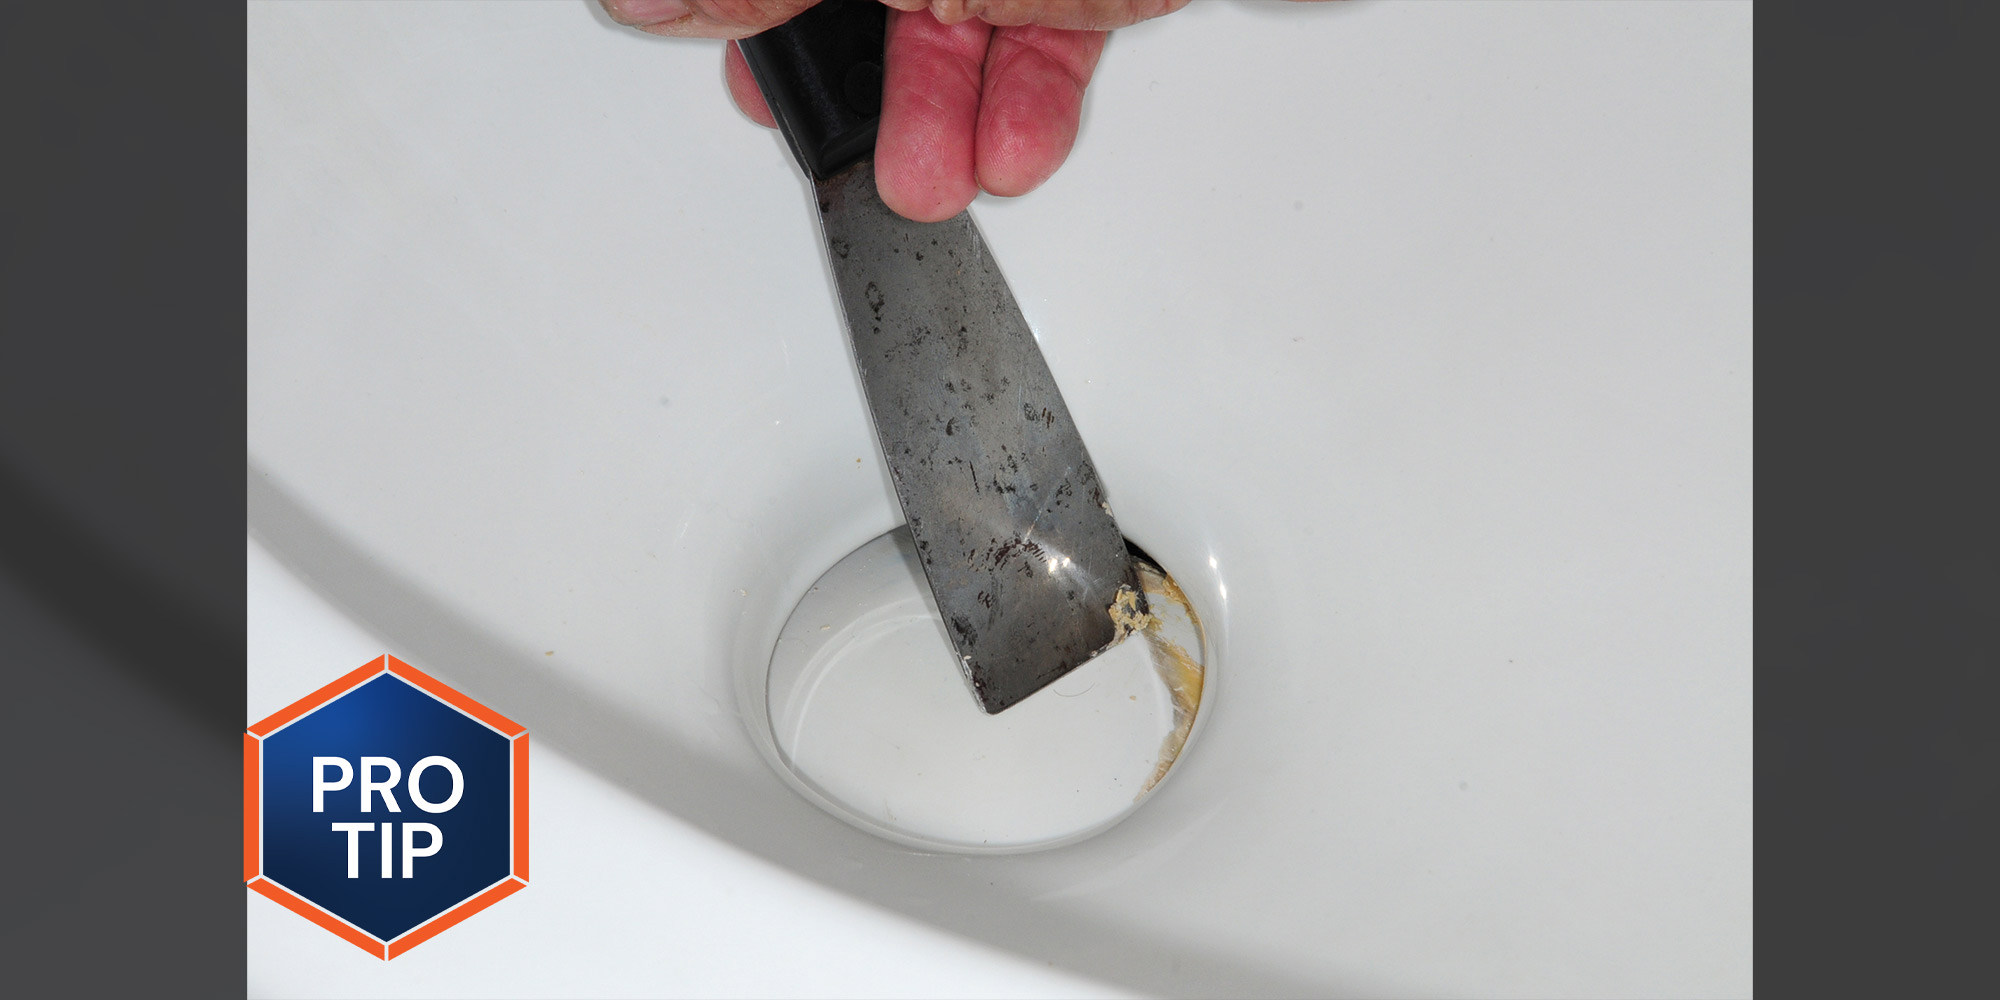
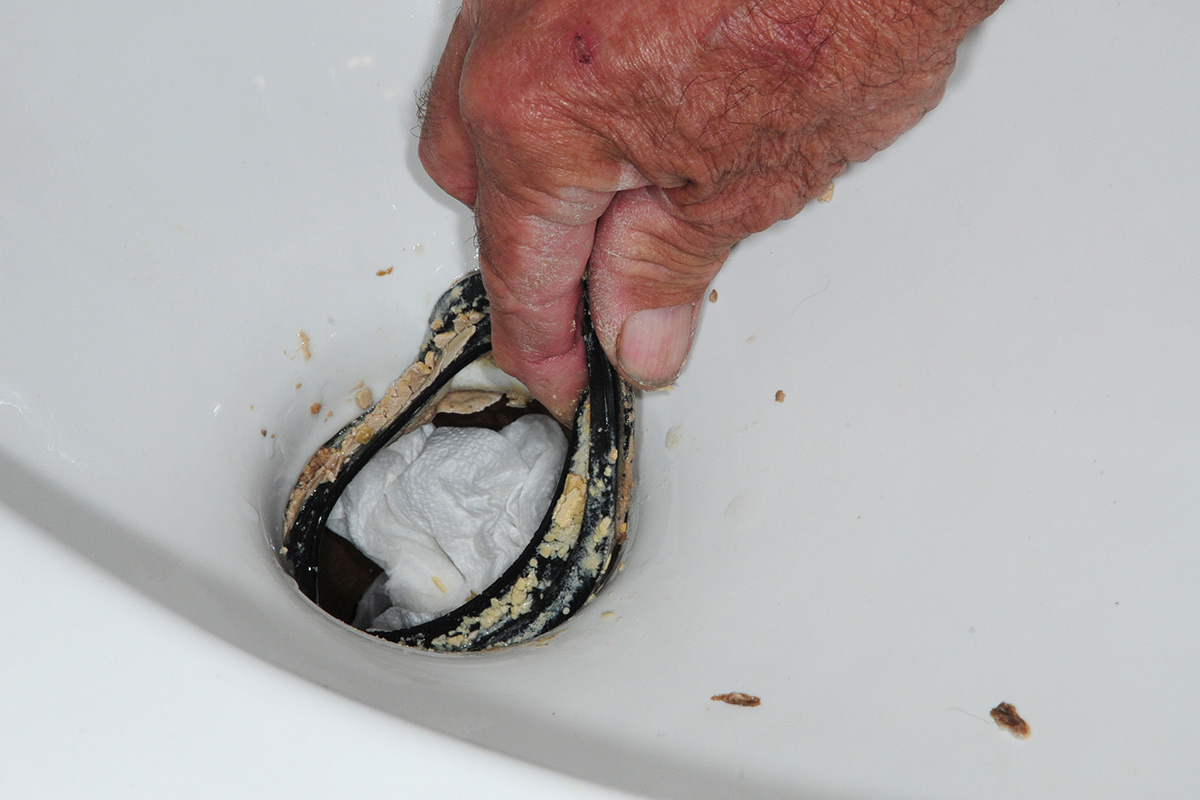
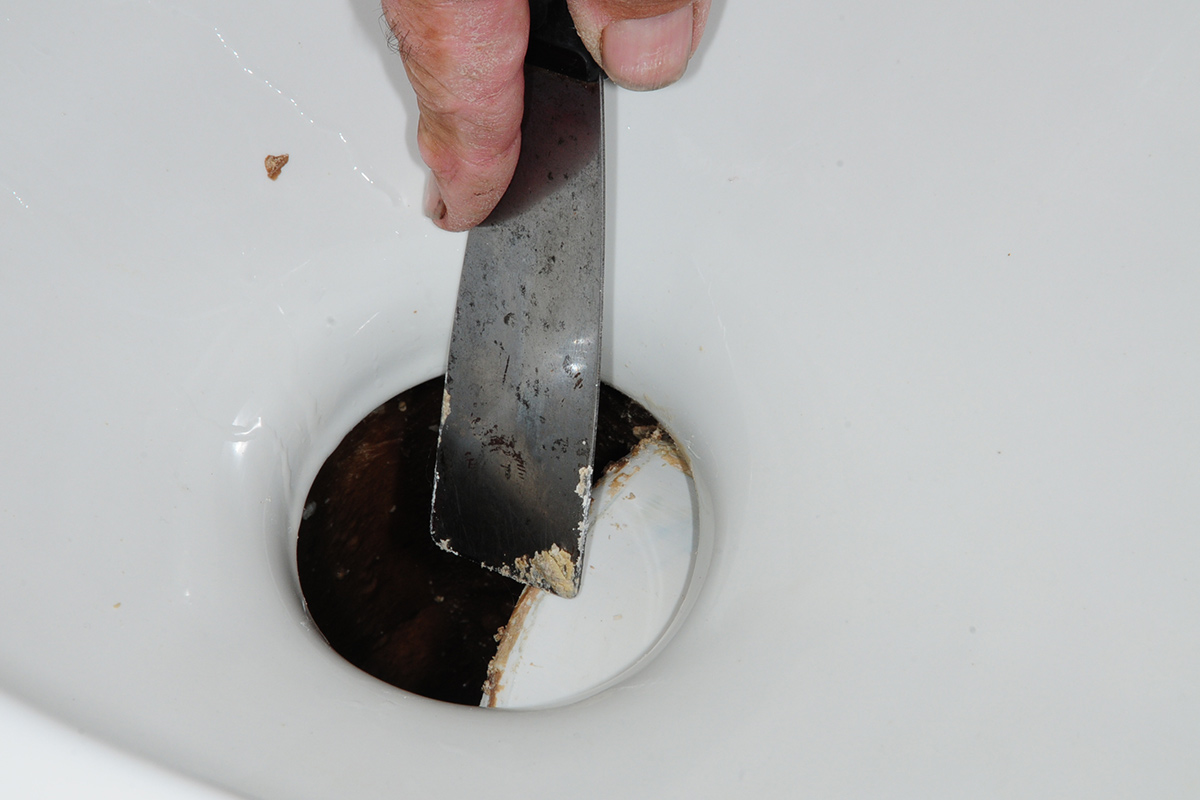
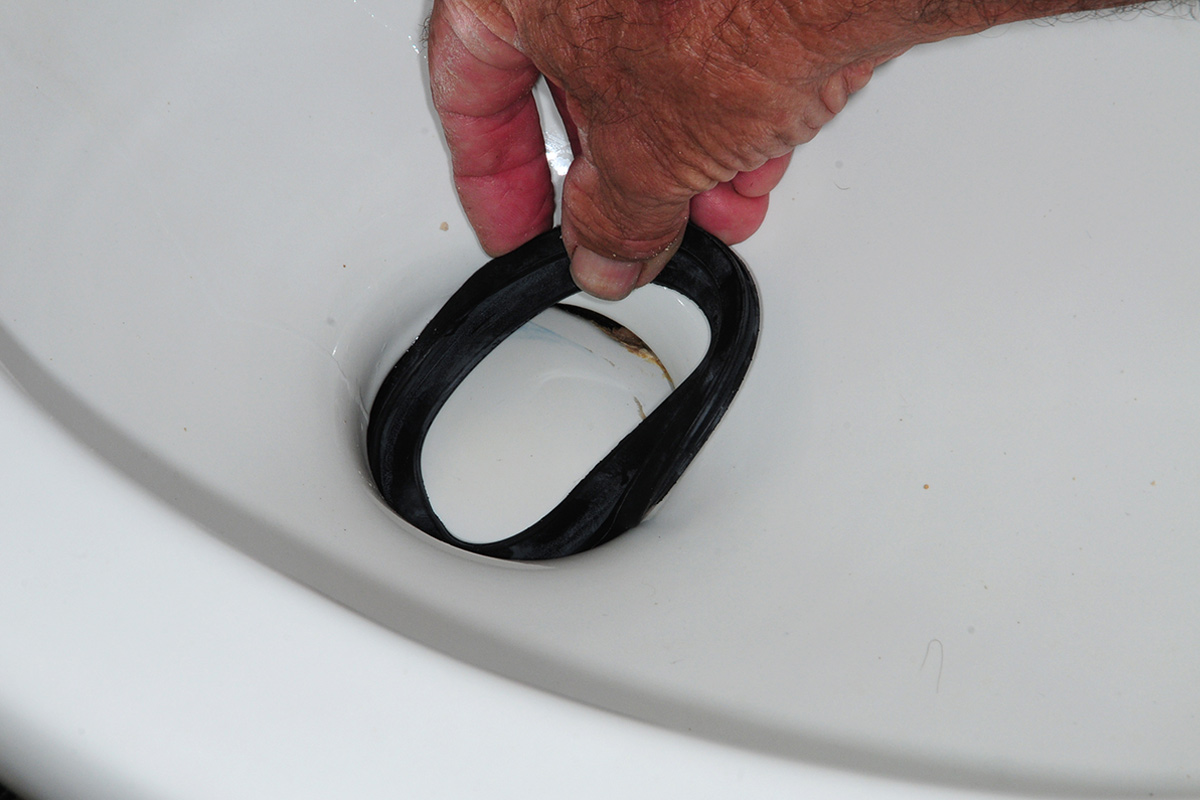
Removing the old seal is, well, icky — there’s no other way to describe it. As gross as it seems, however, you may not want to wear gloves because you’ll need a good grip to maneuver the seal. (Of course, remember to wash your hands well with soap and hot water and finish with sanitizer.) After removing and discarding the old seal, the area around the opening was cleaned with a rag and paper towels, then a putty knife was used to remove any calcium build up on the valve. If you are not proficient with a metal putty knife, consider going to plastic, although it’s not as effective. It takes some patience to remove all the calcium, but it’s important that the valve does not act like sandpaper when opening and closing.

the old seal is lifted out of the hole
The old seal will simply lift out of the hole. Bare hands work best for this job, although it’s admittedly pretty gross without using gloves. Just remember to wash your hands with soap and hot water after the job is done and finish with a dose of sanitizer.
a putty knife is used to clean around the edges of the valve opening
Carefully clean around the edges of the valve opening with a putty knife to remove caked on hard-water deposits. If you’re not proficient with a metal putty knife use plastic — it won’t work as well, but you don’t want to scratch or gouge the valve surface. The putty knife was used to remove deposits on the leading edge of the valve. Tie a string to the putty knife handle and yourself to prevent dropping it into the tank or pipe by accident. To access the valve opening fully, the paper towels can temporarily be pushed further into the pipe.
The valve was closed before installing the new seal. To seat the valve, it’s just a matter of getting the rubber to tuck in around the hole. Usually, it takes only a few minutes to accomplish this task, but if it resists, apply a dab of plumber’s grease to seat the rubber. Open the valve to make sure the seal is fully seated, remove the paper towels and proceed to coat the top of the valve and seal with plumber’s grease. Use a thin layer of the grease; more is not better. We’ve had great luck with Oatey Plumber’s Faucet and Valve Grease, which is available in most home improvement stores for around two bucks for a 1-ounce tube.
the new seal is installed over the closed valve
an index finger is used to work the seal around the edges of the valve opening until it seats
Once the valve is clean and smooth to the touch, close the valve before installing the new seal. Work the seal around the edges of the valve opening until it seats. Usually there is no resistance, but if there is, apply a thin coat of plumber’s grease. Open the valve and work your finger around the seal to ensure that it has seated completely.
a hand holding a tube of Oatey Plumber’s Faucet and Valve Grease squeezes a small gob onto an index finger
Clean the top of the valve and seal again to make sure it’s dry and ready for a coating of plumber’s grease. We have found that one of the best products for protecting the valve and seal is Oatey Plumber’s Faucet and Valve Grease. This grease, available in home-improvement stores and online, will promote a smooth valve operation while preventing the build-up of hard water deposits. Apply a thin layer of grease to the top of the valve and around the seal. Don’t overdo it; more is not necessarily better and will only make a mess. The bowl will now holds water, which prevents noxious odors from the holding tank escaping into the interior of the RV.

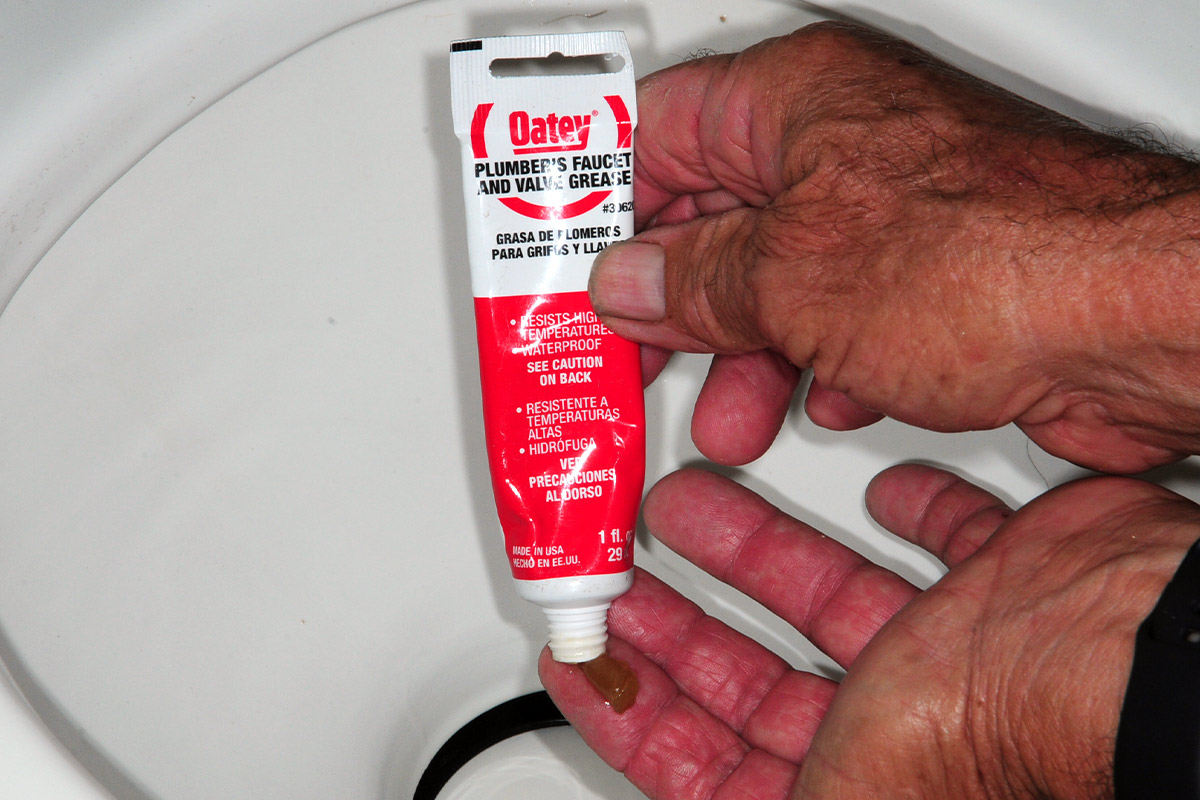
There’s no getting around the fact that hard water will play havoc with toilet seals, valves and water ports in the bowl. Cleaning these areas frequently will prevent calcium build up and using Lime-A-Way every couple of months will also extend the life of the seal. Consider coating the seal and top of the valve monthly with plumber’s grease. Your toilet, your RV’s occupants and your guests will thank you.

Get Updates
Subscribe today and never miss an issue!
Get all the latest tips and news to keep you moving on that open road!
RV Enthusiast January/March 2024 Issue
Current Issue
January/March 2024
Spring is back in bloom and with it we are proud to present our latest issue of RV Enthusiast! The January/March issue covers furnace failures and how to fix them, the best batteries for boondocking, quick and easy weekend projects, PLUS so much more!

Already a Subscriber? Click here for Access to the Full Issues.

Share This