Flush Away Your Troubles
RV water heaters are often overlooked until it’s too late. Regular tank flushing and replacement of the anode rod (for Suburban models) will ensure full capacity and plenty of hot water. While you’re at it, inspect the pressure-relief valve for annoying leaks.

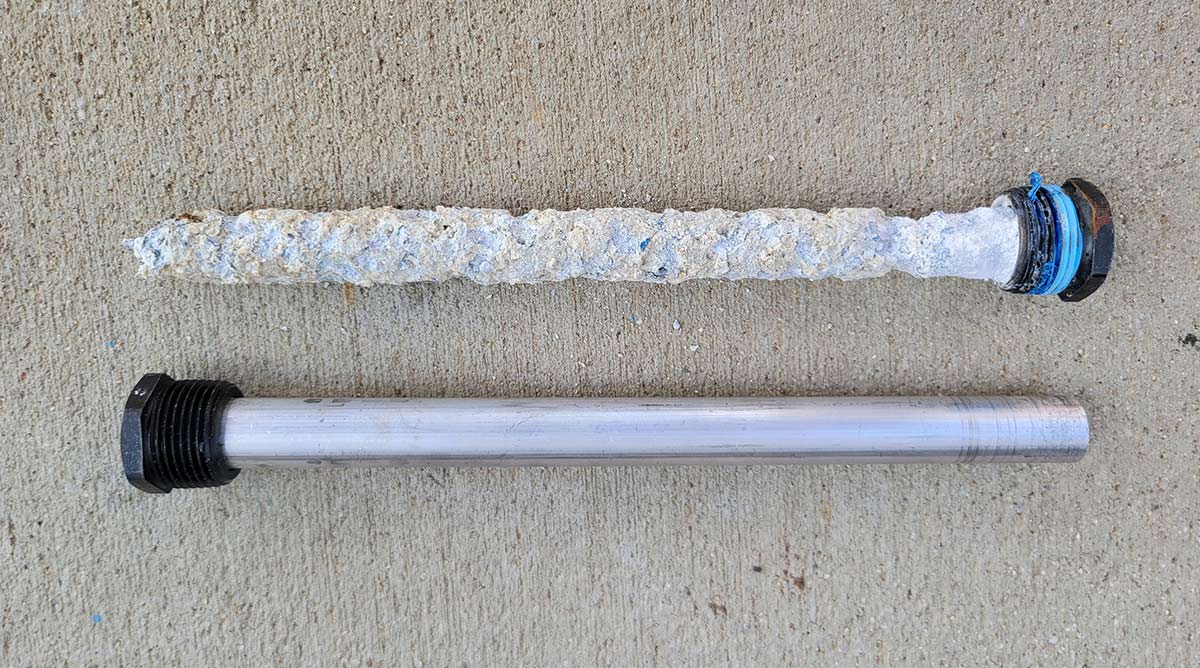
Atwood tanks and the drain-plug threads are made of aluminum and using an aftermarket anode rod is not recommended. Don’t get fooled by those who tout their use; they can literally weld themselves into the drain hole from the electrolysis between the steel and the aluminum. Suburban water heaters have a porcelain-coated steel tank, which requires the use of an anode rod to protect against deterioration of the steel. The rule of thumb is to replace the anode when it’s about 50% deteriorated or annually, whichever occurs first; I recommend checking the anode rod at least every six months and replacing as necessary.
Anode rods come in either aluminum or magnesium; they’re both designed to protect the steel tank. The difference between the two is the hardness of the material: Magnesium is softer, will deteriorate quicker and is far more effective than the aluminum counterpart (which will work if you have fairly soft water). There’s no question that the better protection and the additional cost afforded by using a magnesium anode rod are more cost-effective than purchasing an entire water heater.
Anode rods also come in different lengths, with the longer ones suitable for 10- and 12-gallon water heaters. Magnesium anode rods have a tendency to make the water smell a little bit like sulfur; sanitizing the system with a bleach/water mixture will help solve the problem.
Before flushing the tank, make sure the water is cool and inspect the pressure-relief valve for corrosion and leaks. If it’s leaking, tap open and close the valve a few times, which may stop the leak. (The intense heat can cause these valves to drip and eventually the seal will fail.) If it leaks, order a new valve before starting the flushing maintenance; valves are specific to water heater brand since the thread sizes are different. While the force of the water flowing out the drain will remove some of the sediment, it’s best to use a flush tool for this job, which can be assembled with parts laying around your garage (like we did; see photo) or you can acquire one online or at RV parts stores. The Valterra A10-4010 Flush Kit has a plastic wand and sells for $14.79 on Amazon. If you want one with a metal wand, check out the RV Water Heater Tank Rinser, Metal Tube on Amazon ($16.99).

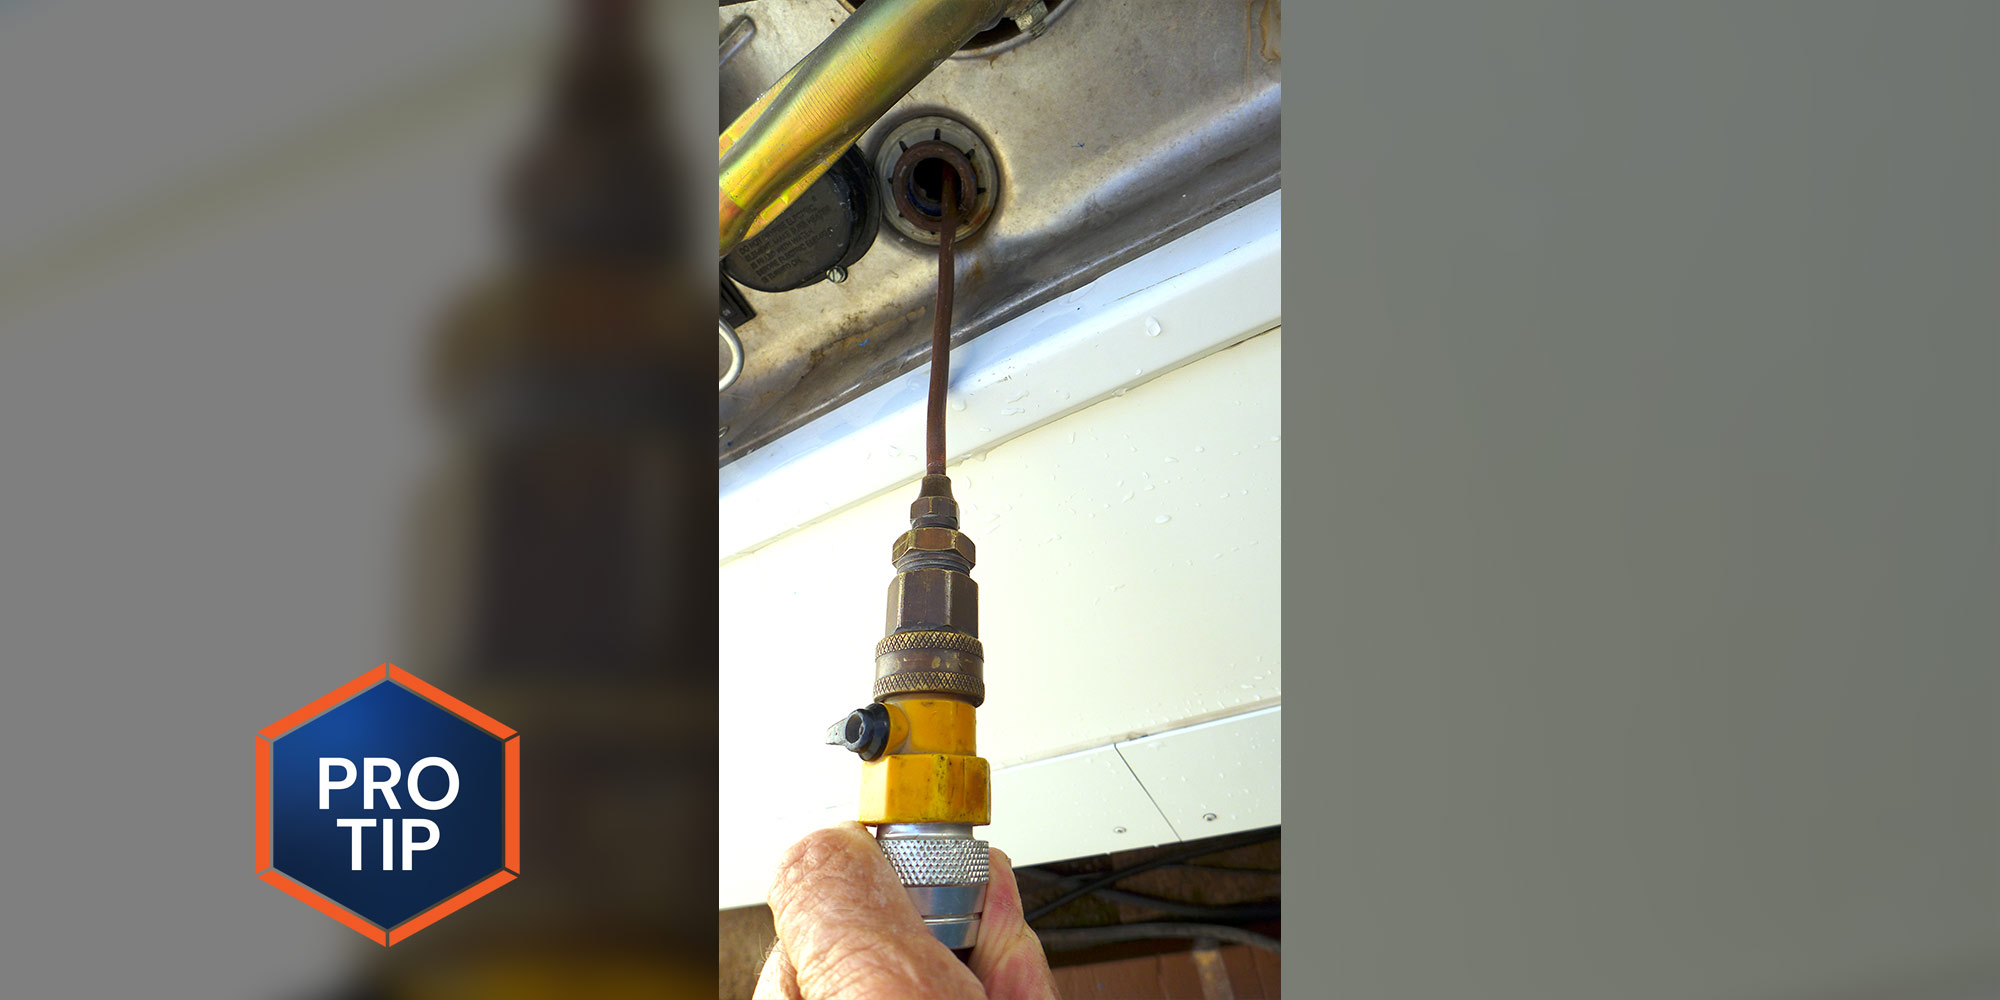
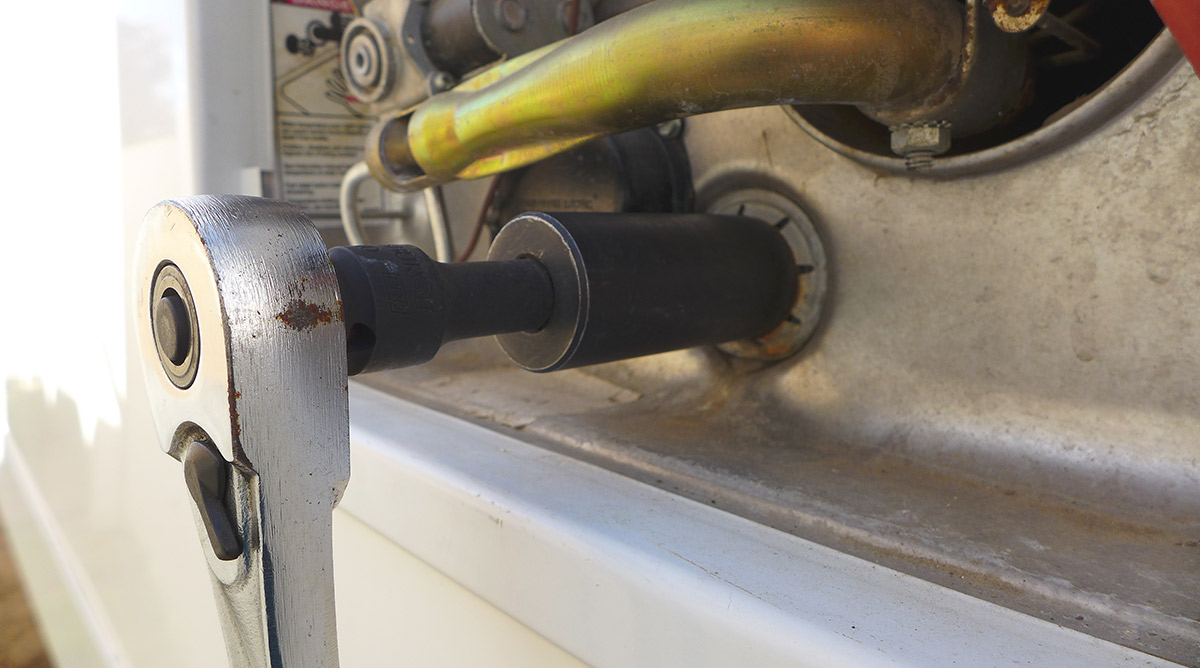
Make sure the gas and electric switches are off; you don’t want the water heater to come on when the water is drained; if the electric element is left on when the water is draining, it will burn up. The water in the tank must be cool before attempting to remove the anode rod (or pressure-relief valve). You will need a deep 11/16-inch socket with a short extension and a 1/2-inch breaker bar or ratchet for this job. The heat and corrosion can make the anode rod very difficult to remove. If you decide to replace the pressure relief valve, you will need a large pair of slip-lock pliers or a crescent wrench to remove it from the tank. You will also need a ¼-inch nut driver to remove the vent assembly to gain access to the pressure relief valve and high temperature Teflon tape to seal the threads.
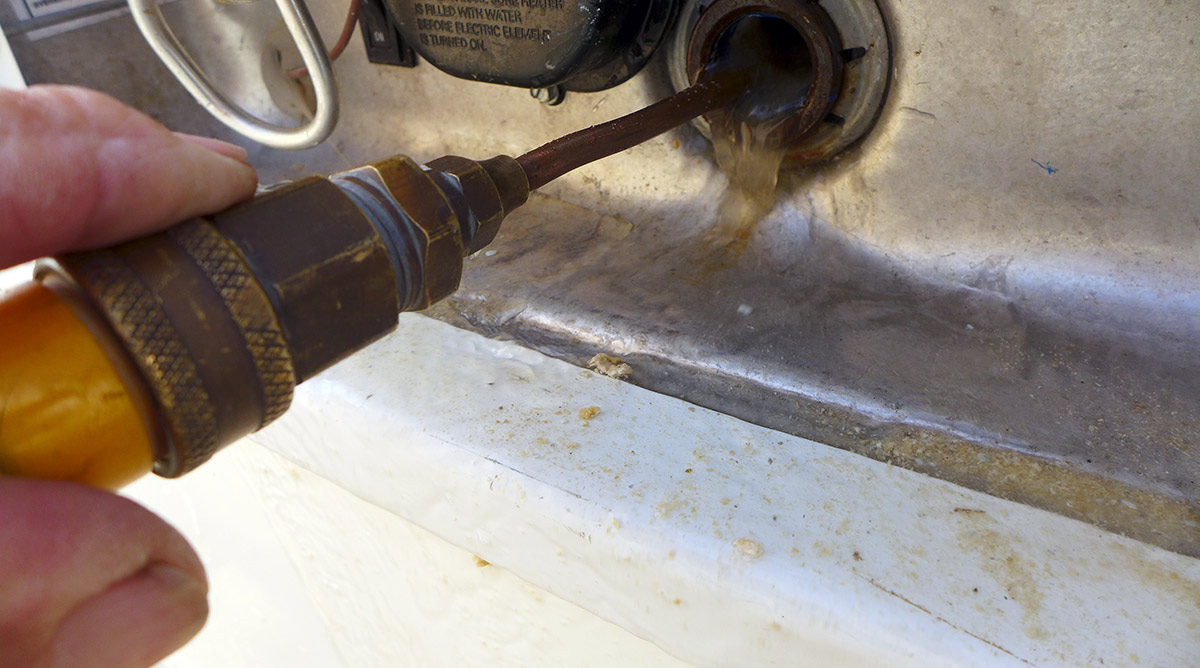
Before you begin, relieve the pressure in the tank by opening the hot side of the faucet farthest from the water heater and leave it open. This will be closed later after the air is purged from the system. Remove the anode rod, then open the pressure-relief valve; do not reverse the order. At this point, there will be a strong stream of water coming out of the drain. First-timers usually stand in front of the drain, but that learning curve will be short-lived. Next, use the flush tool and insert it as far into the tank as possible. Turn on the lever and as the water flows, push and pull the wand while using a side-to-side motion, which will force the debris out of the drain. Repeat this process until you’re certain that all of the deposits have been eliminated.


Apply the Teflon tape to the anode rod threads and install it into the drain. The length of the anode rod makes it somewhat awkward, so be careful not to cross-thread when installing. Tighten the anode rod with the socket; these are very large threads, making it difficult to strip. At this point if you decide to change the pressure-relief valve, use the Teflon tape for the installation. You can torque this tightly as well and make sure the opening is pointing down.
Leave the pressure-relief valve open and turn the water on. As soon as the water gushes out close the valve and go inside to make sure that the air is purged from the faucet, which will be evident when the “spitting” stops and the water flows freely. Turn on the electric or the gas mode and wait for the water heater to completely cycle off; at this point you can check for leaks since the pressure will be built up. If there are any leaks you will need to give the anode rod and/or pressure-relief valve another quarter of a turn. You may need to remove and clean the strainer from the sink if some of the dislodged deposits made its way into the basket.
If you did not change the pressure-relief valve and it leaks, you will need to turn the water off, cool down the water, relieve the pressure and change the valve. Repeat the process above to purge the air from the tank.
Both of these water heater brands are designed to have a small air gap at the top of the tank. Double check your work in a couple of days to make sure there are no drips.

Already a Subscriber? Click here for Access to the Full Issues.