Fringe Element - RV Enthusiast Magazine

Fringe Element

by | Dec 1, 2023 | Pro Tip, RVEXPERT

Photos by the author
When the binding on the woven vinyl flooring in this fifth wheel began unraveling and looking ugly, it was time to find a solution. Installing a PVC transition strip not only hid the wear and tear, but it also added to the aesthetics.
Now that carpeting is virtually extinct among RV builders, woven vinyl has found its way under — and on — a lot of slideout-room floors. In our fifth wheel, woven vinyl was installed in place of the carpet and we elected to have binding sewed into the edges of the material.

Big mistake.

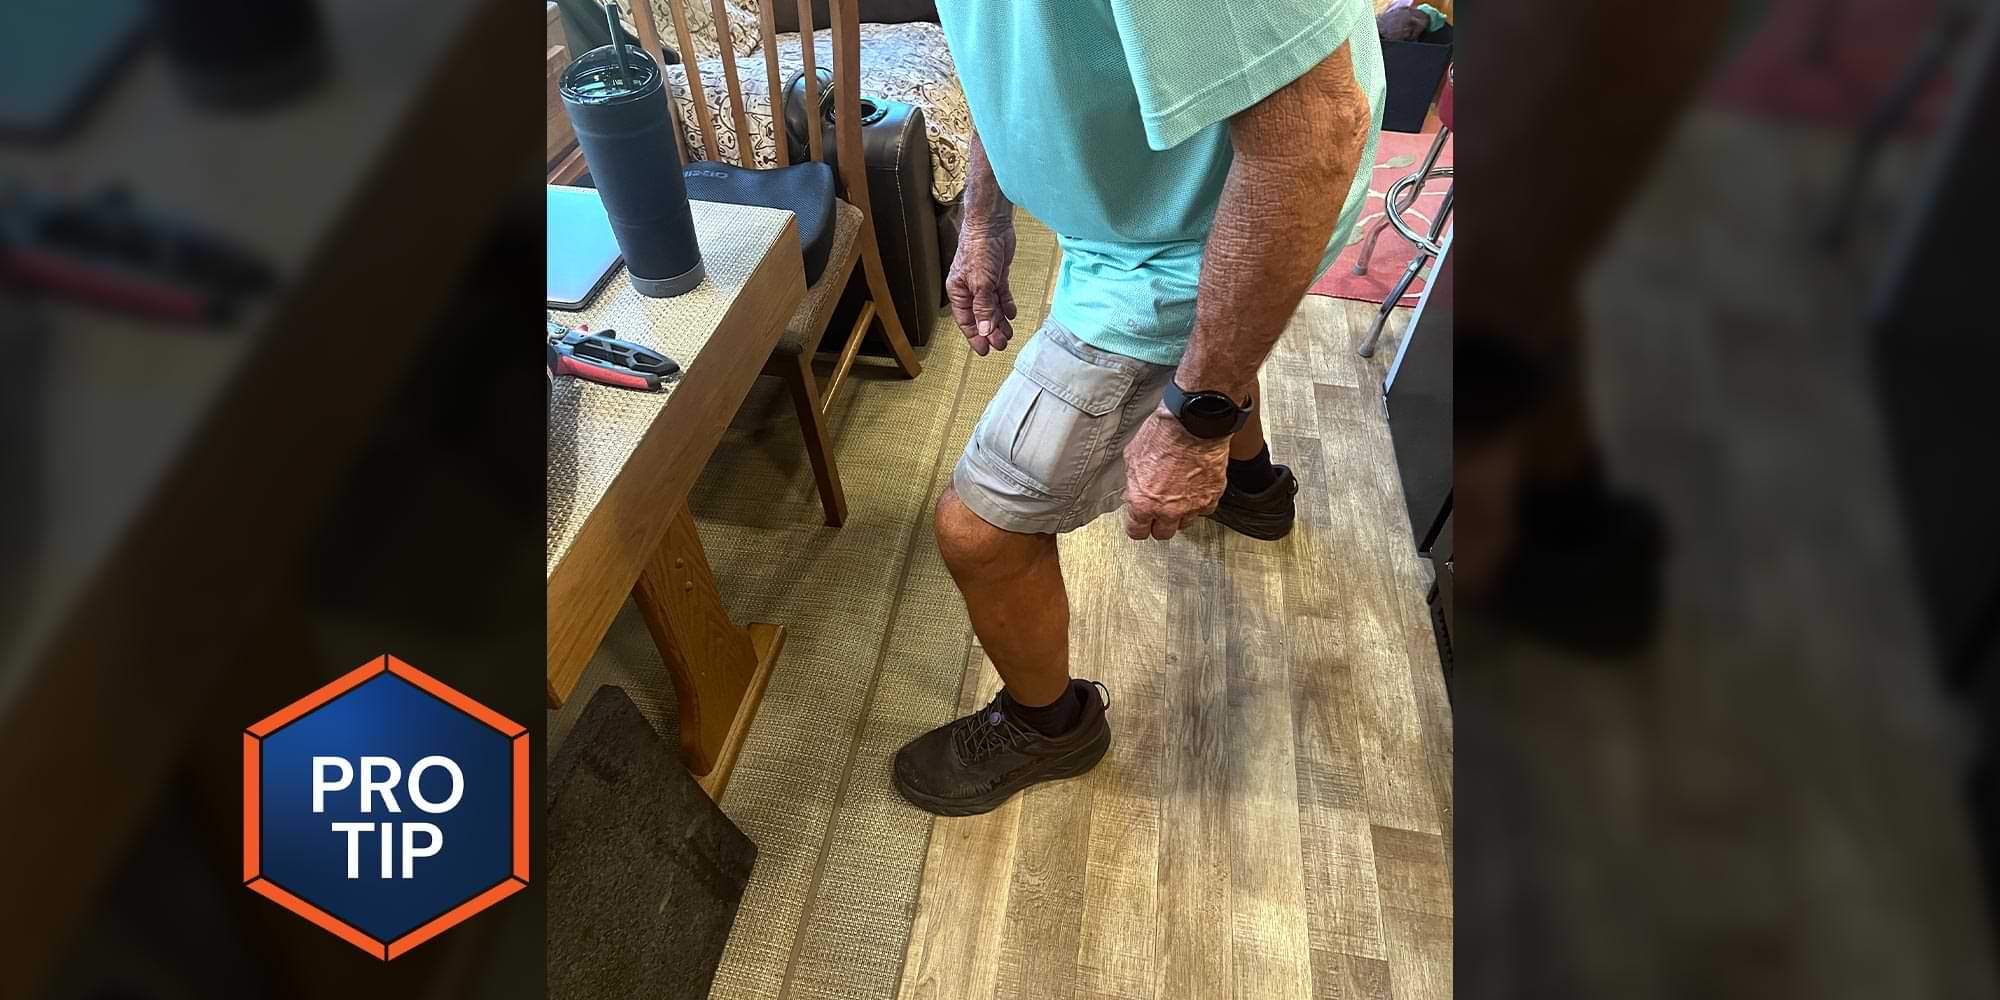
After a few months of walking on the transition section of woven vinyl permanently adhered to the cabin floor, the binding started to wear — and just a short time later, the cloth-like material gave way entirely and presented a pretty ugly picture. To say it prematurely aged the look of the interior would be an understatement.

We struggled to find something that would cover the eyesore, but the search was hampered by the way in which the vinyl was applied. To allow for the slideout to glide over this section of woven vinyl, it was glued to the main floor under the slideout floor. In other words, there was no way to re-sew on new binding.

two index fingers point to areas of tattered binding along the edge of an RVs woven vinyl flooring

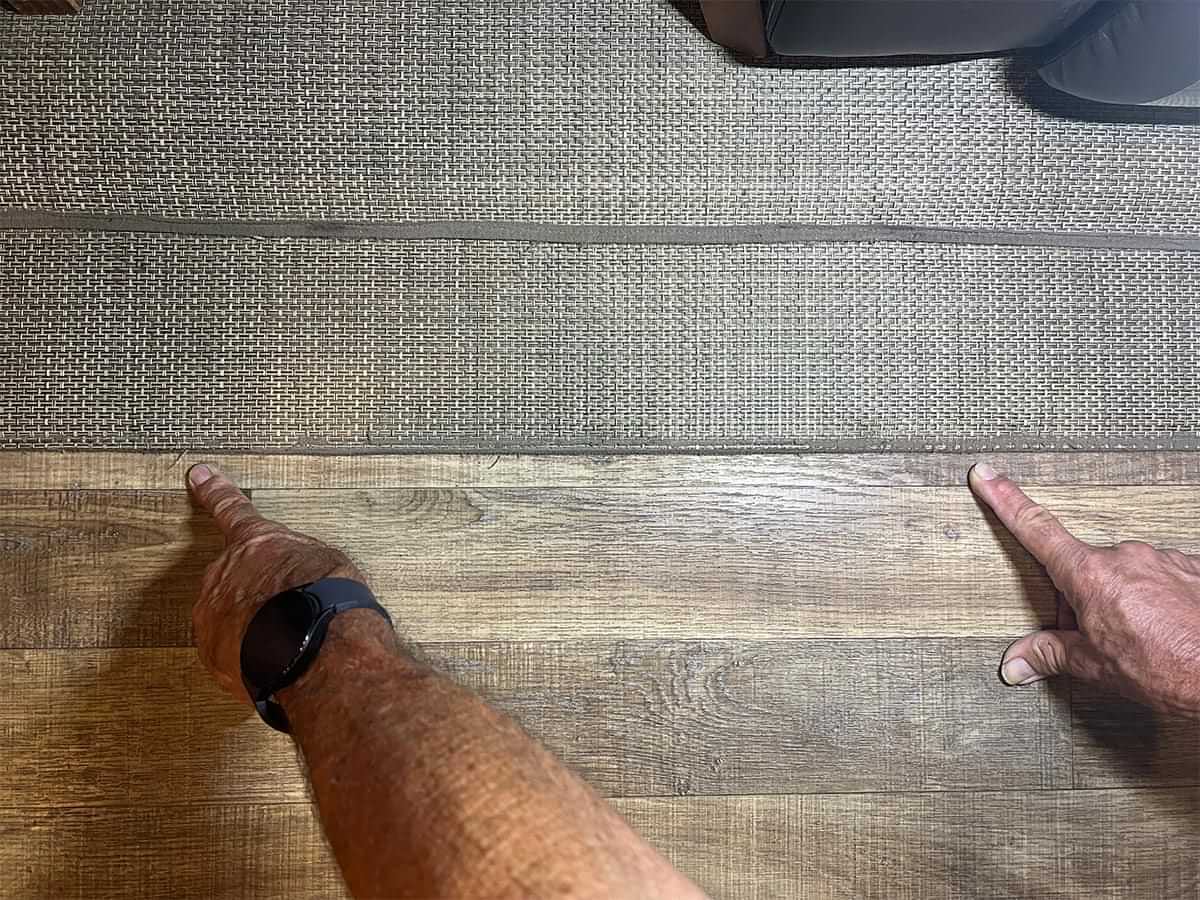
The binding that was added to the edges of the woven vinyl flooring started to wear shortly after the installation. In retrospect, adding the binding was not a good idea. Since the vinyl was glued to the main floor, it was not possible to replace the binding, which became an eyesore.

top view of two rolls of transition strip with adhesive backing, strong metal scissors, a heat gun, alcohol and a headlamp organized for use
A good solution for hiding the torn binding was to cover the area with a transition strip with an adhesive backing. Two rolls were purchased on Amazon for $32. A cutting tool (or strong scissors), heat gun (or hair dryer), alcohol and a headlamp were needed to complete the installation.
The solution we finally settled upon was to apply a floor transition strip so that the slideout could ride up and over the edge of the woven vinyl while the strip was attached to the floor. Of course, our search included Amazon where we found “Floor Transition Strip Self Adhesive PVC Carpet to Tile” PVC material (sold in just short of 10-foot lengths for $15.99). The transition strip can be cut to length using an industrial scissors or tin snips, which is what we used. It has a lip that measures 5mm, which was perfect to cover the binding — or what was left of it — and still have enough material to stick to the floor using the attached acrylic tape. Two rolls of the transition strip were needed to cover the length of the woven vinyl under the slideout and along the entryway where the vinyl was extended during the installation.

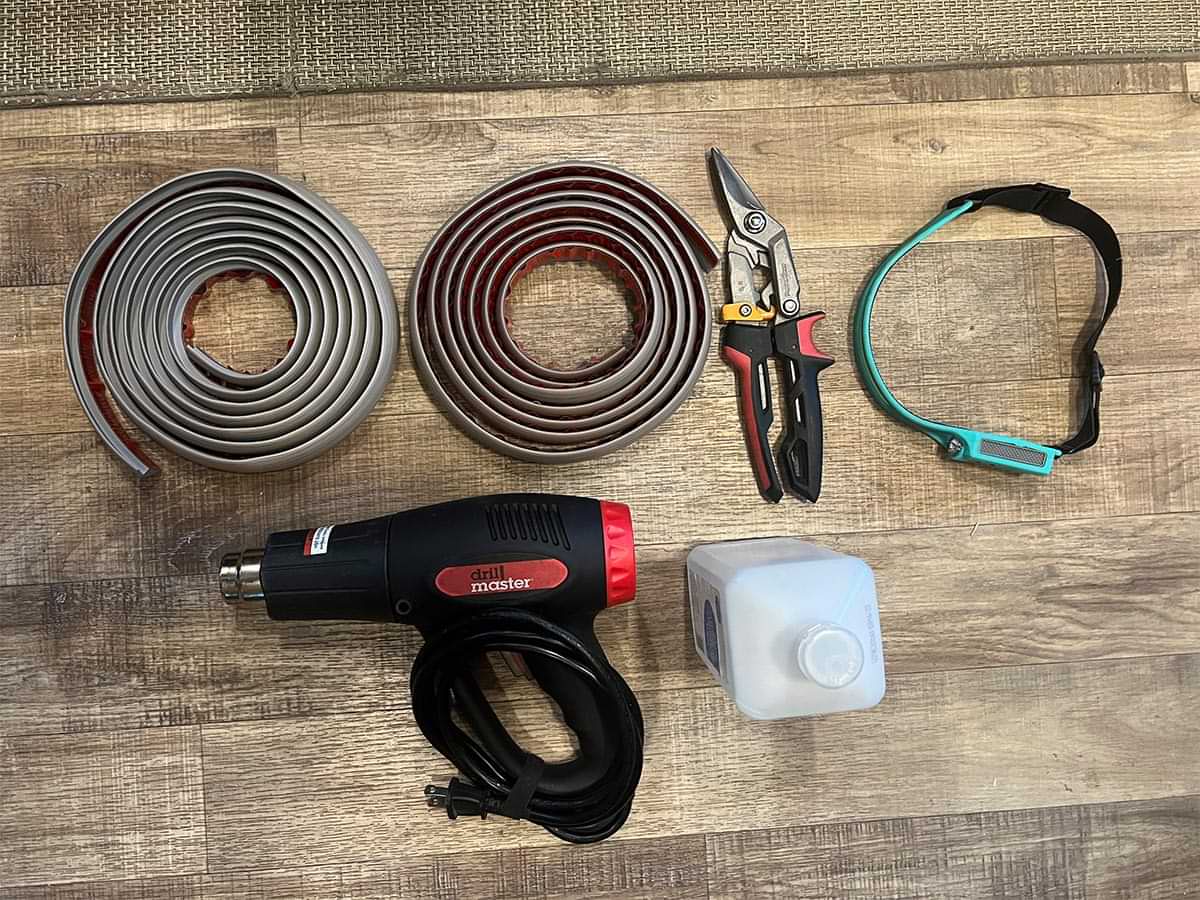
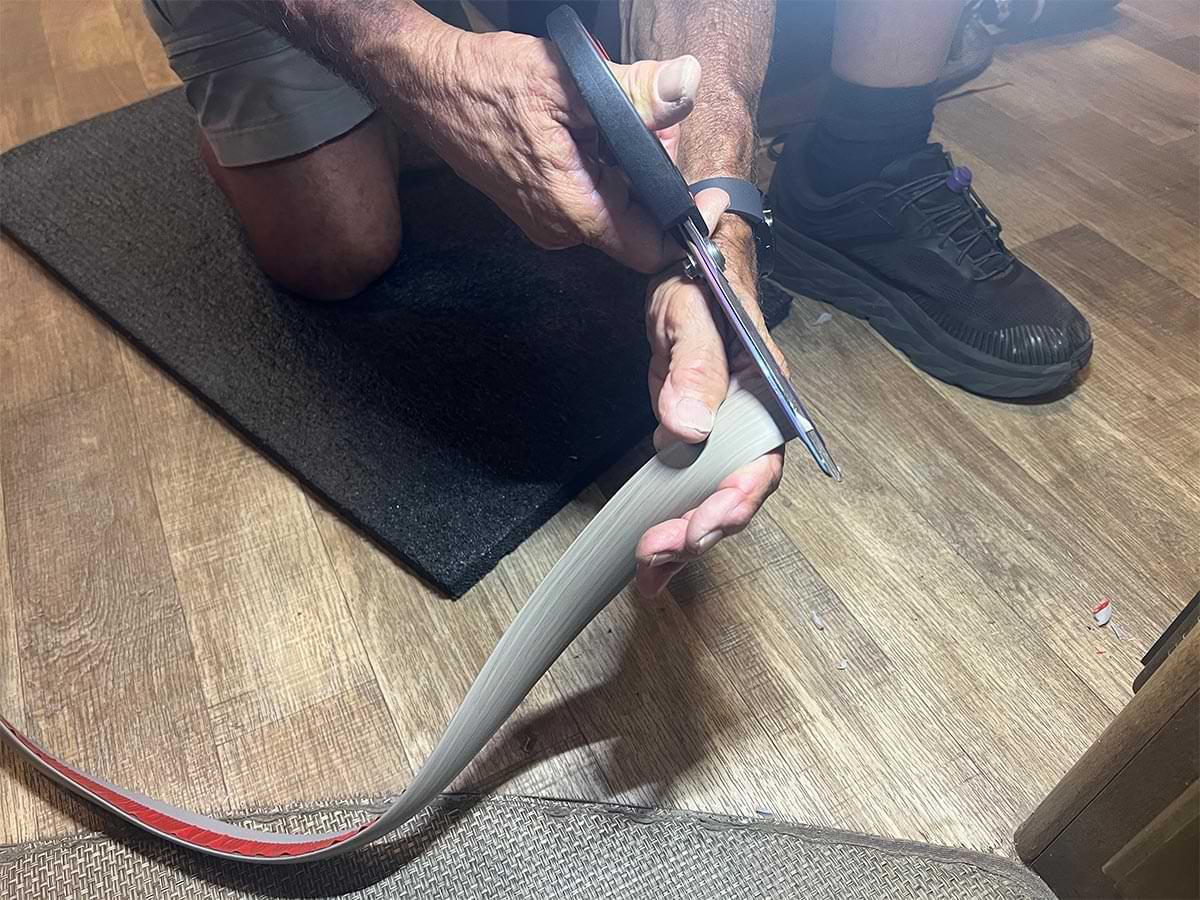
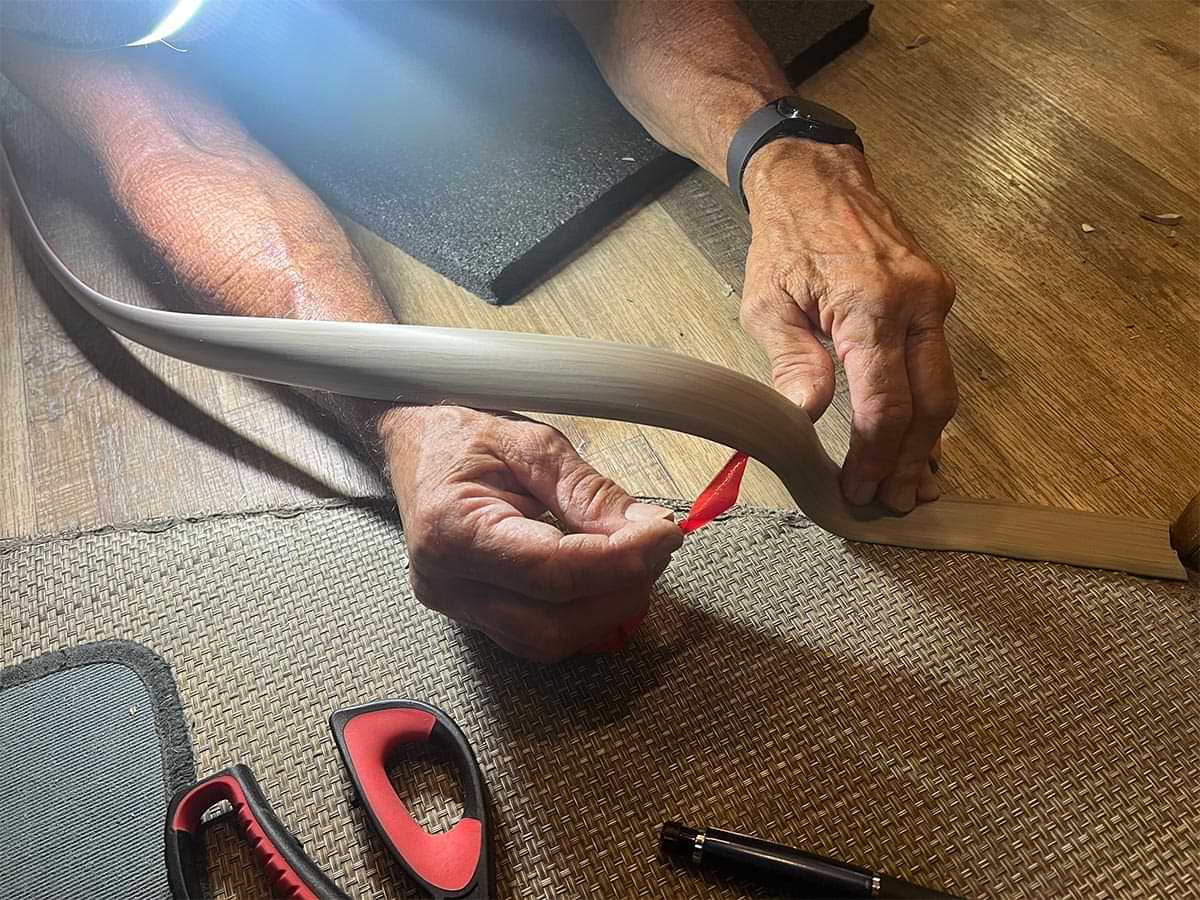
The pliability of the strip material was a big factor for this job, primarily because of the sweeping curves going into the entryway. The PVC strip is easy to bend, and a heat gun or hair dryer can be used to manipulate the material. Just be careful when using a heat gun, which can send extremely hot air and melt the transition strip.

Another benefit of the material is that it has a smooth surface and is stain-resistant, so it’s easy to clean. And, since it’s smooth (and comfortable under bare feet), there is little chance of pulling up the edges with shoes or your toes.

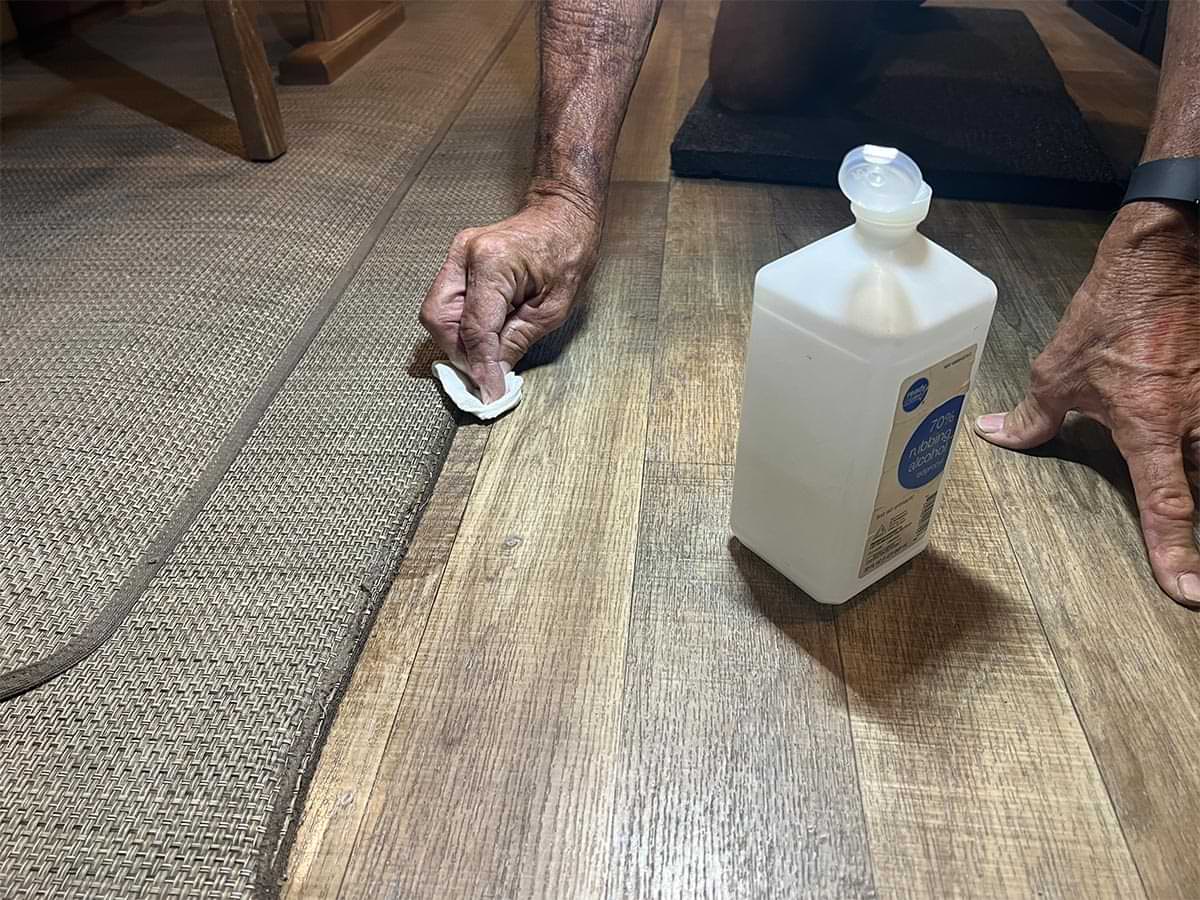
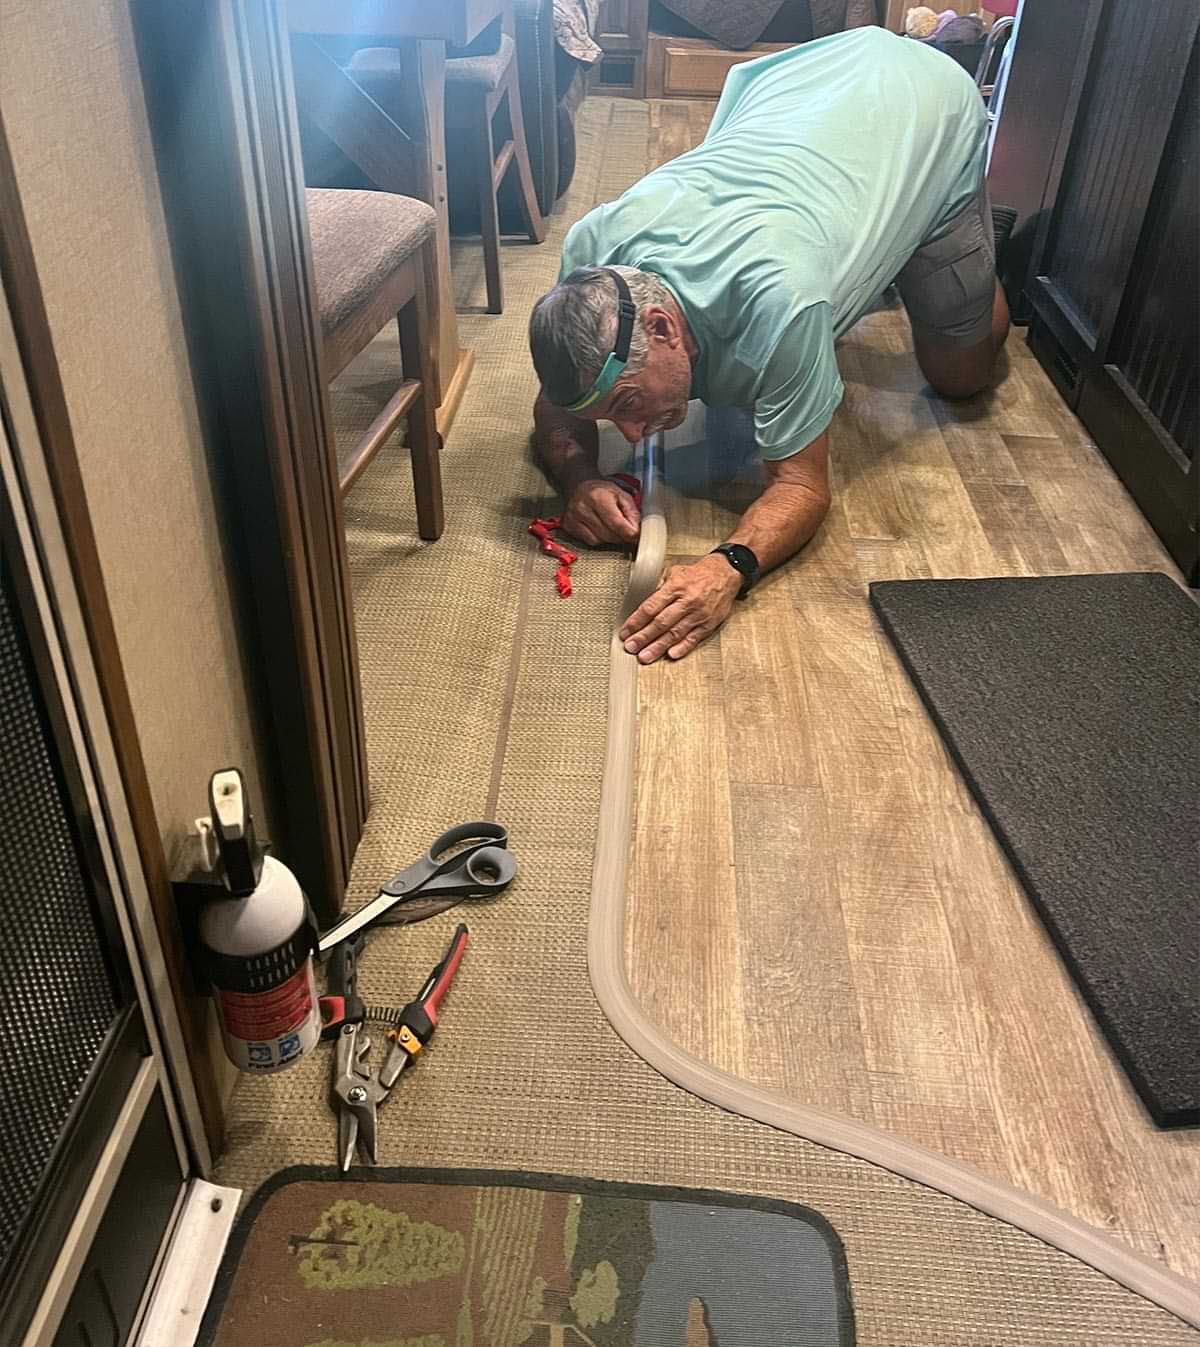
Before starting the project, a shorter length of transition strip was cut and temporarily installed in a central area to make sure there was enough clearance for the slideout when moving in and out and there was no restriction. Once confirmed, the coiled transition strip was unrolled on the ground outside to allow the sun to take the bends out of the material. While it was “baking” in the sun, we cleaned the woven vinyl and adjacent floor with alcohol — which is critical when applying anything with two-face tape.

the PVC transition strip placed on a driveway in the sun to stretch out the rolled material
The PVC transition strip is packaged in tight rolls, which made it necessary to stretch out the material on the patio and allow it to “bake” in the sun. Once heated up, the material was much easier to handle.
the edge of the woven vinyl (at the binding) and adjacent main floor are cleaned thoroughly with alcohol and a paper towel
While the transition strip was heating up, the edge of the woven vinyl (at the binding) and adjacent main floor were cleaned thoroughly with alcohol. If you fail to clean the area, the adhesive will not bond properly, reducing its hold to the floor.
transition strip is cut to fit around the cabinet in the entryway
The transition strip was cut to fit around the cabinet in the entryway, where the project started. This area was the most complicated because of curves in the woven vinyl.

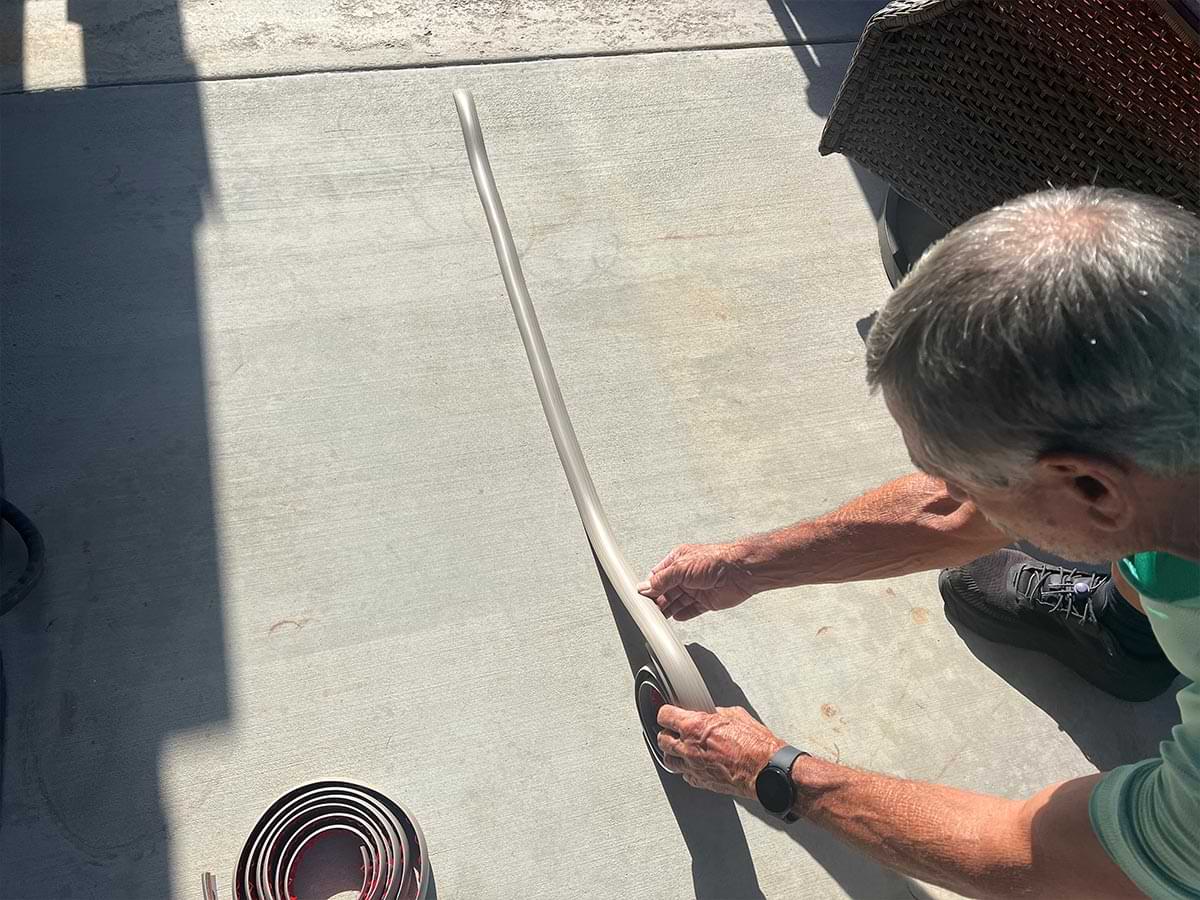
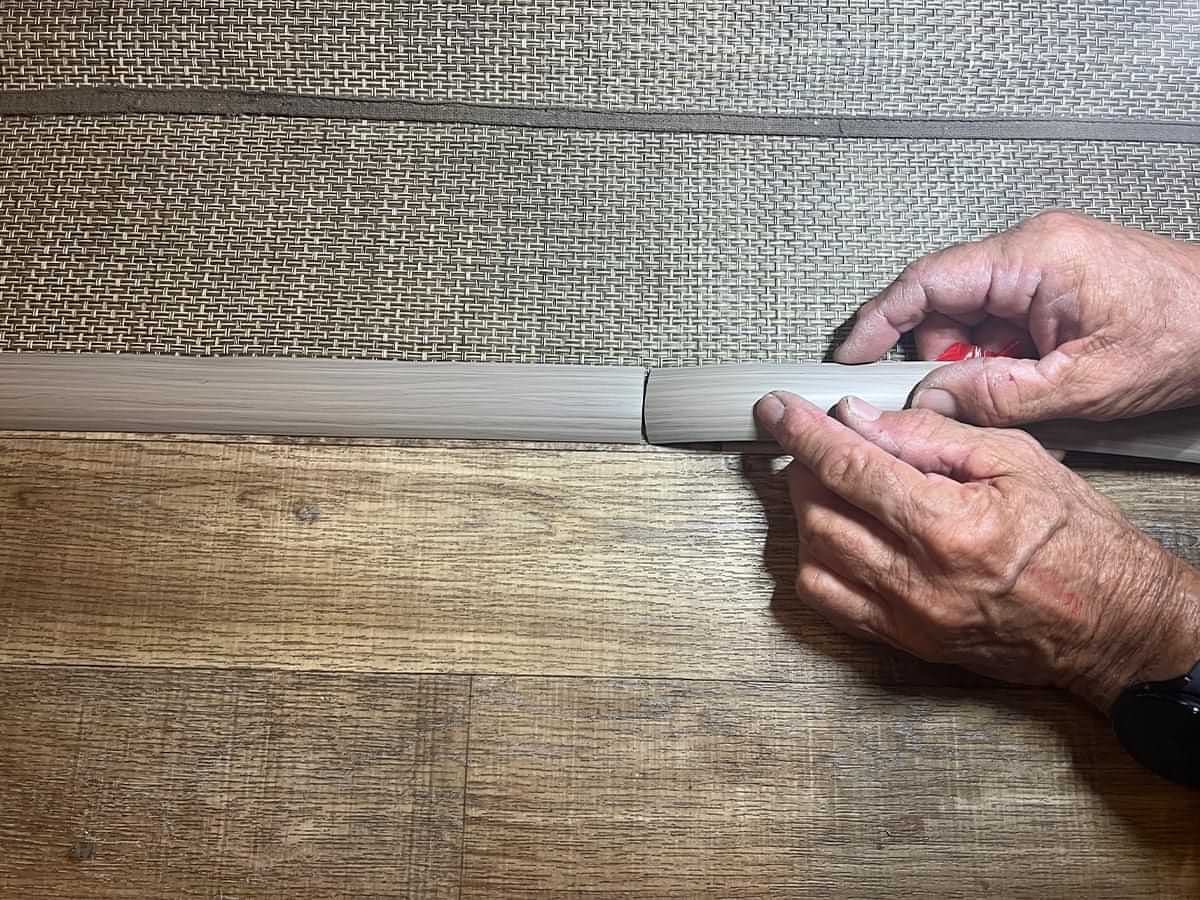
We started at the entryway and cut around the end to fit against the cabinet, bending the material a little at a time to follow the curvature of the woven vinyl. Happily, this process was easier than expected and the heat gun helped keep the transition strip soft. The tape backing was released a few inches at a time, after which the strip was seated to the floor. A few more passes with the heat gun assured the PVC material would stick properly; the adhesive is very strong and has kept the transition strip in place securely for months of walking on under full-time living conditions. At first, we were worried that the seam between the two lengths of transition strip would create a problem, but that was short-lived; the two sections mated very smoothly without any lifting from the floor.

with the backing tape removed in short sections, the transition strip is adhered to the floor
Once the backing tape was removed — in short sections — the strip was placed on the floor. A 5mm step in the material made it possible to cover the binding while lying flat on the main floor, which was necessary to allow the adhesive to bond.
a heat gun is used to make sure the transition strip maintains its shape
Fortunately, the PVC material was easy to work with, even around the bends. A heat gun was used to make sure the transition strip maintains its shape. Be careful not to overheat the material with the heat gun, which provides very hot air. A hair dryer will also work, and frankly is a safer option for those not experienced with a heat gun.
a second strip of transition material is applied to the woven vunyl edge directly after the first strip
At first, we were concerned that the seam between the two lengths of transition strip would create a problem, but that was short-lived. If the cuts are clean and straight, you’ll barely notice it’s there.
a man wearing a headlight leans low to the floor while carefully removing tape backing and adhering the transition strip along the edge of woven vinyl flooring
Take your time when applying the transition strip along the length of the slideout, and only remove short sections of tape backing at a time. The clear acrylic adhesive is very strong and allows the transition strip to stick firmly to the floor, without gaps which can be caught by shoes or your toes. The finished modification really improves the look of the interior — a visitor would be hard-pressed to think it was anything but a factory effort.

I guess the stars were aligned for this project because there are quite a few moving parts to consider when applying this type of transition strip in an RV. If you determine that this type of modification will work in your RV, you won’t be disappointed — not only does it improve the appearance of the living space, but it also looks as if it was factory-installed.

Get Updates
Subscribe today and never miss an issue!
Get all the latest tips and news to keep you moving on that open road!
RV Enthusiast January/March 2024 Issue
Current Issue
January/March 2024
Spring is back in bloom and with it we are proud to present our latest issue of RV Enthusiast! The January/March issue covers furnace failures and how to fix them, the best batteries for boondocking, quick and easy weekend projects, PLUS so much more!

Already a Subscriber? Click here for Access to the Full Issues.

Share This