Pan Patch - RV Enthusiast Magazine

Pan Patch

by | May 10, 2023 | Pro Tip, RVEXPERT

After years of use, the shower pan in our fifth wheel began developing cracks. Instead of replacing it — a major undertaking, especially for full-timers — we opted to repair it with an untypical solution.
Anyone who has owned their RV for an extended length of time is painfully aware that nothing lasts forever — and it’s amazing where things begin to wear out. For example, I’ve noticed that cracks were starting to appear in the shower pan of my RV. Naturally, my first thought wasn’t printable — but as I thought about it, there have been a lot of feet on the pan since I bought my rig new in 2015, so the wear-and-tear was, really, inevitable.

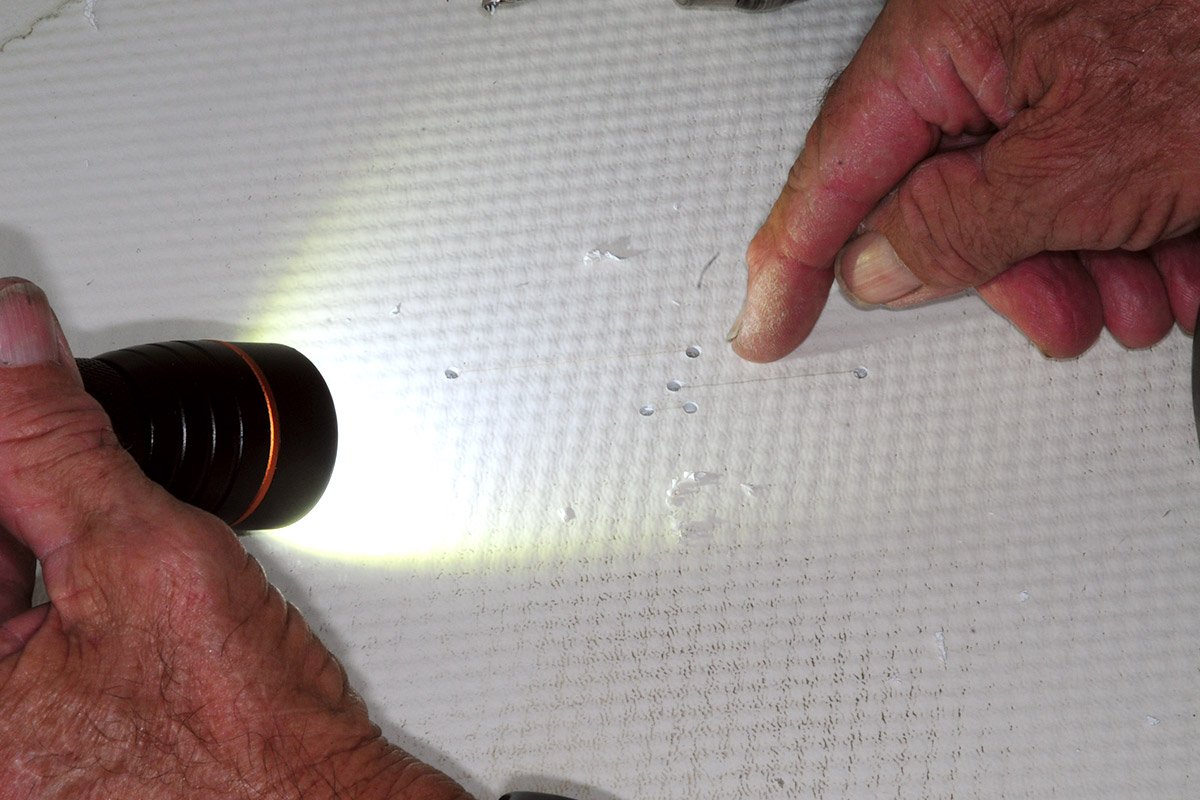
That said, I couldn’t ignore the cracks, which could allow water to leak into the basement. Left unchecked, this would lead to dry rot and its collateral damage to the structure. Rather than replace the shower pan — which would require removal of the shower stall wall panels (and the faucet/diverter and drain) to replace — so with Technical Director, Bill Gehr’s help we opted to seal the pan with Flex Seal, a relatively new product that we wanted to try

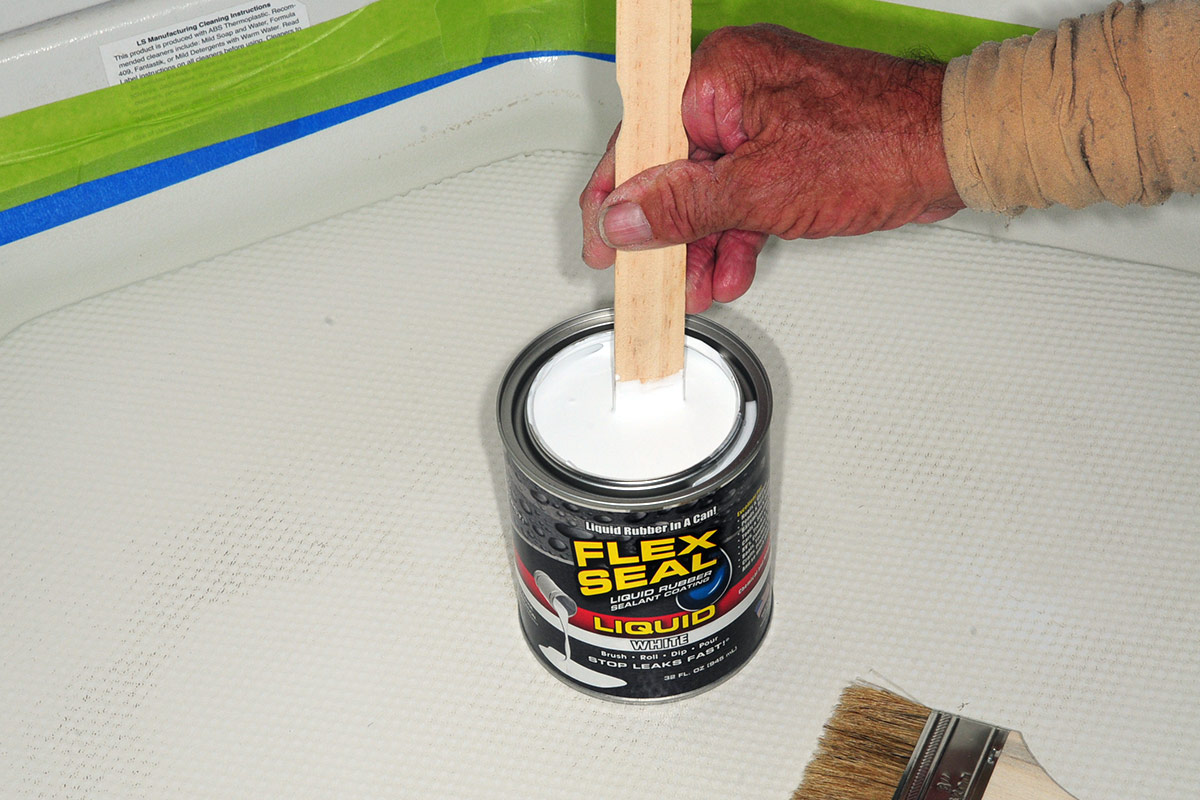
I’m not a big fan of “as seen on TV” products, tagging most as novelty items, but Flex Seal caught my eye. What the heck, if a guy can patch the bottom of a boat with this stuff and it will float on water without sinking, there should be some validity to the company’s claim. Flex Seal is available as a tape, adhesive glue, Flex Shot (an aerosol-propelled sealant), paste, liquid and even super glue. We bought a quart of Flex Seal Liquid Rubber Sealant Coating (the liquid version of the product) for $34.98 on Amazon and a couple of throw-away paint brushes at the local home improvement store and figured we’d give it a shot.

blue masking tape is used to block areas in the shower pan
protected blade is used to cut the extra masking around the tape covered shower pan drain

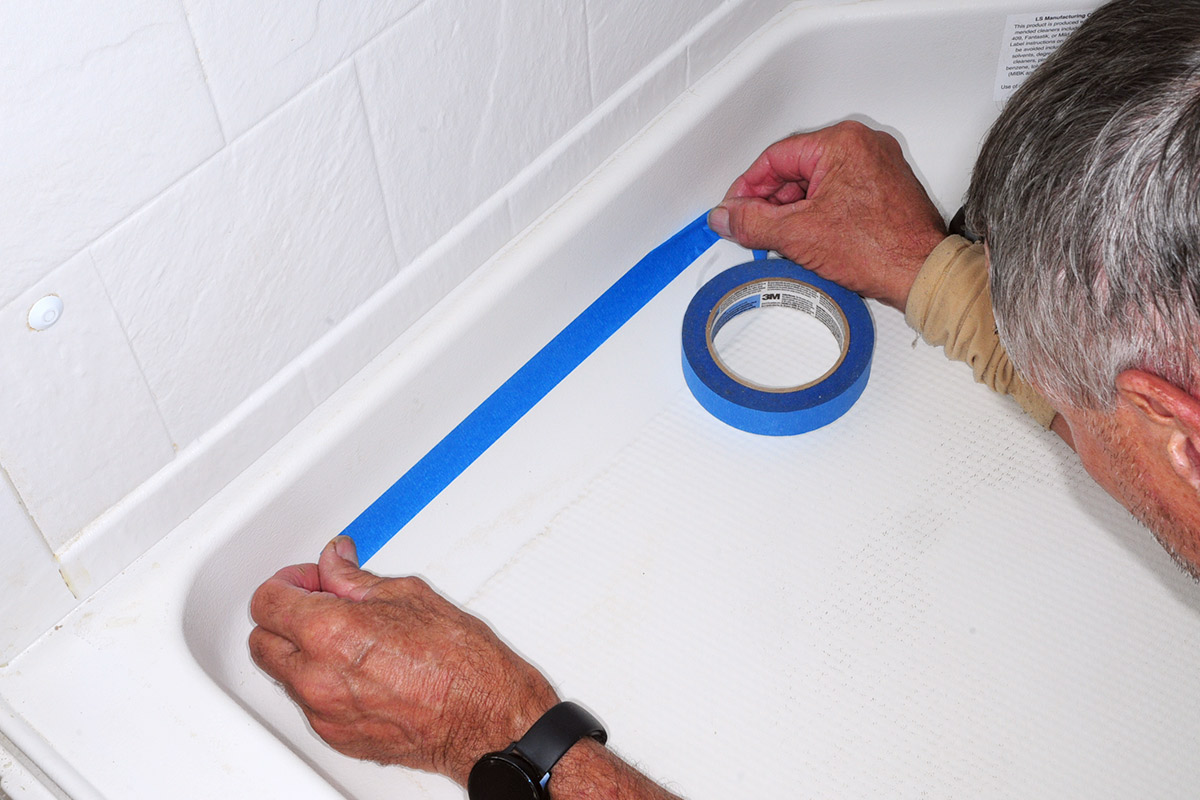
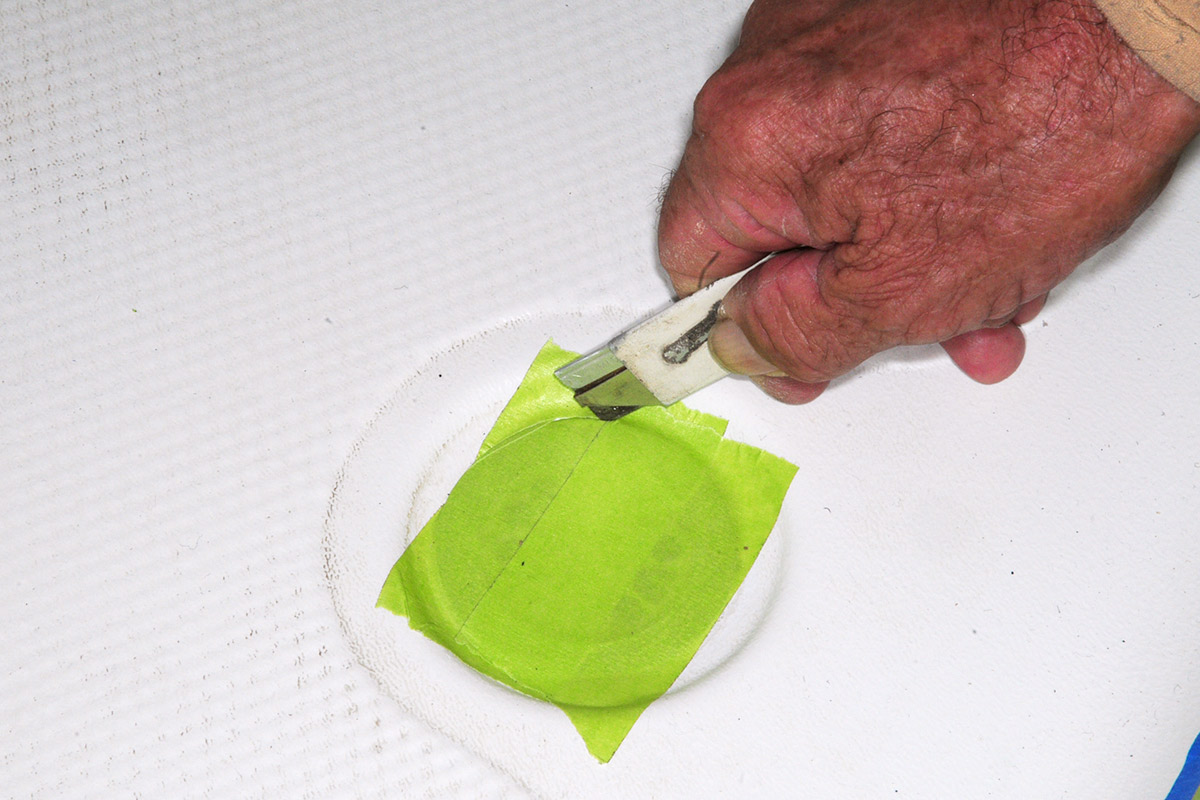
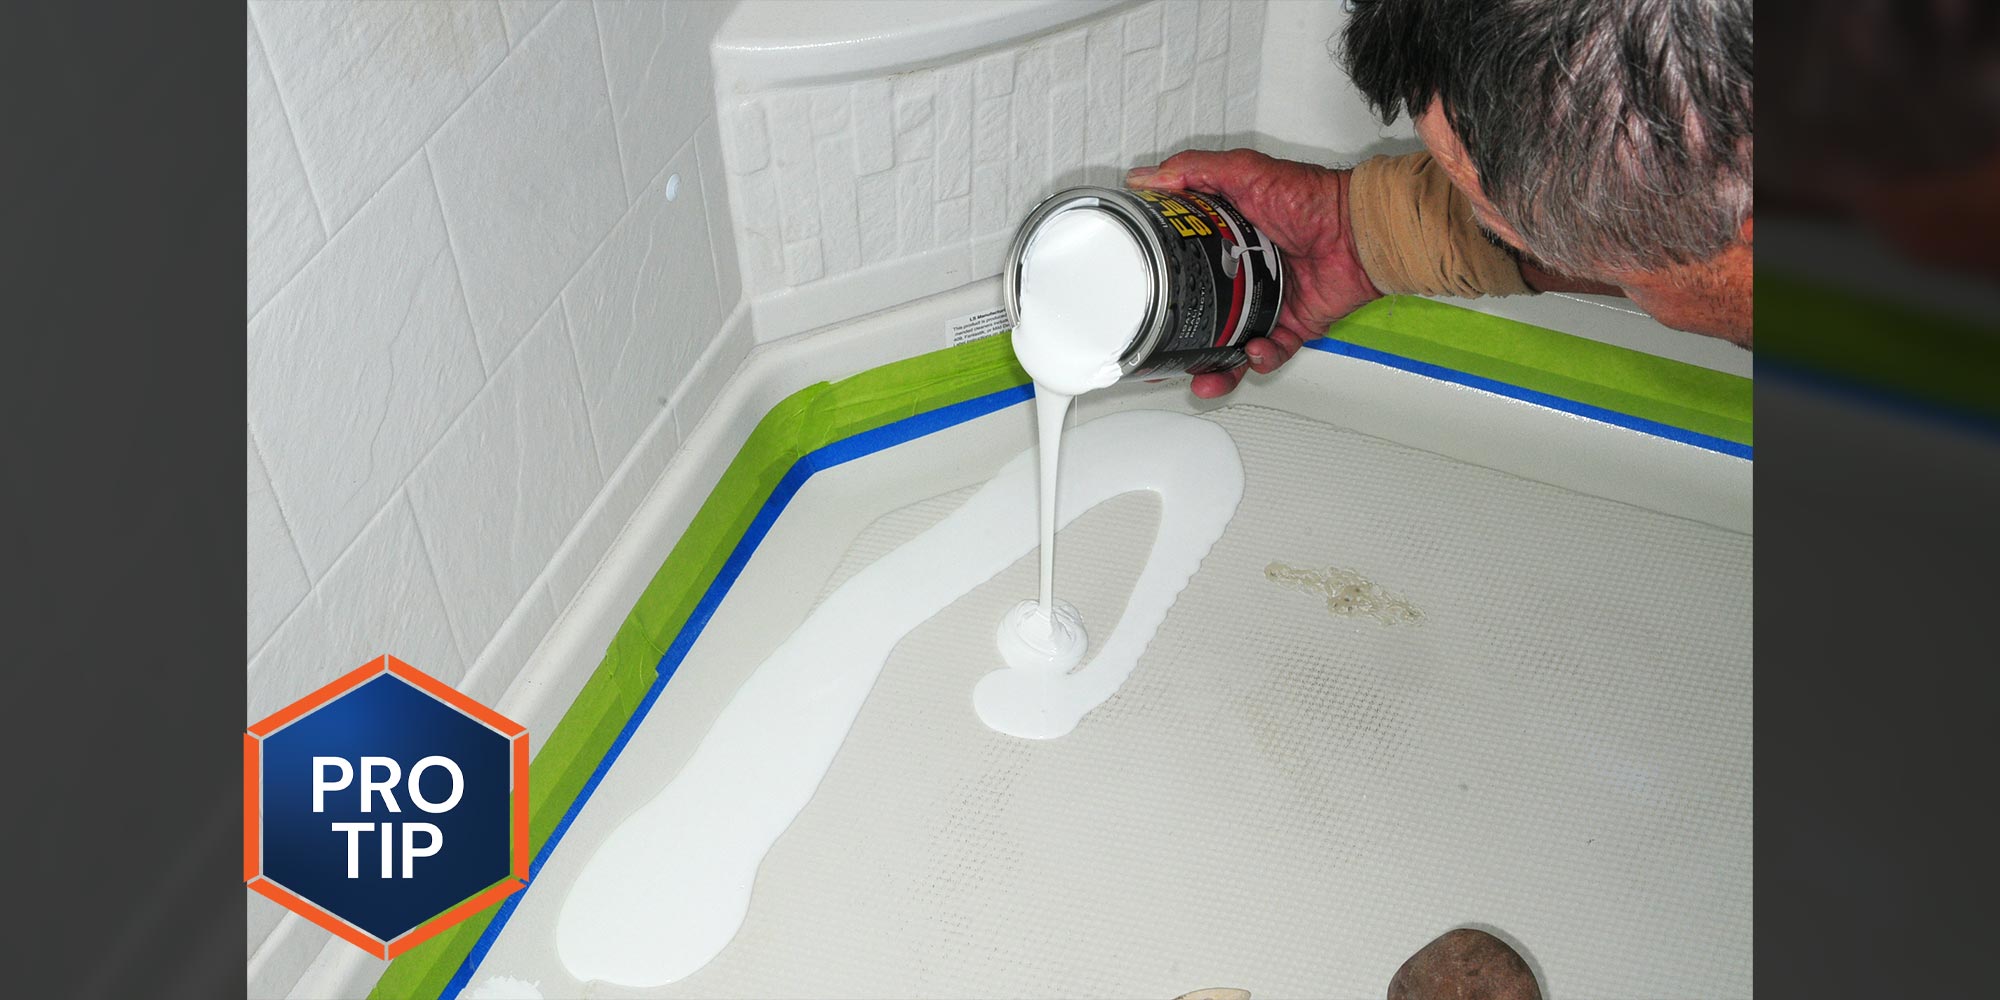
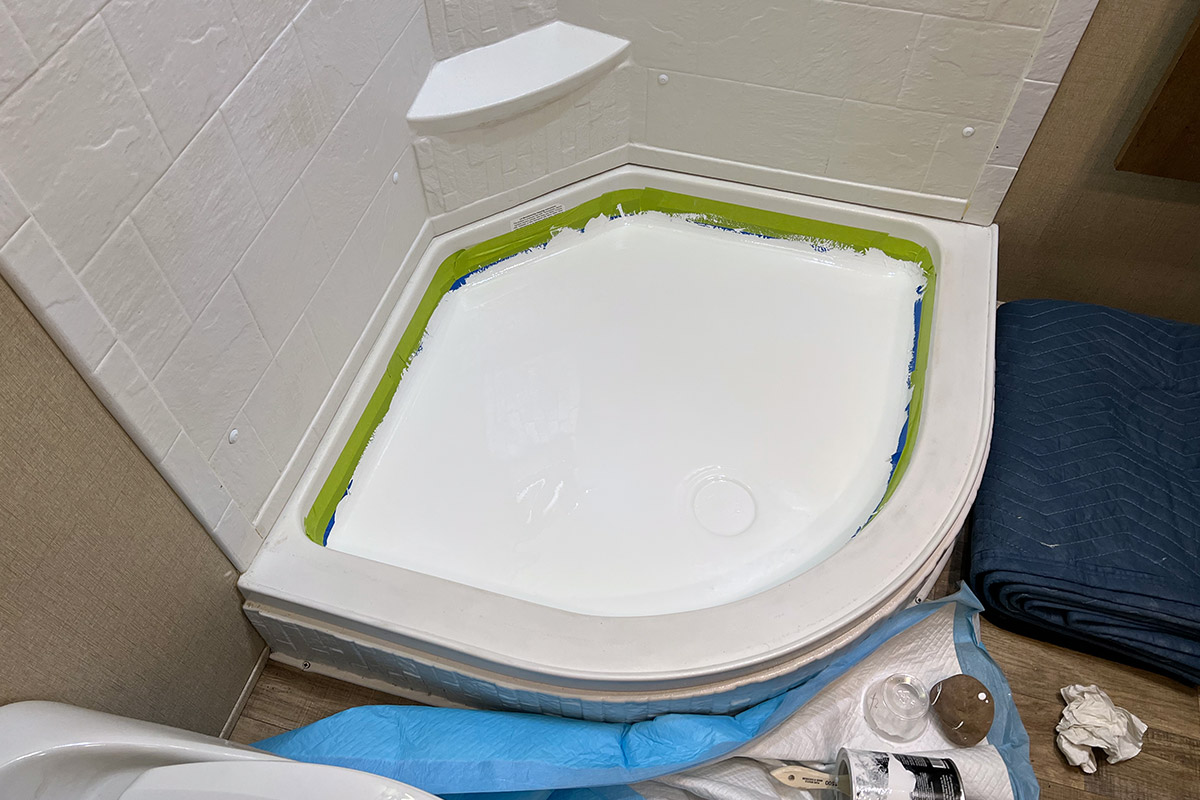
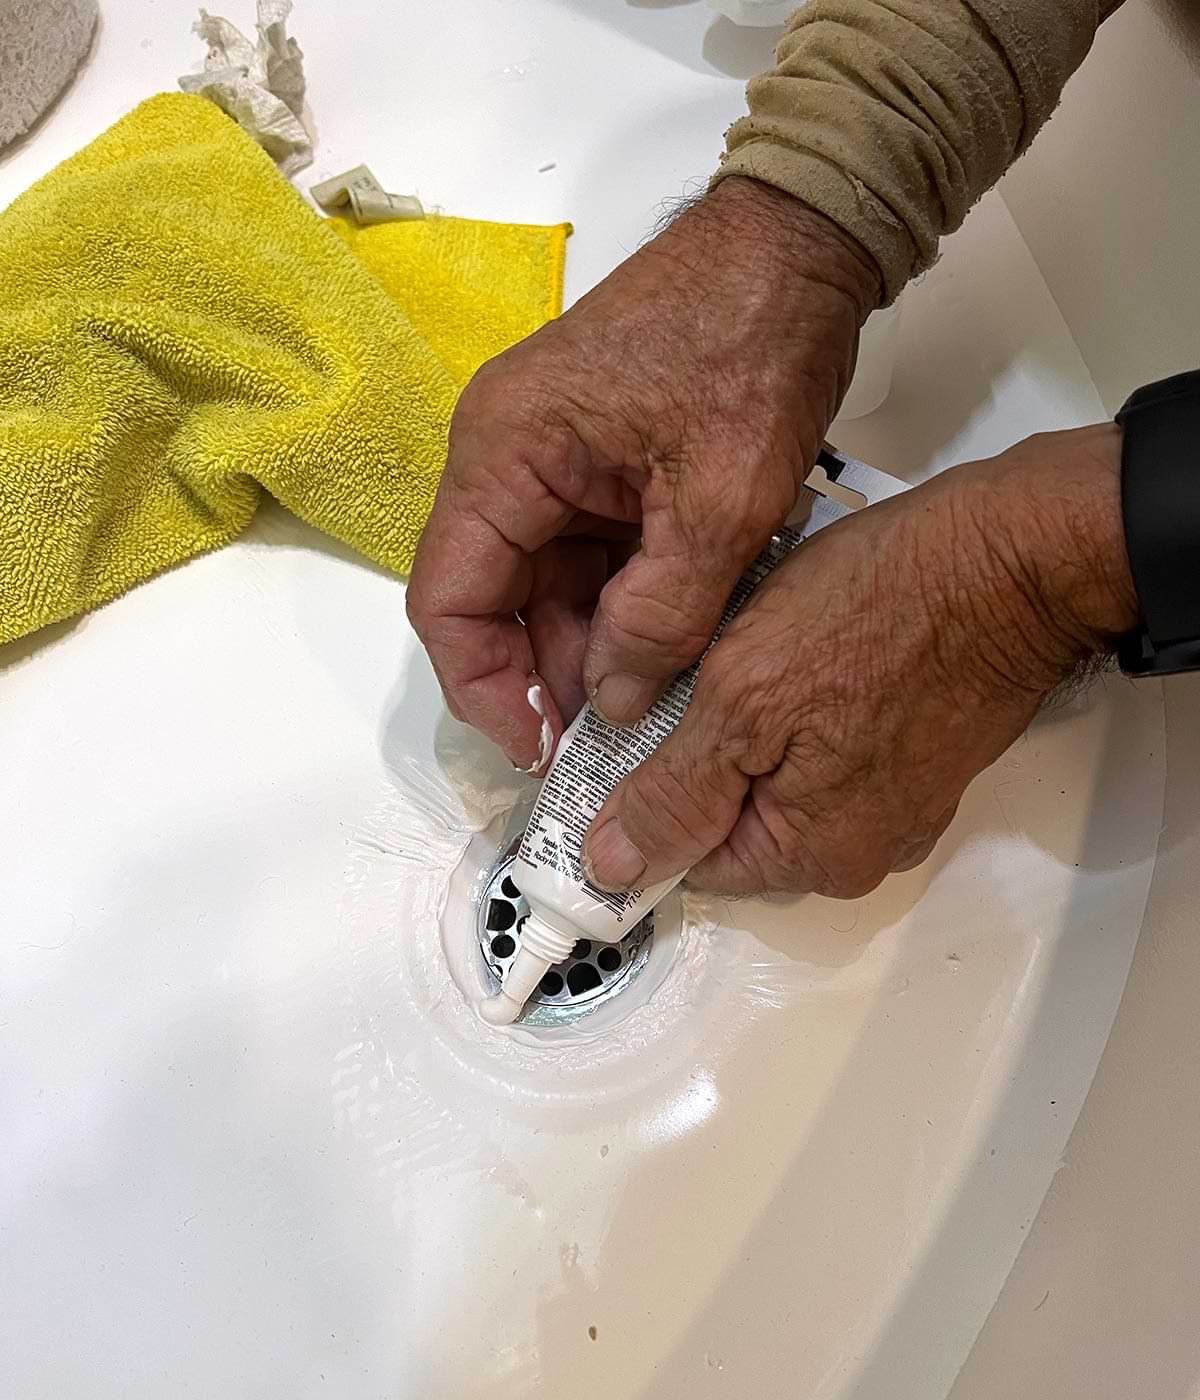
Getting the shower pan ready for the coating of Flex Seal took quite a bit of time. A natural ridge in the pan looked like the perfect place for the liquid rubber to settle, so the upper sections were protected with masking tape used for painting. It was imperative that the shower pan drain be protected and not filled with rubber. Extra layers of masking tape were cut into position with a razon knife.

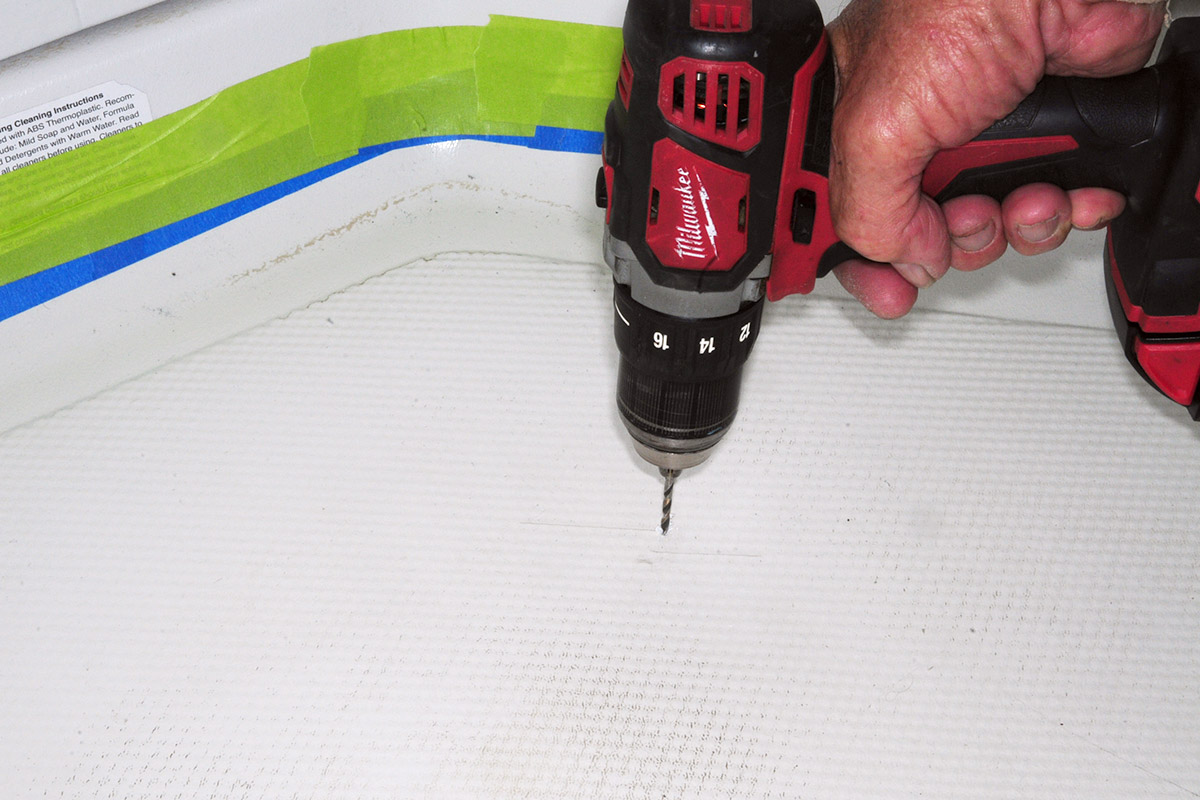
After sealing the cracks by drilling holes at each end to stop the spread, the area was sealed with hot glue and allowed to dry. (The thought was that the hot glue would keep the cracks under control when the pan flexes.) From here, the pan was masked with painter’s tape and the drain covered before roughing up the surface with sandpaper and cleaning with alcohol.

a drill is used to created holes in the cracked areas of the shower pan
a hand holds a flashlight at an angle as a finger points to drilled holes in the shower pan
Over the years, the shower pan had developed hairline cracks that eventually widened and began allowing water to leak into the under-floor structure. Allowing water to leak will lead to dry rot and structural damage. Before coating the pan with the Flex Seal, holes were drilled at both ends of each crack — to stop the crack from lengthening — and filled with hot glue. The idea was that the glue would help prevent the cracks from opening as the pan flexes.
a fine grit sandpaper sheet is used to roughen the pan surface
70% isopropyl rubbing alcohol is applied to a paper towel in a hand

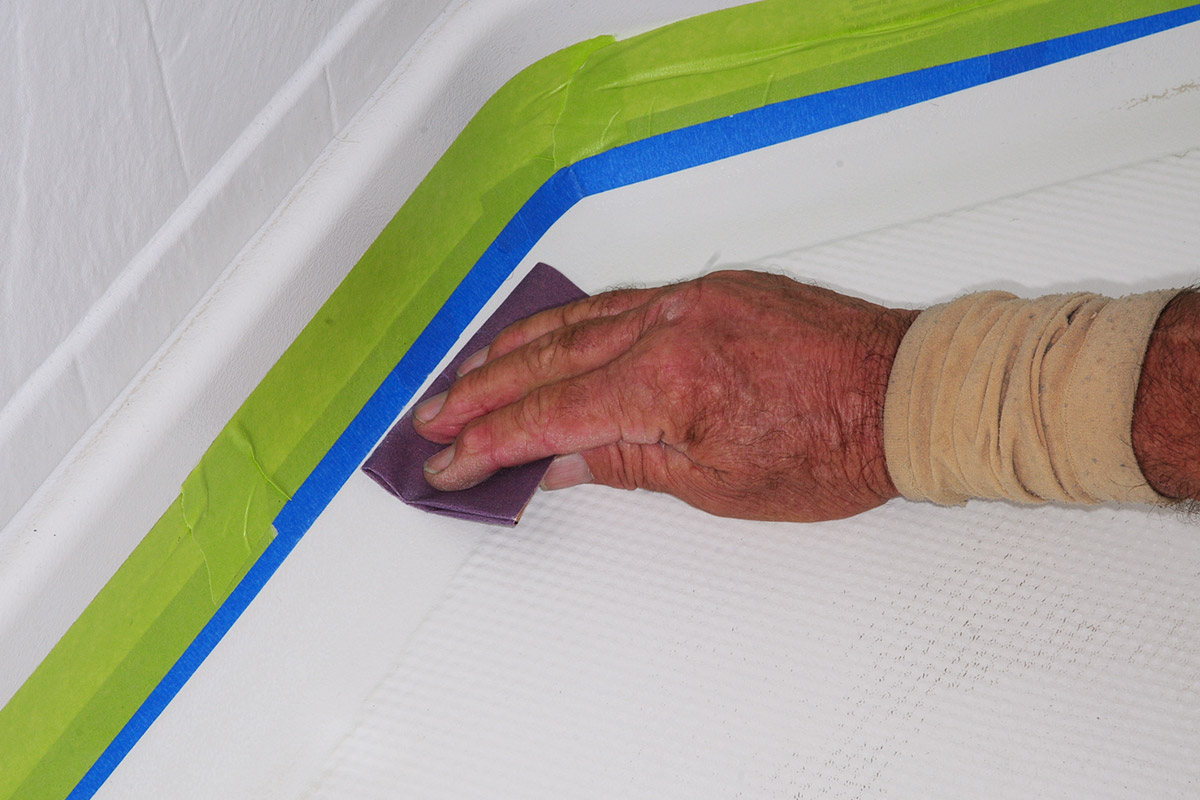
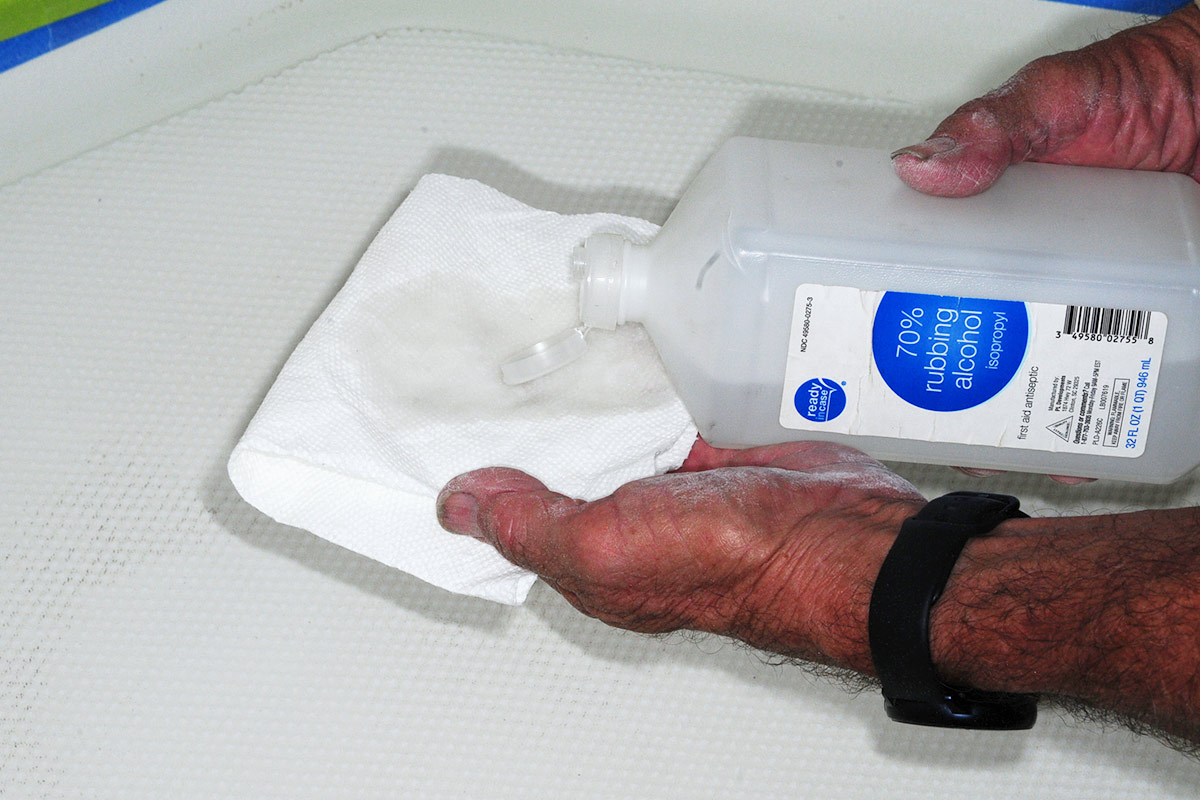
The last step in the preparation process was to rough up the pan surface with a fine grit sandpaper or pad and wipe off any residue with alcohol.

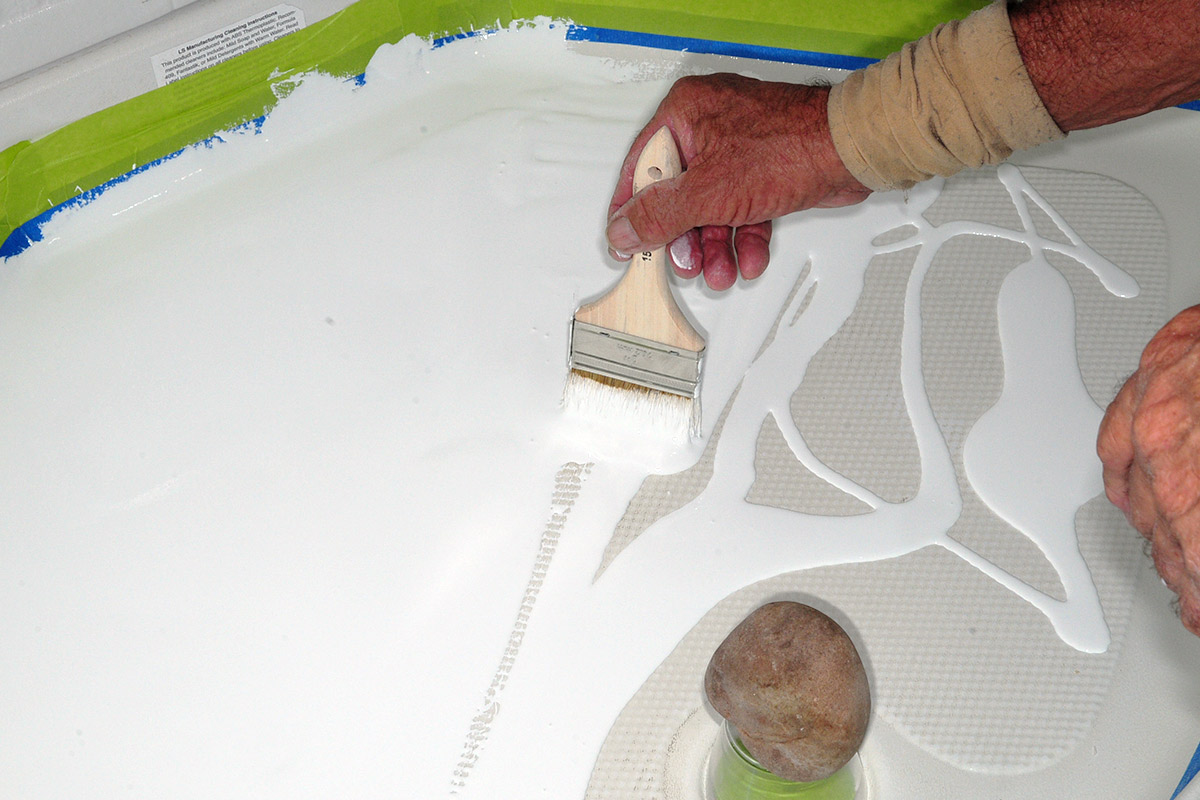
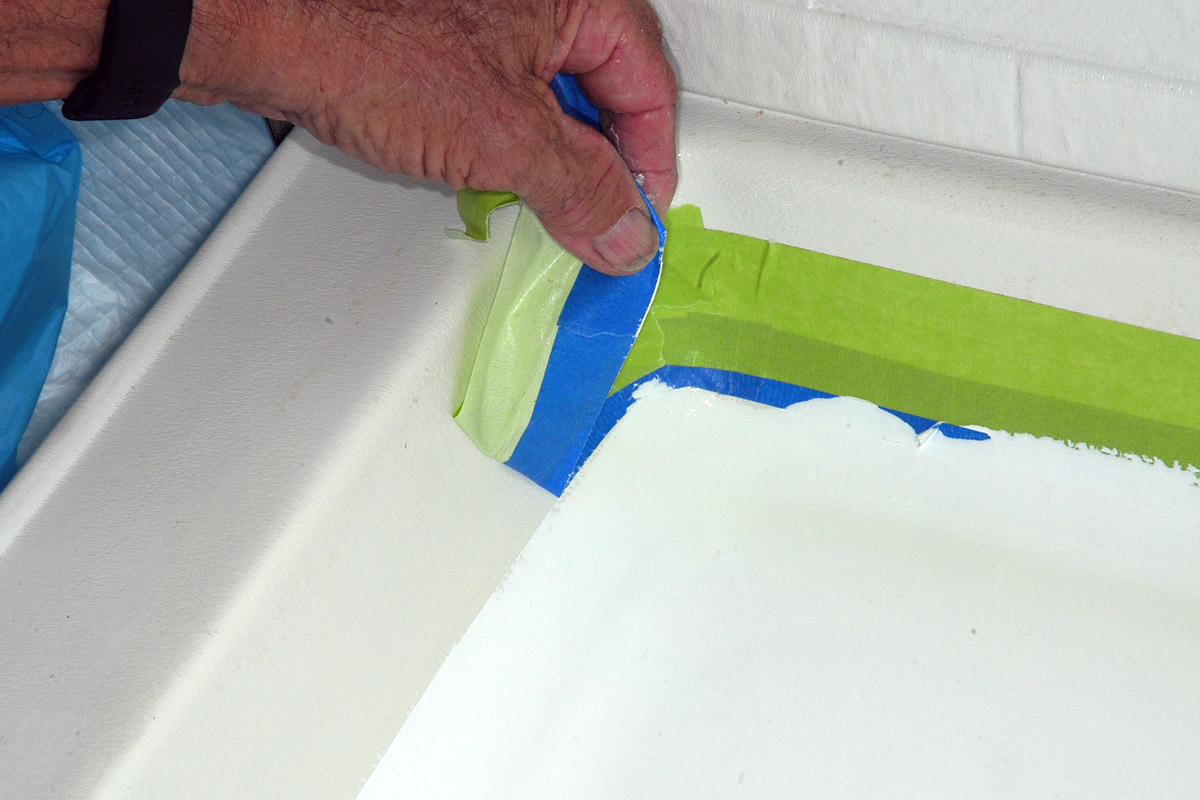
The white-color Flex Seal was poured onto the shower pan directly from the can and spread with the throwaway brushes; there was just enough to provide a thick layer on the entire shower pan. At first, the liquid seemed to be self-leveling, but as it took on a life of its own there were a few ripples in the surface, which were puzzling. The masking tape was removed after the material skinned over to make sure it would lift off (allowing the rubber material to dry over the tape would require cutting it off with a sharp blade and, even then, remnant pieces of tape would be hard to trim). The Flex Seal was allowed to dry for more than 48 hours before the rubber material formed a strong bond on the shower pan. Most of the surface ended up being smooth, leaving only a few imperfections that we could live with.

a paint stick is used to thoroughly mix the flex seal liquid in its can
We guessed that one quart of the Flex Seal rubberized liquid would do the trick, and, fortunately, was just enough. Before pouring onto the pan surface, the liquid was mixed thoroughly.
a paintbrush is used to move the flex seal liquid along the block area in the shower pan
After pouring the Flex Seal liquid on the pan, throwaway paint brushes were used to direct the material for complete coverage. The liquid seemed to be self-leveling, which made it less difficult to distribute the material evenly.
downward view of the drying flex seal in the shower pan
It took more than 48 hours for the Flex Seal to completely dry and once it did, there were a few ripples that had popped up for no particular reason. In the end, we were pleased with the results and any inconsistencies in the finish were minor.
the masking tape is removed from flex seal perimeter
All the masking tape was removed once the Flex Seal skinned over, otherwise it would be permanently “sealed” and require precise trimming. Fortunately, we thought of that in advance.
the edges of the drain are sealed with silicone
Once the masking tape was removed from the drain, the edges were sealed with silicone.
Finally, a foot-scrubbing mat, bought at Bed, Bath and Beyond, was cut down to fit the pan without overlapping the sides. There are several mats on the market, but we liked the idea of massaging our feet, while getting them clean with less effort, so the scrubbing feature was appealing and — like the Flex Seal — has worked like a champ.
Get Updates
Subscribe today and never miss an issue!
Get all the latest tips and news to keep you moving on that open road!
RV Enthusiast April 2024 Issue
Current Issue
April 2024
No fooling, it's here–our latest issue of RV Enthusiast! The April issue covers 2024's Newest Parts & Accessories, RV OEMs Debut New Entry-Level Towables, an in-depth slideout floor replacement, PLUS so much more!

Already a Subscriber? Click here for Access to the Full Issues.

Share This