Range Wars - RV Enthusiast Magazine

Range Wars

by | Jun 14, 2024 | Pro Tip, RVEXPERT

Galley cooking appliances help to make your RV completely self-sufficient while traveling — so long as you keep them clean. Here are a few troublespots to watch for — and deal with.
In order for your galley appliances to work properly, their source(s) of energy must be correct and within specifications. Propane-fueled RV appliances are set by the manufacturer to function at 10 to 11 inches of water column (a means of expressing a measurement of pressure). Since the gas inside your LP-gas vessels is pressurized to as much as 250 psi, that’s obviously too much pressure to cook with. The LP-gas system on your RV uses a two-stage regulator to bring cylinder/tank pressure down to an industry-standard 11 inches of water column.

If your propane-fueled appliances aren’t functioning correctly, the first thing to troubleshoot is the regulator to ascertain it is operating at the correct pressure — but that’s a topic for another time. For now, let’s focus on some simple maintenance tips to help extend the life of your range and oven.

Most gas RV ranges and cooktops are a legacy design, with a pilot-fired oven and manual igniter for the cooktop, with propane entering through a third-stage regulator. The regulator reduces fuel pressure to about 10 inches water column into a fuel rail that feeds the cooktop valves and a thermostatically controlled oven valve with a pilot valve. For the most part, these ranges are generally available in 17- to 26-inch models, with three burners.
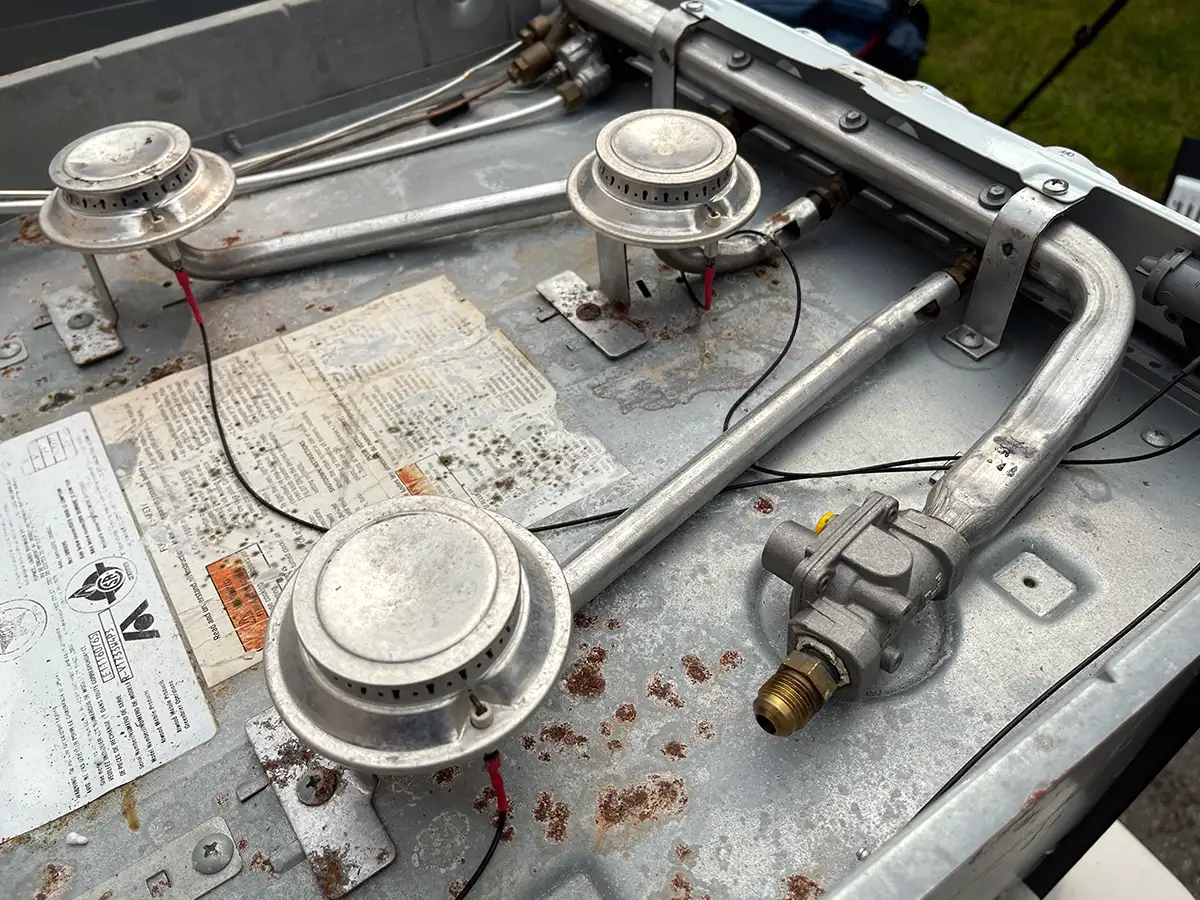
angled view of an RV range with its propane gas line and other valves visible
The lower section of this range is pretty messy. The propane gas line (right) goes through a third-stage regulator to the fuel rail, where all the valves are connected. The burners each have a single screw holding them in place. The igniter wires for each burner pull straight down to disconnect. The igniter needs to be clean in order to produce a good spark.
Maintenance of your range is, first and foremost, dictated by the manufacturer. Since many manufacturers have changed appliance materials, we can no longer offer a one-size fits all approach to maintenance and cleaning the way we could in the past. However, if you have a standard style LP-gas range, there are some things you can do to keep it more functional for the long term.

Cleaning your range — and especially the cooktop, inside and out — is essential. With standard cooktops, the surface is open to the “utility” area underneath and around the burners. A boil-over or spill can make for a tremendous mess, especially since there are holes in that space that can allow spills to leak down into the range and the cabinet. A good way to help prevent spill migration and spillage from “cooking” onto the metal surface is to line inside the cooktop area with aluminum foil.
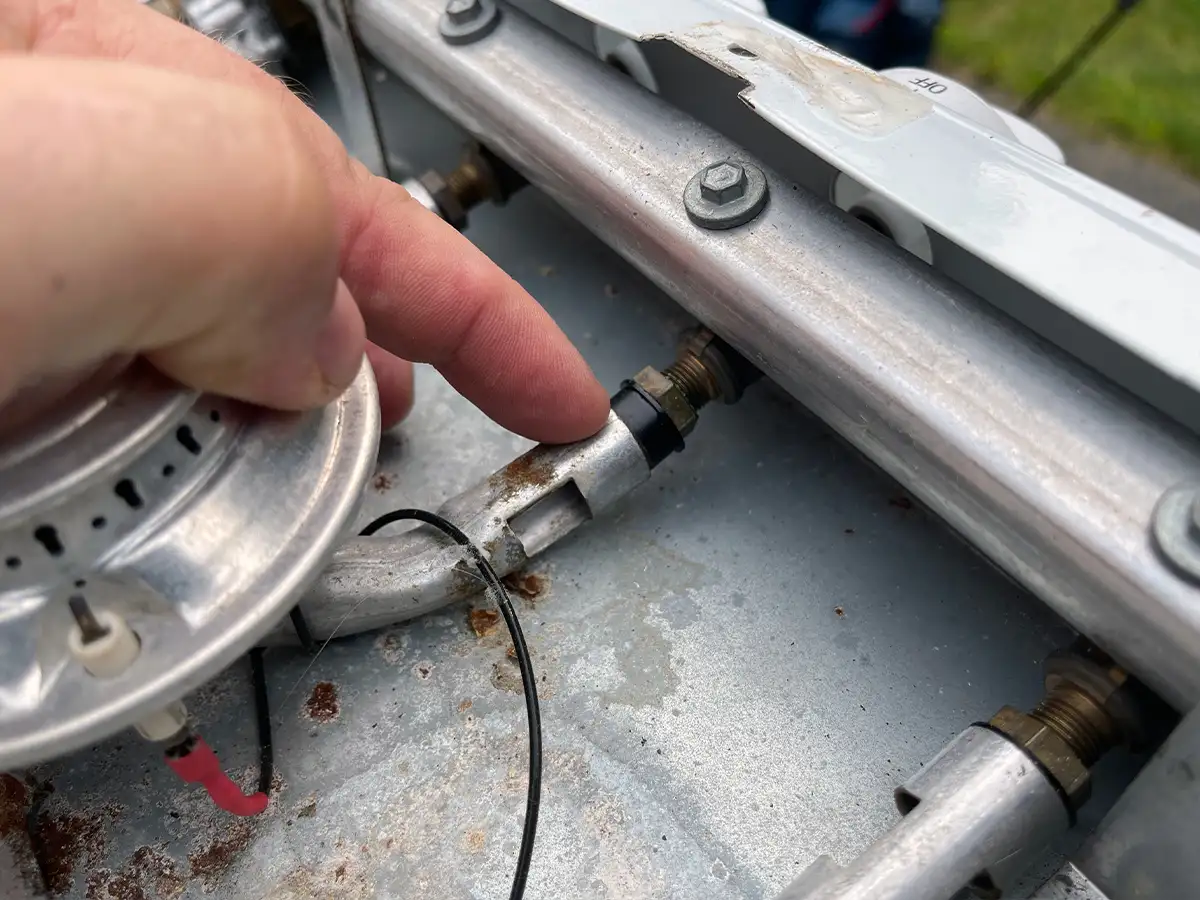
close view of an index finger pointing to a burner valve
If you remove the burners for cleaning, don’t lose the burner bushing! It slides off the valve easily.
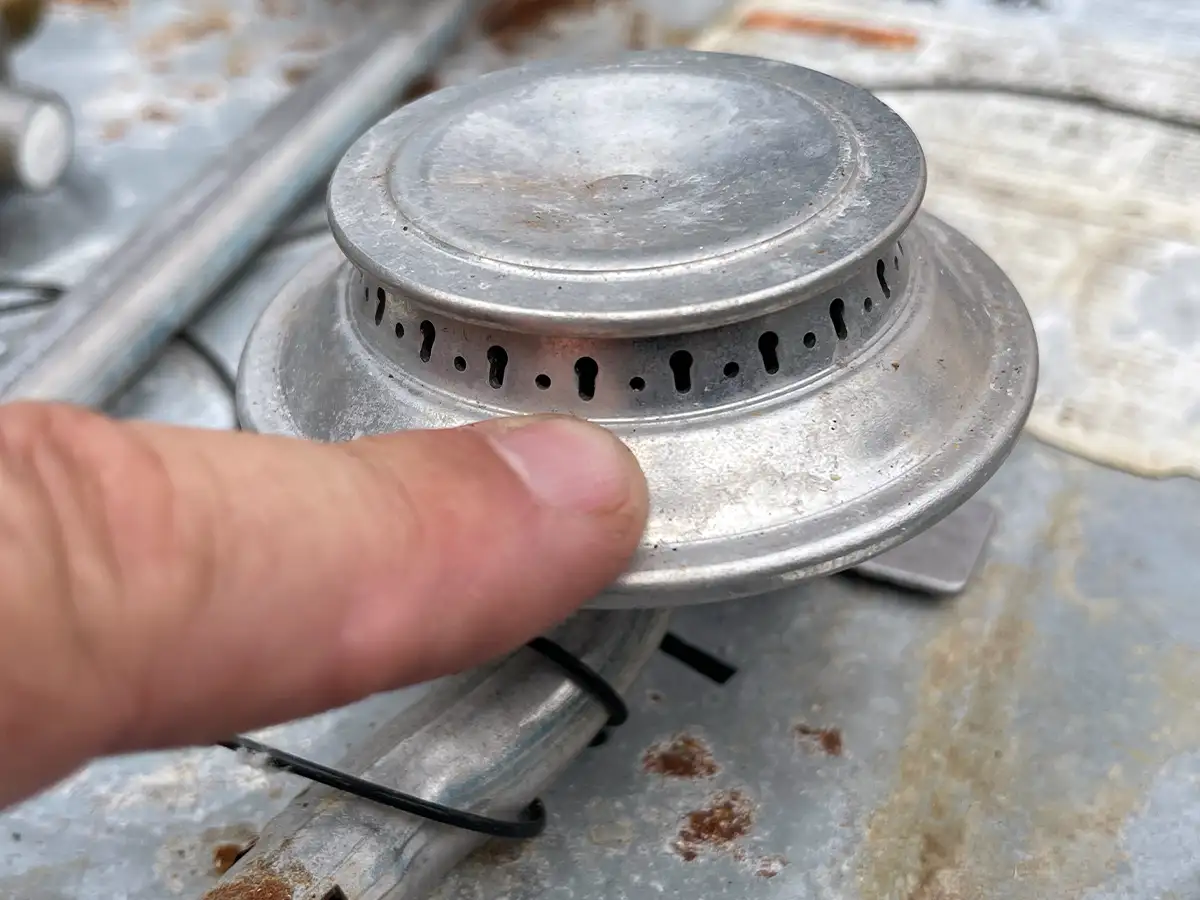
close view of an index finger pointing to the ports on a cooktop burner head
If you have a big boil-over, you might get the ports full of whatever you’re cooking. Remove the burner and soak in hot soapy water and lightly scrub with a stiff bristle brush to clean, being careful not to damage the jets.
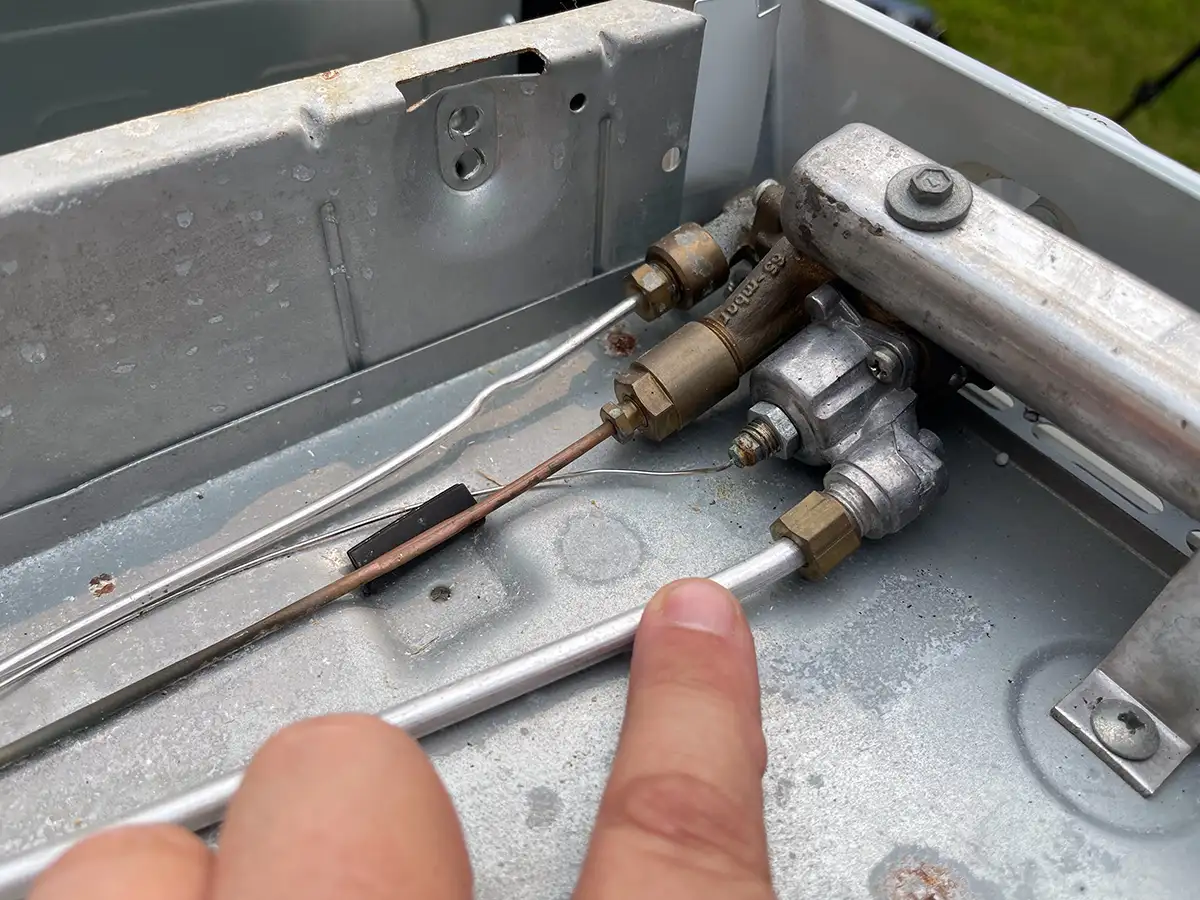
an index finger points to the main gas tube leading to the oven pilot
The oven thermostat on most legacy ranges has the main gas tube, pilot tube, thermal bulb for oven-temperature sensing and a pilot thermal bulb.
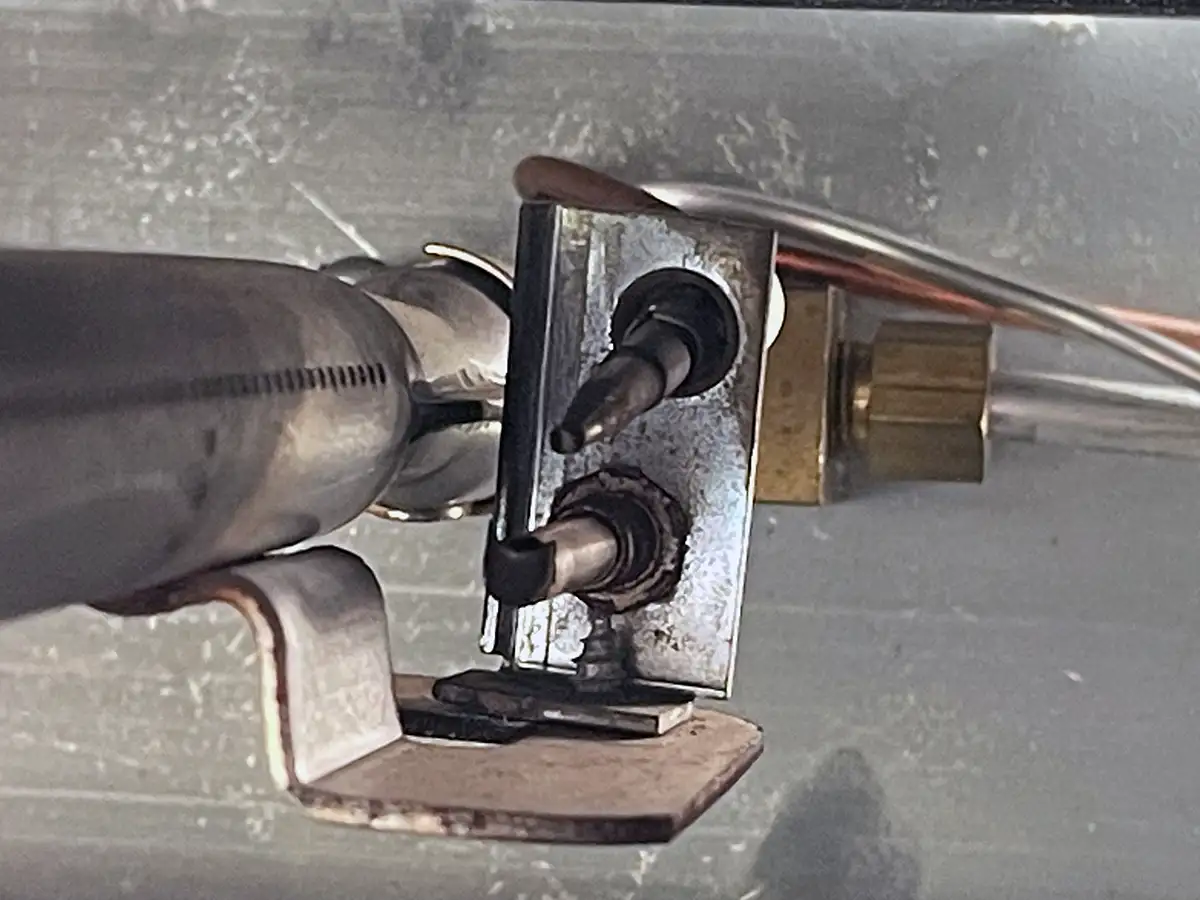
close up of the oven pilot in an older Atwood unit
The oven pilot in an older Atwood unit is shown here. The pilot thermal bulb is covered with soot and should be cleaned with emery cloth. The main oven burner is to the left.
The burners on newer cooktops are solid-state units, which can’t be disassembled for cleaning like your range at home. Fortunately, they’re easy to remove and scrub in a bucket of soapy water using a stiff bristle brush should a spill cook onto the burner and plug the jets. Just be careful — they are made of aluminum and can be damaged. Most utilize one screw, and they slide onto the gas orifice on the fuel rail.
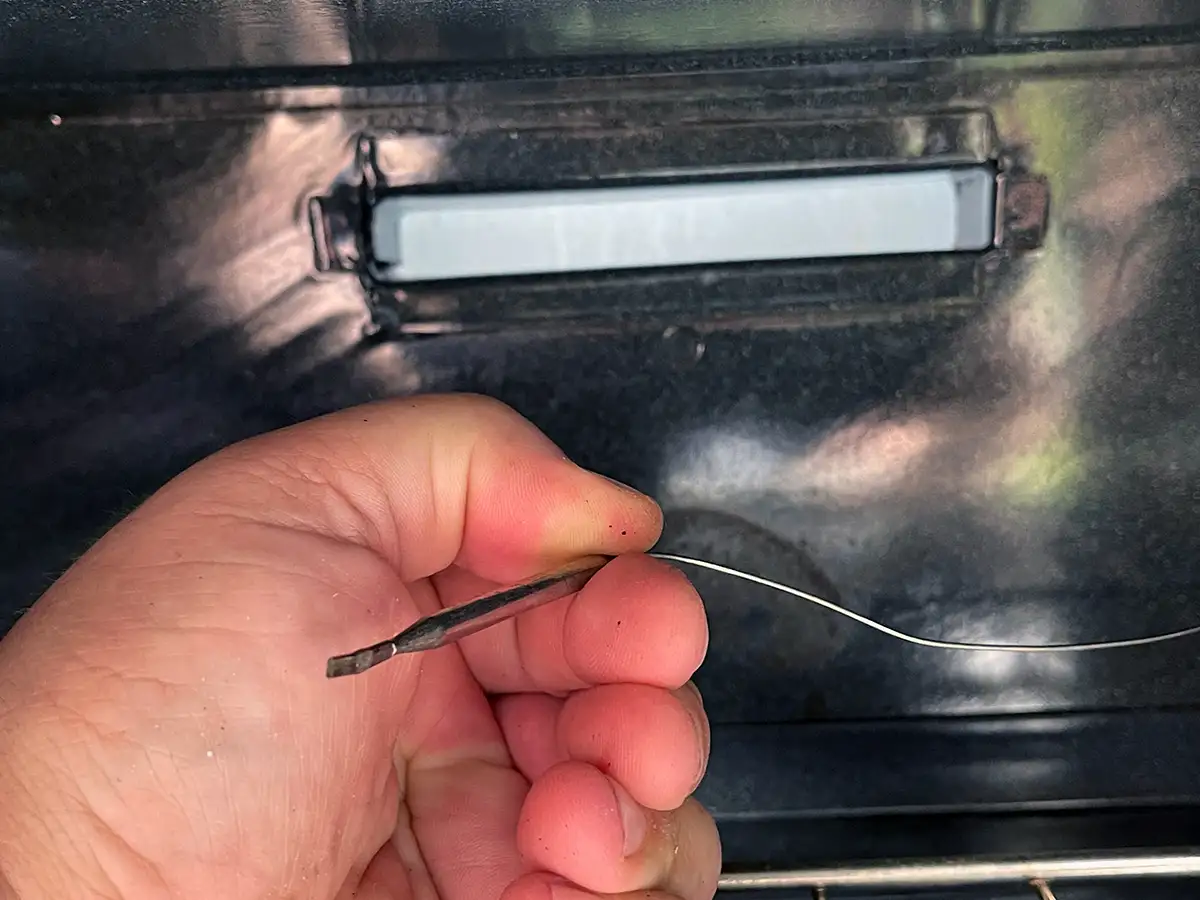
close up of a hand holding the bracket end for the oven bulb
The oven temperature bulb should also be clean. In this case, it was sitting on the floor of the oven; the bracket for the bulb, which goes in the hole in the back, was missing.
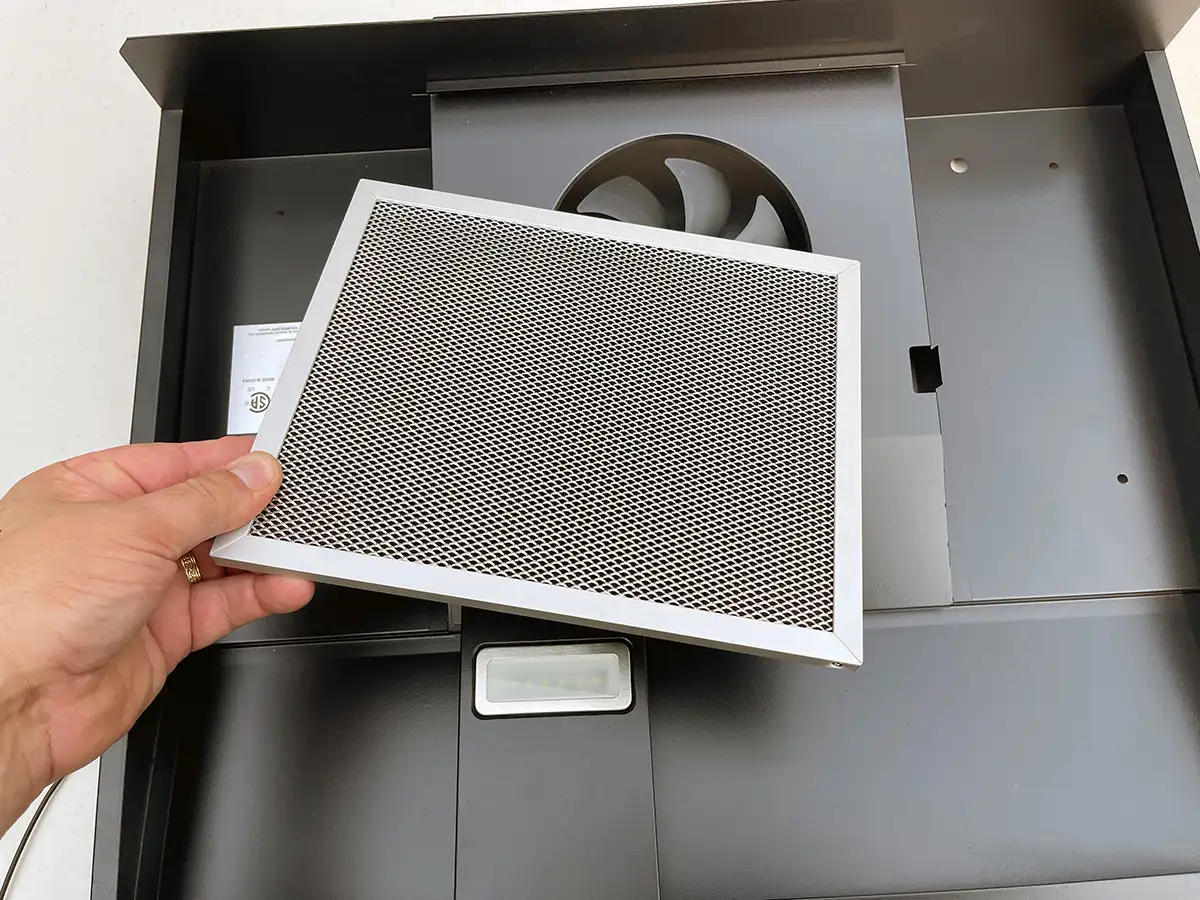
a hand holds the vent cover of a range hood
The range hood needs service, as well. Keep the filter(s) clean and check to make sure there are no nests in the hood or duct.
The oven burner and pilot are pretty much protected from spills. The thermal bulb, which senses the temperature inside the oven box, is usually mounted at the rear. It may get dirty; if it does, it can become less accurate. If this becomes a problem, pull the bulb carefully from the back wall and lightly sand it with emery cloth to clean it up.

By the way: Another concern many folks have is the accuracy of the oven thermostat — or lack thereof. This, frankly, isn’t unusual. Using an aftermarket oven thermometer will allow to you monitor temperatures and adjust accordingly. The diminutive size of the RV oven box — in comparison to larger residential and commercial ovens — means the flame is closer to the food and in a tighter space. Hot spots are inevitable.

Get Updates
Subscribe today and never miss an issue!
Get all the latest tips and news to keep you moving on that open road!
RV Enthusiast July/August 2024 cover mockup
Current Issue
July/August 2024
As the summer days linger on, escape the heat with the newest edition of RV Enthusiast! The July/August issue covers Improving RV A/C Efficiency, Rear- and Side-View Cameras, Truck shock Repair, PLUS so much more!

Already a Subscriber? Click here for Access to the Full Issues.

Share This