Resealing Your Shower - RV Enthusiast Magazine

Resealing Your Shower

by | Jun 23, 2023 | Pro Tip, RVEXPERT

Photos by the author
Finding a replacement gasket for an RV shower door can be tough. Applying a 3M silicone seal strip is simple, inexpensive — and only takes 30 minutes to install.
A large percentage of RV showers today are fitted with a glass door that opens outward in similar fashion to a residential setup, only smaller. Many of these shower doors have a seal on the bottom to prevent the water from running out onto the floor. Unfortunately, these seals don’t last as long as one might expect, falling prey to deterioration that leads to tearing, pieces falling off — and water puddling on the bathroom floor. While it’s possible to put a bathmat down, most of them are not designed to absorb copious amounts of water and you’ll end up with a soaked mat or a puddle on the floor, making it hard to dry your feet — and we won’t even address the consequences should that water find its way into the RV’s wood substrate.

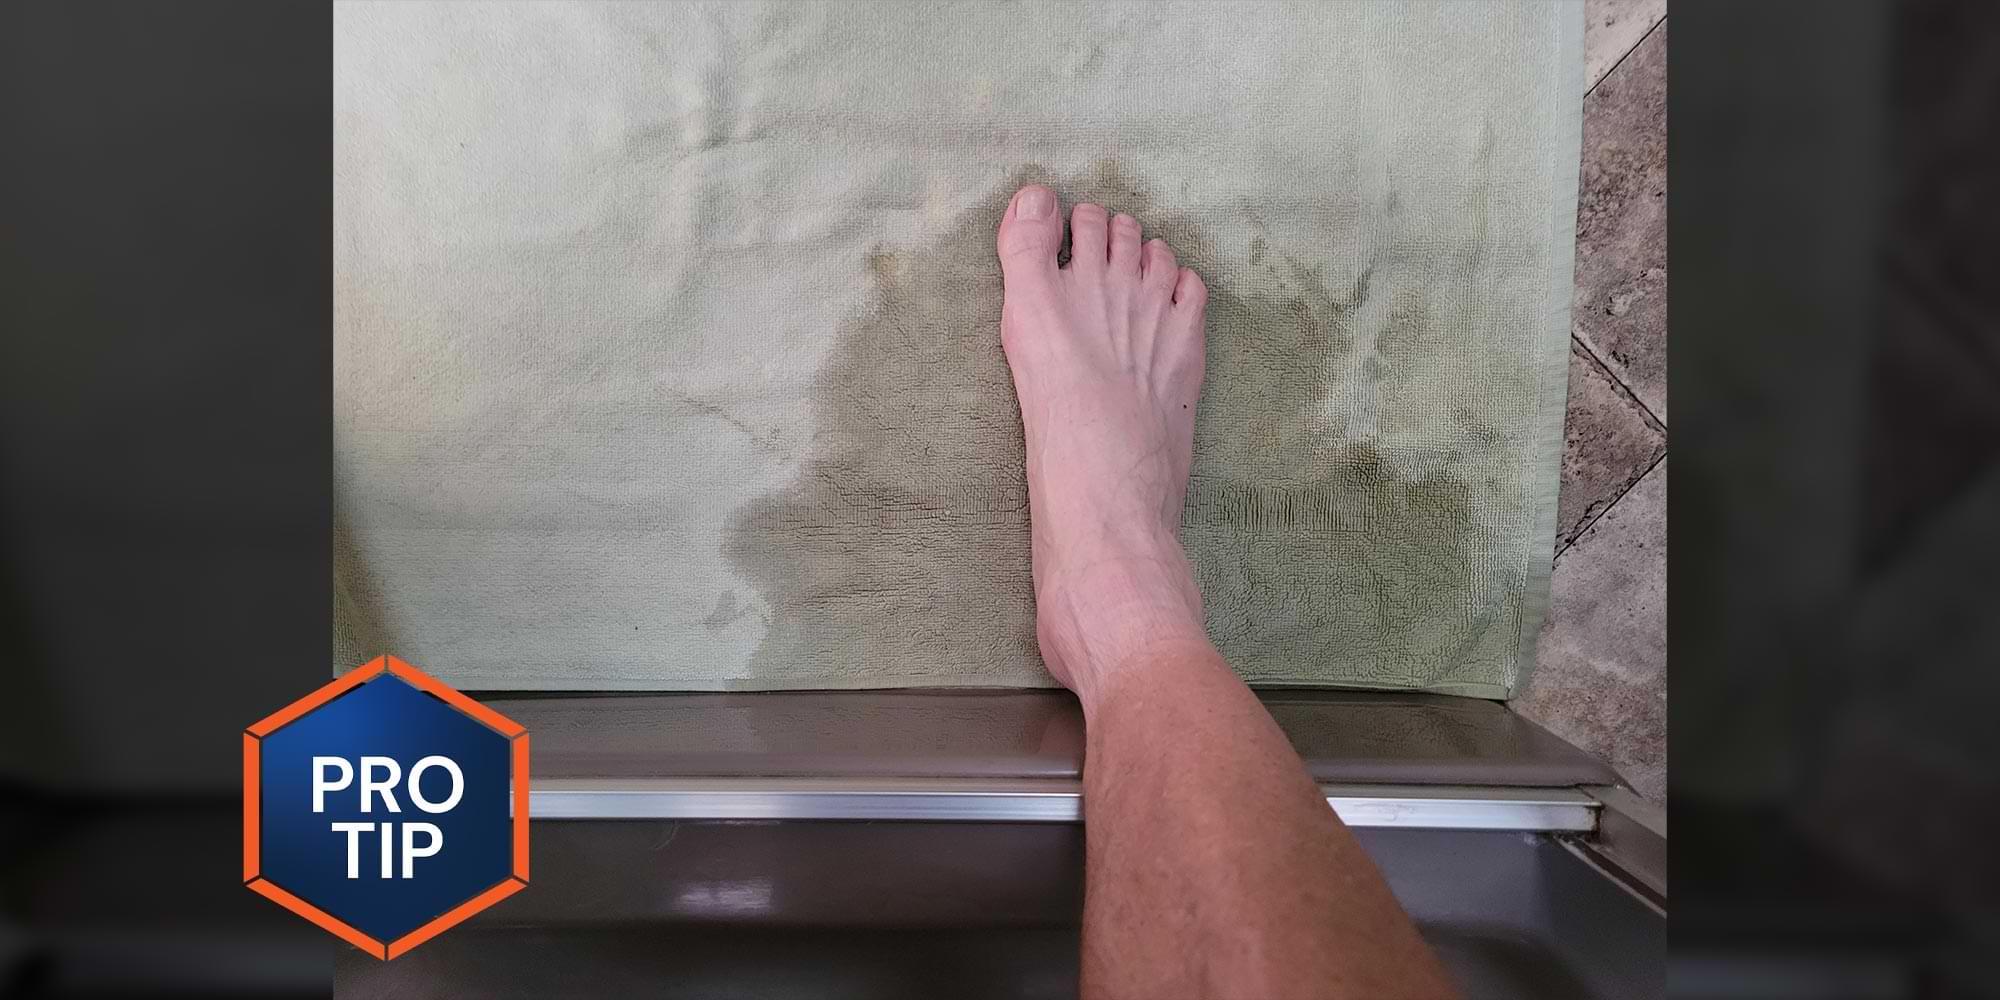
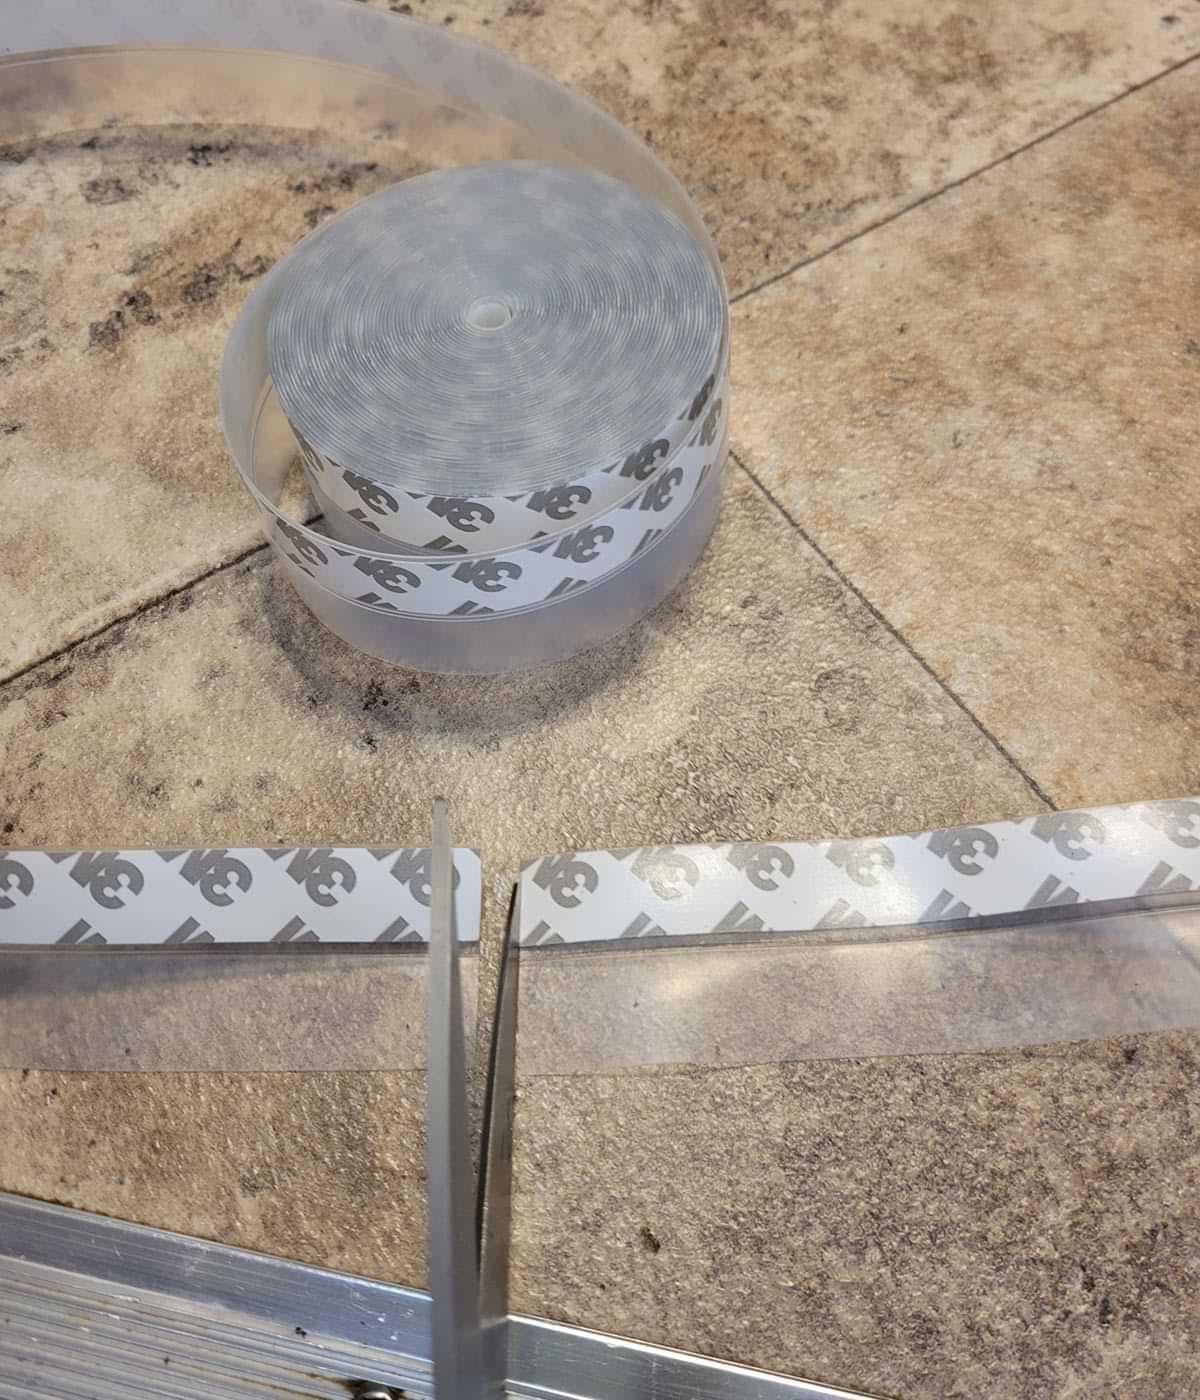
Data stickers with the shower-door manufacturer name and model number seem to disappear, making it difficult to find replacement parts — and if they are available, good luck finding replacement parts. I struggled for years with the problem before finally discovering a simple silicone seal strip made by 3M. It’s actually marketed as a “silicone seal strip” for doors and windows, but the combination of 3M’s venerable adhesive tape laminated to a flexible silicone edge looked like it would work. I took a chance and ordered a 26-foot, 1 ¼-inch-wide seal strip ($13.69 on Amazon). Length and widths of these rolls of flexible strip are all over the place when you go online — just Google “self-adhesive silicone strips.”

TechnoRV Advertisement
close up of the original and worn bottom seal on a swinging glass shower door
The original seal for the shower door gave up years ago, allowing water to run on the floor. Finding an exact replacement proved futile.
Since this seal strip comes in several different widths (25mm, 35mm, 45mm and 60mm, which translate into widths from about 1 inch to about 2.4 inches), you’ll need to measure your shower door first to get an idea how far the edge of the silicone strip needs to protrude past the bottom of the door so it will prevent the water from splashing out.

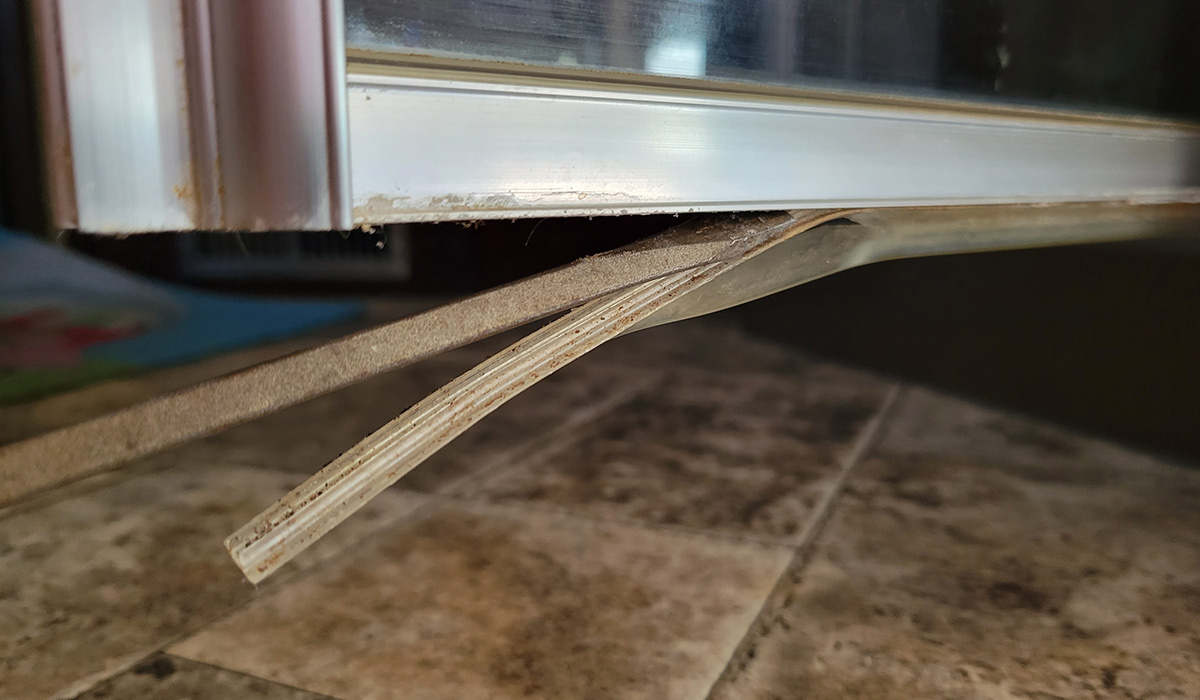
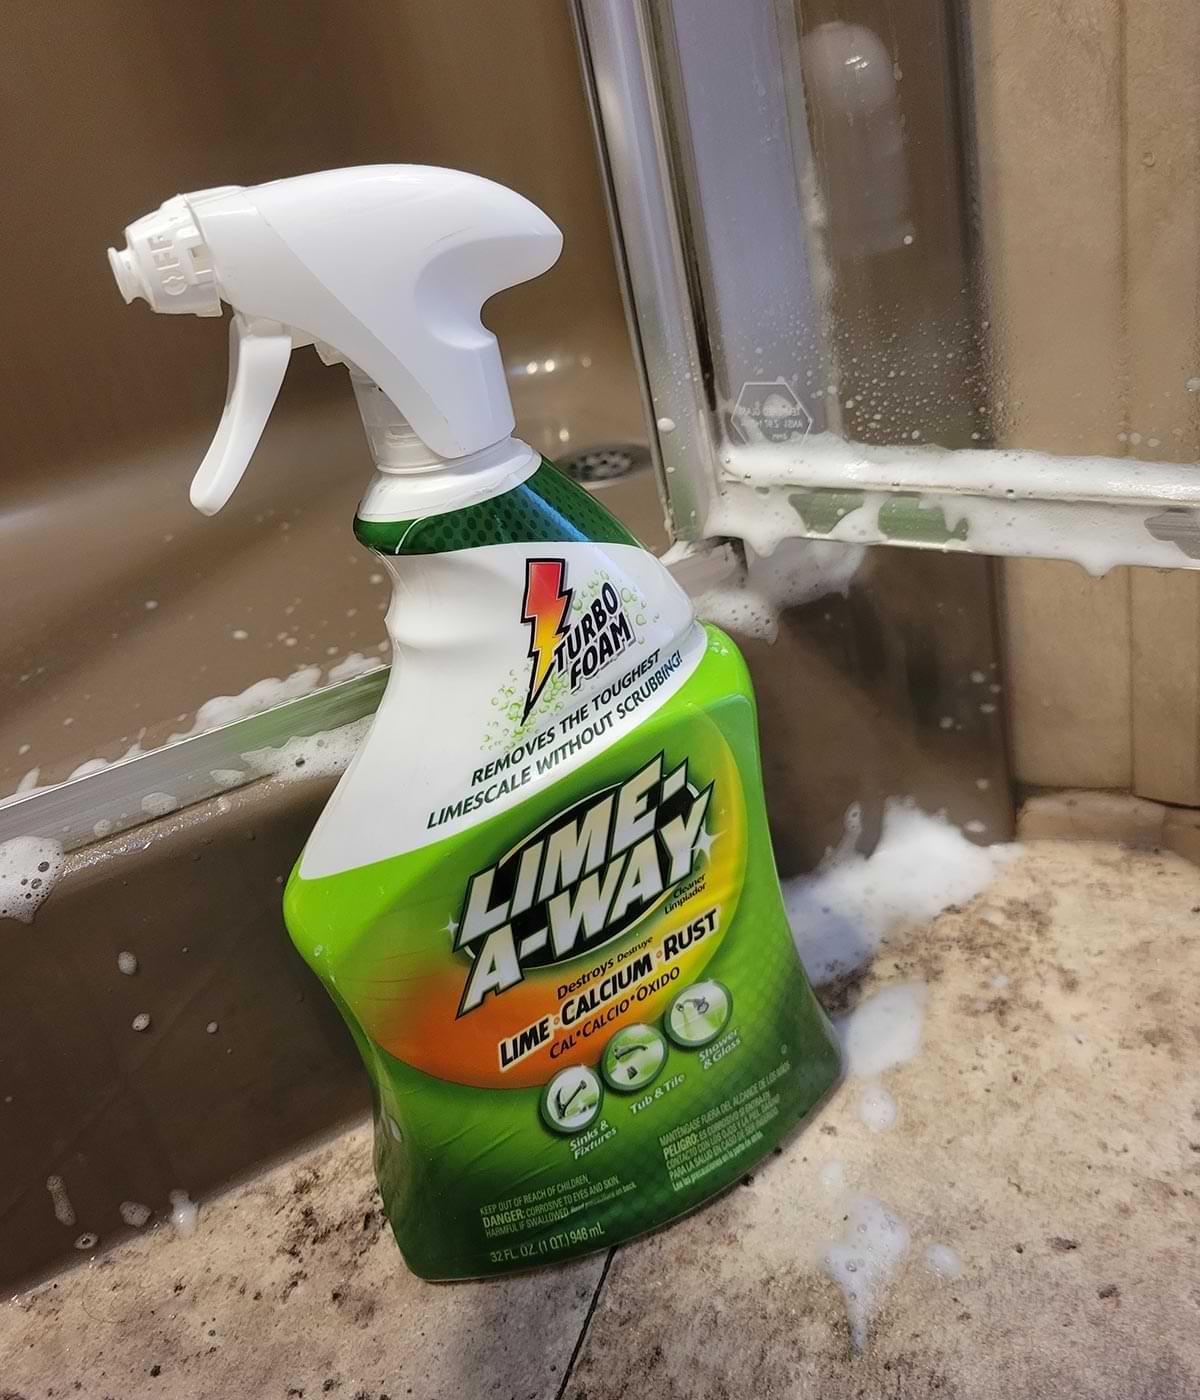
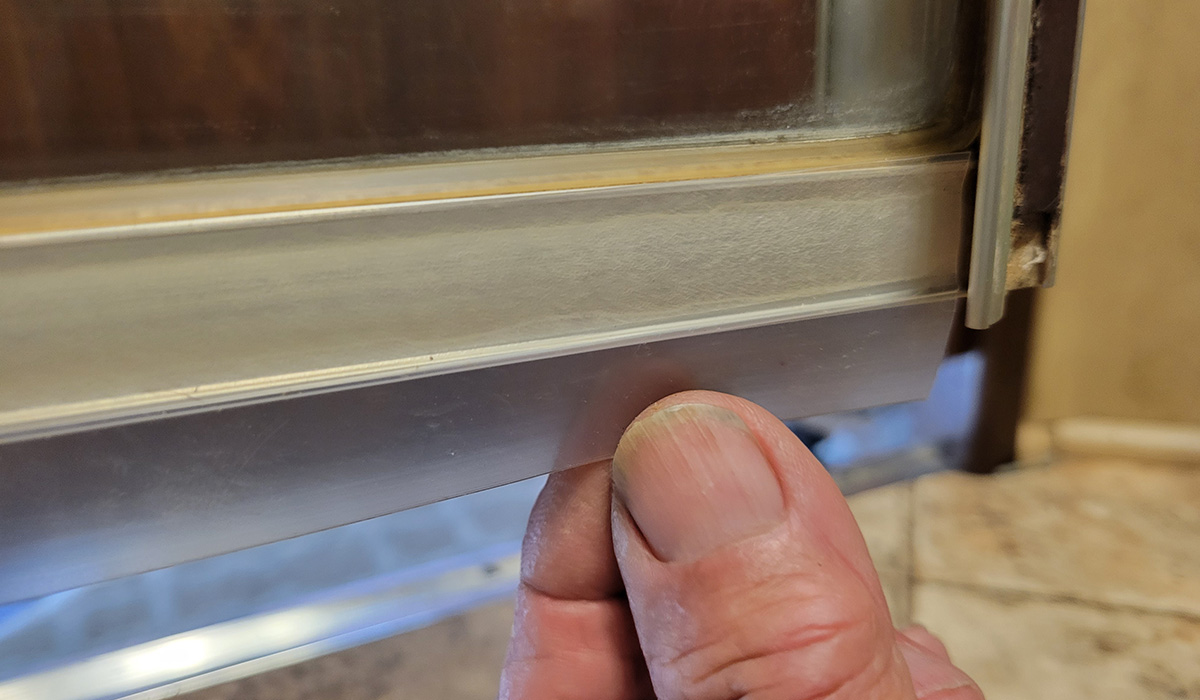
The installation is really simple. Measure and cut a piece of the 3M seal strip to run the entire length of the door. Most of your time will probably be spent preparing the surface. If your door bottom has a lot of calcium deposits, you will need to first remove all the crud and smooth out the surface (we prefer to use Lime-A-Way foam) before trying to affix the seal strip — trying to apply the tape over a rough surface is an exercise in futility. Once the surface is rid of any calcium deposits, clean the area with alcohol and allow to dry thoroughly.

a roll of 3M’s silicone seal strip beside a recently cut strip of seal
3M’s silicone seal strip comes in various lengths and widths. A 26-foot roll of 1.4-inch-wide seal strip was purchased on Amazon, which was perfect for fixing this shower door. After measuring the door length, the seal strip was cut with scissors.
a Lime-A-Way container placed on the floor in front of a shower door bottom that has bee sprayed
There was quite a bit of calcium on the shower door frame, which was removed with Lime-A-Way foam. Be sure to use the foam version (indicated on bottle), which does a better job of adhering to vertical surfaces. Once the calcium was removed and the surface smooth, the shower-door frame was cleaned with alcohol and allowed to dry thoroughly. This will facilitate proper curing of the adhesive on the seal strip.
Slowly peel off about 1 inch of the adhesive backing and apply the strip to the door frame a little bit at a time. Don’t get in a rush; once it sticks to the surface it’s difficult to get off. When you are satisfied it’s in the correct position, press down on the strip to make sure it sticks properly. Depending on how the door/frame closes, it may be necessary to cut the seal tape to go around any protrusions. It’s also possible to attach the seal strip to the shower-pan frame where the door shuts against it, if necessary.
the 3M seal strip is steadily applied along the base of the shower
Apply the seal strip on the shower-door frame a little at a time, peeling off the adhesive backing as you go. Don’t press too hard at first; you may have to move it for proper positioning.
close view of the new 3M seal strip adhered to the bottom of the shower door
When you are happy with the positioning of the seal strip, apply pressure to seat the adhesive. While this seal strip is not an actual replacement for the original on the shower door, it looks good — and prevents water from puddling on to the floor.
This simple project solved a problem that admittedly went on for too many years. It keeps the water in the shower pan where it belongs — and there are no more sopping wet bathmats and feet. It’s likely, too, that you’ll find other uses for this silicone seal strip, including projects to fix drafty windows, doors, vents or maybe even making a refrigerator gasket repair.
Get Updates
Subscribe today and never miss an issue!
Get all the latest tips and news to keep you moving on that open road!
RV Enthusiast July/August 2024 cover mockup
Current Issue
Check it out!
As the summer days linger on, escape the heat with the newest edition of RV Enthusiast! The July/August issue covers Improving RV A/C Efficiency, Rear- and Side-View Cameras, Truck shock Repair, PLUS so much more!

Already a Subscriber? Click here for Access to the Full Issues.

Share This