Room With a View - RV Enthusiast Magazine

Room With a View

by | Nov 3, 2023 | Pro Tip, RVEXPERT

Photos by author
Mounting a Garmin RV-specific GPS with a 10-inch screen takes some ingenuity to assure it won’t get in the way of dash controls or restrict windshield visibility — and be safe to use. A triple-jointed extension arm from Tackform made it possible.
It’s hard to imagine traveling without a GPS device these days. My favorite is the Garmin RV 1090, which has been upgraded to the RV 1095. The 10-inch screen is super-clear and makes it easy to get pertinent information at-a-glance. While it’s not uncommon today to find big, colorful screens factory-installed in tow vehicles and many motorhomes, the Garmin is packed with RV-specific information (like RV parks at your destination and safe routing based on a personal profile that’s programmed into the device).

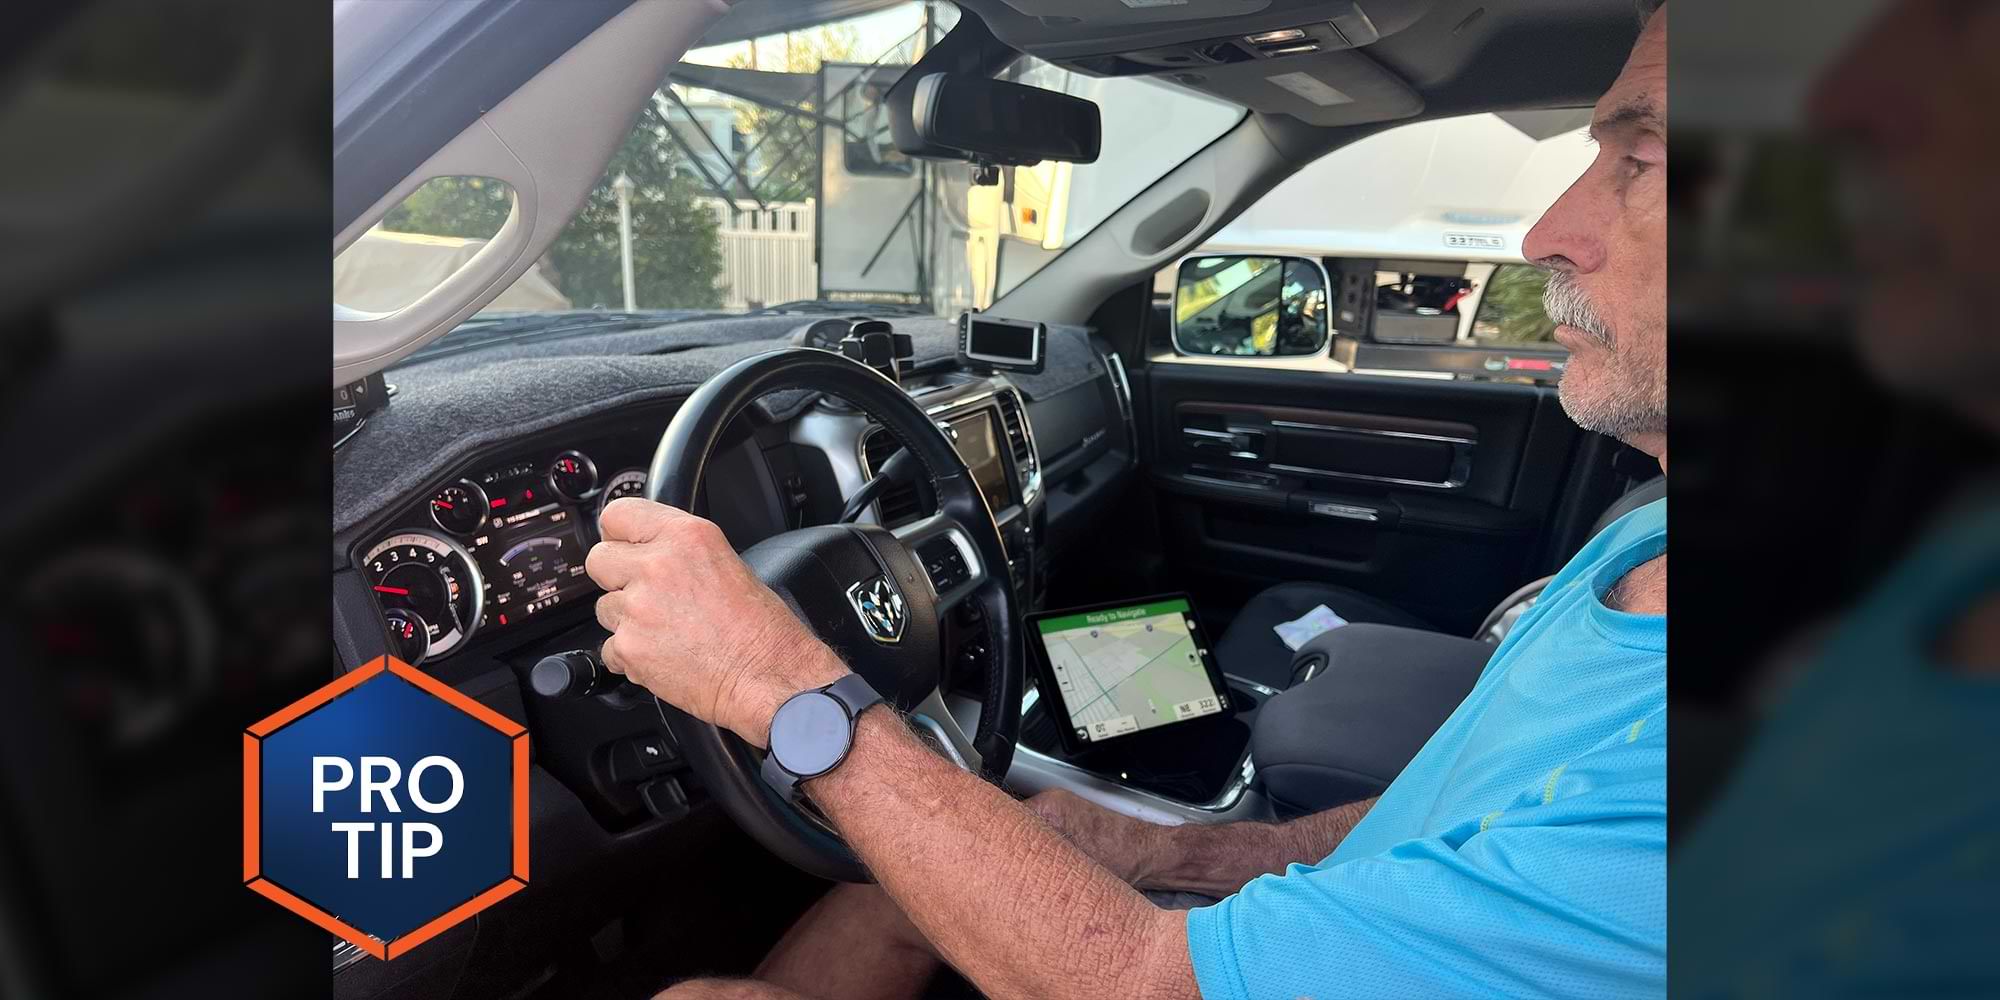
But while it’s a great GPS for RV travelers, the screen size does present mounting challenges. The GPS comes with suction cup and screw-on mounts — and its magnetic base makes it easy to remove and install — but it can get in the way when mounted on the dash or windshield.

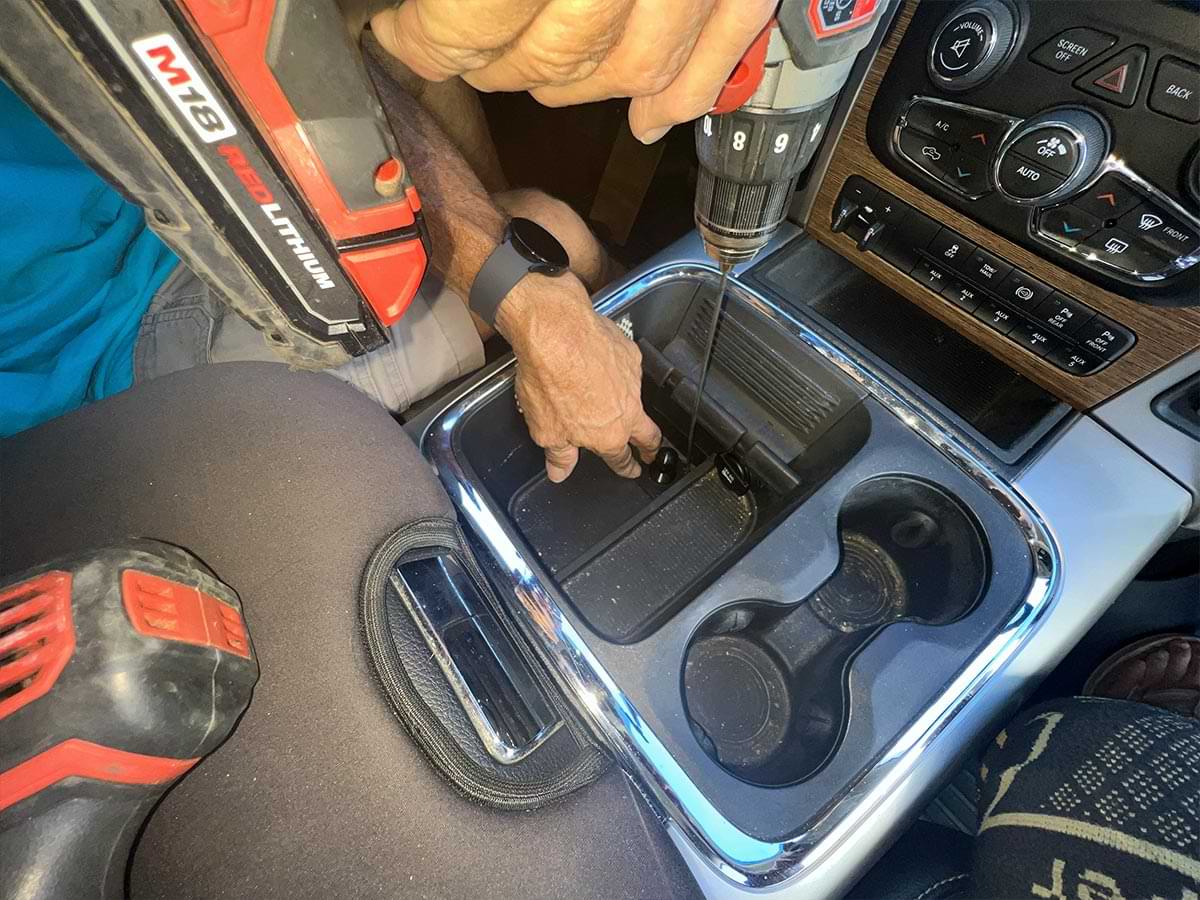
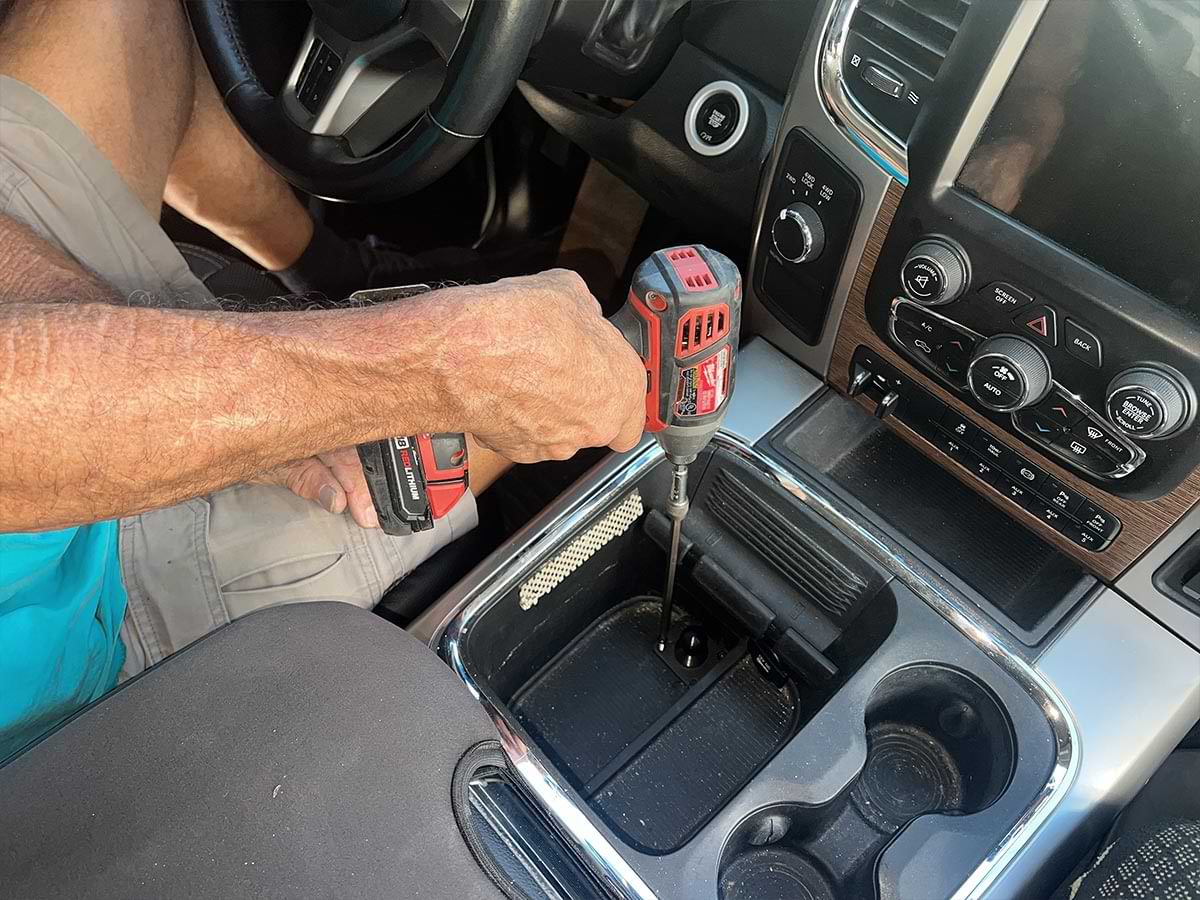
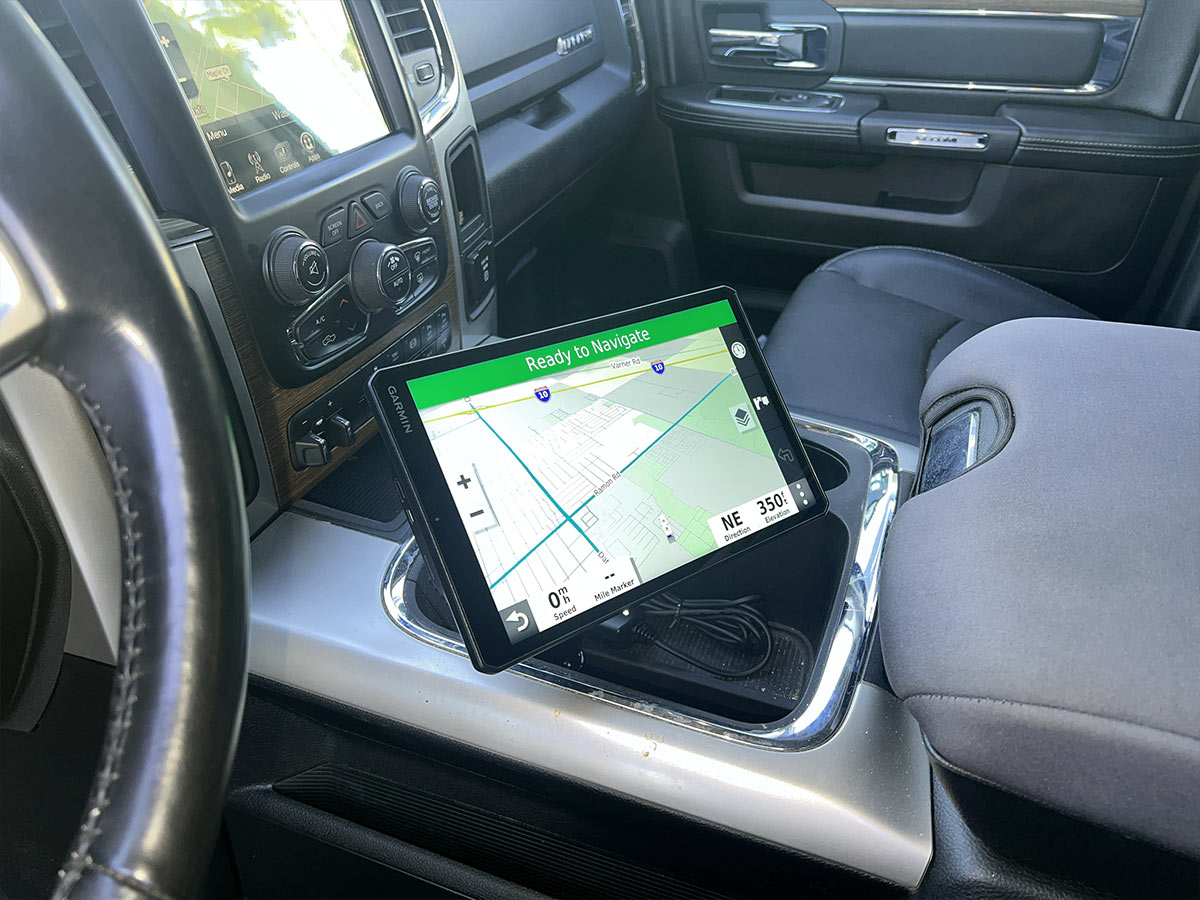
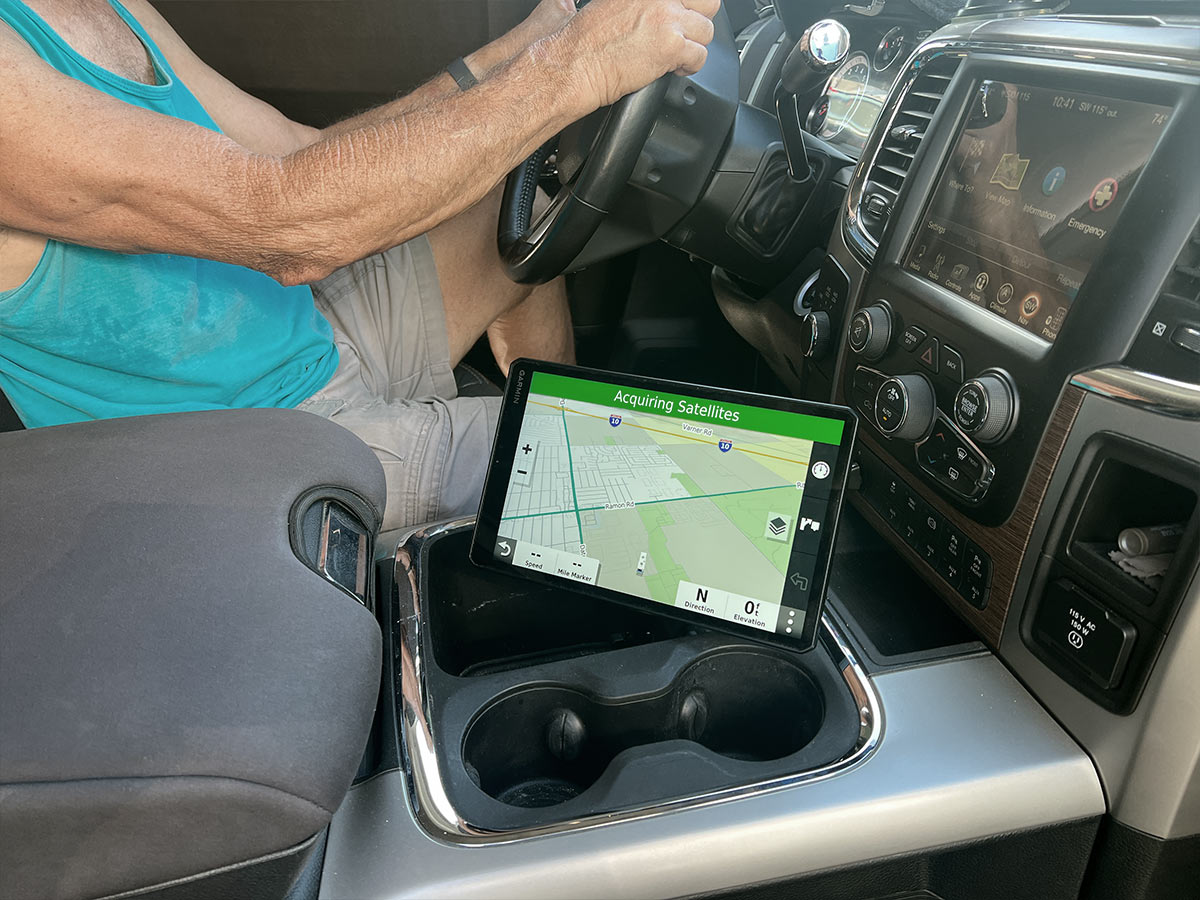
One great solution is to mount the screen on the center console or on the floor in front of it, positioned for safe viewing by the driver. In this case, I found a perfect place to mount a bracket in the center console of a Ram pickup. It took some maneuvering to make sure the big screen would not interfere with dashboard controls and buttons, but there was plenty of room to mount the screen. And with the right bracketry, the screen can even be rotated toward the passenger, which was a personal priority.

Once the location was established, however, the real trick was finding the right brackets. After searching the Internet extensively, I found just what I needed at Tackform, a company that specializes in the design and manufacture of just about any bracket configuration you can want for turning your tow vehicle or motorhome into a certified rolling office.

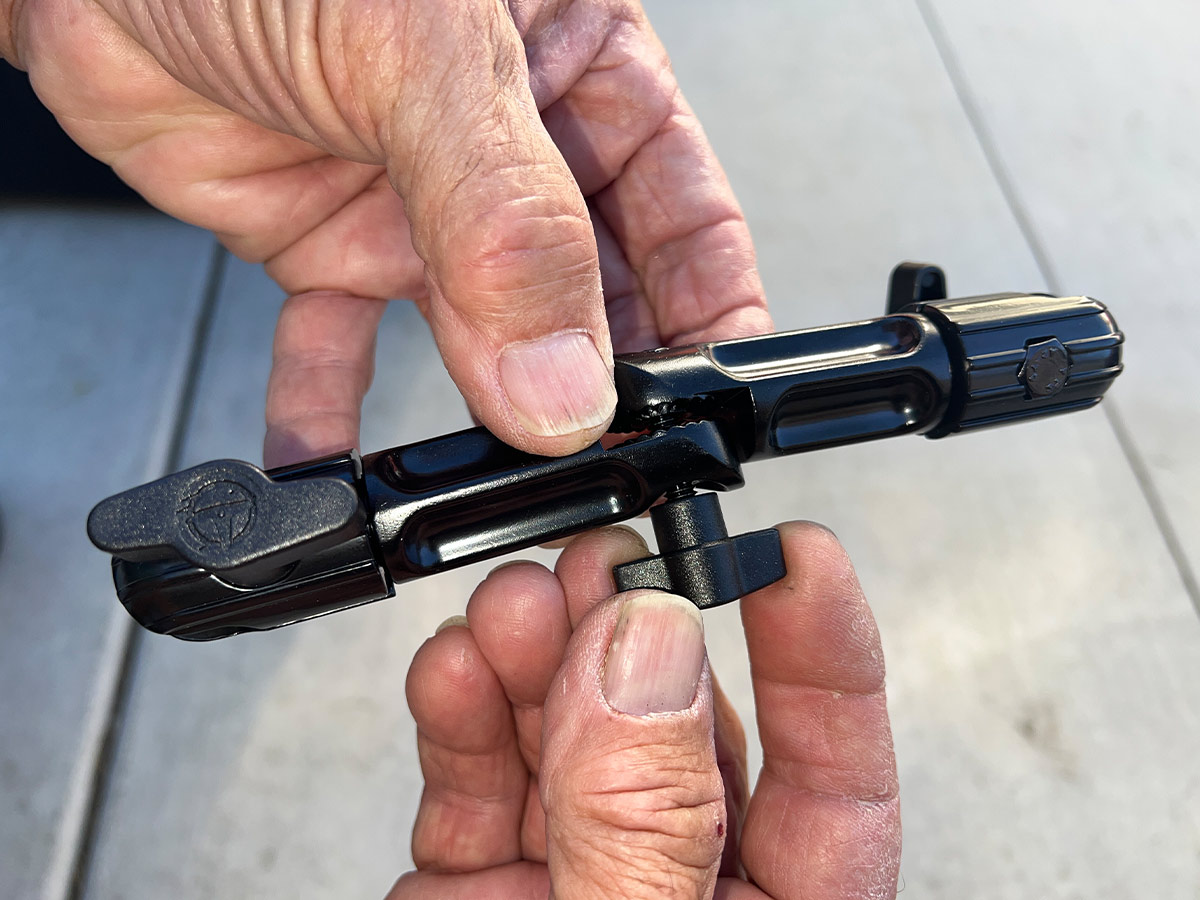
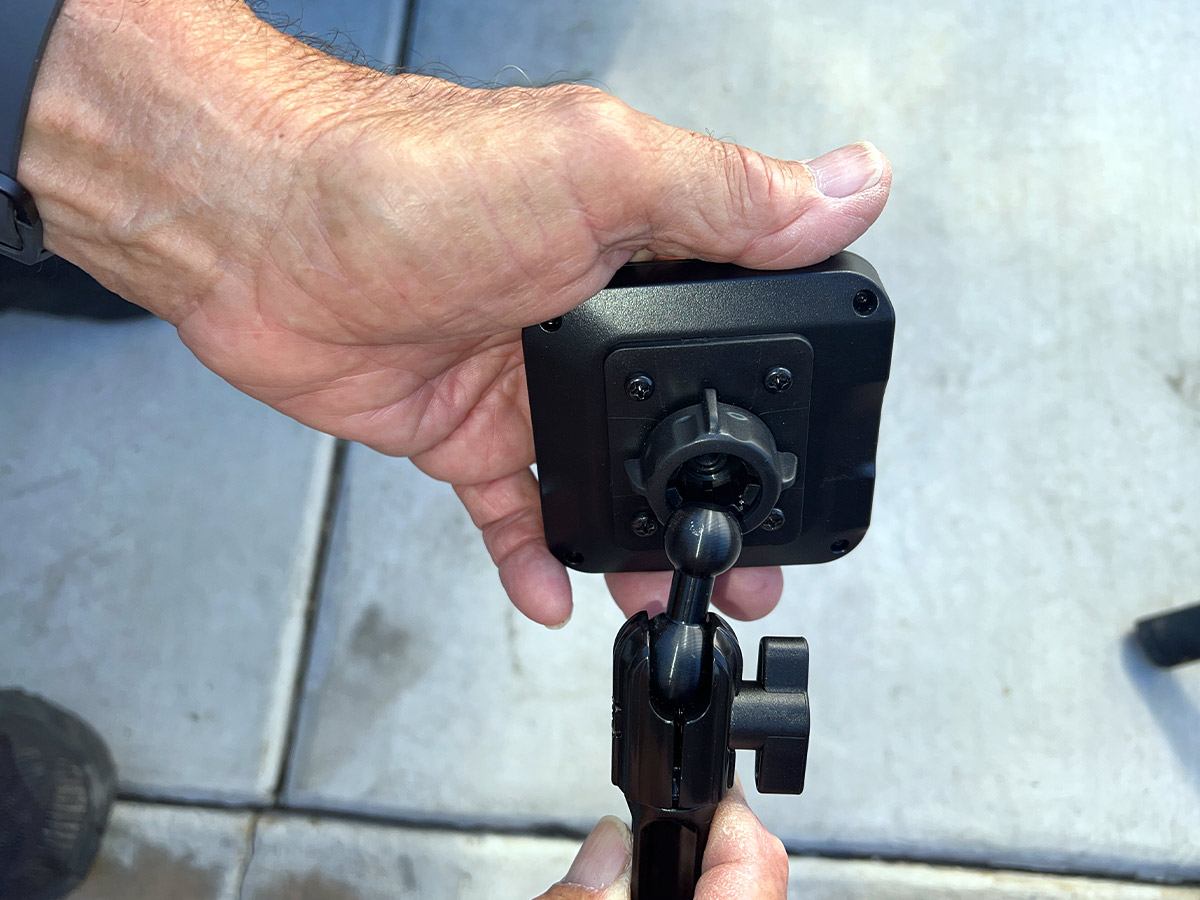
The bracket of choice was an AMPS Drill Base Mount that has a 7-inch modular arm and a 20mm ball system (part number TFEN-AM02-17; $44.95). It comes with a 2- x 21/8-inch base with an industry standard AMPS hole pattern that’s attached with one of the 20mm balls. The arm is made of metal and, along with the high-quality finish, portrays a product that’s not going to give up the ghost — or go limp or vibrate wildly — under severe conditions. It incorporates an elbow joint in the middle, along with two ball-actuated articulation points, providing the utmost in adjustability — all handled by thumb screws (so tools are not necessary).

high angle view of the Garmin magnetic base parts organized including a Tackform 7-inch modular arm, a metal base with a 20mm ball for mounting the arm to the center console, a 20mm-to-17mm ball that connects to the top of the arm and an adapter
The parts needed to mount the Garmin magnetic base included a Tackform 7-inch modular arm, a metal base with a 20mm ball for mounting the arm to the center console, a 20mm-to-17mm ball that connects to the top of the arm and an adapter that screws onto the back of the Garmin magnetic base for connecting to the 17mm ball on the arm. For $50, we had all the necessary parts ready for rough service.
hands hold the 7-inch modular arm with a focus on the central adjustable elbow joint
An elbow joint in the middle of the modular arm provides additional adjustability, which helps position the screen in perfect view of the driver or passenger.
the metal base that comes with the modular arm kit is held in one hand in mock placement to the extension arm
A metal base that comes with the modular arm kit was screwed into a cubby hole in the center console of a Ram pickup. It connects to the arm using a 20mm ball and a thumb screw. An extension arm can be added if mounting on the floorboard.

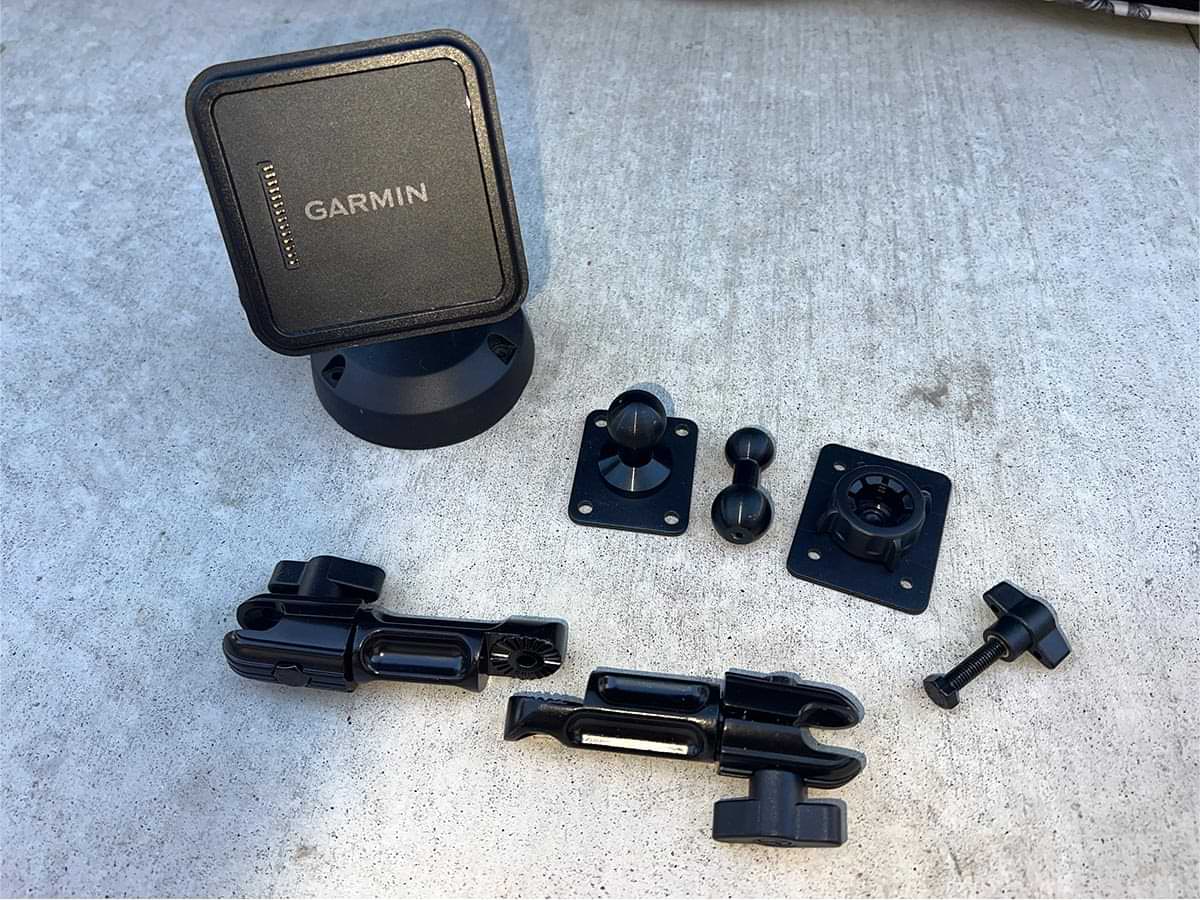
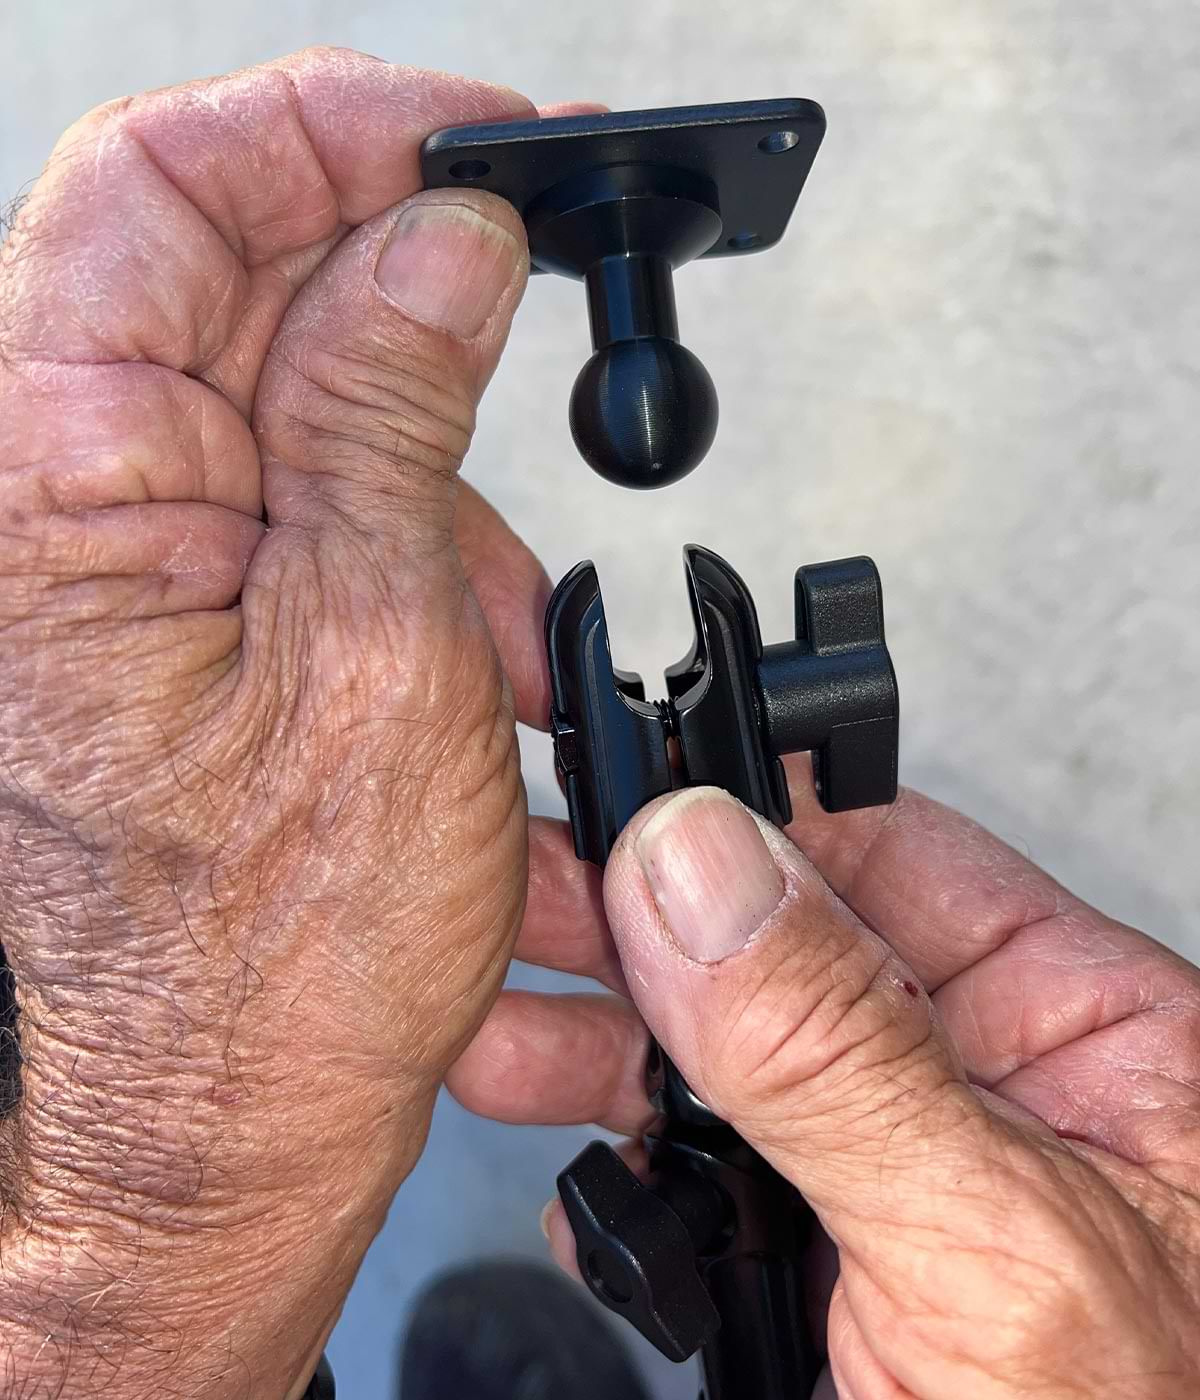
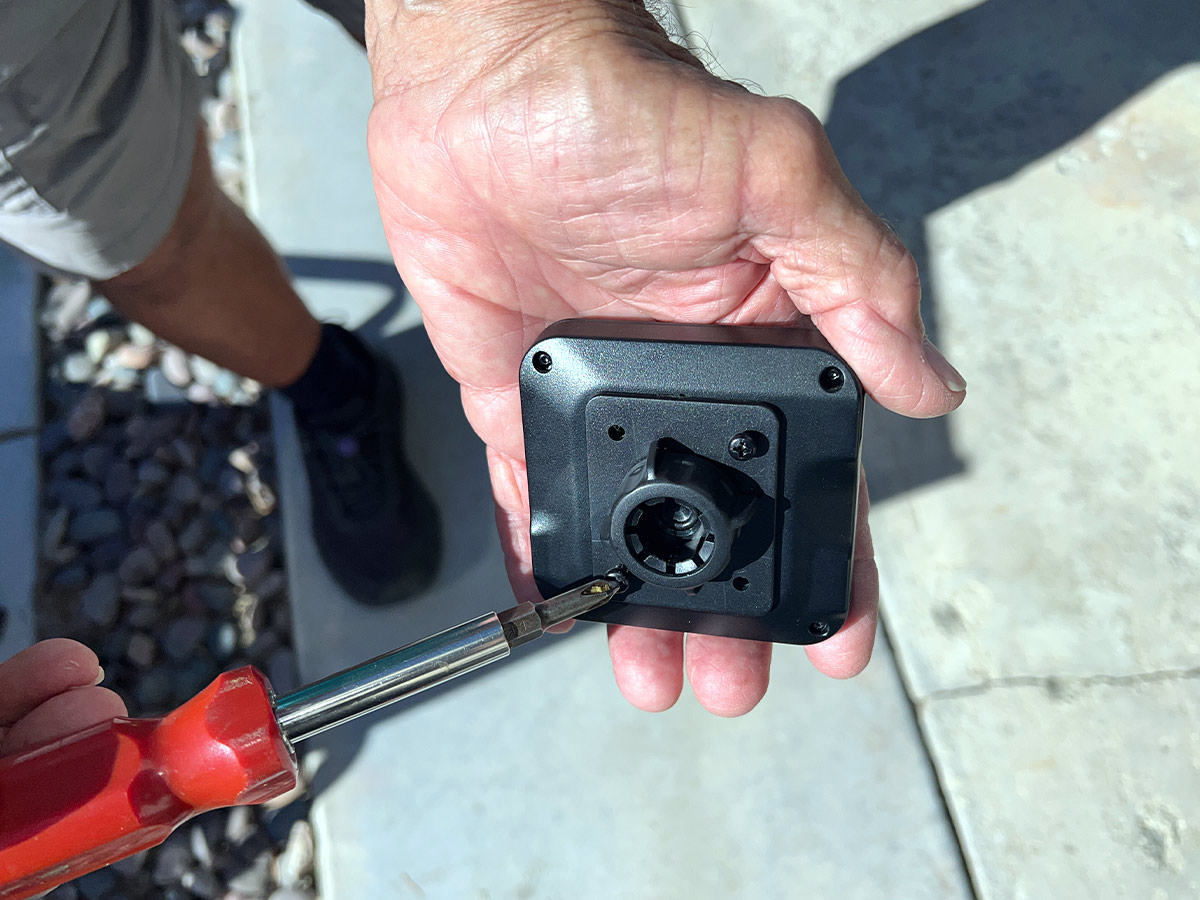
The bracket is designed to accommodate a Garmin 17mm ball mount on many of its models, which was the rub here; the RV 1090 has a bracket that accepts a 22mm ball. That little detour was modified with an AMPS 17mm holder/receiver (part number TL-HL-04; $4.95). This adapter attached to the Garmin magnetic base using the existing holes and screws, making it capable of mounting to the 17mm ball on the Tackform extension-arm’s top articulation point.

Truck System Technologies Advertisement
the 22mm ball holder is fastened to the Garmin magnetic base with two screws
the 17mm ball in the top of the modular arm is connected to the 22mm ball holder fastened to the magnetic base
A small hiccup was presented by the 22mm ball holder on the back of the Garmin RV 1090. Many Garmins have 17mm ball holders, which would fit the arm, but an adapter can be ordered for only $4.95 that mounts to the back of the Garmin magnetic base via the industry-standard, AMPS bolt pattern. With the ball holder in place, the magnetic base can be connected to the 17mm ball in the top of the modular arm.

Mounting the arm base to the center console took only a few minutes using four screws, which I had in my fastener box; the heads were already black, so it matched the bracket. The only caveat was getting the bit into the cubby hole to drill pilot holes, but an extra-long bit took care of that issue.

a drill is used to put the first pilot hole in the plastic center console
another pilot hole is drilled into the plastic center console
Mounting the base required pilot holes be drilled into the plastic center console. A long bit was used to prevent cutting into the side of the console with the cordless drill chuck. Fortunately, I keep a few long bits around for just such projects; these bits can be found in any home improvement or hardware store. Once the pilot holes were drilled, the mounting plate was secured with four screws.
Finally, the articulation points were adjusted so that the driver can view and touch the screen and also turn it toward the passenger while still maintaining the general proximity without blocking one of the cup holders — or unnecessarily cluttering up the dash.
view of the GPS monitor mounted to the vehicle center console and turned in the direction of the drivers seat
The modular arm can be adjusted to a position where the GPS screen is in perfect view of the driver, accomplished via the thumb screws that tighten the top and bottom balls in place and the center elbow. The almost infinite adjustment capability is quite impressive, as is the build quality of the metal arm.
view of the GPS monitor mounted to the vehicle center console and turned in the direction of the passenger seat
Being able to rotate the GPS screen toward the passenger was a big priority. Often, the passenger can help navigate to fuel stations, stores and attractions — or input changes in travel plans —rather than distracting the driver. This is done by simply loosening and tightening the thumb screws. The only caveat: making sure the GPS doesn’t cover the cup holders.
Get Updates
Subscribe today and never miss an issue!
Get all the latest tips and news to keep you moving on that open road!
RV Enthusiast January/March 2024 Issue
Current Issue
January/March 2024
Spring is back in bloom and with it we are proud to present our latest issue of RV Enthusiast! The January/March issue covers furnace failures and how to fix them, the best batteries for boondocking, quick and easy weekend projects, PLUS so much more!

Already a Subscriber? Click here for Access to the Full Issues.

Share This