Small Tips, Big Results - RV Enthusiast Magazine

Small Tips, Big Results

by | Sep 8, 2023 | Pro Tip, RVEXPERT

Photos by the author and Bill Gehr
Sometimes, it’s the little things that can make a big difference in livability and comfort. RVers love to tinker — and are not afraid to share great ideas with the entire community.
RVers are industrious by necessity. It’s not possible for the manufacturers to cover all the bases when building and outfitting an RV, so owners are constantly looking for tips that will improve livability and convenience. Finding new ways to hook up the RV in camp, modify storage facilities, expand galley space, coddle your pets, carry tools or set up an ultimate patio are just a few of the hundreds of tips floating around RV communities and forums on the Internet. Some are time proven and some don’t work — but an initial idea just about always leads to others.

As an RVer, coming up with new ideas and sharing them with fellow enthusiasts is a rite of passage.

My obsession with finding ways to make tasks easier and more convenient has led to countless ideas and projects that have been implemented over the years. Although sometimes not possible, I relish having things readily accessible but are also stored neatly. So, I’m constantly building “systems” to store tools, supplies, chairs and the barbecue, to name just a few areas where improvements come in handy.

Speaking of tools, freezer-strength, plastic storage bags that zip shut make good pouches for wrenches and sockets. These clear bags make it easy to see what’s inside and the plastic material lasts much longer than expected. It’s easy to separate metric and standard tools, they can be stored in a toolbox or bag and you can even write on them with a Sharpie if you need to. I like tool bags because they can be squished into cubby holes. Harbor Freight also has a selection of tool bags at reasonable prices.
hands place wrenches of different sizes into a heavy duty Ziplock bag
Plastic storage bags with a zip seal are perfect for organizing tools. Here a Ziploc-brand bag holds a selection of ratcheting wrenches. These bags are perfect for separating metric and standard wrenches and sockets. Make sure you use the ones designed for freezer storage, which are heavier.
hands place the wrench holding Ziploc bag into an external RV compartment that holds various tools and supplies
Plastic storage bags hold up amazingly well and can be stashed in tool bags, which are easier to “stuff” into compartment cubby holes. The clear plastic makes it easy to identify what’s in the bag without opening.

Here are a few other “quick tips” that might make their way into your own bag of tricks.

Making the Connection

Hooking up a sewer hose commonly leads to frustration, starting with the sewer inlet at or near the hookups. It’s almost comical how many sewer inlets are configured for something other than standard sewer-hose fittings — and the rub is that most RV parks require tight connections to prevent sewer gas from escaping.

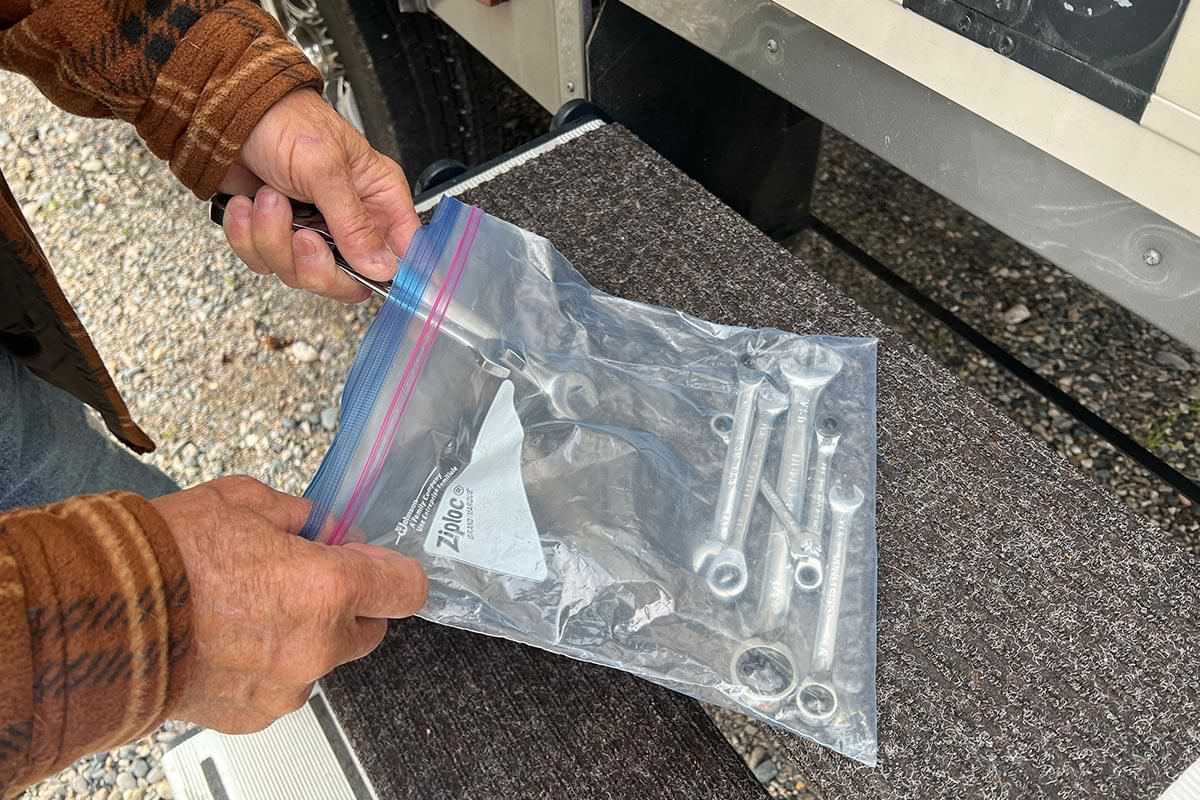
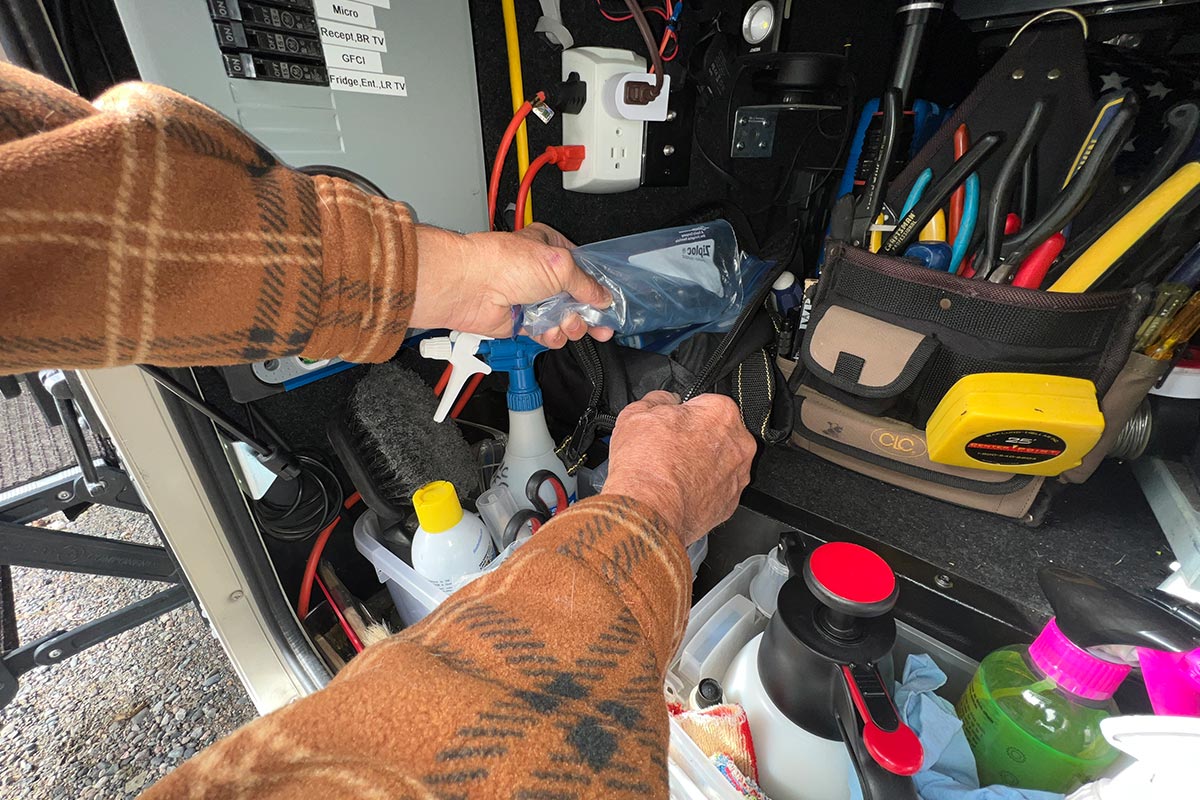
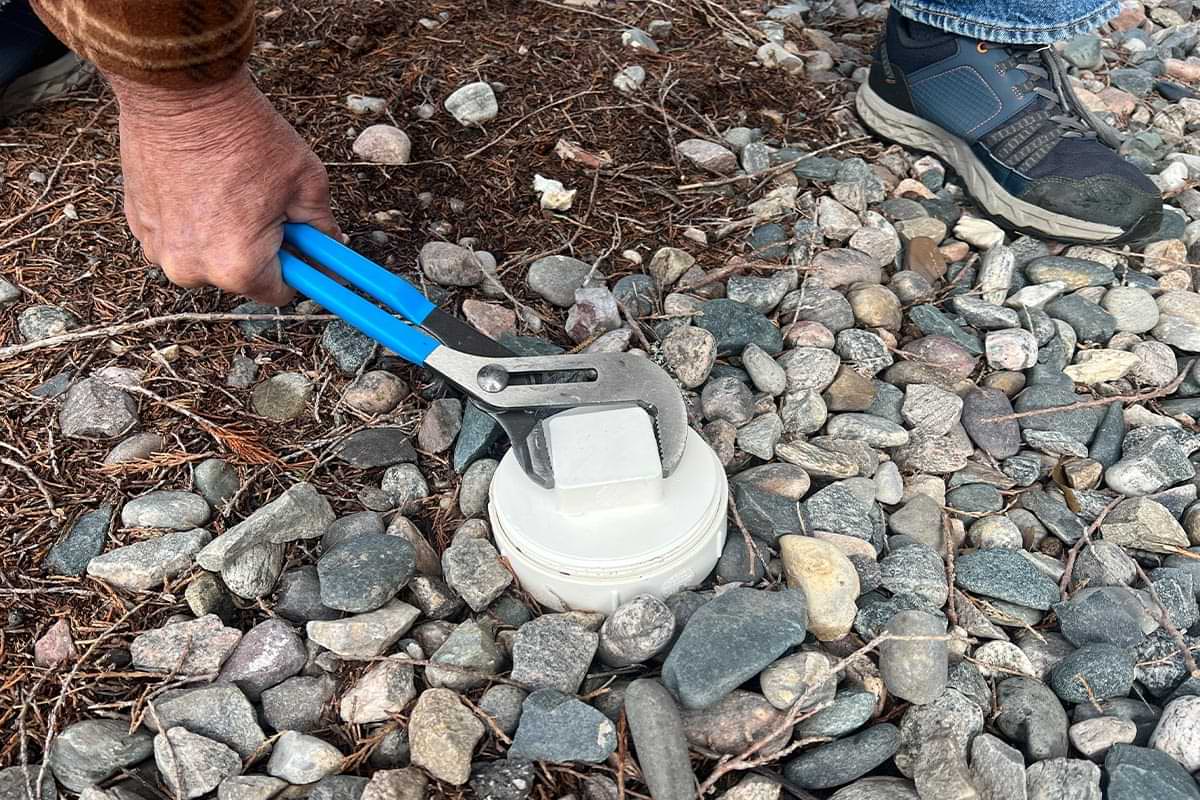
Bunged-up threads are common, and when a previous resident tightens the inlet cap more than necessary, getting it off by hand can be painful. A 12-inch offset pliers is the logical tool to help remove the cap, but mine was always tucked away in the toolbox. Now I keep the offset pliers mounted to the front aluminum rafter in the pass-through compartment using a strong magnet fastened to the rafter for super quick access.

blue handled 12-inch offset pliers grip a sewer inlet cap
Sewer inlet caps that have been overtightened are a pain to remove by hand. A 12-inch offset pliers provides a good grip for unscrewing the bulky cap. Keep the offset plier in a place where it can be grabbed quickly.
In too many cases, the threads are in such bad shape that attaching an adapter is virtually impossible — not to mention inlets that have no threads to begin with. For these situations, I use a Camco 3-in-1 Flexible Sewer Hose Adapter that can be found on Amazon for $8.47. This flexible fitting is simply “stuffed” into the sewer inlet that has stripped threads or none at all; the press fit is made to work in 3-, 3 ½- and 4-inch openings. Once inserted, the end of the sewer hose can be secured and form a tight seal — and your neighbors will be thankful.
the Camco Flexible 3-in-1 Sewer Hose Adapter Hose Seal is placed in a sewer inlet with an RV sewage hose near by
If the pipe threads in the sewer inlet at the hookups are stripped (or non-existent), attaching a sewer hose adapter is virtually impossible. Most RV parks require a secure seal when hooking up the sewer hose, which can be accommodated with the use of a Camco 3-in-1 Flexible Sewer Hose Adapter that can be found on Amazon for $8.47.

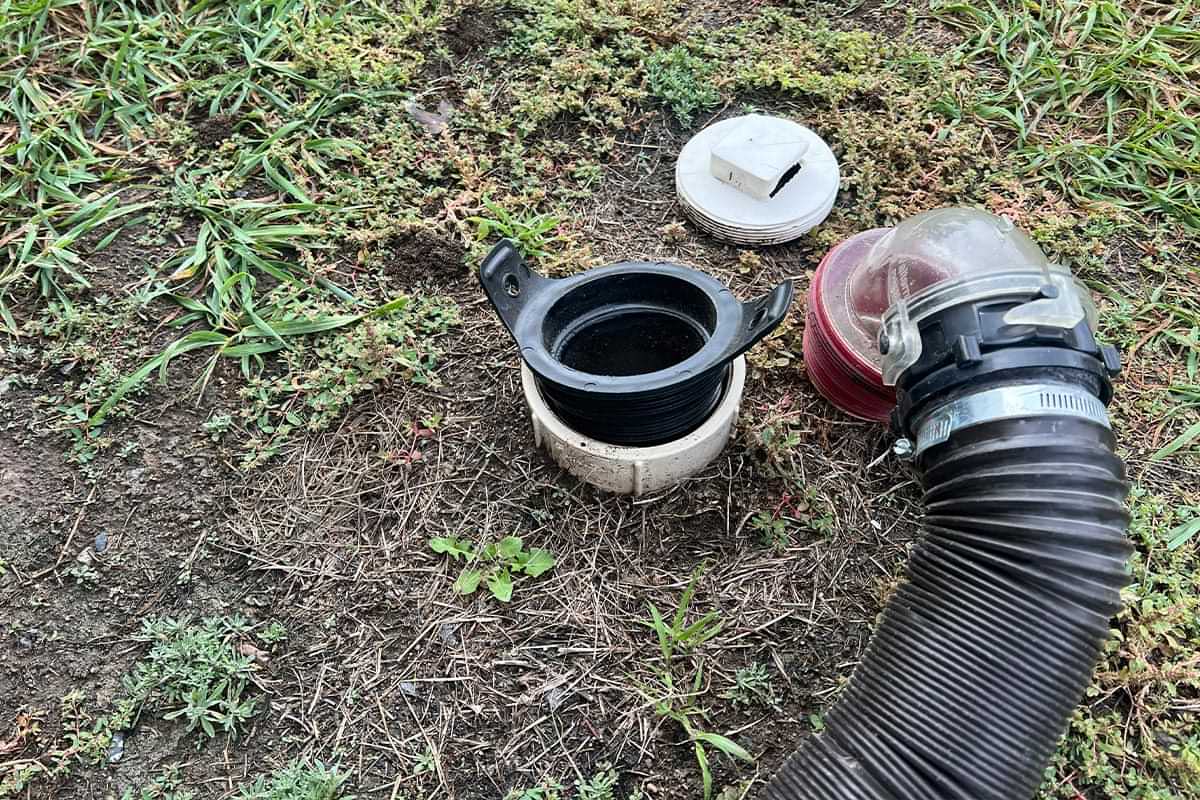
Also, many RVs have dump valves and sewer-hose connection points in two locations — which means using a “Y” fitting to connect two hoses. If the second outlet only drains gray water, consider using a cap with a standard male hose fitting whereby a water hose can be connected and routed to the sewer outlet. Since it’s best to drain the water when the tank is almost full, all you have to do is put the hose end into the sewer inlet and open the valve. If you want to get more exotic, consider installing a water hose connector into the sewer-hose fitting.

a sewer cap with a standard male hose fitting allows the use of a water hose for draining gray water
If you dislike connecting a second sewer hose for dumping one of the gray-water tanks, a sewer cap with a standard male hose fitting will allow the use of a water hose for draining gray water. Just make sure to dedicate the hose for this purpose and mark it accordingly — and re-connect the 4-inch sewer hose to the inlet after dumping gray water to prevent foul odors from “polluting” the air.

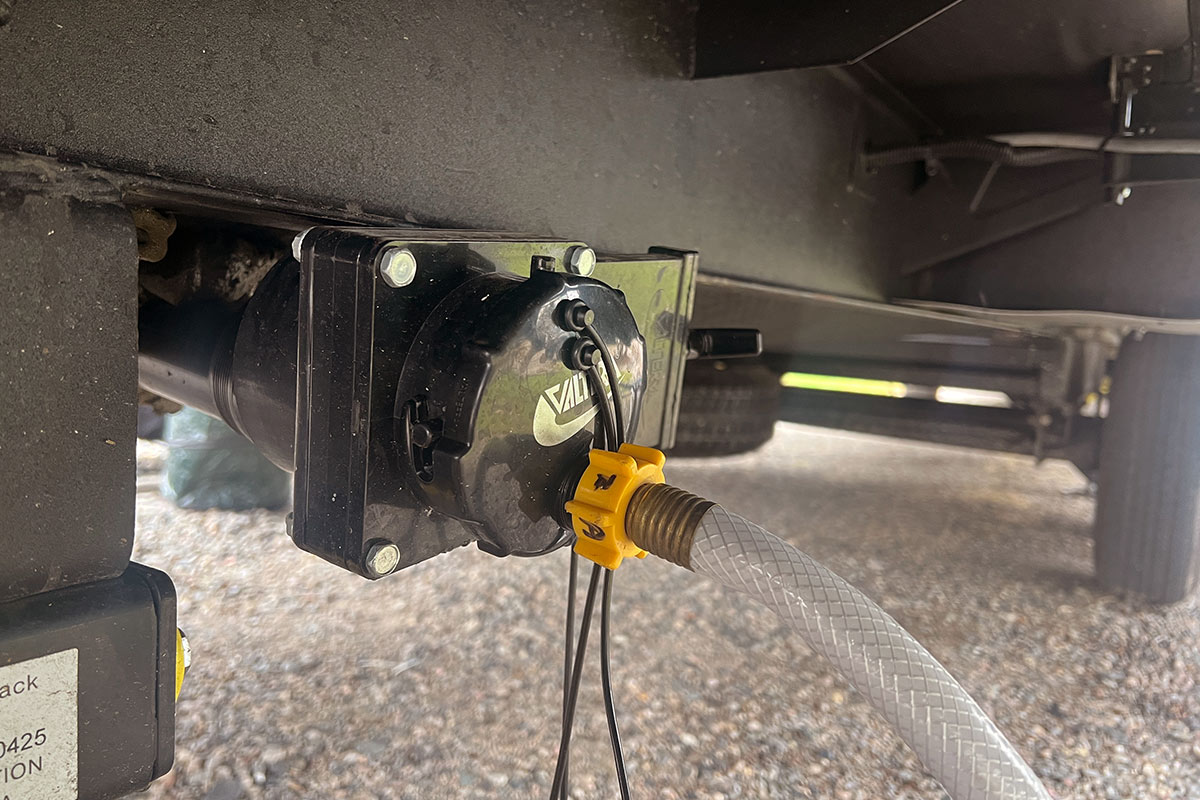
When finished, put the sewer hose back in place immediately to control odors. Just make sure to only use a water hose dedicated for this purpose. This type of cap can be found in most RV supply stores and online, in black and clear iterations.

Fill ‘er Up

The fill inlet on diesel-powered Ram trucks has a spring-loaded flapper seal and a cheap plastic cover to prevent debris from entering the tube between fill-ups. This cap is a joke and can be easily damaged or lost. A simple way to close off the filler is to adapt a pipe plug designed for pressure testing. You’ll need a 1 ½-inch pipe plug — the Oatey-brand plug sold at Home Depot ($5.65) works perfectly. It has a plastic body, and the rubber gasket expands to seal off the opening by tightening the wing nut.

a hand holds an Oatey-brand 1 1⁄2-inch pipe plug for pressure testing beside the fuel filler hole on a Ram diesel-powered truck
the Oatey-brand 1 1⁄2-inch pipe plug is used as cap for the fuel filler
The cover for the fuel filler in Ram diesel-powered trucks is really cheesy, if not missing altogether. To prevent debris from entering the filler neck, a pipe plug for pressure testing makes a great cap. The rubber gasket is expanded by turning the wing nut until the filler inlet is sealed tightly. This Oatey-brand 1 1/2-inch pipe plug from Home Depot has a plastic base and sells for only $5.65.

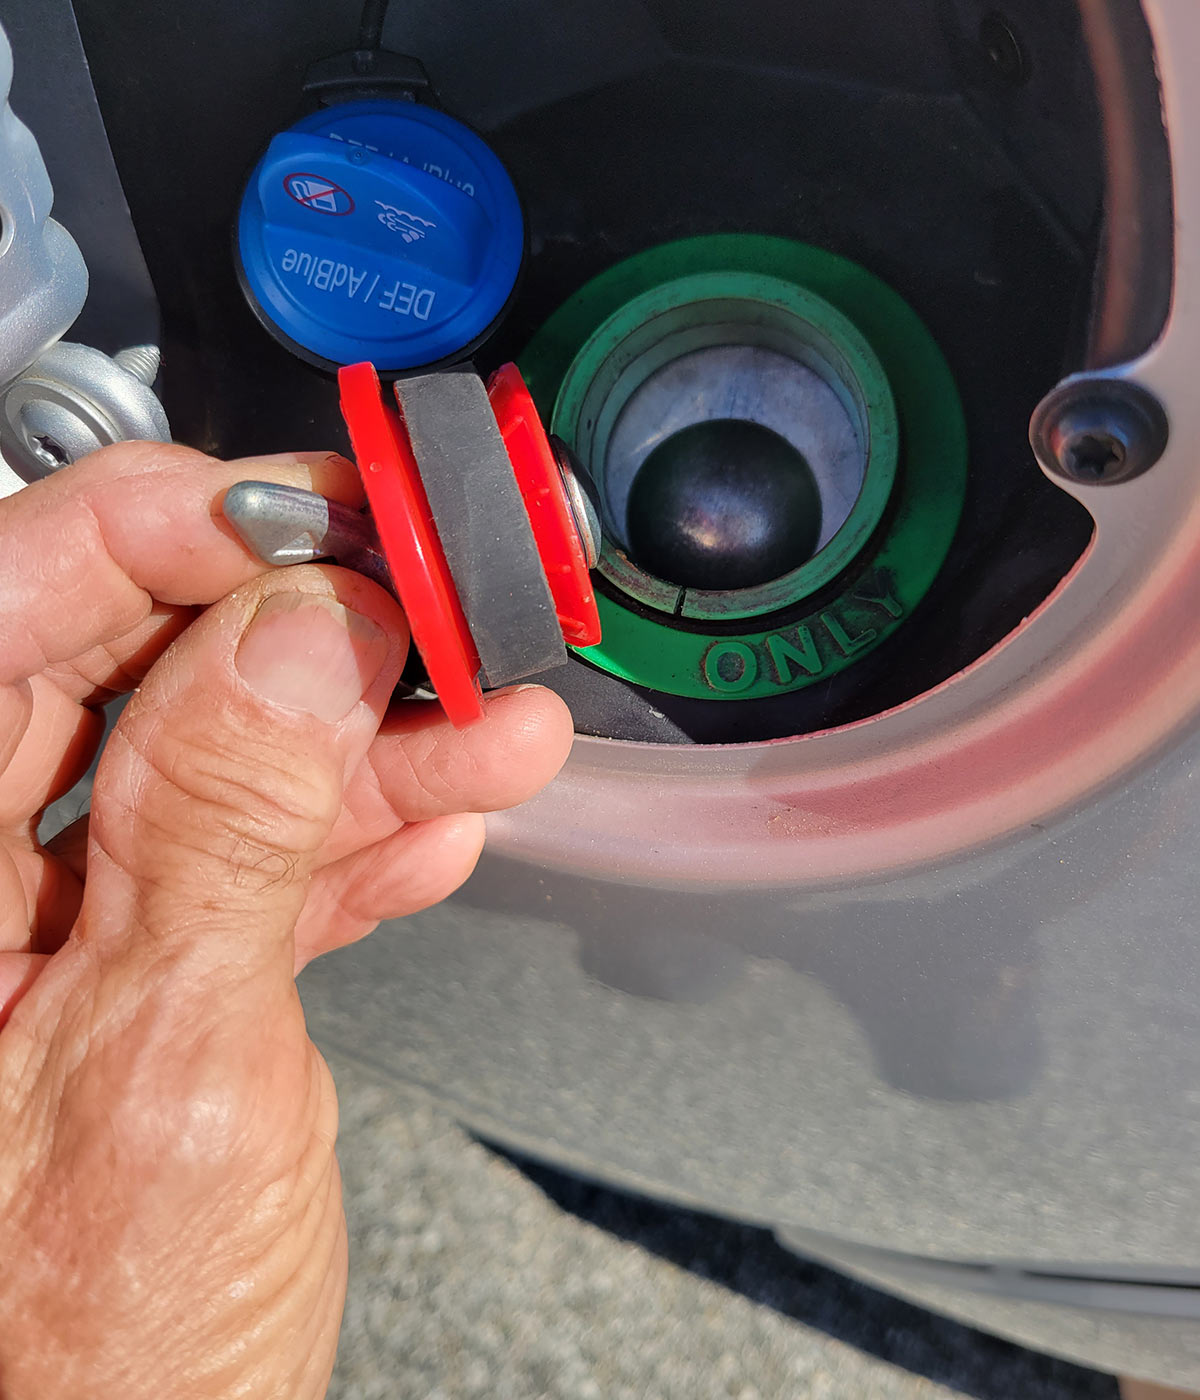
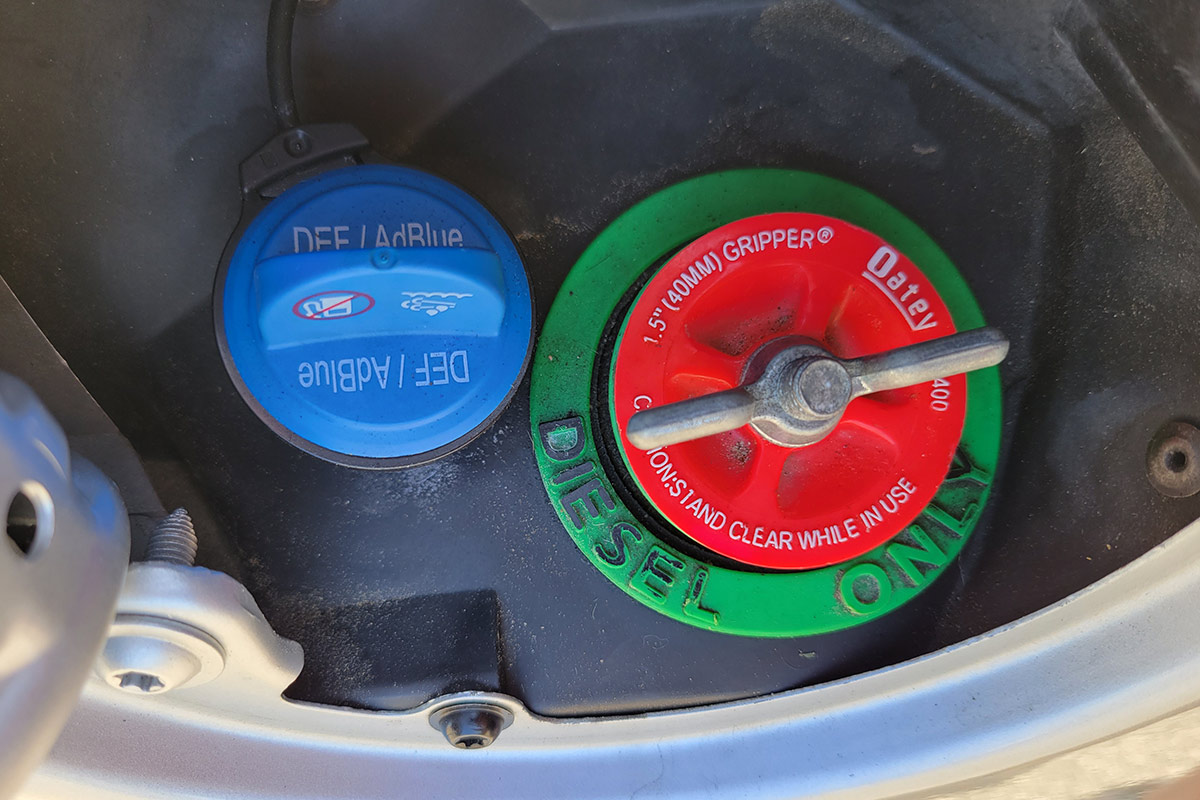
There are other pipe plugs on the market if the Oatey plug is not available, including those that have a metal body, which is not necessary. My pipe plug has been in service for five years and is still working fine.

Screw It Down

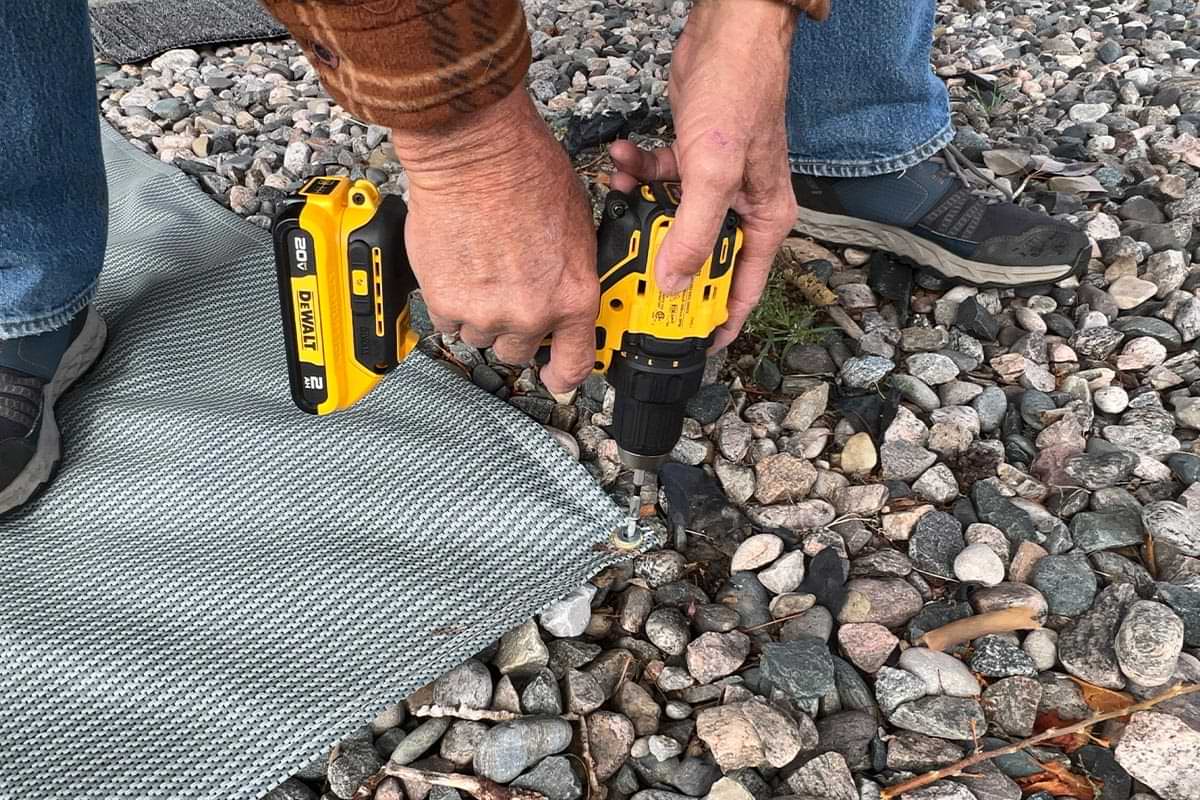
Patio mats are a great complement to any patio — but when spreading one out on dirt or gravel (most RV parks prohibit its use on grass) they usually have to be staked down to prevent the material from sailing away (or at least folding up and presenting a trip hazard). Tent stakes are the norm, but a fellow RVer, who happened to be a home builder by trade, drives long screws and washers — using a cordless screw gun — through the end grommets and into the ground. Most times 4-inch screws will suffice — and it sure beats pounding in tent stakes that can bend and require a crowbar for removal.

screws and washers and a cordless screw gun are used to fasten a patio mat to the dirt below the pebbled ground
Patio mats are wonderful but when the wind blows, can be difficult to control. Typically, tent stakes are pounded through grommets and into the ground to hold down the corners. If you want to eliminate prying the stakes out of the ground with a crowbar, consider using long screws and washers that can be driven by a cordless screw gun. Here, 4-inch screws did the trick; longer screws may be necessary, depending on the ground.

On the Rocks

Just about every RVer relies on ice (cubed or crushed) to cool down water and drinks. Ice is certainly readily available, but we’re forced to buy at least a 5-pound bag — and many times a 10-pound or larger bag of ice. Having limited freezer space, we often had to throw away most of the ice after filling our cups. Obviously throwing away ice was a waste of money.

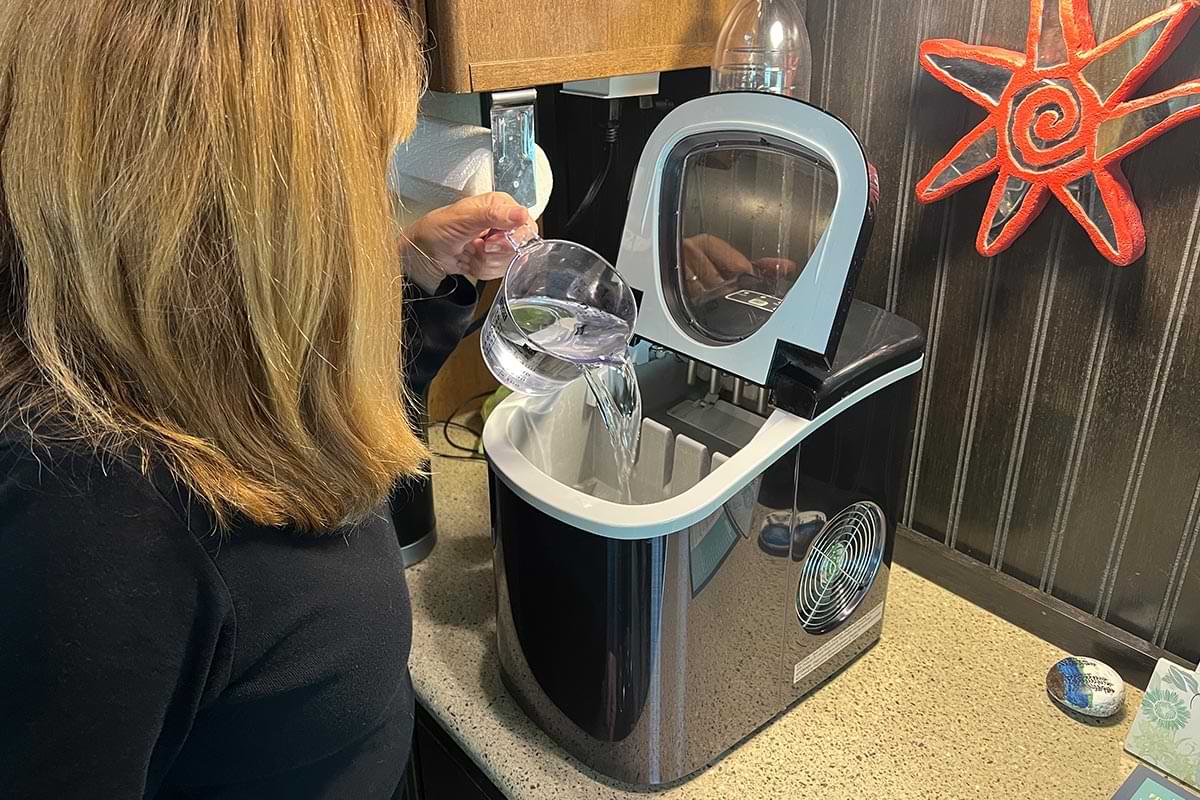
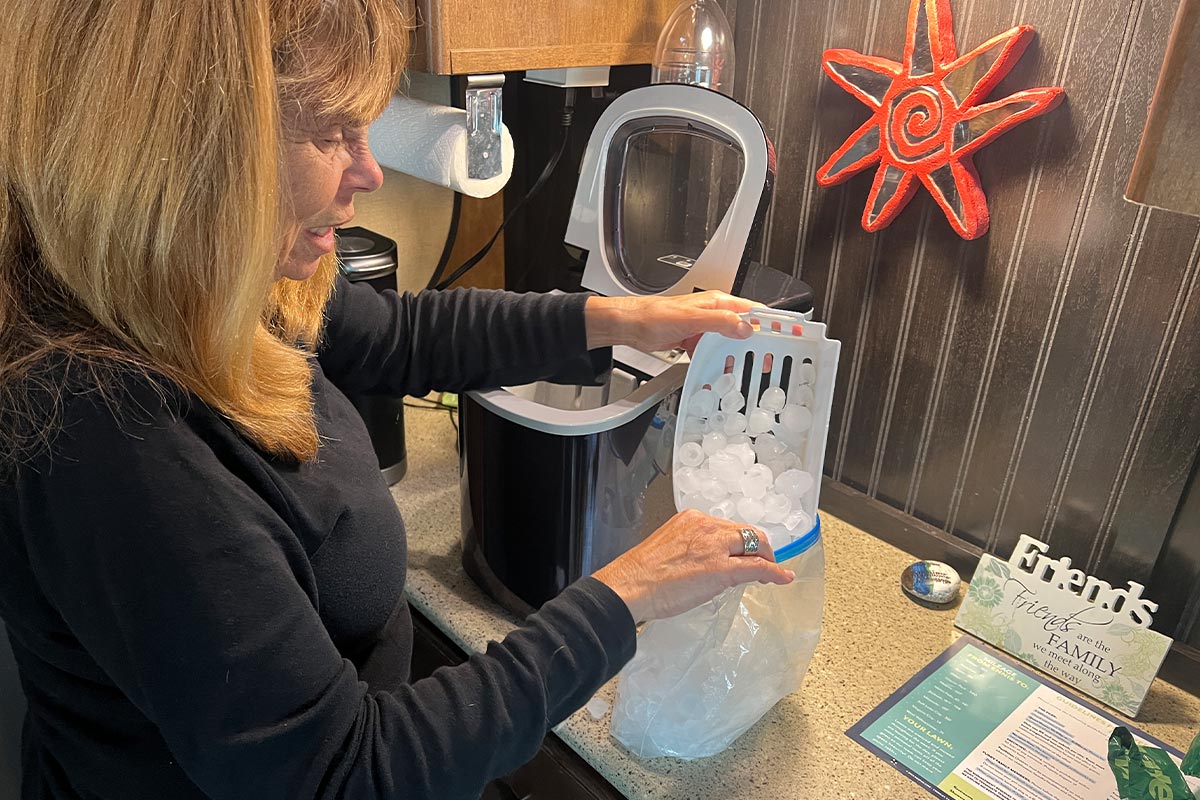
The solution was to purchase a portable ice maker, since our freezer was not equipped with such a provision. Ice makers are commonly found for less than $100 at stores like Walmart and/or Sam’s Club. The brands and color differ, but essentially they are identical products. We use the ice maker almost every day and it travels under the dinette table when the road. It does take up space on the counter, but the convenience is worth the sacrifice. Once water is added to the reservoir, the first batch of ice takes around 10 minutes. Most of these machines are said to make 26 pounds of ice a day, but unless you want to babysit the machine all day, that number is not really practical. This summer we’re traveling with three other couples, and we are the daily ice dispensary for the whole group.

a woman pours water from a measuring cup into a portable ice maker on the counter of an RV kitchen
Ice for cooling down drinks is readily available, but in most cases storage in RV freezers can be problematic due to limited capacity. Rather than throw unused ice away, which is literally money down the drain, consider a portable ice maker. These ice makers are typically sold in stores like Walmart and/or Sam’s Club for less than $100 and are also available online. Although they are sold under different brand names, they all have similar styles and function.
a woman pours ice from a small tray into a Ziplock bag
Portable ice makers, like this Frigidaire-branded model, are said to produce up to 26 pounds of ice in a day, but that requires adding water and emptying the basket all day long, which is not only impractical but usually unnecessary. It takes around 10 minutes to make a batch of ice, which can be transferred into a plastic bag and stored in the freezer. This is one of the best appliances added to our fifth wheel.

If the ice maker is used continually, figure on it lasting a year or two, but it’s still cost-effective, especially for full timers.

Another benefit of having the portable ice maker is the ability to use purified water from our onboard water filtration and sanitizing systems.

Discovering tips from other RVers is always fun and can even spur spirited conversation when gathering around the fire pit. It’s amazing how resourceful RVers are — and trading tips is always safer than discussing politics.

Get Updates
Subscribe today and never miss an issue!
Get all the latest tips and news to keep you moving on that open road!
RV Enthusiast January/March 2024 Issue
Current Issue
January/March 2024
Spring is back in bloom and with it we are proud to present our latest issue of RV Enthusiast! The January/March issue covers furnace failures and how to fix them, the best batteries for boondocking, quick and easy weekend projects, PLUS so much more!

Already a Subscriber? Click here for Access to the Full Issues.

Share This