Snip, Snip, Tape and Grease
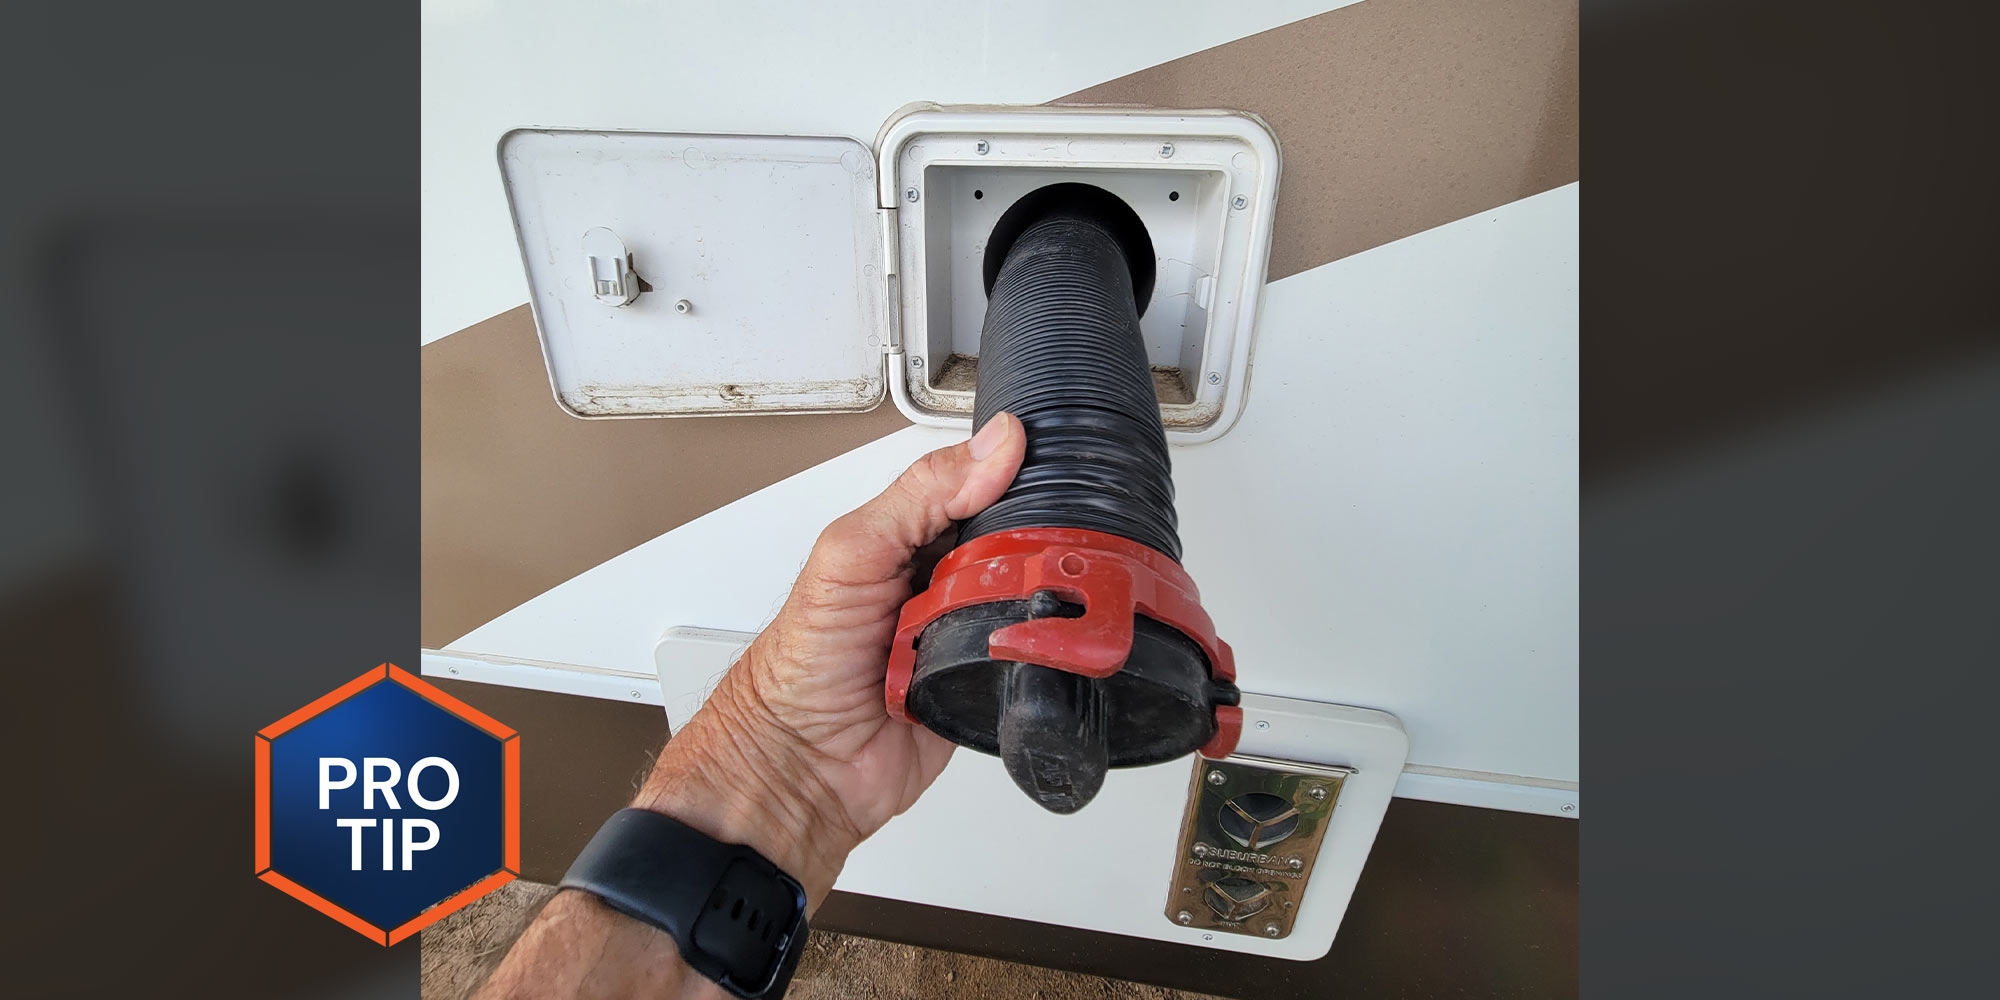
Installing sewer hose fittings that will clear available storage holders — including the 4-inch square bumper on trailers and fifth wheels — doesn’t have to be a frustrating job
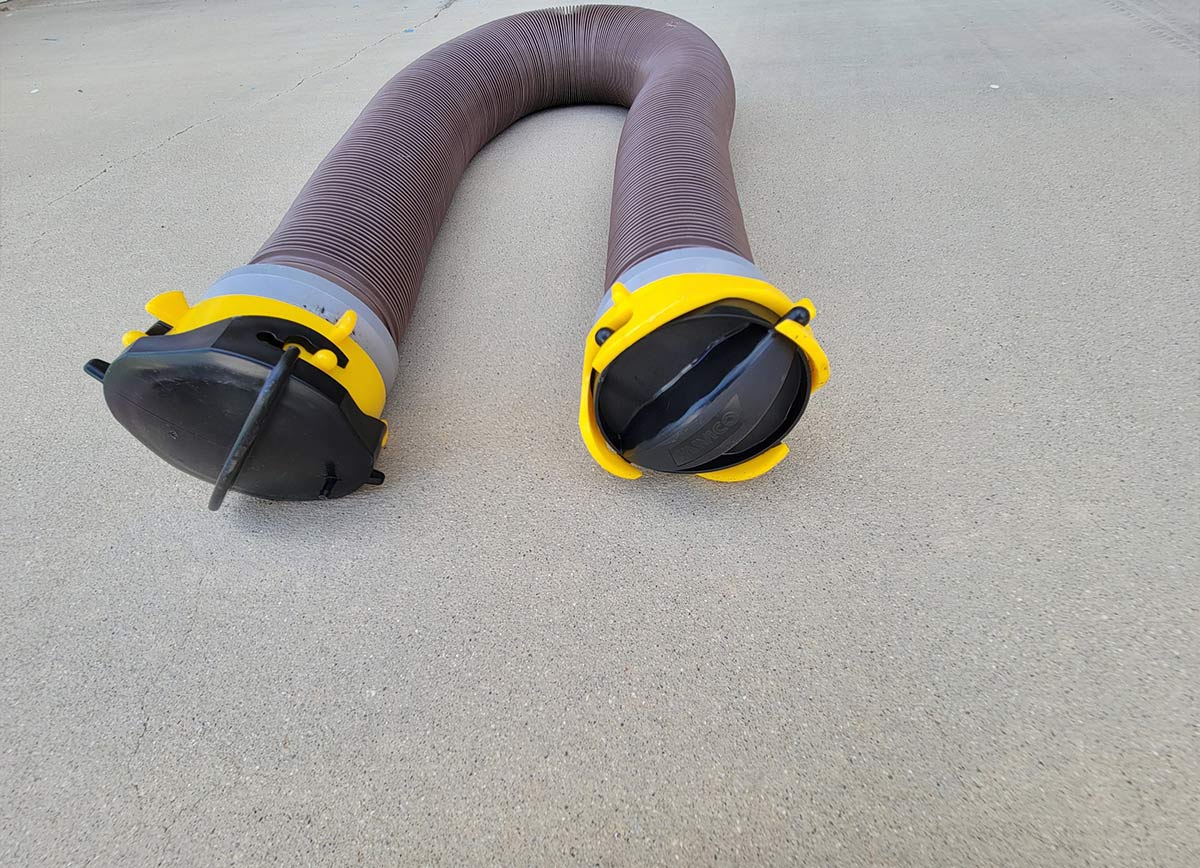
We all love RVing, but we can’t say that about dumping the holding tanks. A big part of the challenge is having the right sewer hose, suitable fittings and finding a place to store these hoses after they have been contaminated with waste from the tanks. There are literally dozens of sewer hoses available in heavy-duty and light-duty iterations, some with pre-installed fittings — not to mention the myriad fittings that can be installed on a blank sewer hose to fit your needs.
Trying to store one or more sewer hoses in tight quarters — like the bumper on the back of a trailer — can be maddening, especially if the fittings are too large to fit into the 4-inch square tube. A good solution is to buy a blank sewer hose and install your own fittings, customizing them to what works for you.
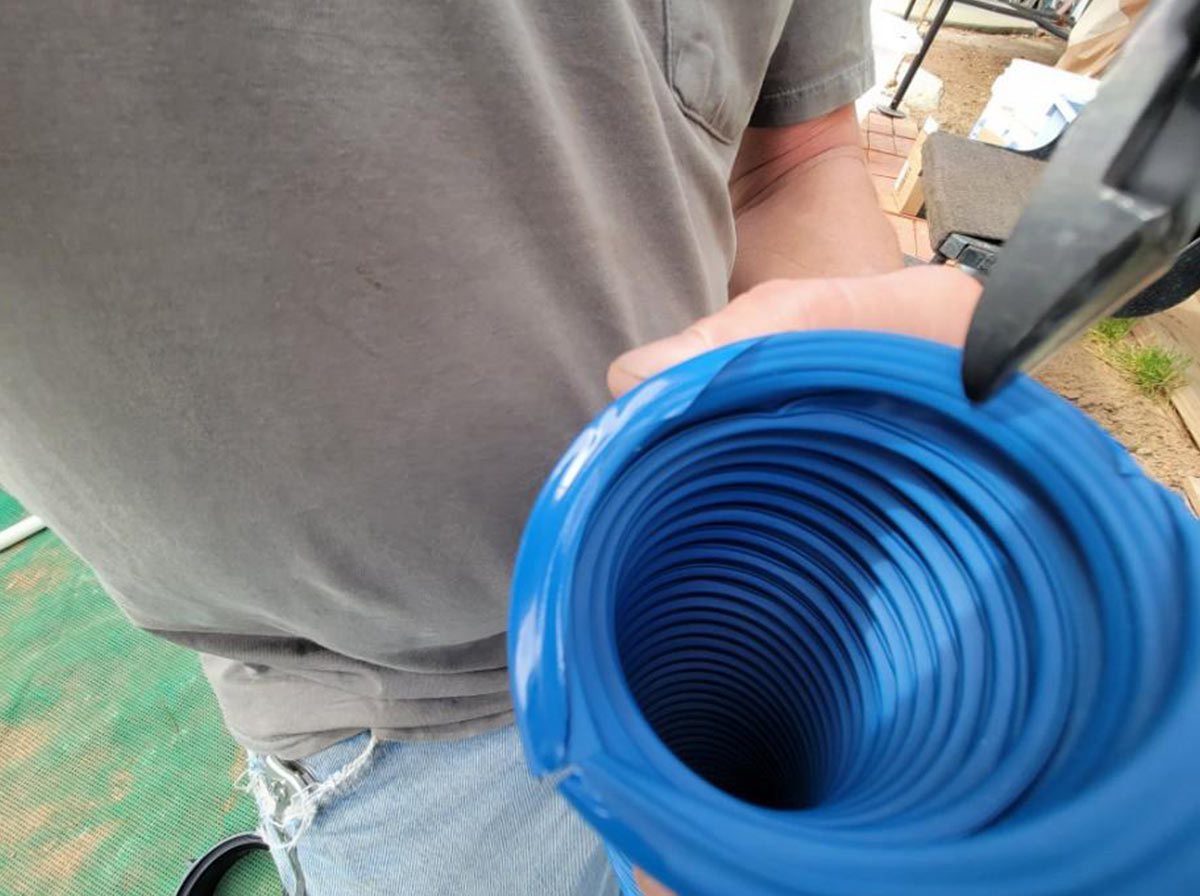
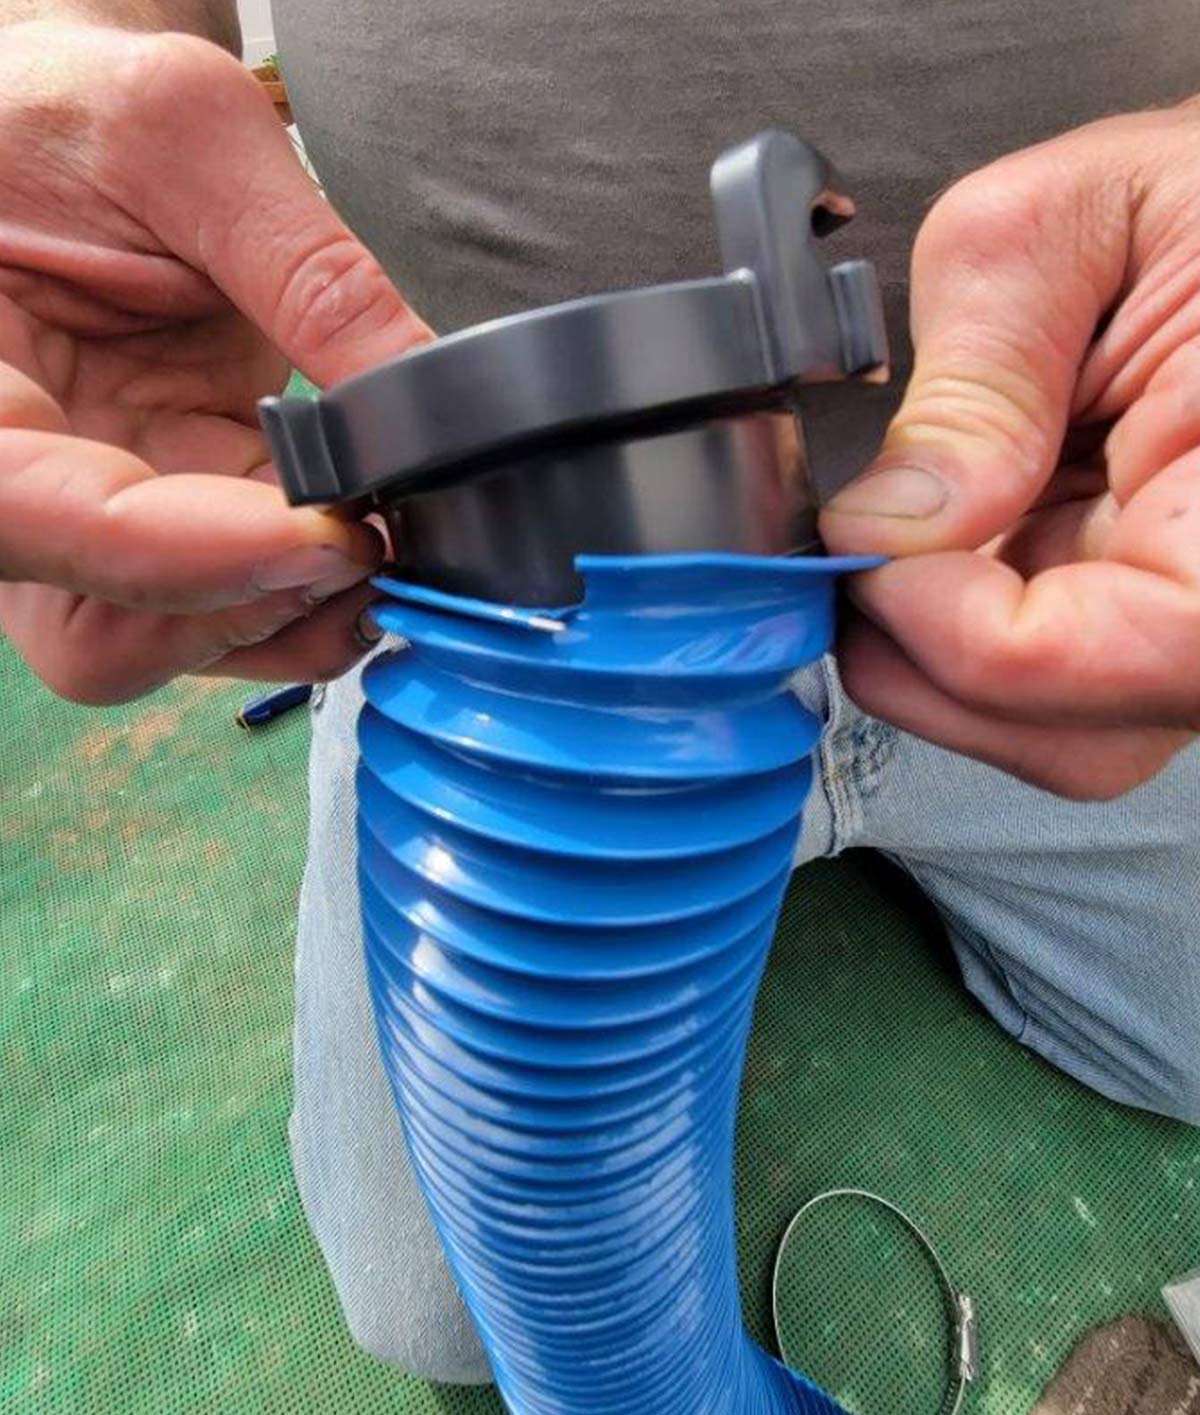
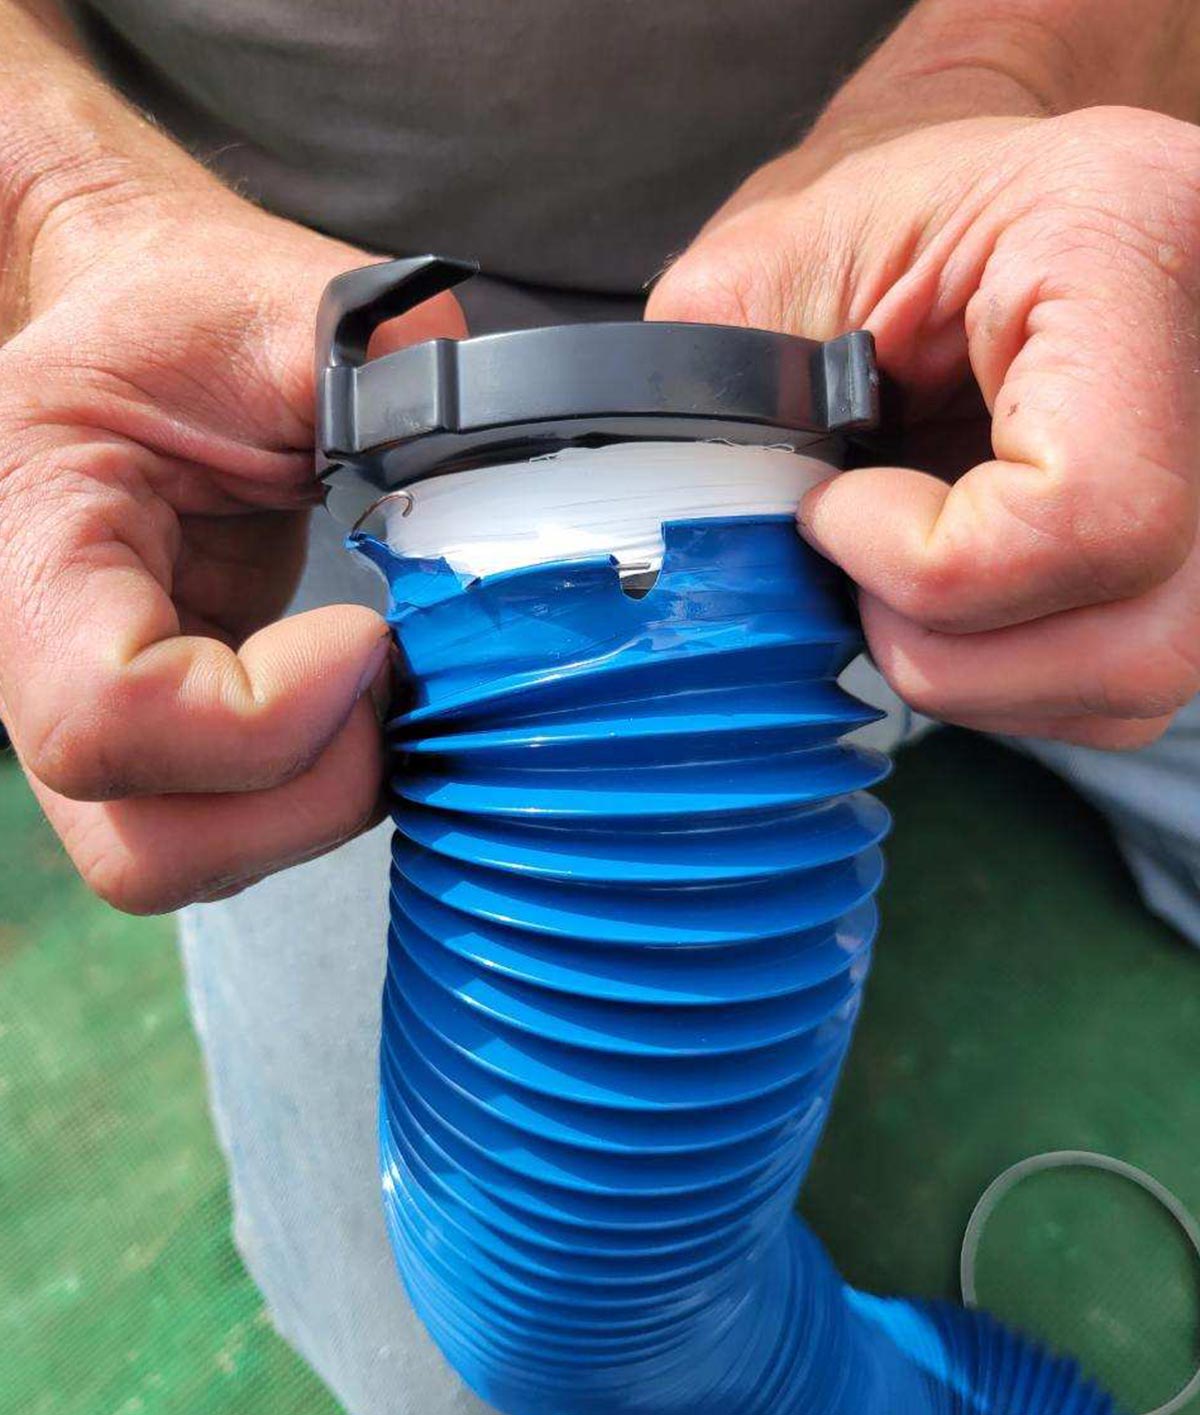
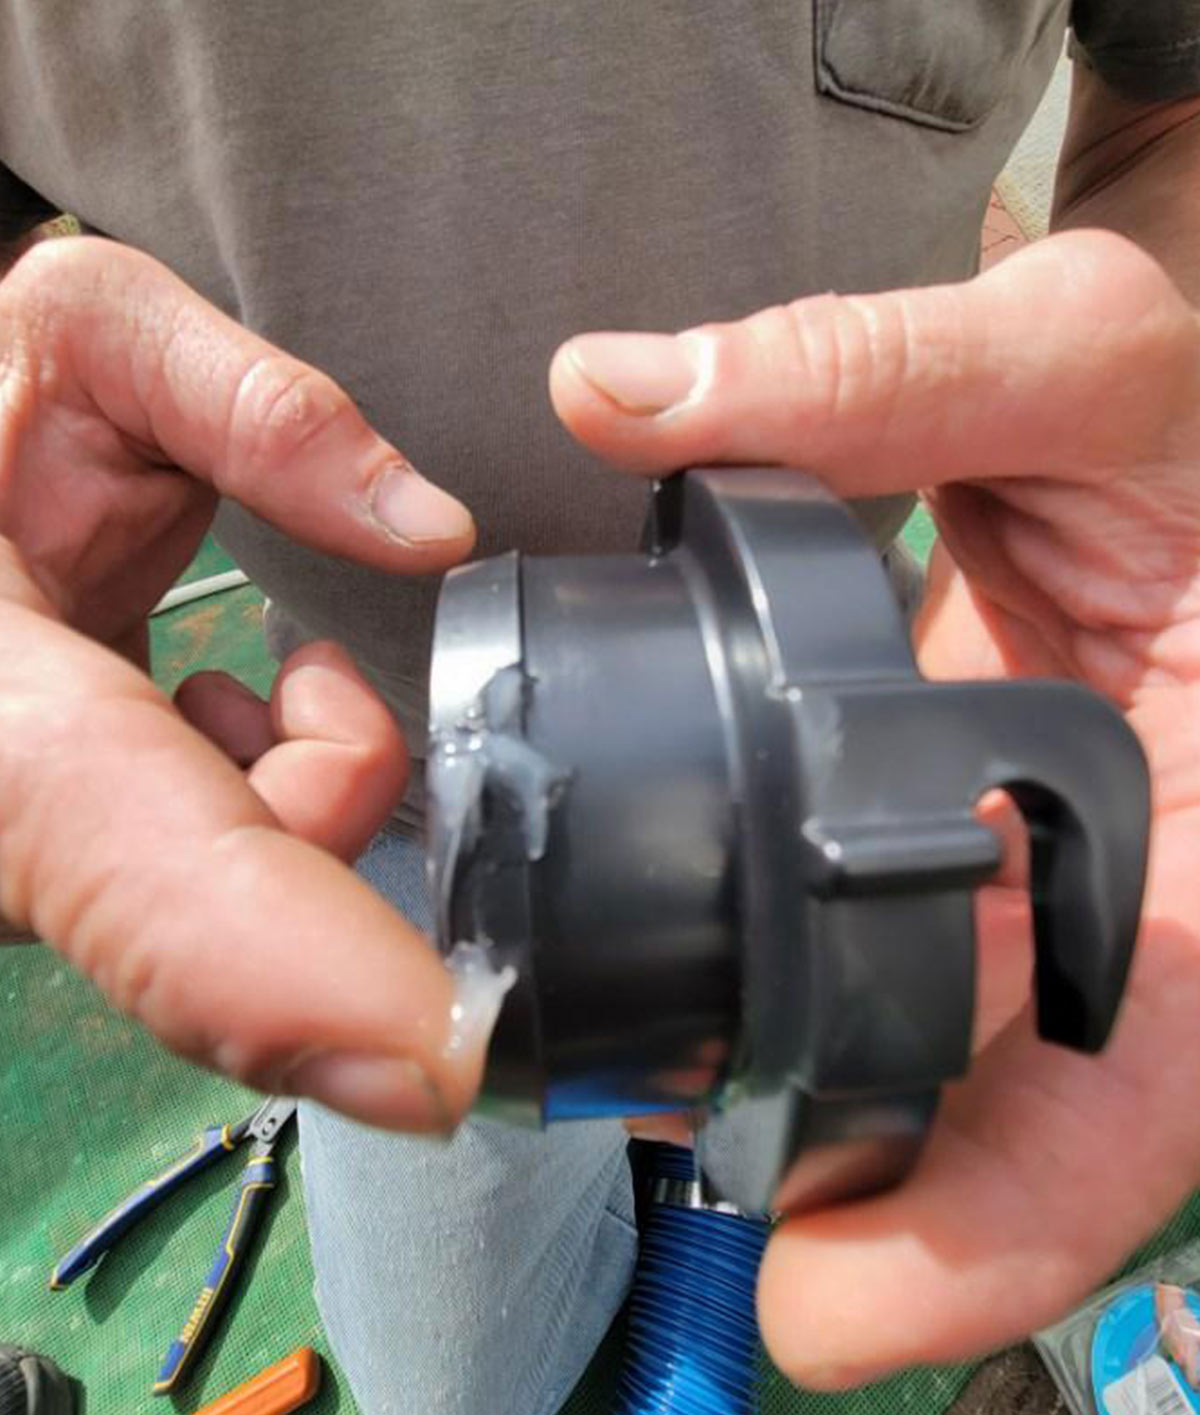
Sounds easy, but if you haven’t tried installing fittings into a flexible sewer hose, especially a heavier-duty product, you’re in for an unpleasant surprise. Most of the hoses are just a little bit too small in diameter — and it can be almost impossible to pull the end over the fitting before installing the hose clamp. Some people just grin and bear the process, while others even resort to heating the end with a hair dryer. Years ago, I discovered a little trick: simply cut the wire opposite the end that’s visible. You’ll need to cut through the wire and the sewer hose material with hand snips, but not to worry; when you pull it all the way onto the fitting, the hose clamp will still fit below the cut. The cut alleviates the pressure and allows the hose to be pulled up easily on to the fitting.
If you need more help, apply a little bit of silicone grease or something similar onto the beveled (leading) edge of the fitting and pull the sewer hose up over the fitting as far as it will go. Install the clamp, taking care not to overtighten it, which will either damage the worm gear and/or create a leak under the material.

Every once in a while, you’ll run into a situation where the connection point leaks, regardless whether the hose clamp has been tightened properly. For these problems, apply several wraps of Teflon tape around the fitting before sliding on the hose. Once you get the hang of it, subsequent fittings will be easy to navigate.
As mentioned previously, storing hoses requires some creative thinking. One method that works well is to wind the hose inside a 5-gallon bucket. This works quite well with a 10- or 15-foot sewer hose, but you’ll have to clean the bucket frequently and have the space to store it. If you have a deep storage compartment, consider using a plastic, hollow fence post. There are also plugs that will go on the sewer hose fittings after you dump the tanks — but be sure to clean the hose by dumping the gray water tank(s) last. You can also squirt clean water through the hose, but be cognizant of contaminating the hookup spigot. Be patient when draining the sewer hose; it seems like the dripping will never end, even while hanging the hose. End caps (available from most RV supply stores and Amazon) will prevent the hose from dripping while in storage.
Handing sewer hoses is a dirty job that can be a lot “cleaner” with the use of proper fittings and sanitary storage procedures.


Already a Subscriber? Click here for Access to the Full Issues.