Peripheral Vision - RV Enthusiast Magazine

Peripheral Vision

by | Nov 22, 2021 | Accessories, Gadgets, RV/Motorhome, Technology

The color monitor is only set up on the dash when a backing event is necessary (driver choice). The large screen makes it easy for the driver to glance at the image and decipher what may be in the way while maneuvering in reverse.

Photos by Bob Livingston

Adding side-mounted cameras to a rear-view safety back-up system mitigates blind spots and unpleasant surprises

Backing an RV travel trailer or fifth wheel into a site, the side of a house or any other place where access is tight can be challenging. For some outdoor enthusiasts, just the thought of backing up sends shivers down their spine — sometimes to the point where they opt for a motorhome just to keep from making uncomfortable maneuvers. For years, driving experts have touted the importance of practicing backing maneuvers in an open lot to become acclimated to the task. It’s great advice — but those inevitable blind spots can still take their toll on a driver’s nerves. Relying on a partner to guide the driver helps mitigate the problem, but can sometimes lead to regrettable arguments and unexpected contact with stationary obstacles. The situation is even more difficult when backing a big rig.

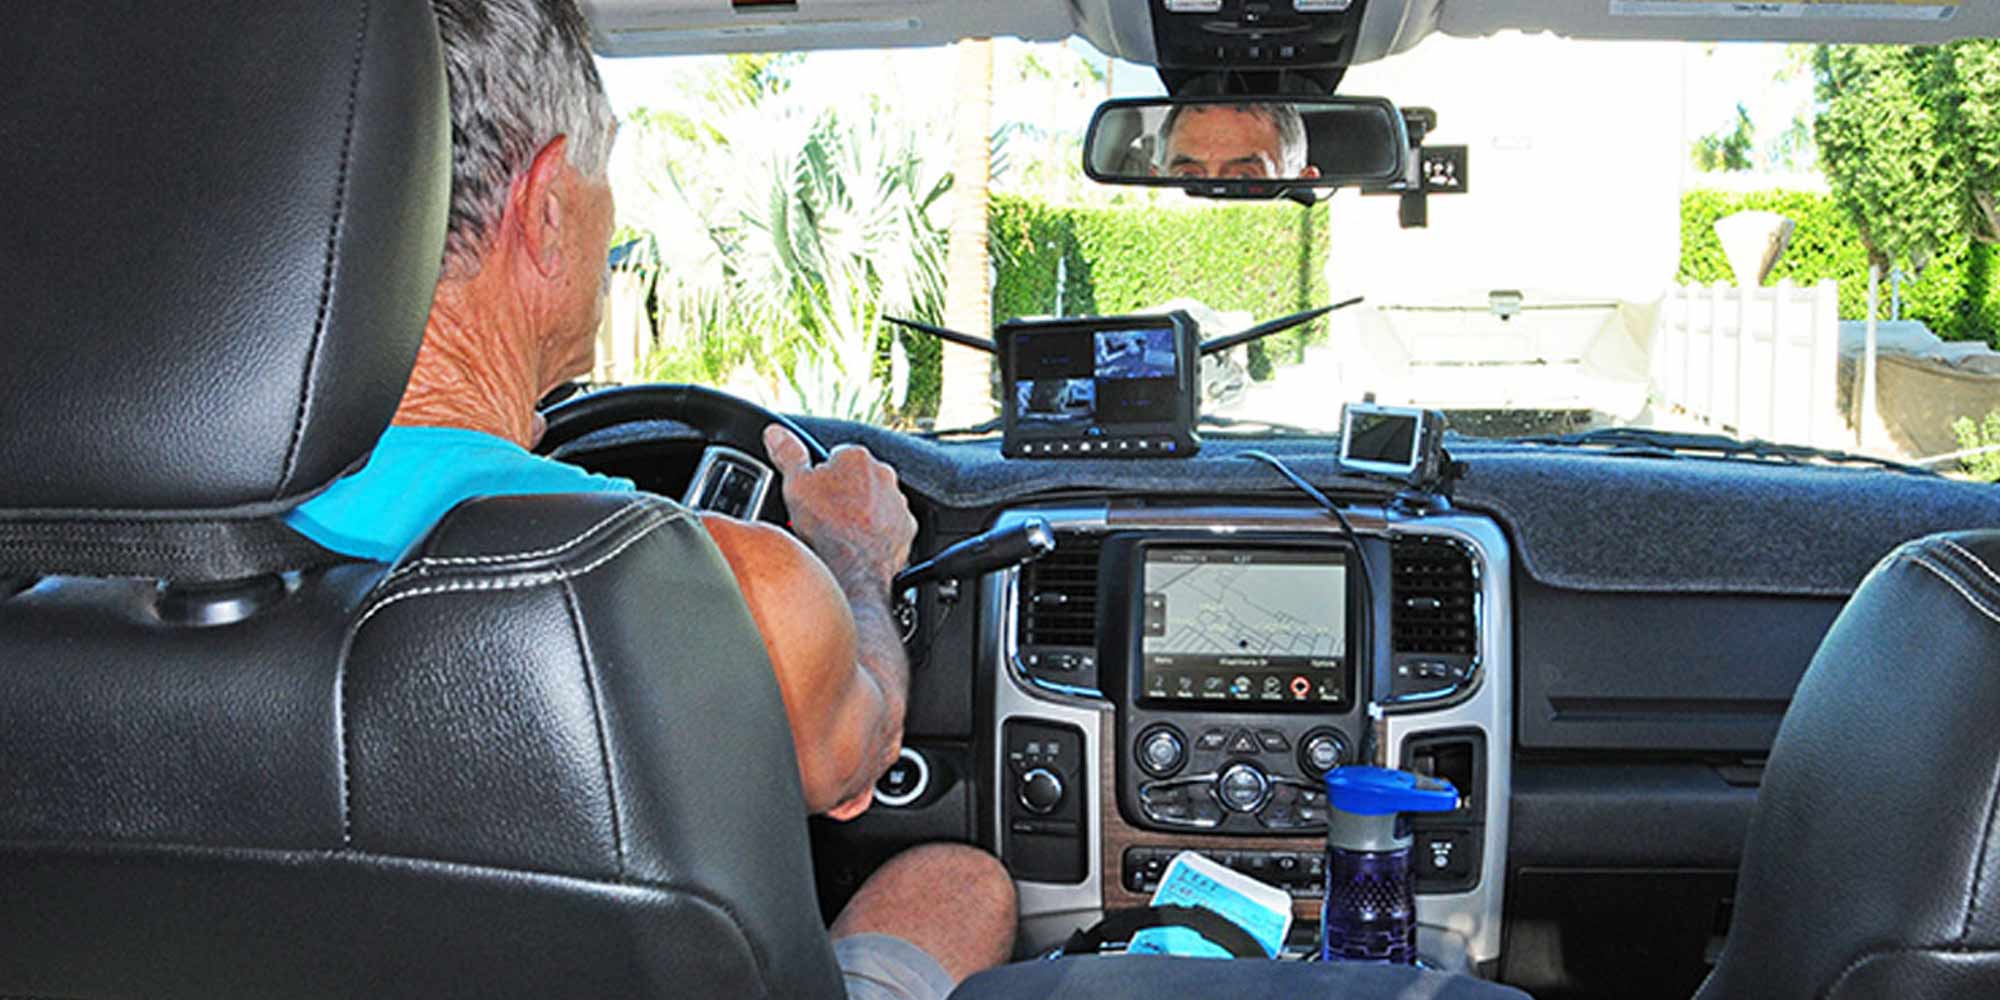
Fortunately, wireless cameras with advanced features have taken some of the edge off of RVing in reverse. The latest wave of large color monitors provides greater definition than products of just a few years ago. However, being able to see what’s behind you doesn’t mitigate the lack of vision when turning — especially on the blind side where vision via the mirror is compromised because of the articulation of the trailer in relation to the tow vehicle. There is a solution, though — and it’s not trading up to a motorhome. Adding additional cameras is a game changer — and if you already have a back-up vision system with provisions for side cameras, mounting the additional hardware can be achieved in just a few hours.

The owner of this 40-foot fifth wheel recently fitted it with a RVS-4Cam back up camera system ($509) from Rear View Safety (RVS) that came with a sizable 7-inch monitor screen which displays up to four very sharp images (something that is critical when trying decipher an image at a glance while also paying attention to your surroundings). It’s also possible to view full-screen images for additional detail. The camera worked great — but because he often traveled solo, it didn’t help much when backing up. Fortunately, RVS also offers side cameras that transmit images wirelessly to the monitor, which is able to split the screen to view what’s behind you and to the sides (providing two additional cameras are installed). As a rule of thumb, higher-quality systems will give you better resolution for identifying obstacles, even ones that are smaller in stature.

removing the bases
Marker lights on both sides of the fifth wheel were close to the locations where the cameras would be mounted for the best side views. Bases are removed to reveal wiring.
clamping the wires
working with the wires
Before crawling under the truck to install the brackets, the spare tire and metal shield will have to be removed to provide access to the frame.
While the side cameras provide a wide view, we quickly determined that they needed to be mounted as low as possible on each side of the fifth wheel and about a foot from the rear bumper for the best view of low objects that may not be visible to the top center camera.

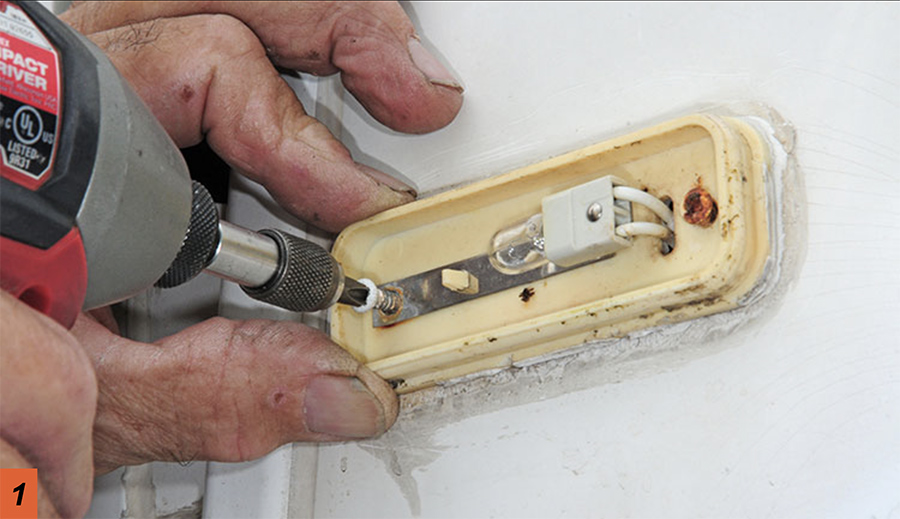
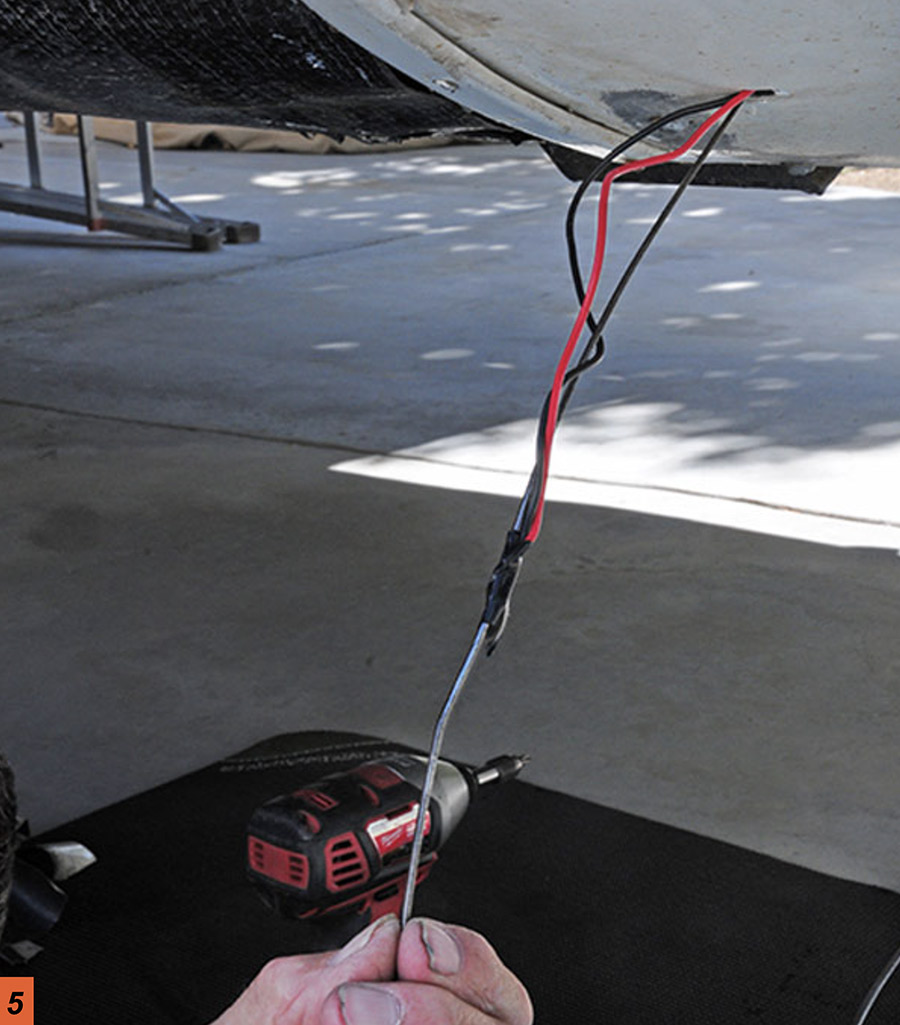
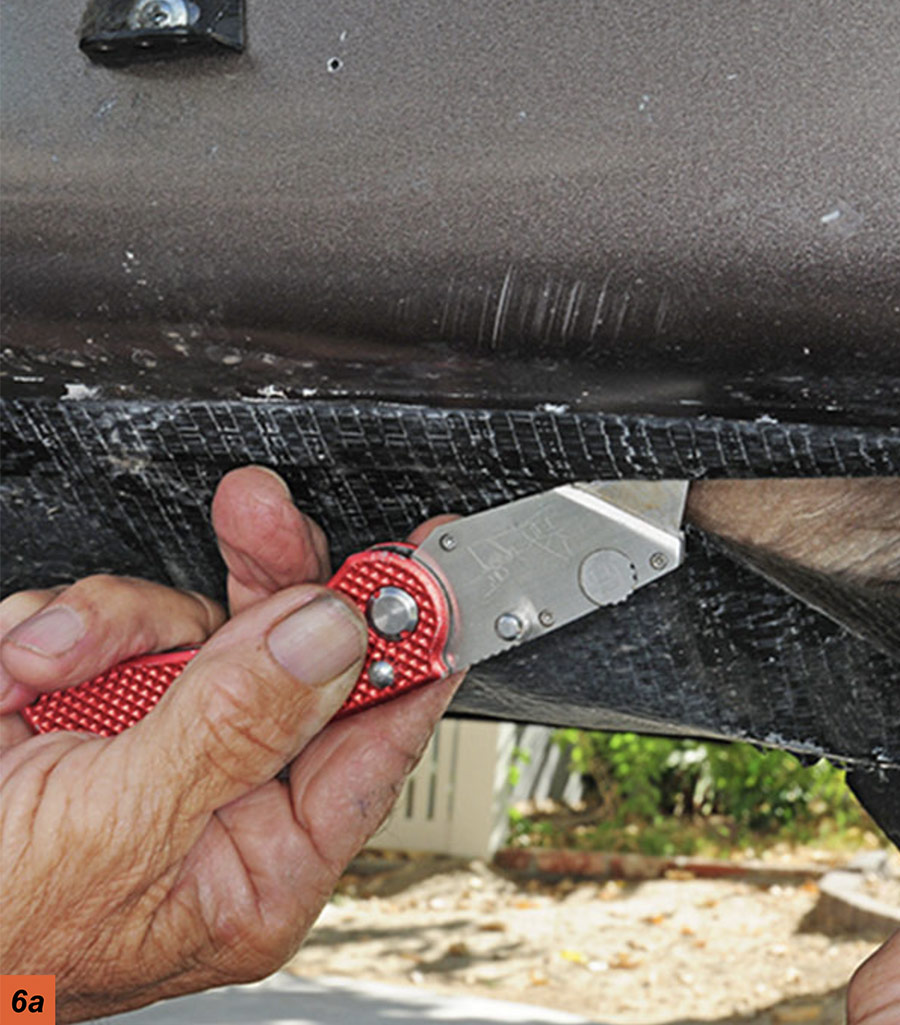
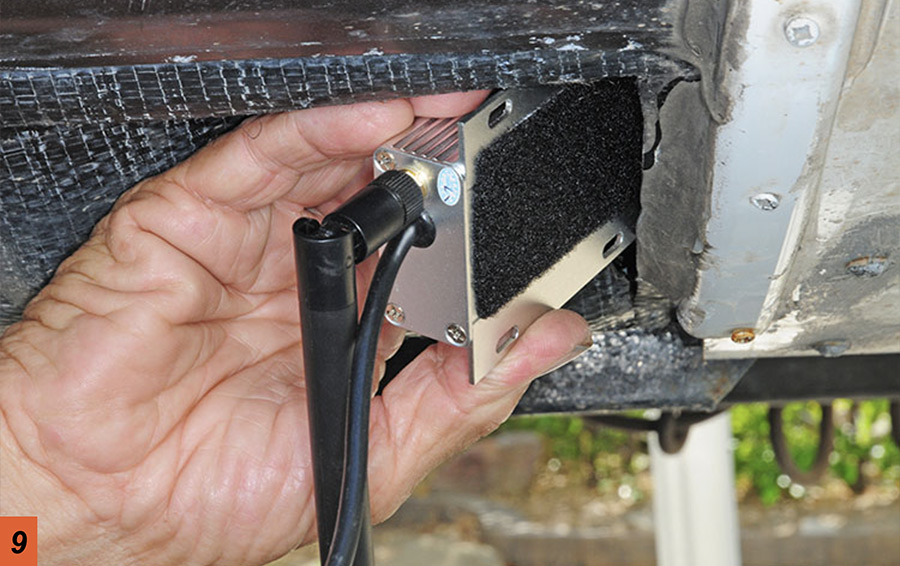
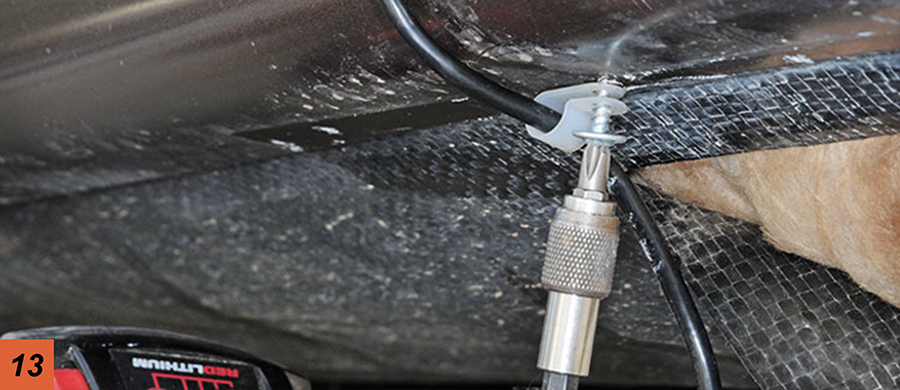
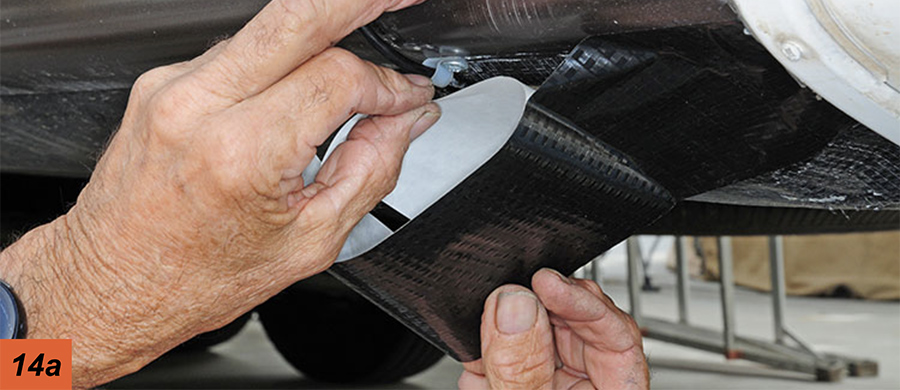
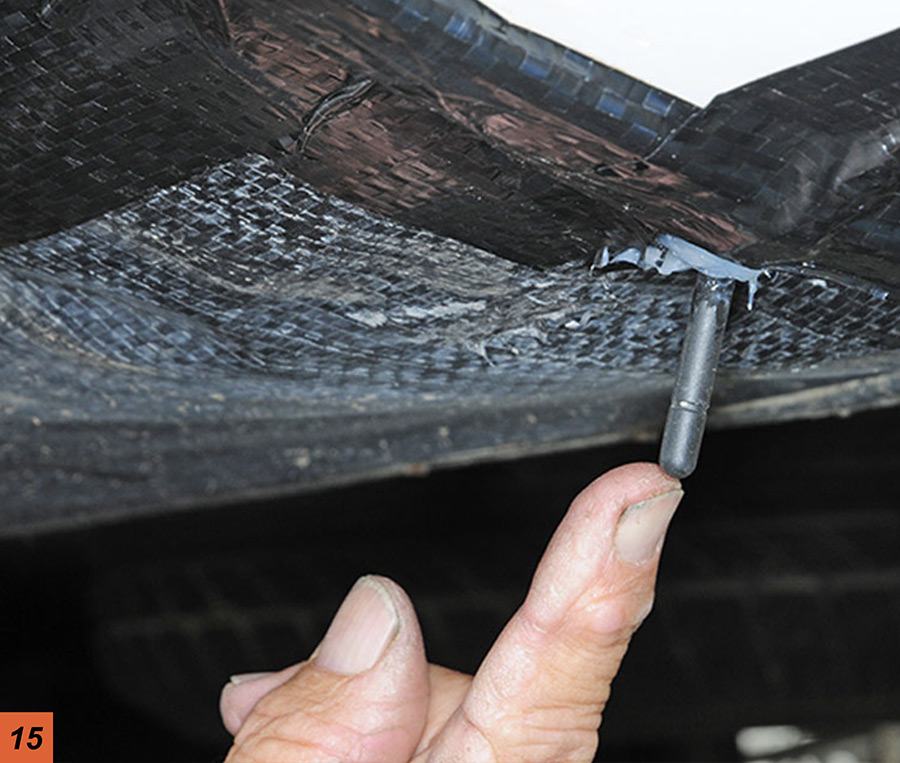
Each camera comes with a wireless transmitter and an antenna that will need to be hard-wired into the fifth wheel marker light to provide 12-volt DC power. For this installation, a section of the underbelly, close to the rear of the fifth wheel, was peeled back to expose a raceway to a nearby marker light. The plan was to hide the transmitter in this location, leaving a hole for the antenna to protrude toward the ground.

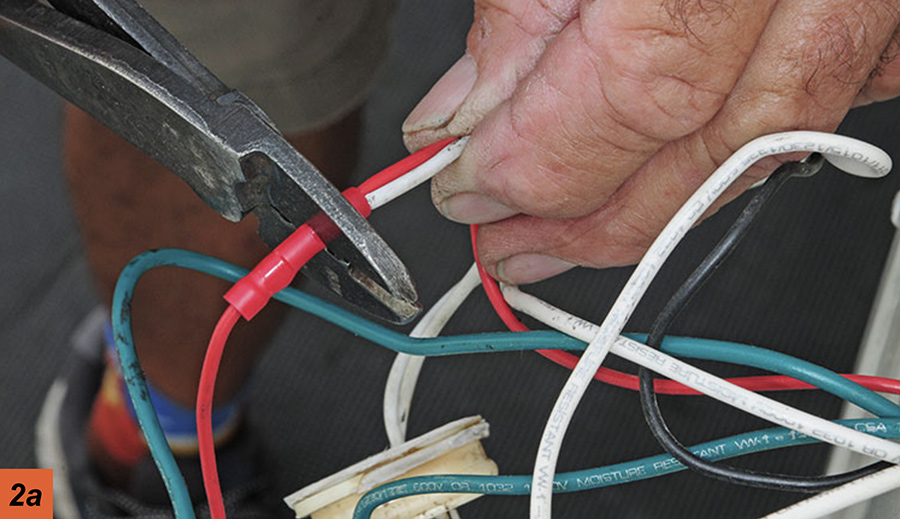
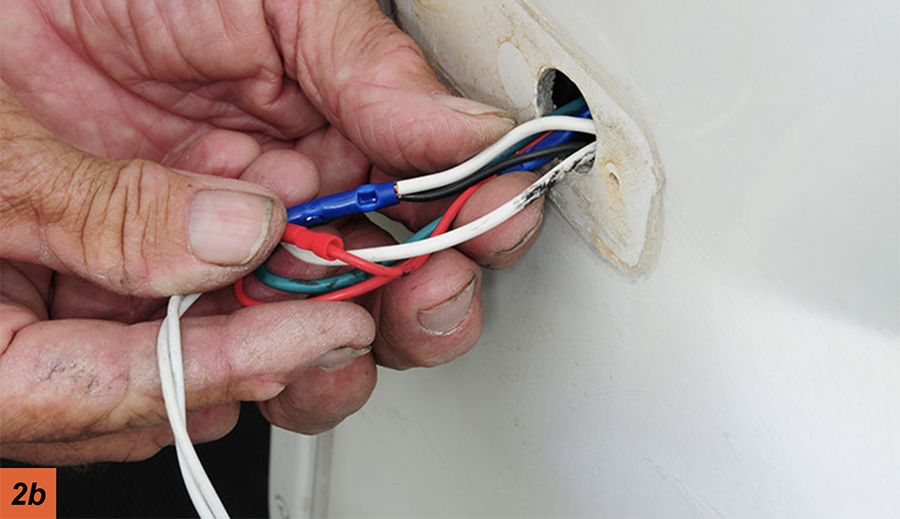
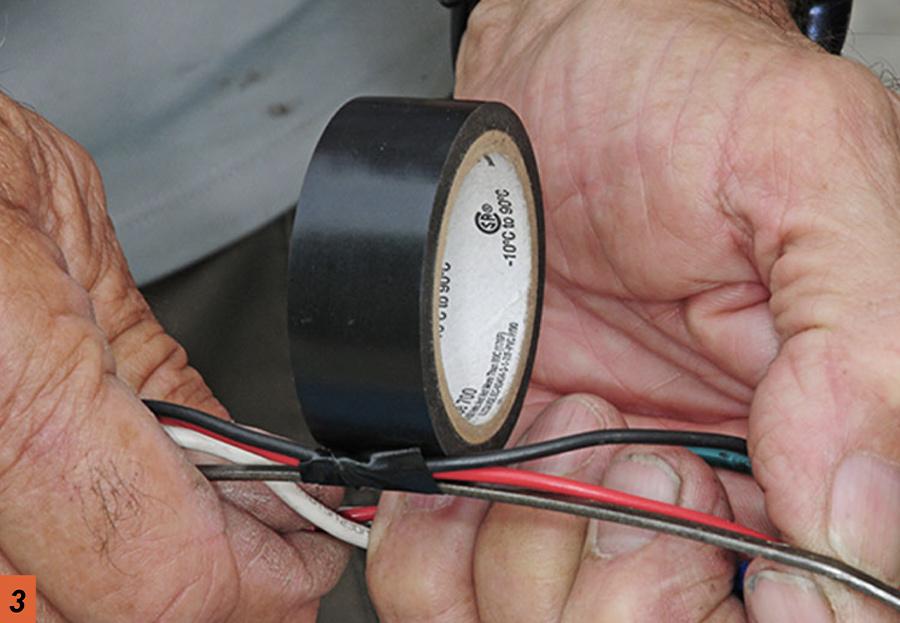
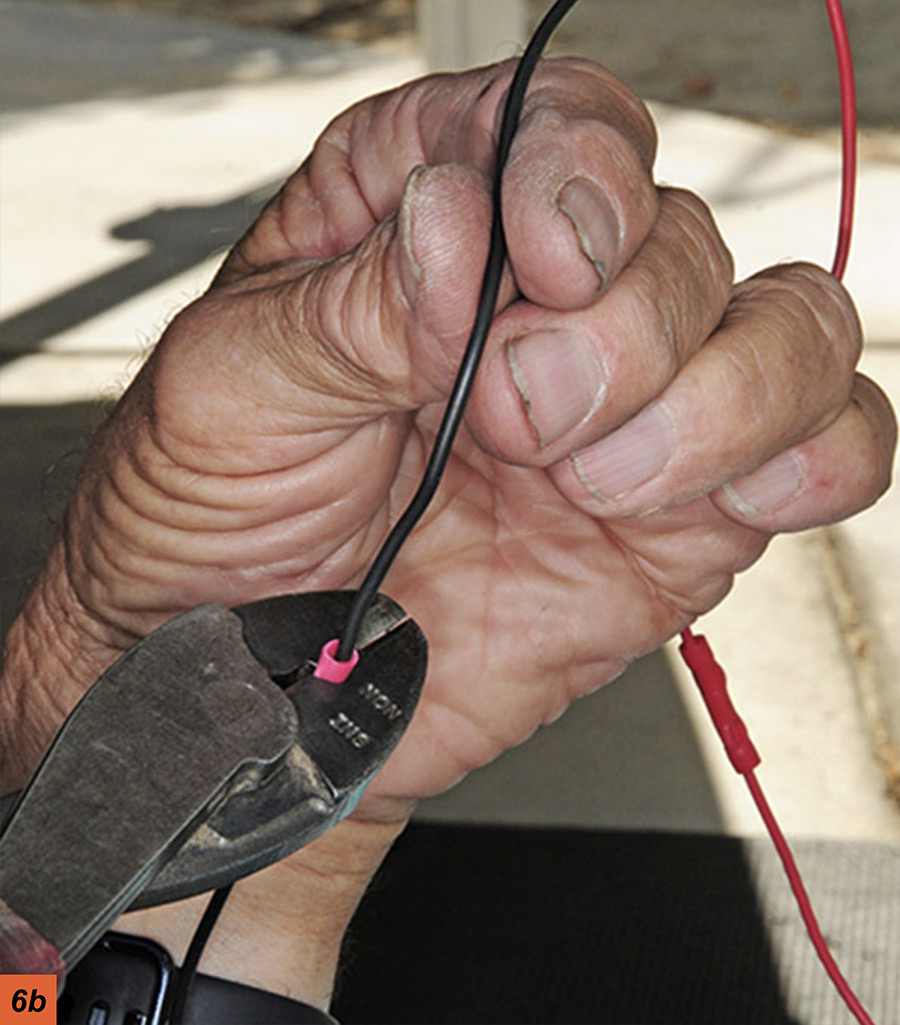
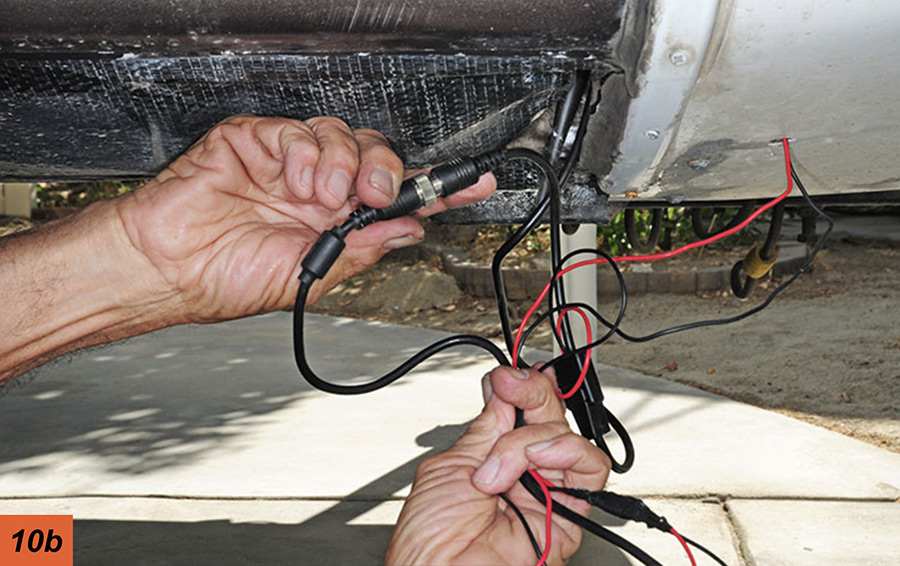
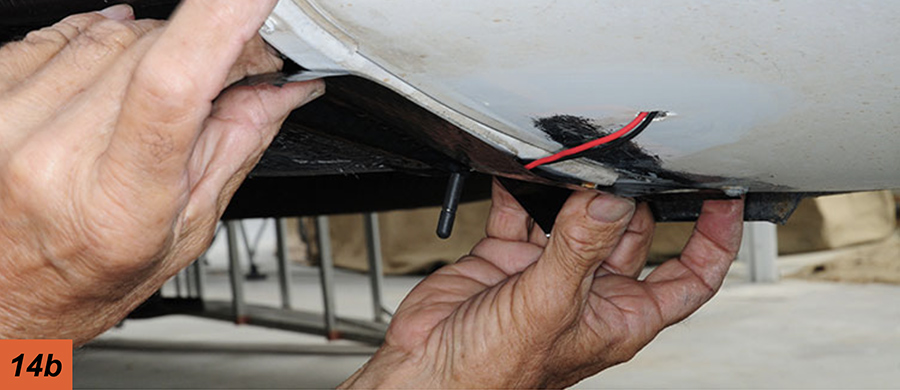
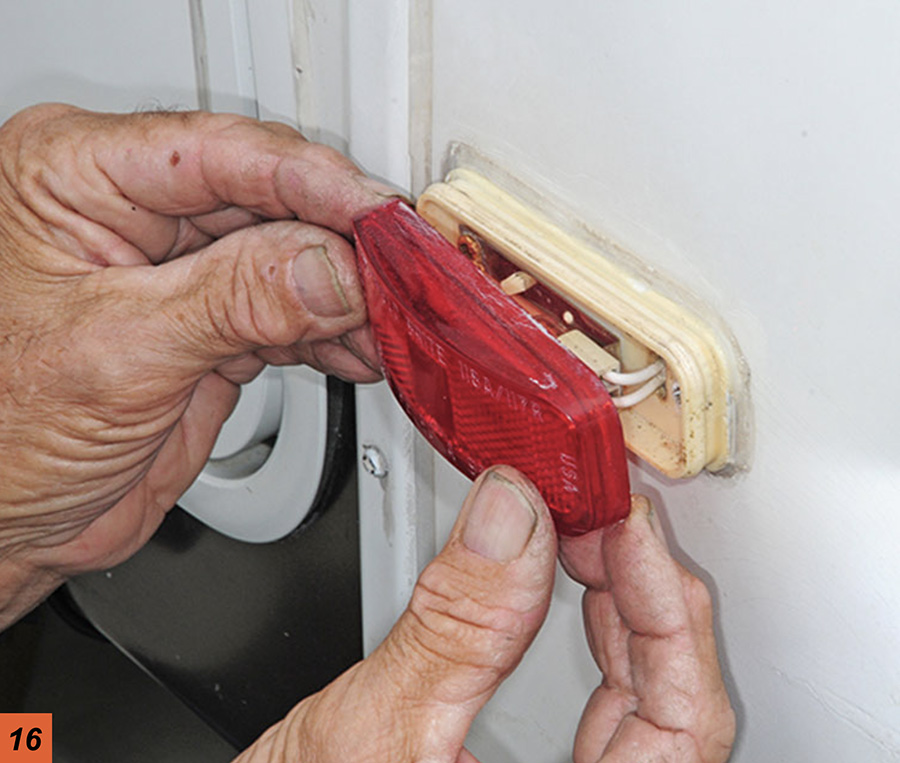
After removing the marker light base, the wires from the transmitter were fished through the opening and butt-connected after identifying the polarity. Typically, moisture will not reach the marker light, but it’s best to either tape the connectors or cover them with heat-shrink tubing. (You will need to turn on your parking lights to activate the transmitter, the same process that’s used to turn on the rear- view camera mounted on the back wall of the fifth wheel.) Once the wires were neatly bundled and attached, the transmitters were placed in the underbelly openings and secured.

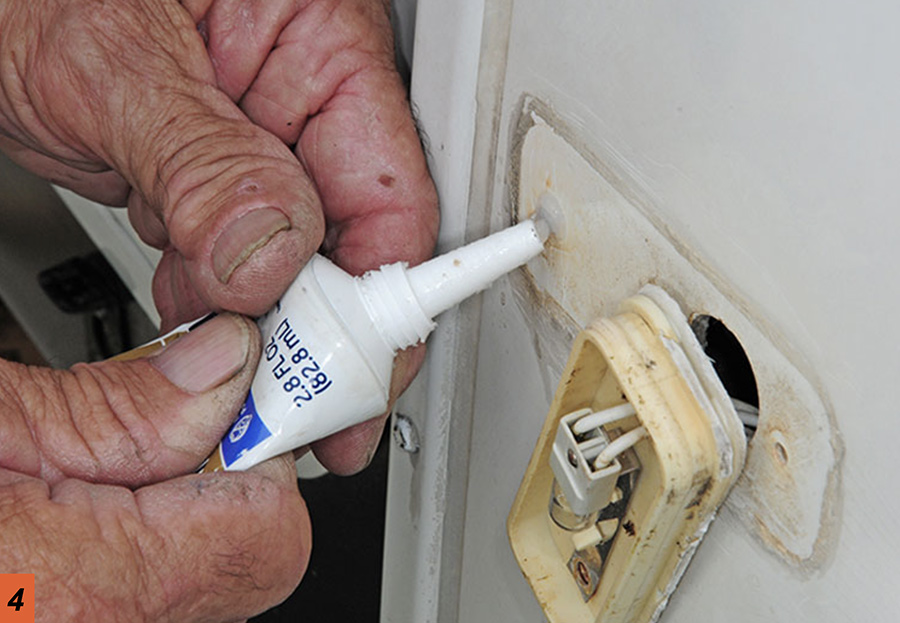
The underbelly must be sealed to pre vent water intrusion, and that’s the rub — most tapes will only stick to underbelly material for short periods of time. Mobile Home Flex Mend Belly Pan repair tape (4 inches by 45 feet; $22.49 at Amazon) is designed to stick to polyethylene underbelly material and will ensure a secure seal. Failure to protect the transmitter from moisture can lead to failures that will not be protected by the one-year warranty.

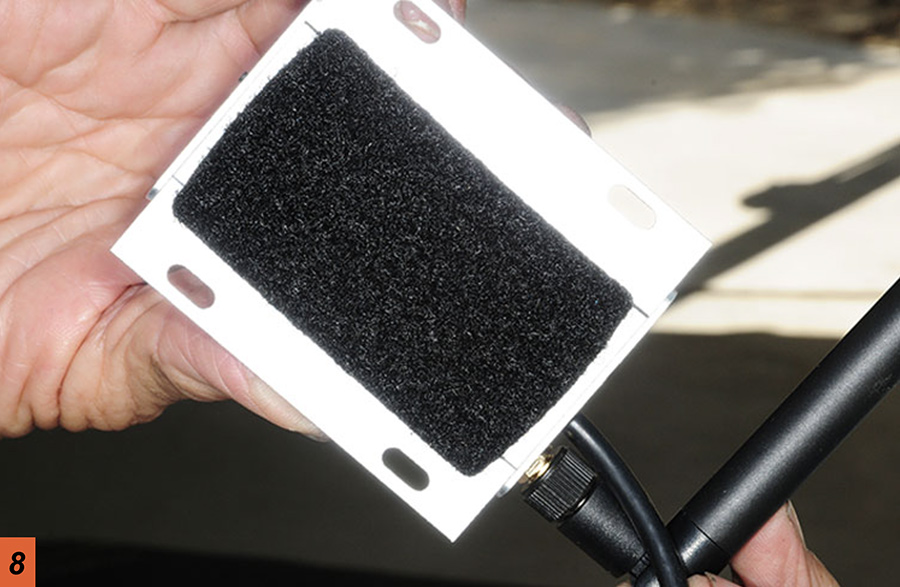
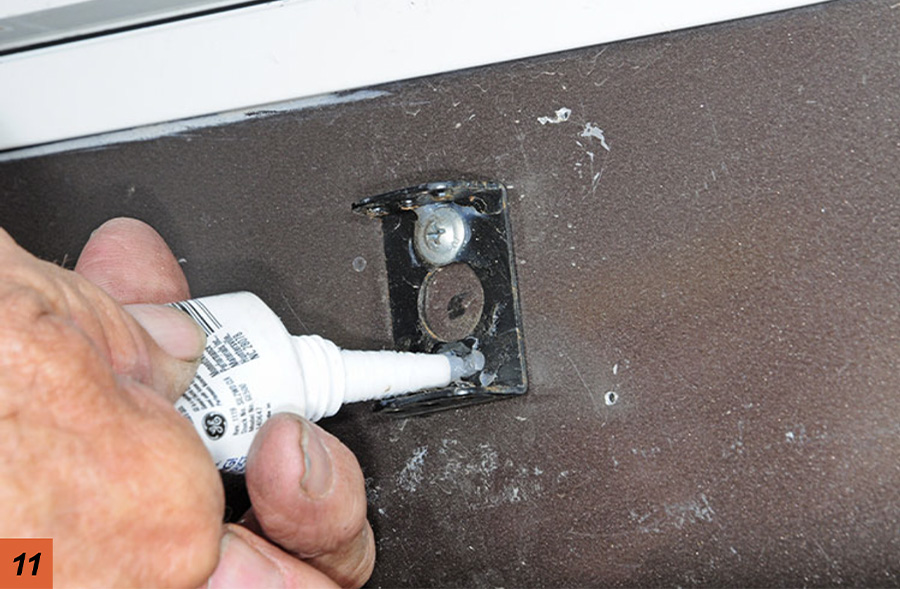
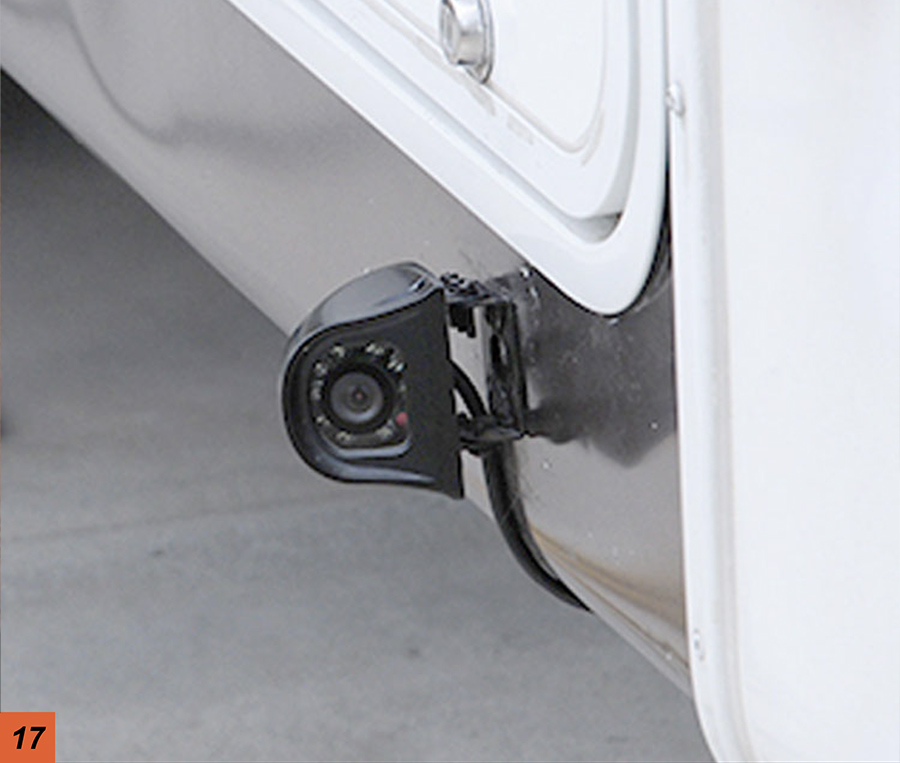
It takes some experimentation to figure out the best locations for the side cameras, which can be accomplished by duct-taping each camera in a spot that you think will give you the best view. Once you locate the best placement for the cameras — and you will have to do some backing to get there — the permanent mounting process can start. You’ll have to hookup the 7-way umbilical cord to activate the side camera and transmit images to the monitor (and, again, turn on the marker lights from the tow vehicle). Toggle between the screens and adjust the cameras for optimal viewing position and mark the locations for the mounting brackets. The brackets are slotted to allow for fine adjustments after they are mounted.

Under real world testing, the images on the screen virtually eliminated blind spots—making it possible to back into tight RV sites without a spotter and the associated stress of not knowing what’s in the way.

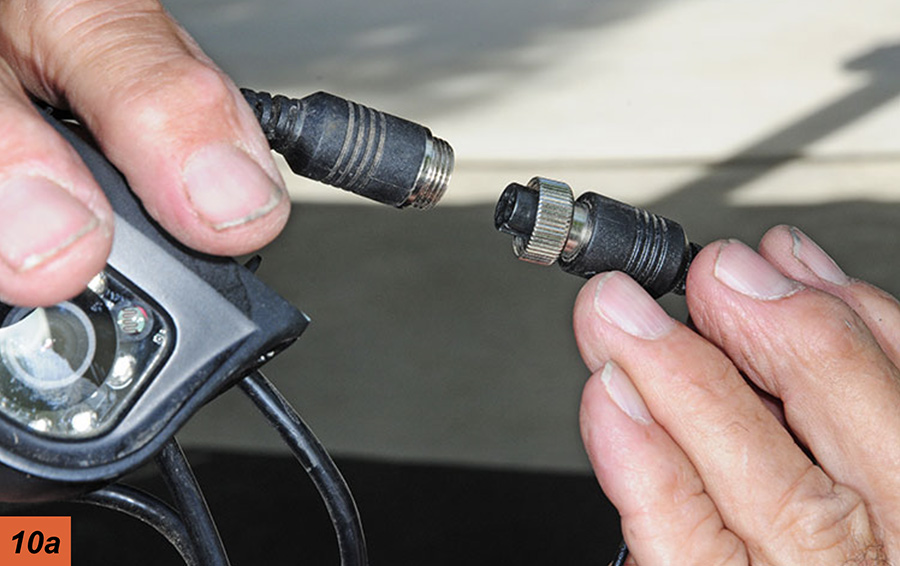
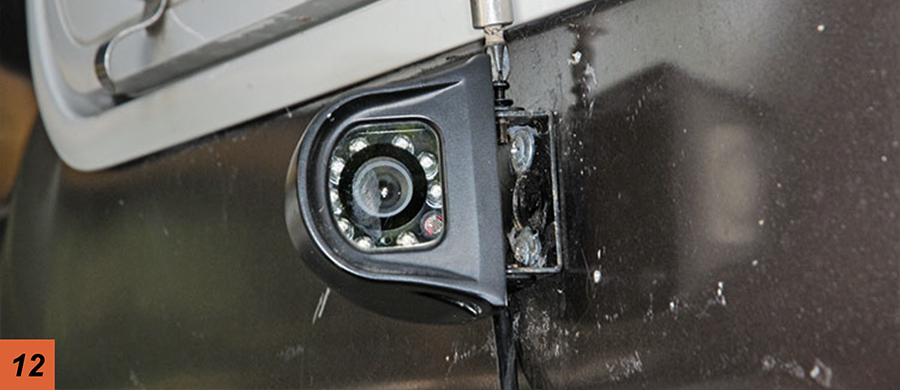
The cameras chosen for this project (RVS-DSS, right and left models; $191 each) offer a 120-degree view via a 2.1mm lens that provides 250,000-pixel-image performance. Each has nine infrared lights for vision in total darkness up to 30 feet, a shock resistant rating of 20G, which should survive even the worst roads, and is waterproof (IP68 rating). Add the cost of the side cameras to the price of the initial RVS-4Cam system ($509) and the needed tapes, and this entire project will set you back about $900. Consider it cheap insurance — and an investment in your relationships. Not to put too fine appoint on it, but it’s a lot less expensive than divorce court. Once you rely on side-view cameras to mitigate blind spots, you’ll be hooked — and the person usually tasked with trying to guide you into a tight RV site will breathe a sigh of relief.

covering the connections with electrical tape
To prevent moisture intrusion, the connections are covered with good-quality electrical tape. Shrink tubing or sealing-type butt connectors are more effective, but tape works in a pinch.
applying silicone to the holes
Silicone should be applied to the screw holes/screws when replacing the marker light bases.
routing the wiring
Wiring is routed (using a fish tape) through an opening that was cut in the fiberglass underneath the rear of the fifth wheel.
cutting an opening
connecting to the transmitter
An opening was cut in the underbelly material to mount the camera transmitter. Power leads from the marker light are butt connected to the transmitter. It’s important to maintain the proper polarity.
attaching the antenna
The articulating rubber coated antenna is attached to the metal transmitter body. The transmitter is a little on the bulky side, so take your time in finding a suitable mounting location.
hook and loop material
The transmitter is secured with hook-and-loop tape inside the opening cut in the underbelly material. It’s not waterproof, so placement away from potential moisture is critical.
showing the properly cut sized hole
Try to cut the hole to a minimum size that will allow the transmitter to be maneuvered in the opening — no sense having to patch up more underbelly material than necessary.
connecting the camera
showing connecting the wires
The camera is connected to the transmitter using a barrel fitting that is very secure and resistant to moisture. After making all the connections, the loose wiring is bundled and stuffed into the opening cut in the underbelly material.
taking the screw holes watertight with silicone
The mounting bracket for the camera is screwed into the flashing that extends below the fiberglass sidewalls. This location was determined after trial positioning using duct tape to secure the camera temporarily. Silicone is used to make the screw holes watertight.
seeing the camera attached
The camera is attached to the mounting bracket with small screws, which are not fully tightened until after final aiming.
a cable routed on the exterior
The cable from camera to transmitter is routed on the exterior to keep from making additional holes. It’s barely visible and held in place with a clamp.
applying the sealing tape
applying the sealing tape to another location
Before sealing the cuts in the underbelly, the material is cleaned with rubbing alcohol to make sure the tape will hold. Mobile Home Flex Mend Belly Pan tape, designed for use on the polyethylene underbelly, is applied to the material and small area of fiberglass where holes were cut.
seeing the antenna poking out
The transmitter was mounted so that a portion of the antenna sticks out from the underbelly. Any gaps in the material were filled with silicone.
the red light lens
The red lens is snapped back on to the marker light base, completing the job.
looking at the camera mounted
Wireless cameras were placed strategically on both sides of the fifth wheel to provide the best possible views and eliminate blind spots. Camera is waterproof and shock resistant.
the different views on the viewing monitor
full screen image on the monitor
The monitor can be switched to display views of both sides of the fifth wheel and views to the rear. If desired, a full-screen image can be set to give the driver more detail. This comes in handy if obstacles are smaller or hard to decipher.
Sources:

Rear View Safety
(800) 764-1028
www.rearviewsafety.com

Get Updates
Subscribe today and never miss an issue!
Get all the latest tips and news to keep you moving on that open road!
RV Enthusiast January/March 2024 Issue
Current Issue
January/March 2024
Spring is back in bloom and with it we are proud to present our latest issue of RV Enthusiast! The January/March issue covers furnace failures and how to fix them, the best batteries for boondocking, quick and easy weekend projects, PLUS so much more!

Already a Subscriber? Click here for Access to the Full Issues.

Share This