Technically Speaking – Q&A: April 2023
Up On the Roof
I have a 24-foot Winnebago Class C motorhome with a fiberglass roof. I noticed that it’s showing its age with some of the fiberglass thread showing. I would like to take care of the problem before it gets too big, since the motorhome otherwise is still in perfect shape. During my research, I have seen a lot of suggestions on how to fix the fiberglass and would like to know the best way to approach this repair.
— Rafael Sanchez
Fiberglass does get a little rough over time, especially if the roof has not been maintained properly. It’s best to keep it clean and treated to a coat of wax or other surface conditioner at least twice a year if the rig is exposed to sun and other outside conditions. Having said that, even though it’s not looking great it’s still going to last a long time.
If you’d like to bring it back to life, professional detailers will cut the surface with a buffing compound and add a coat of wax to bring it back to life — but it’s going to be slippery and potentially unsafe to walk on to service rooftop accessories and inspect for breaches in the caulking/sealant. Depending on the extent of the damaged area, you can consider painting the roof with a high-quality marine paint; with the proper primer and preparation, the paint will last for many years. If you want to provide safer footing, consider adding some sand or an anti-slip material in the paint.
Of course, you can always cover the damaged area with Eternabond tape, as long as it is contained and out of sight. Eternabond is available at many RV supply stores and online. And while you’re up there, inspect the roof caulking (sealant) to make sure there are no breaches before starting any project to repair the fiberglass. This is another area where Eternabond tape can work wonders.
If you plan on keeping the rig for a long time, the ultimate fix is to replace the entire roof with new material from companies that specialize in such services. Here are some websites to check out: rvroofingsolutions.com, rvroofingpros.com, rvroof.com, crazyseal.com, rv-armor.com.
Sucking Up the Dirt
We need a new vacuum cleaner in our 40-foot motorhome now that we are living in full time. We brought one of our small upright vacuum cleaners from the house and it’s worked fairly well but technology is definitely changed and there are so many new options. Some of these vacuums are really expensive, so we don’t want to throw our money away on products that really don’t work, and more importantly, not suitable for RV use. We also need to consider storage options. I thought maybe you would have some great ideas since you are a full-timer.
— Jolene Thompson
Jolene, I think we’ve all been there. It’s bad enough trying to keep up with cleaning dirt that accumulates quickly when you’re in campgrounds without paved surfaces, and when you’re off the grid, dirt is a bigger part of the primitive lifestyle.
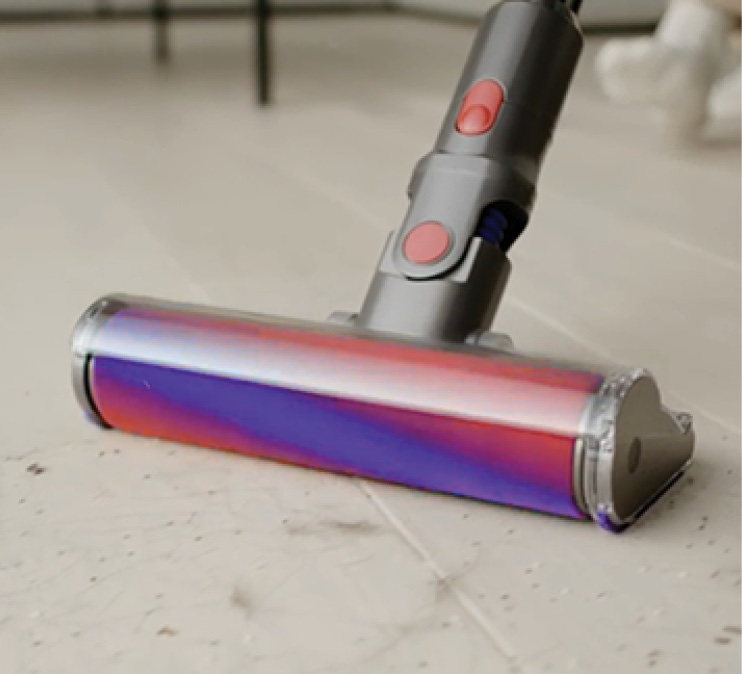
Cordless vacuums are definitely the way to go; they’re easy to handle, quick to access and they can be used for other jobs outside the RV, like cleaning up spills on the patio mat or the floormats/carpet in your tow or dingy vehicle. I personally have a Dyson V8 Absolute model with all of the accessories (dyson.com). One of the most useful tools is designed for cleaning wood or vinyl flooring — the most popular materials used in RVs these days. The crevice tool is indispensable and the extensions snap in quickly and prevent bending over and stressing your back. And it hangs on the wall using little space, so it’s out of the way and always handy. The power of the Dyson cordless is probably unbeatable. Granted, it’s on the pricey side at around $500, but I don’t think you’ll regret the decision.
That said, there also are other cordless vacuums out there that will probably do the job — I know someone who bought an off-brand cordless stick vacuum that has, he said, decent suction, a four-stage filter and has a solid 4-star rating on Amazon (with more than 7,000 ratings). It’s only rated at 180 watts — about half of the Dyson’s 350 watts — but he spent less than $100.
If you prefer something with a cord, there are many small uprights that have the capability of vacuuming carpeting, wood and/or linoleum floors. You definitely should look for a model with a hose so you can vacuum cupboards or your vehicle, which undoubtedly is going to get filled with dirt from your feet. I’ve also seen some owners use small shop vacs. While they are on the crude side, they are usually “bulletproof” and offer a lot of suction. Plus, they are easy to empty.
It’s Not Cool to be Hot
— John Spielman
John, you’re not alone when it comes to suffering from uncomfortable inside temperatures while camping in areas with extreme heat. One of the easiest fixes is to insulate your windows with a bubble-type insulation purchased at most home improvement stores; these can be rigged up temporarily and will help control heat. Cover the inside of your roof vents with special pillows designed to be stuffed in the frame; these really help insulate against heat, considering the only separation between the outside sun heat and the interior are thin plastic lids that so nothing to control heat.
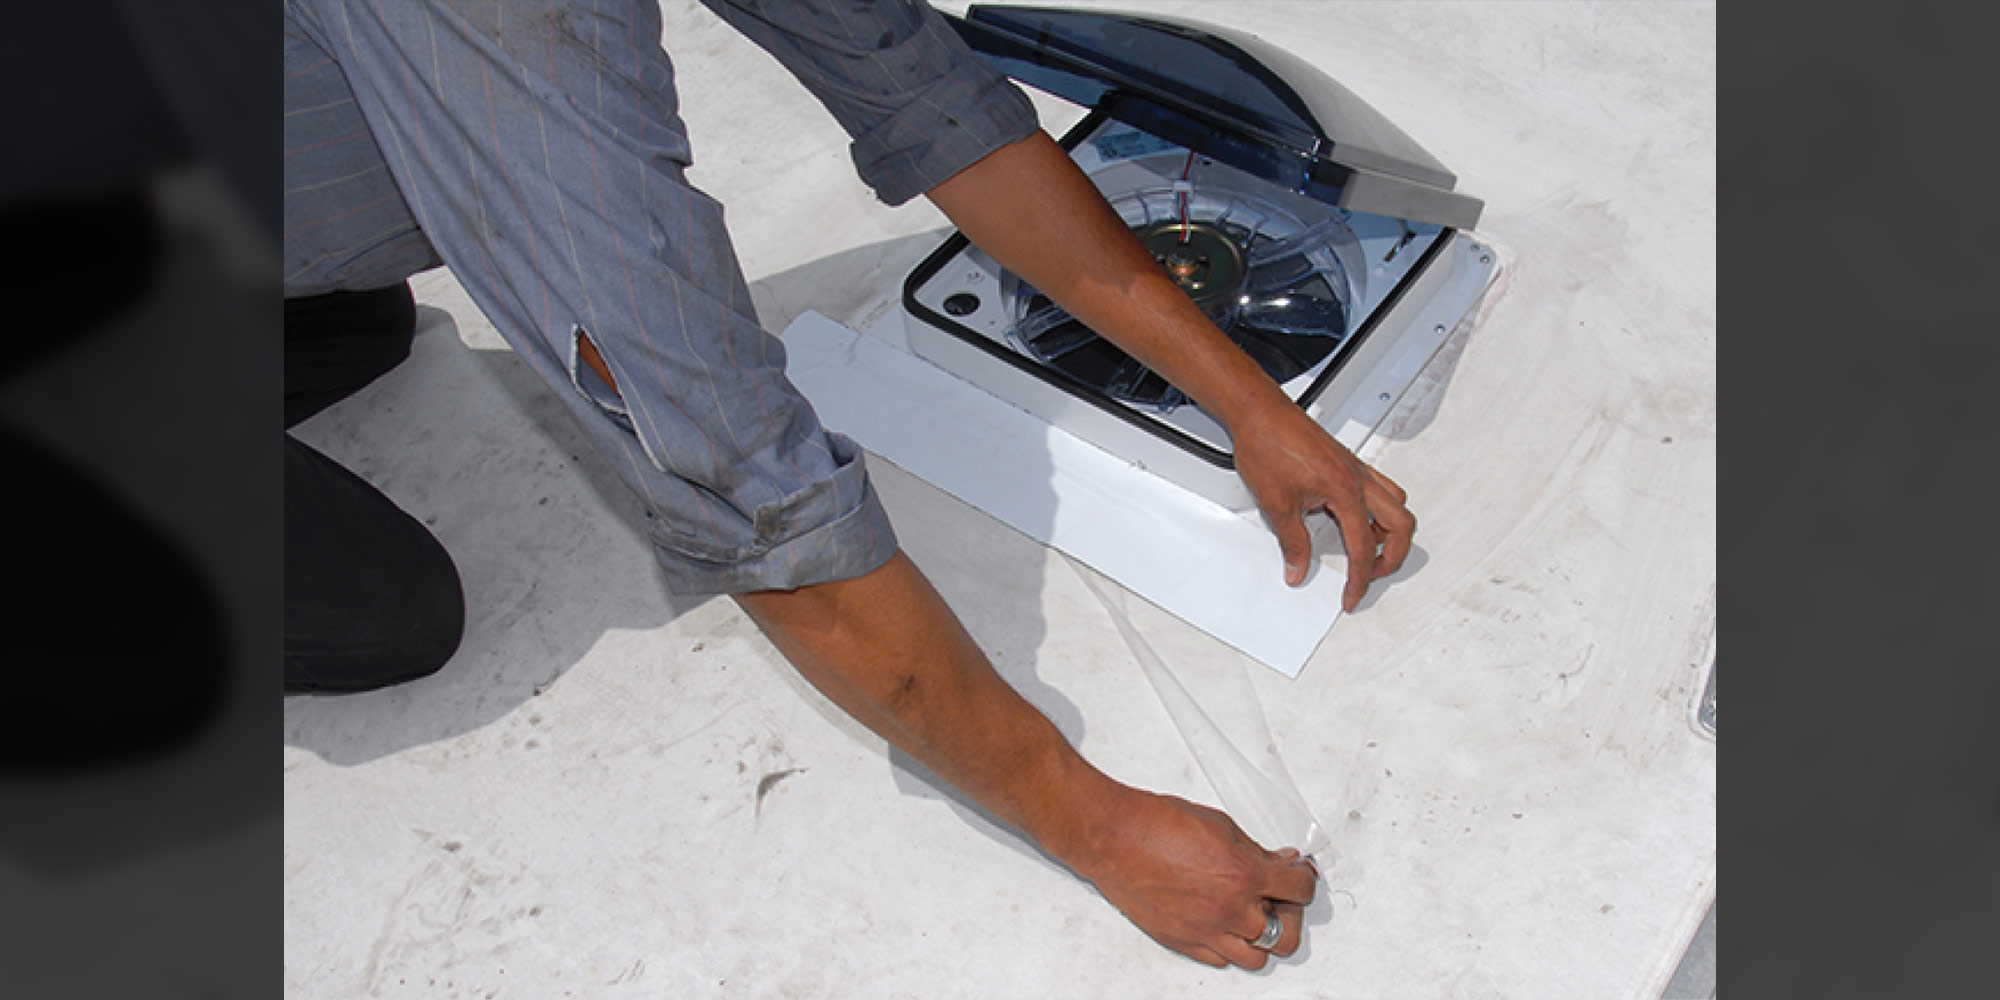
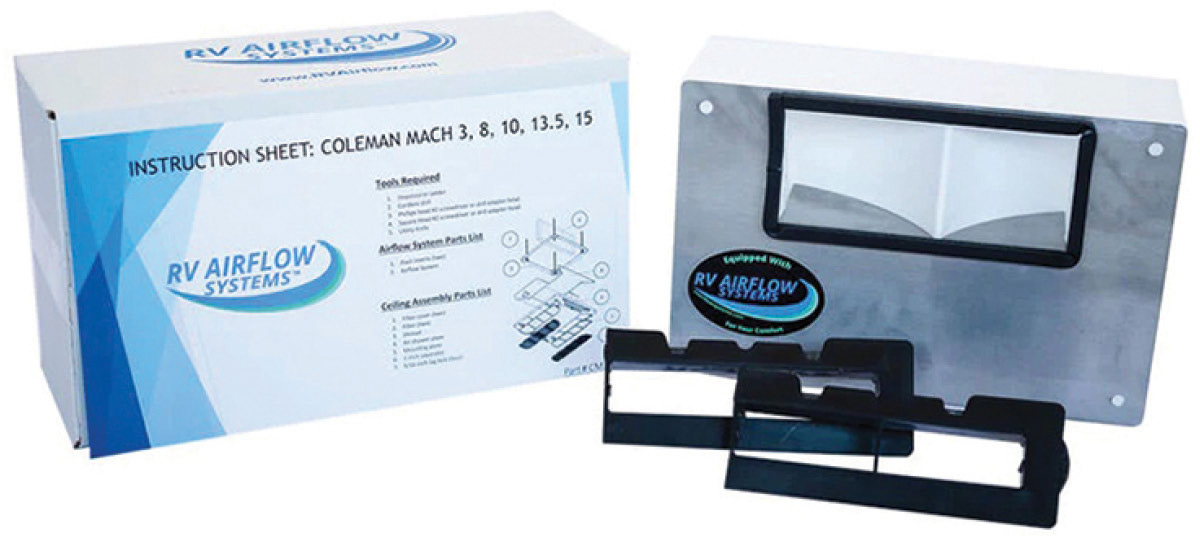
You didn’t mention whether or not you had slideout rooms; if so, you can install a slide-out topper awning on each one to provide some shade and help with intense heat soak from the sun beating on the roof/ceiling that may not be insulated as well as the sidewalls. Also, extending the patio awning will help during some of the day. I would also suggest modifying the air-conditioner plenum with a kit from RV Airflow Systems (see “Rapid Cooling” in this issue). It will surely improve efficiency. No matter what, turn on the air early in the morning to start the cooling process before the day gets hotter.
If you spend a lot of time in hot climates, consider installing a second air-conditioner. Most fifth wheels are already wired for this purpose.
Getting a Little Foggy Inside

I totally disagree with that diagnosis, since we plan on keeping the RV. Their second option was to break the window and put in plexiglass, which is absolutely ridiculous for such a large window and probably not even practical for the smaller windows. I did go online but it’s mind-boggling to take in all the options. What would you do?
— Douglas Epstein
Douglas, I have personally been there, and I’ve seen many RVs with fogged-up windows. You’re right; they are ugly. Usually, a fogged-up window is the result of poor manufacturing or flexing of the body of your RV, which can break the seals and allow moisture to get between the panes. This can be especially prevalent with larger picture windows, but even the smaller ones are not immune. As the sun beats on the windows more moisture is drawn in between the two panes of glass.
There are really only two viable options: Replace the entire window — which, as you found out, is very expensive — or there are several places around the country that will remove the window, take it apart, clean out the moisture (fogging) and reseal the panes to prevent future fogging. This is a much cheaper option, and in most cases, these companies will make the window better than it was when new.
If you are on the road, you probably can find service centers across the country that offer this service, and you can find most of them when searching on the Internet. Some of these companies set up booths at shows and rallies, and many dealers offer this service through independent contractors. Just keep in mind that you’ll have to remove the window and ship it to the repair center if you’re not in an area that offers this service.
As ominous as that sounds, however, removing a window is not that difficult and shipping to and from these facilities is done all the time. The only exception is crating and shipping huge windows, which are better repaired at a local facility during travel. In the end, it may still be cost-effective when compared to replacing the window(s).
It’s at most inconvenient, but in the end, you’ll have a window that looks new again, and no more blurred vision when looking out.

Already a Subscriber? Click here for Access to the Full Issues.