Keeping the Air Flowing Freely - RV Enthusiast Magazine

Keeping the Air Flowing Freely

by | Aug 31, 2023 | Climate control, Electrical, Repairs and Upkeep

Photos by the author

Regular air-conditioner maintenance will keep the air flowing and cool. Failure to take the time to assure proper function will lead to poor efficiency and reduced cooling.

Summer heat drives most of us inside our RVs where, fortunately, the air-conditioner(s) purrs away, dropping the temperature to comfortable levels. It would be nice if all we ever had to do was turn it on and set the thermostat, but that’s not reality. Neglecting air-conditioner maintenance can lead to poor performance or even total failure — and if Murphy has anything to do with it, failure only happens when the temperatures are extreme and the interior feels like an inferno.

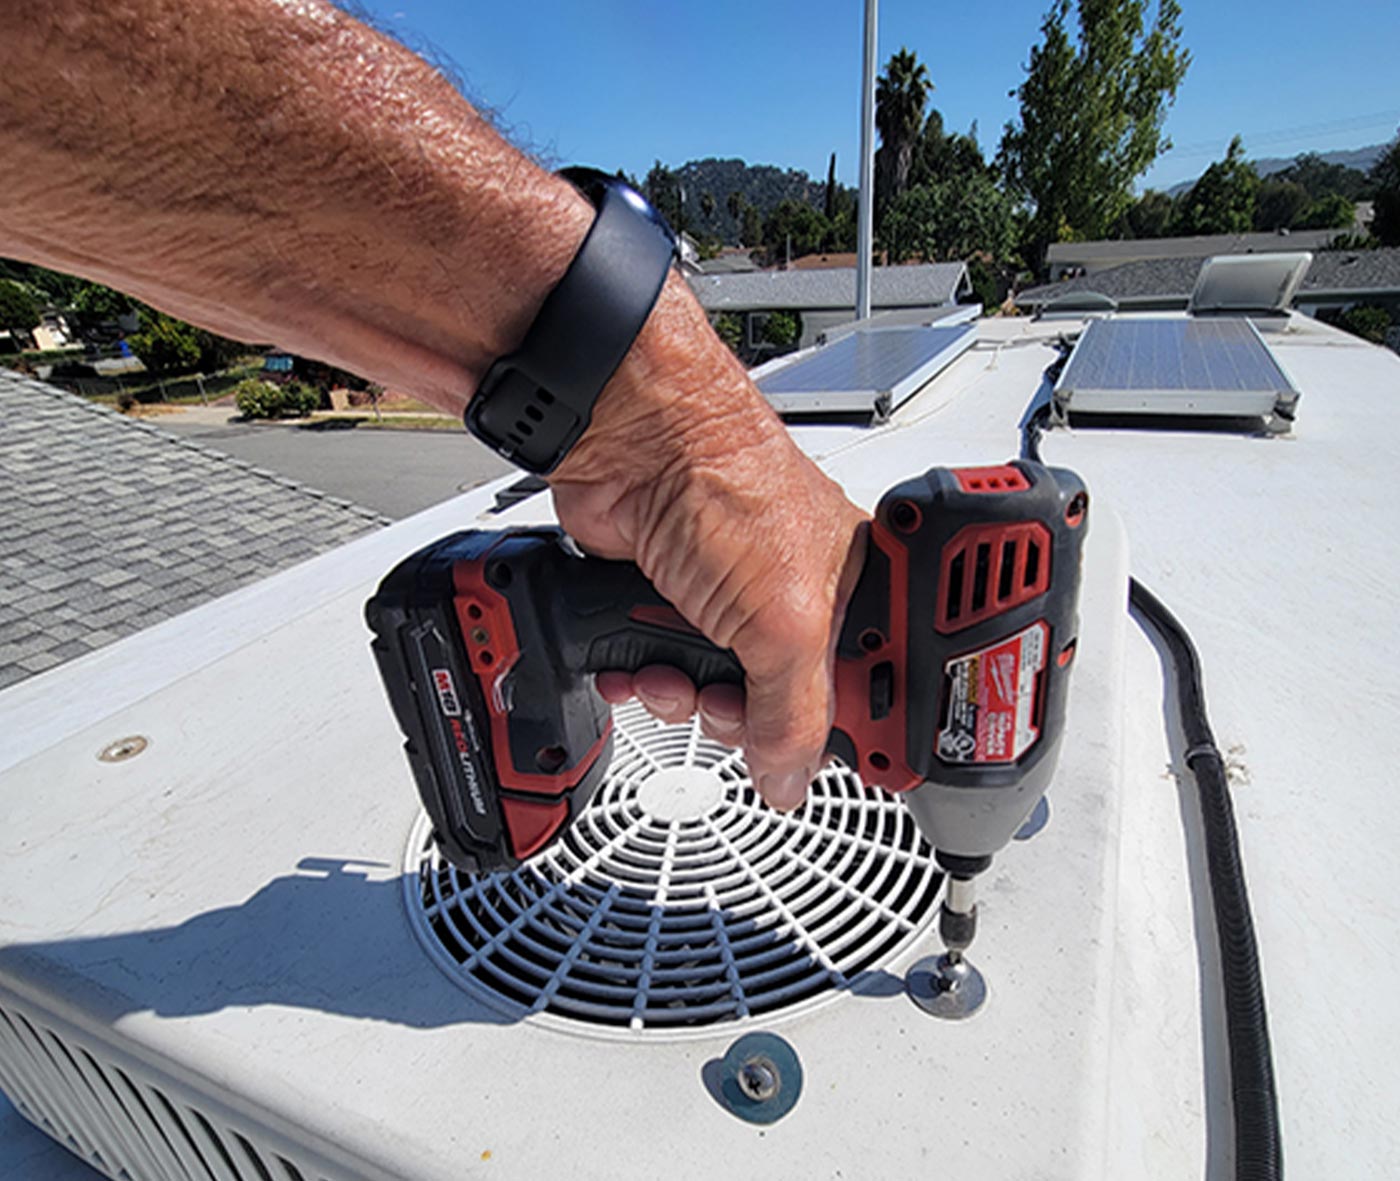
Fortunately, the maintenance checklist is not that long and many do-it-yourselfers can do the work themselves, unless they are not comfortable on the roof of an RV. Keep the A/C clean and you can realize big hikes in performance.

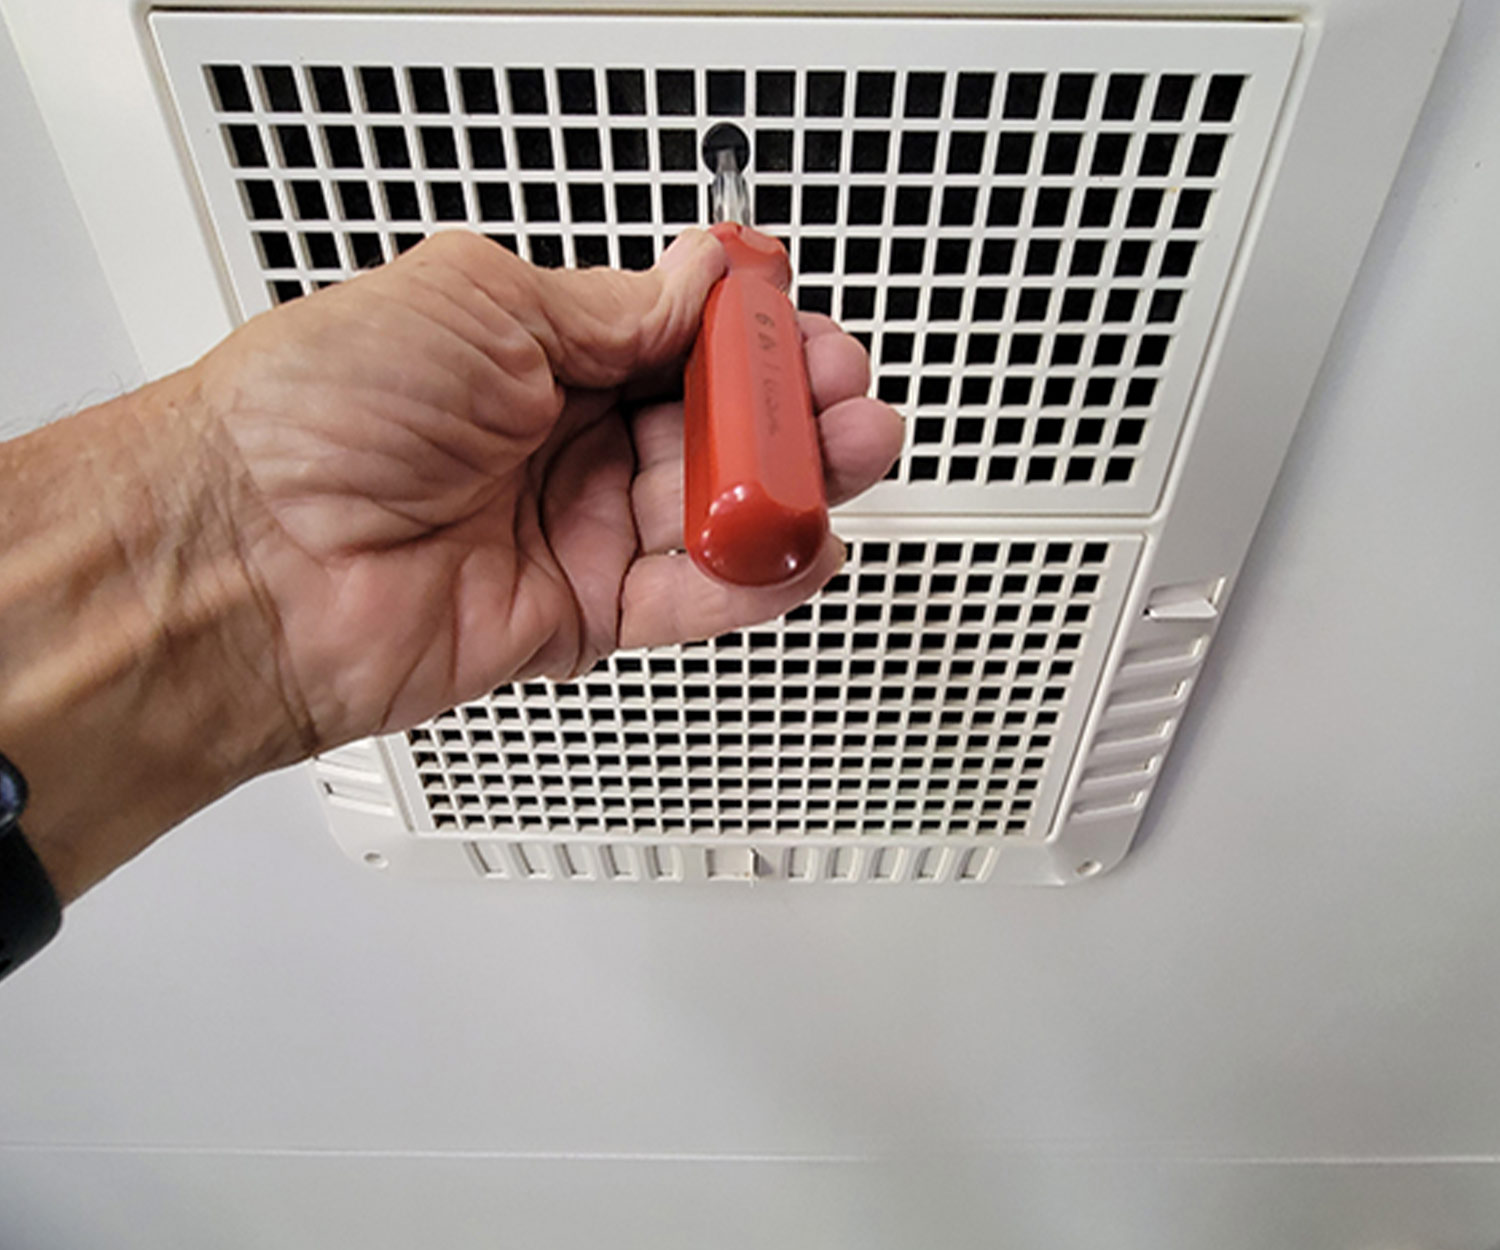
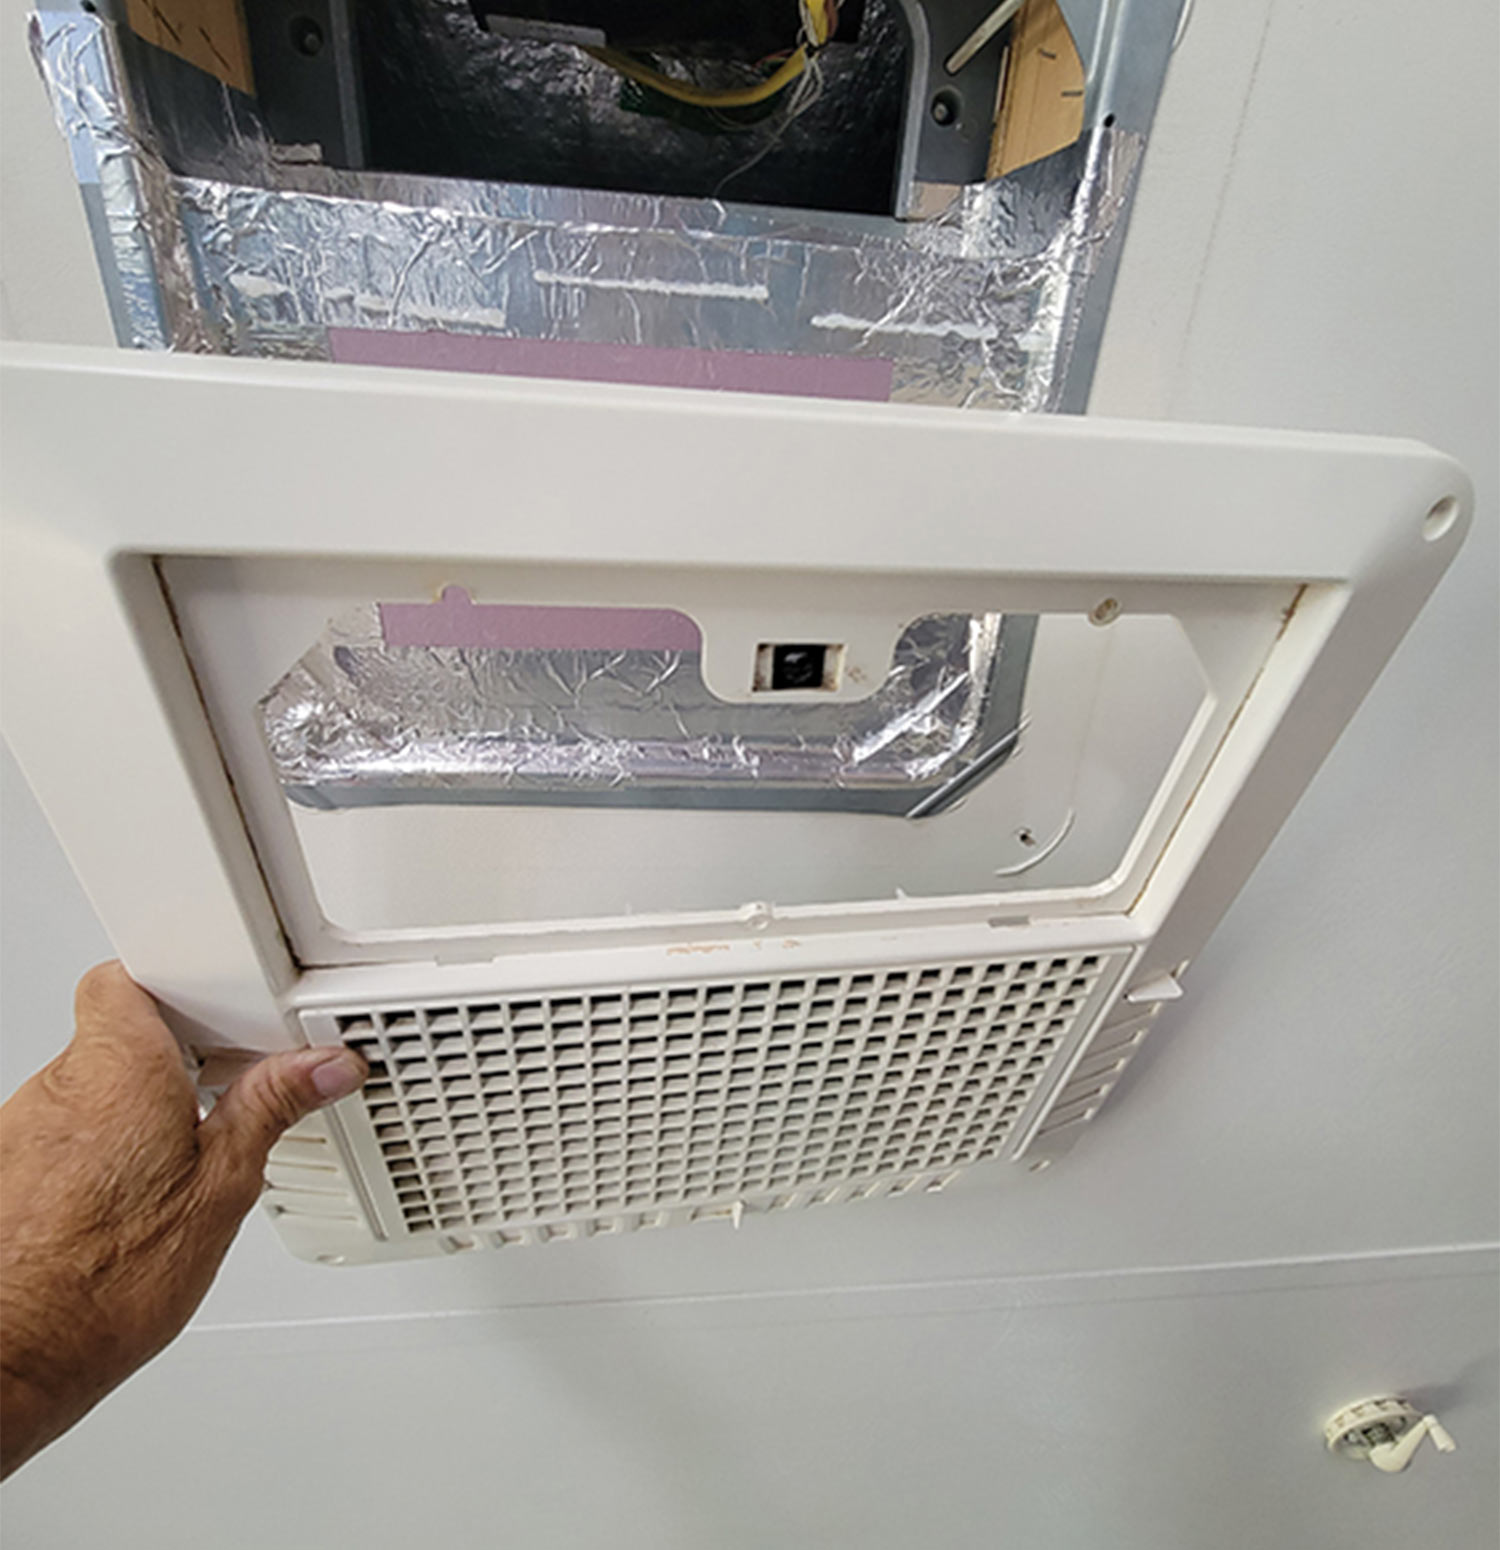
In its simplest form, cleaning the return air filter(s) reaps big rewards, unless there is a component failure. Typically, all you need is a little soap and water to clean the filters. These filters are attached to the air-distribution box (ADB) and are easy to remove for washing.

Keeping the return-air filter clean also keeps most contaminants from clogging the evaporator, which over time will certainly reduce the efficiency of the air-conditioner. During heavy use the filter should be cleaned every three to seven days, depending on the climate and the amount of dust, pollen and debris that’s in the air — and that includes particles stirred up by moving rugs or towels. You’ll be amazed how much stuff is picked up from the inside of the RV, even with all the windows closed. Even cooking in a closed RV can add grease to the filter(s) and the evaporator (which is why it’s smart to always run your stove’s exhaust fan while cooking and running the air-conditioner).

Aftermarket filters offered by RV Air are designed to trap airborne contaminants and help relieve allergy symptoms for some people, and the company’s filters with activated carbon will also remove odors. RV Air filters are generally available to Coleman-Mach and Dometic air-conditioners. Owners of other brands may be able to make the generic filters work — just check with the company first. RV Air’s filters have a MERV (minimum efficiency reporting value) of 6, which will block particles larger than 3.0 microns (rated at 3.0-10 microns). A Merv 6 rating will not reduce the efficiency of your air-conditioner, but a filter with a Merv 15 rating, for example, will drastically restrict the air flow to the evaporator. The rule of thumb is that the supply air should be equal to the return air into the evaporator. Filters are also available for ceiling-mounted registers.

cleaning tools on disply including a container of Nu-Calgon evaporator foam, Coil King Condenser Coil cleaner and a dishwashing wand
There are a couple of ways to go when it comes to cleaning the evaporator or condenser. The “least messy” is using Nu-Calgon evaporator foam (on right) that doesn’t require rinsing with clean water. Before the no-rinse spray came around, Coil King Condenser Coil cleaner (center) was the best stuff to use (it works well but makes a mess). A dishwashing wand makes short work of the cleaning process.
One area that is often overlooked is the condenser, which is located under the shroud covering the air-conditioner on the roof. Service starts by removing this shroud, which is usually held in place by a few, easy-to-reach fasteners. Once the shroud has been removed, you will see the condenser (a set of aluminum fins that is located near the exhaust fan blades). You’ll also see some wiring, the compressor and maybe a control box, depending on the make and model of the A/C.

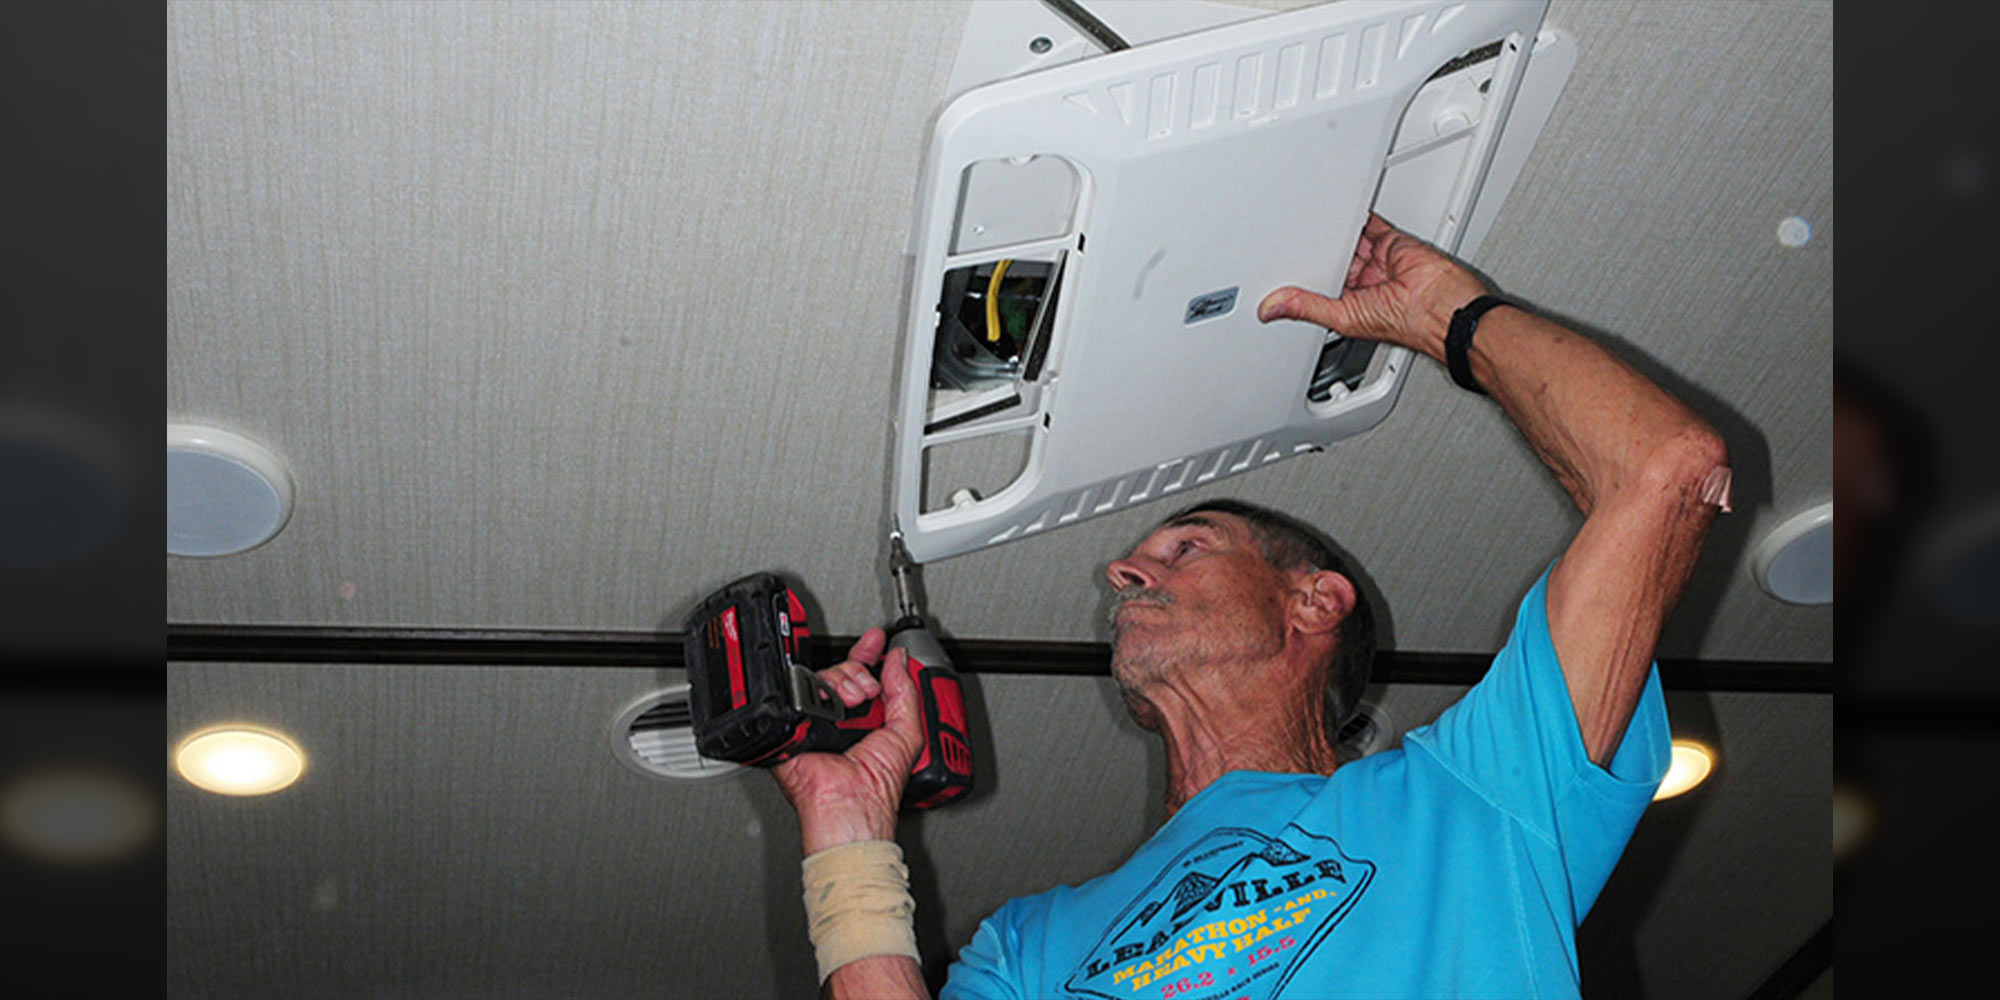
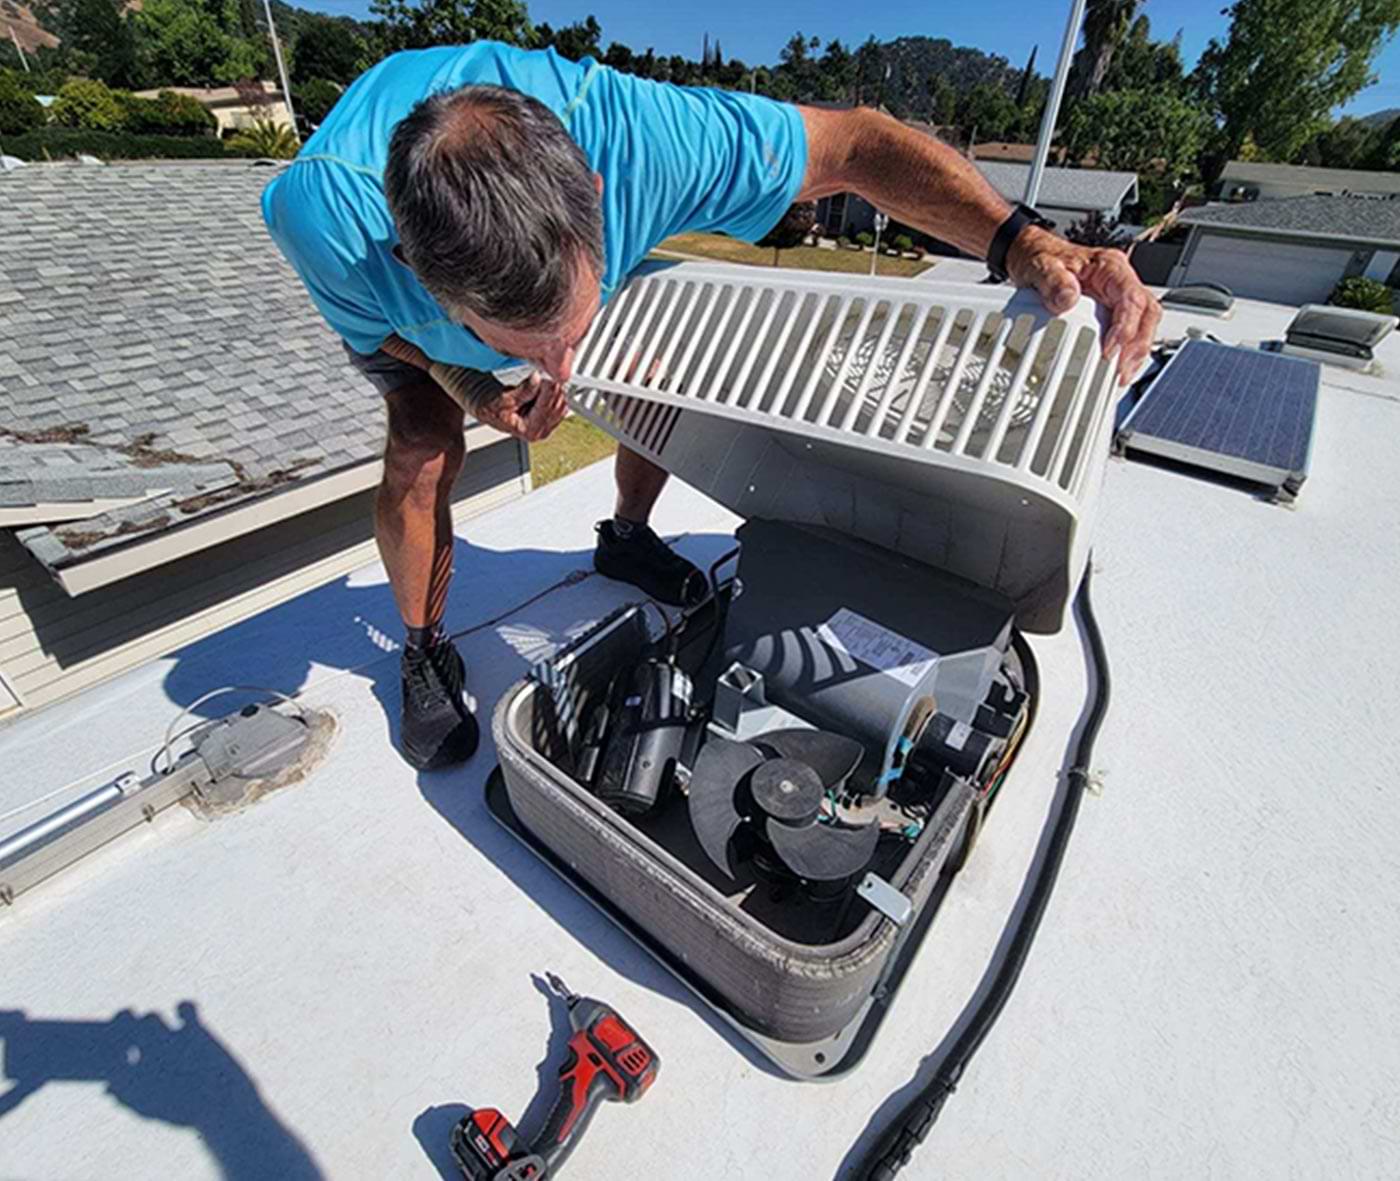
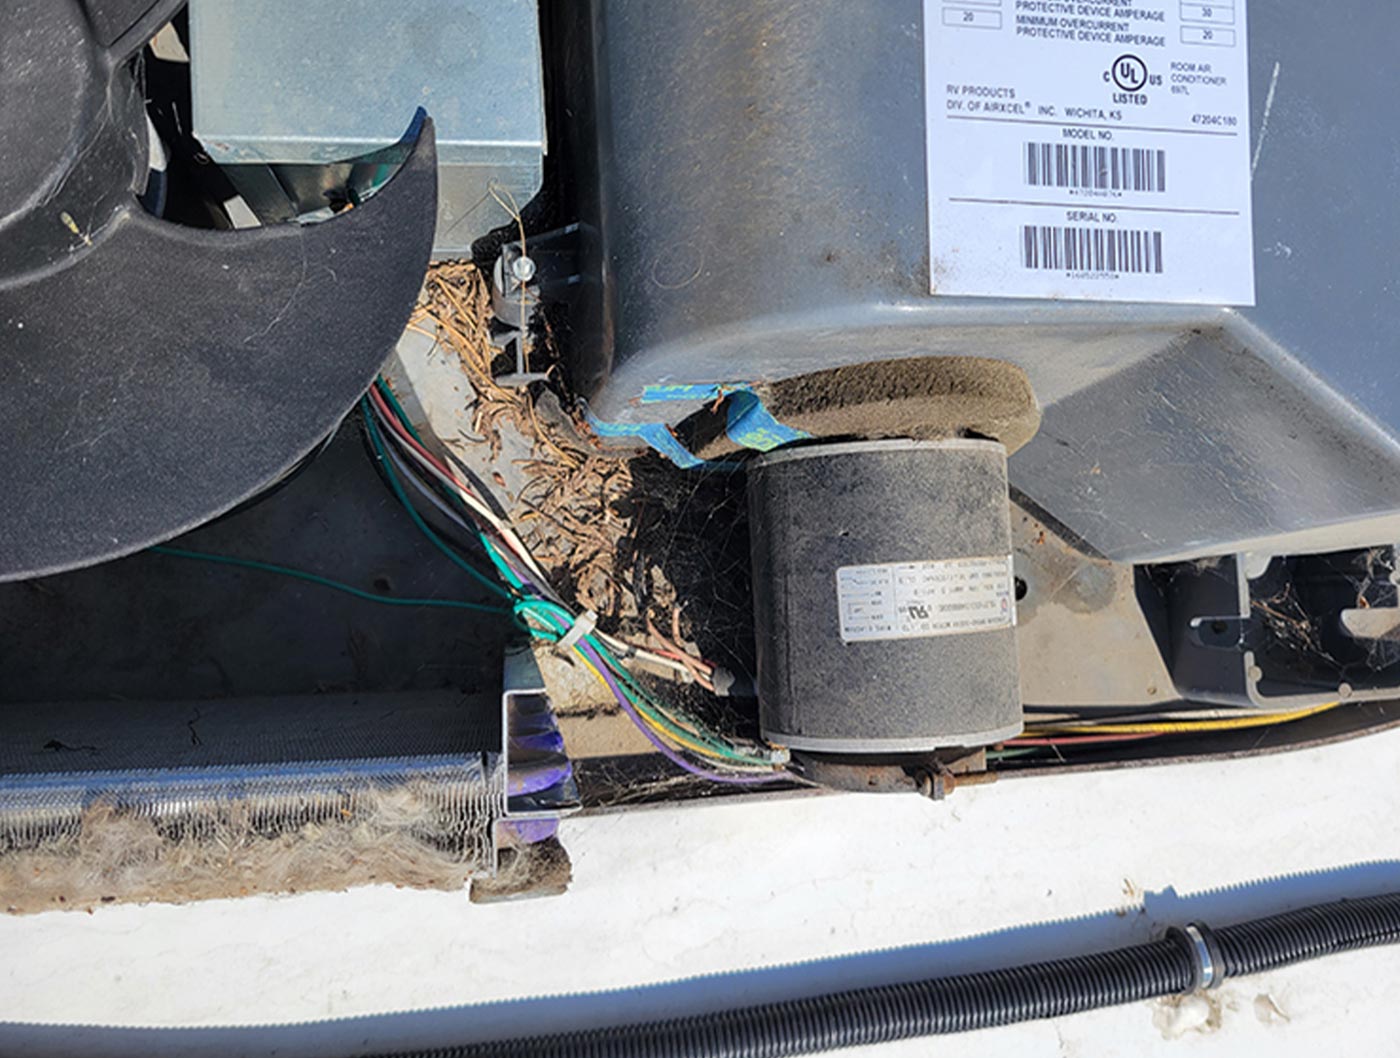
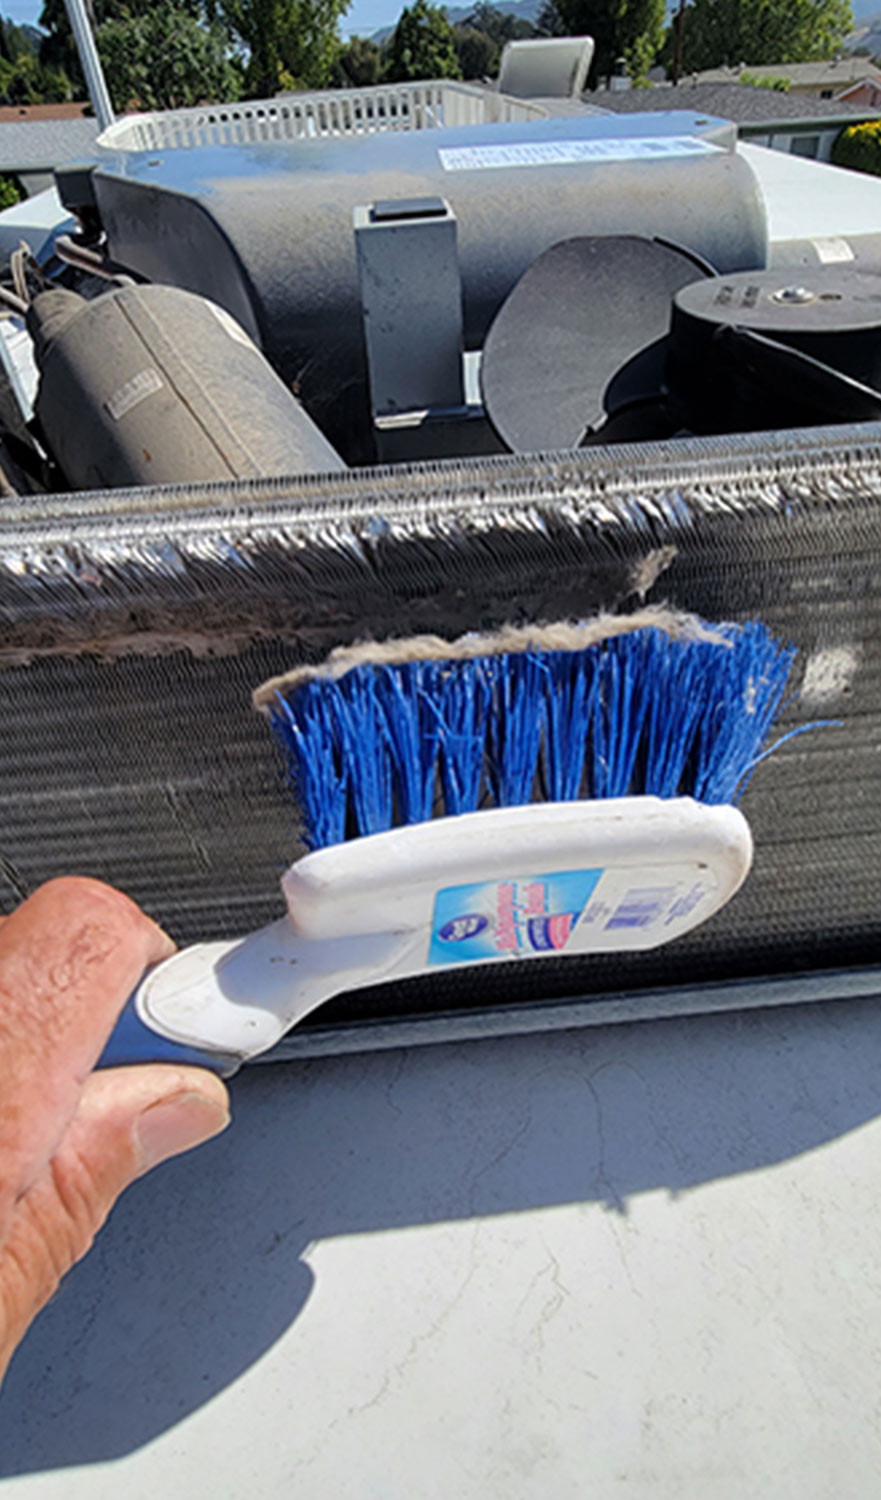
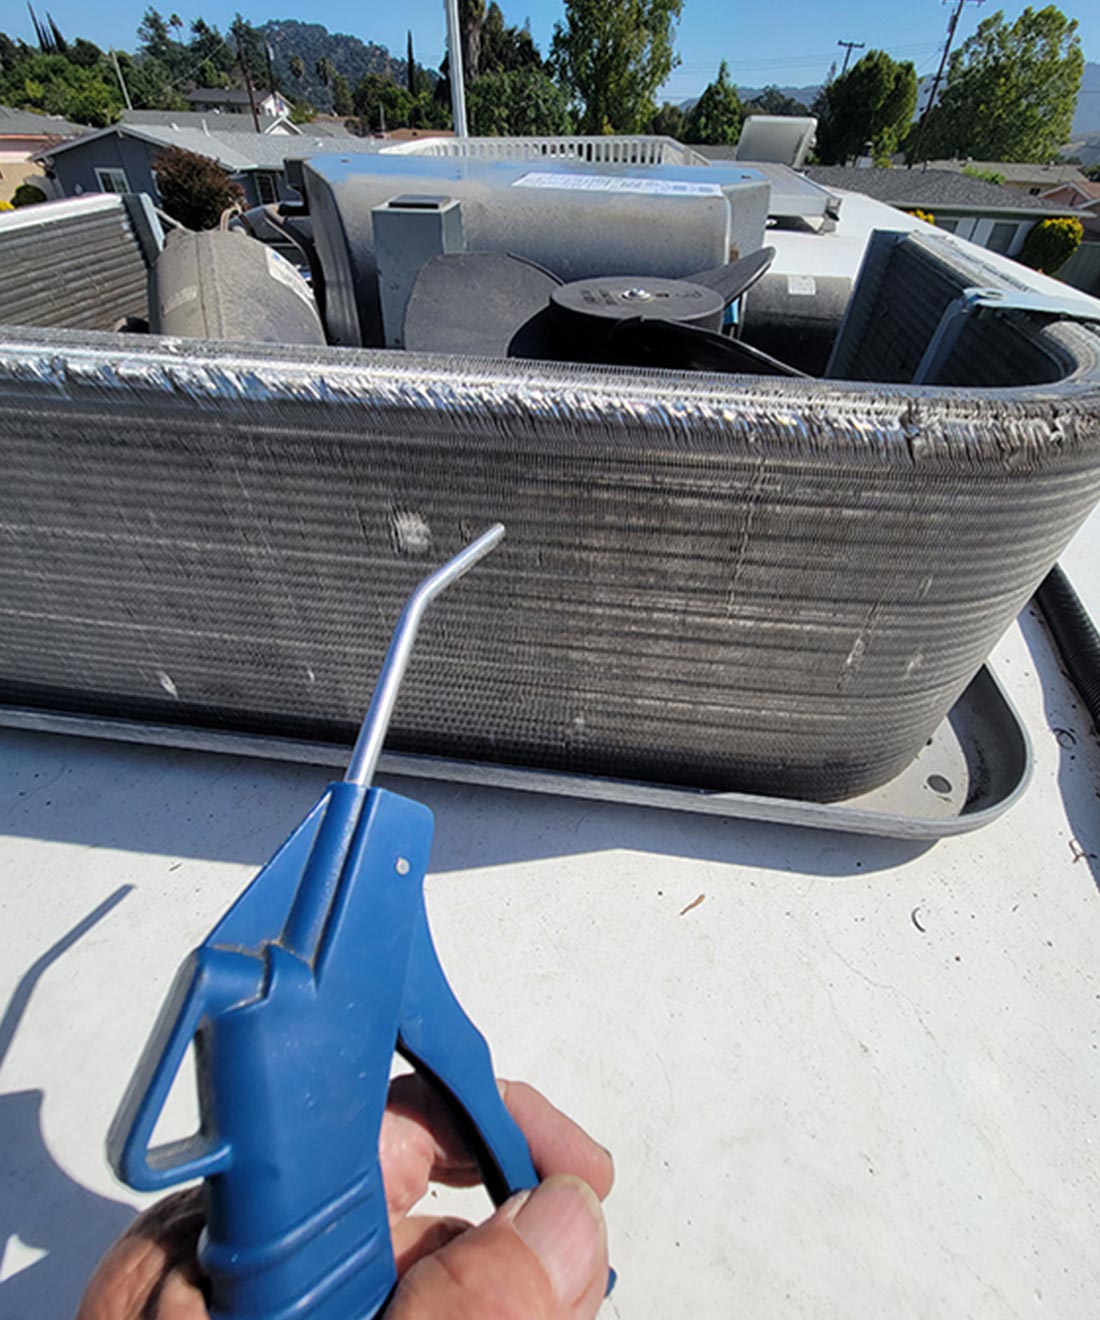
The space under the shroud can be home to critters and plenty of dirt. Don’t be shocked to see a huge network of spider webs or maybe a bunch of leaves — courtesy of parking under trees — and plenty of other debris. Start by cleaning the components carefully without detaching or damaging any wiring; compressed air (100 psi) from a nozzle can be used to blow out all the dust and debris. Be careful not to get too close to the condenser fins, however; too much air pressure can damage the fins. You may not see a lot of dust expelled from the condenser since the fan continuously blows through it, but this step still helps. Always inspect the condenser after a sandstorm or when camping under shedding trees, like cottonwoods.

a screw driver is used to remove a screw from the AC hold-down panel
the hold-down panel is removed with the return-air filter attached
Once the hold-down panel is released with a screwdriver, it can be removed with the return-air filter attached. These air-filters vary in size and form depending on the model of air-conditioner, but all are easily accessible.

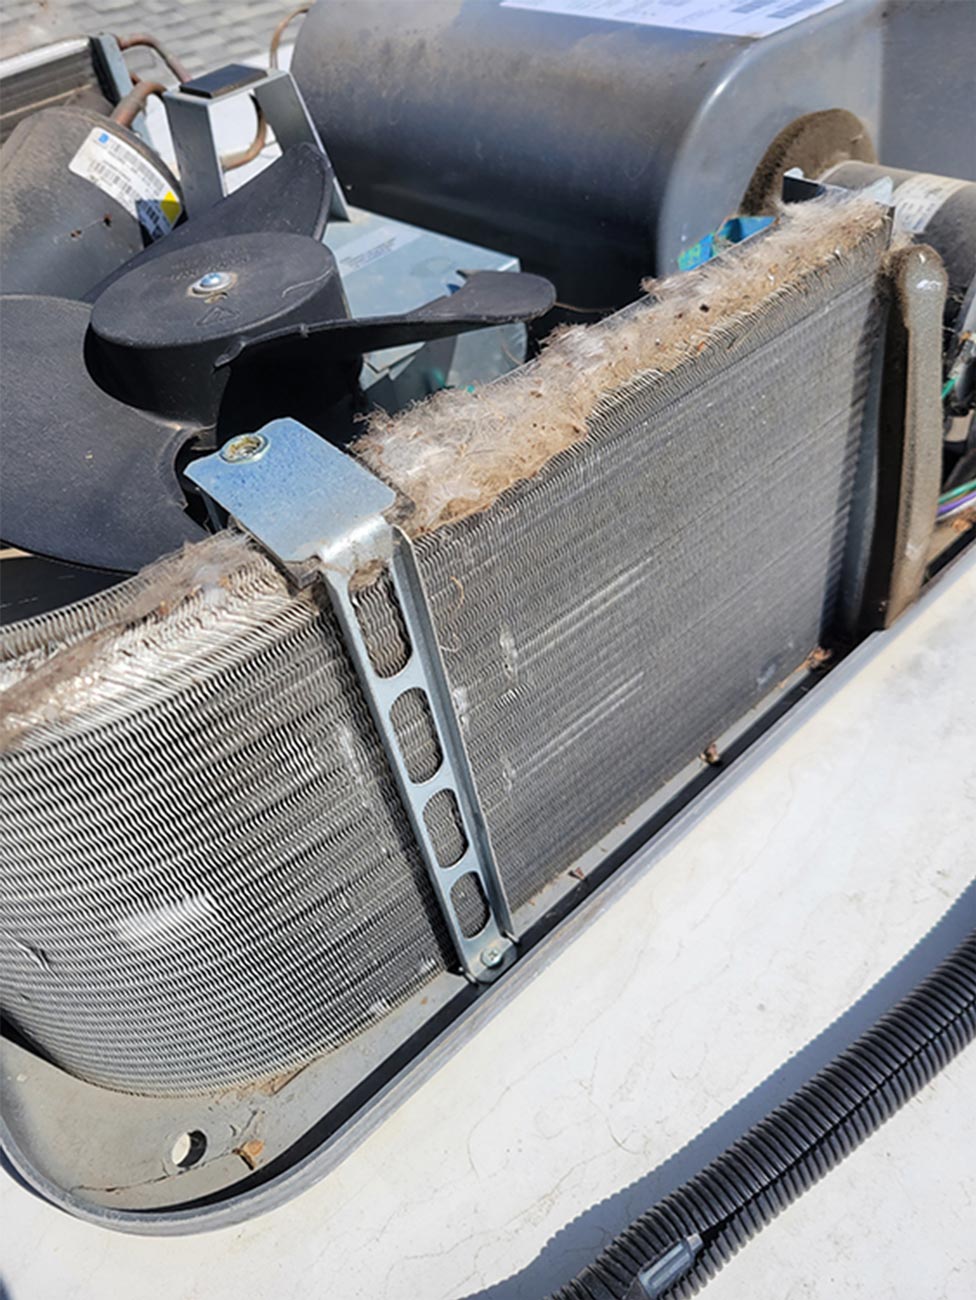
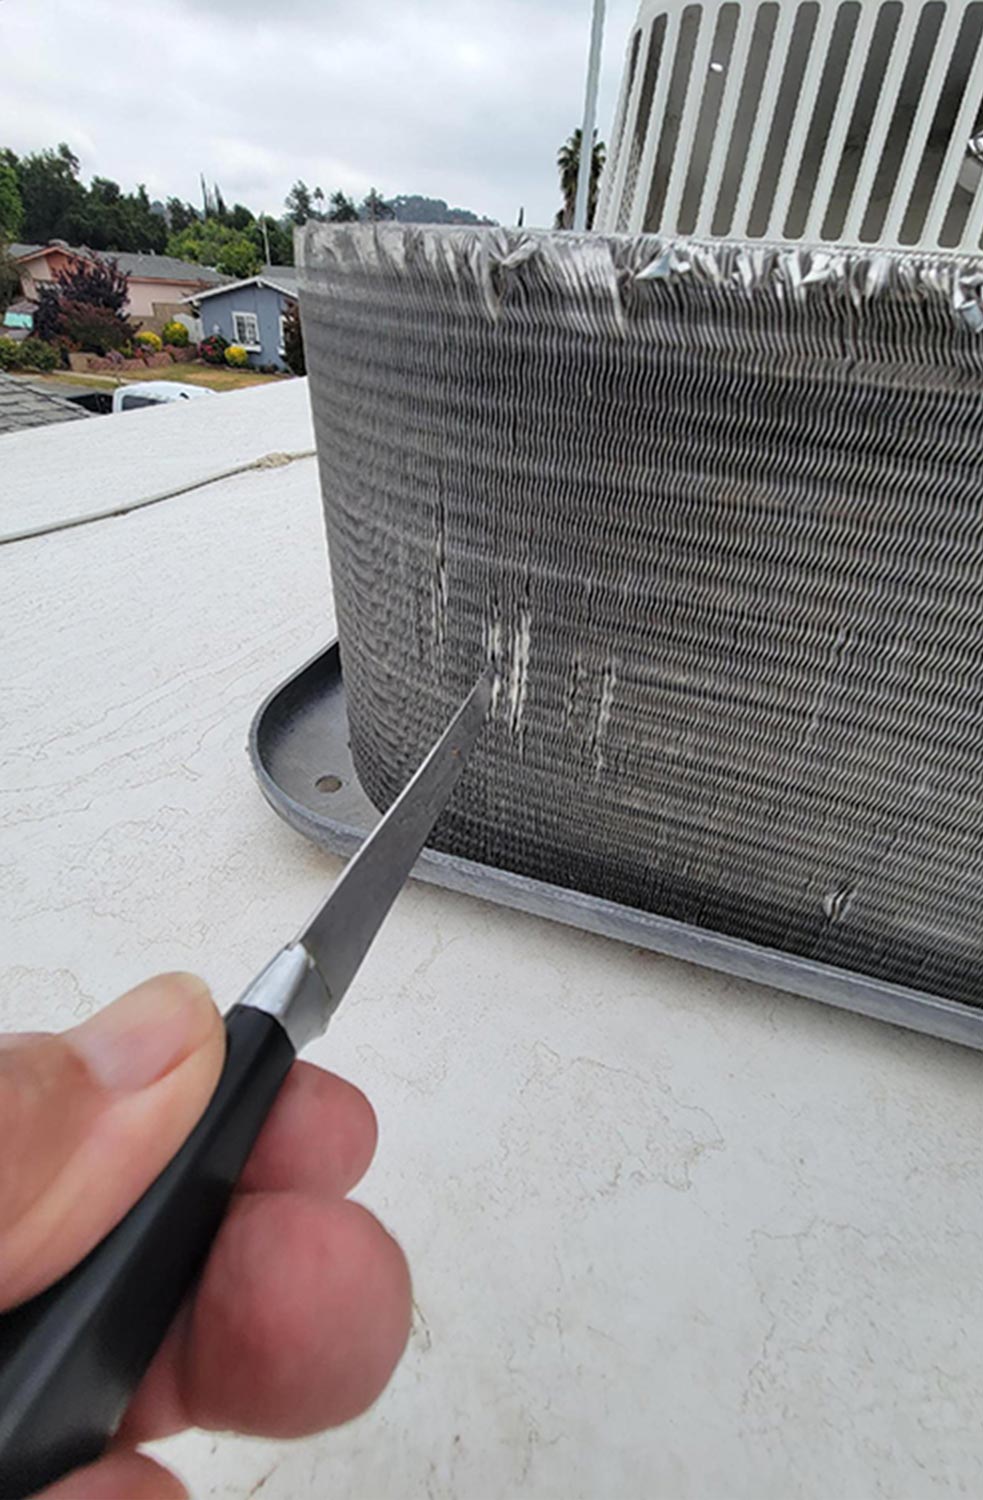
I’ve seen many air-conditioners over the years where the condenser fins were completely mangled or flattened to one side, which will reduce efficiency. Straightening the fins can be painstaking, but a commercial tool for this application may speed up the process. You can also use a simple butter knife or similar tool that’s not too sharp to straighten bent fins. Once everything looks okay, reinstall the shroud and move to the inside of the RV to clean the evaporator.

the return-air filter is washed in an RV sink with soap and water

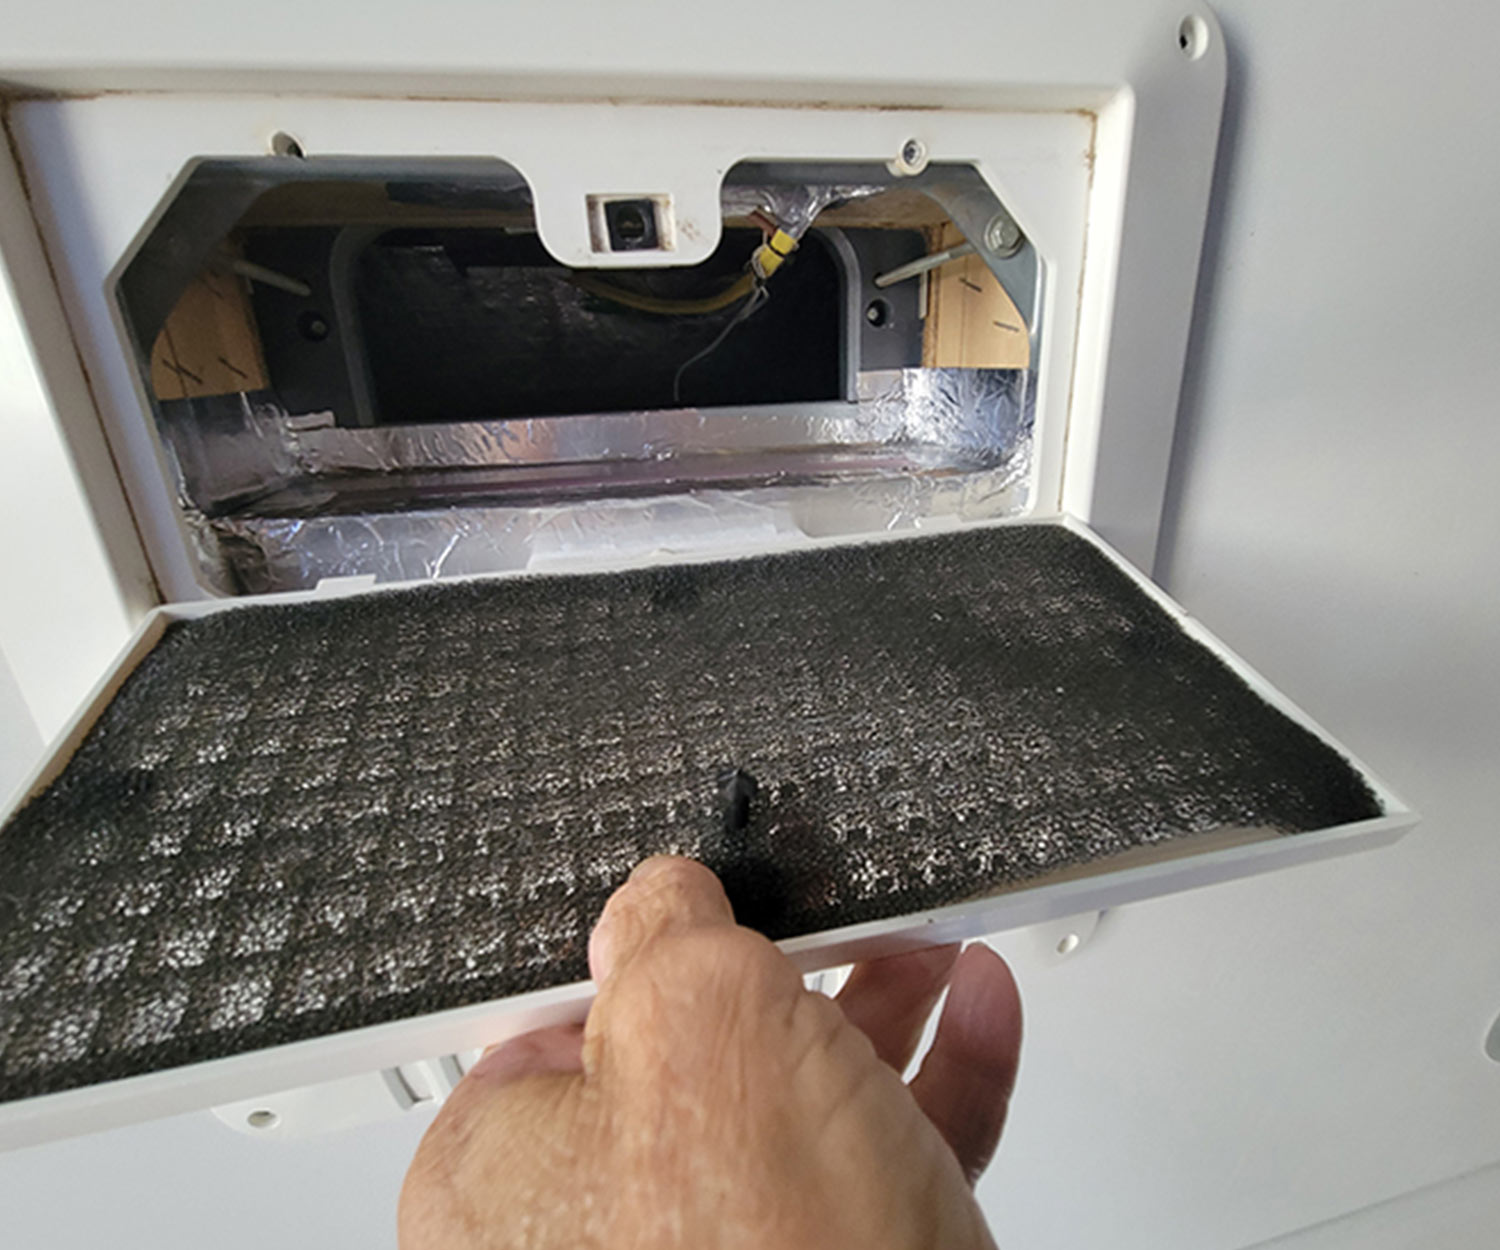
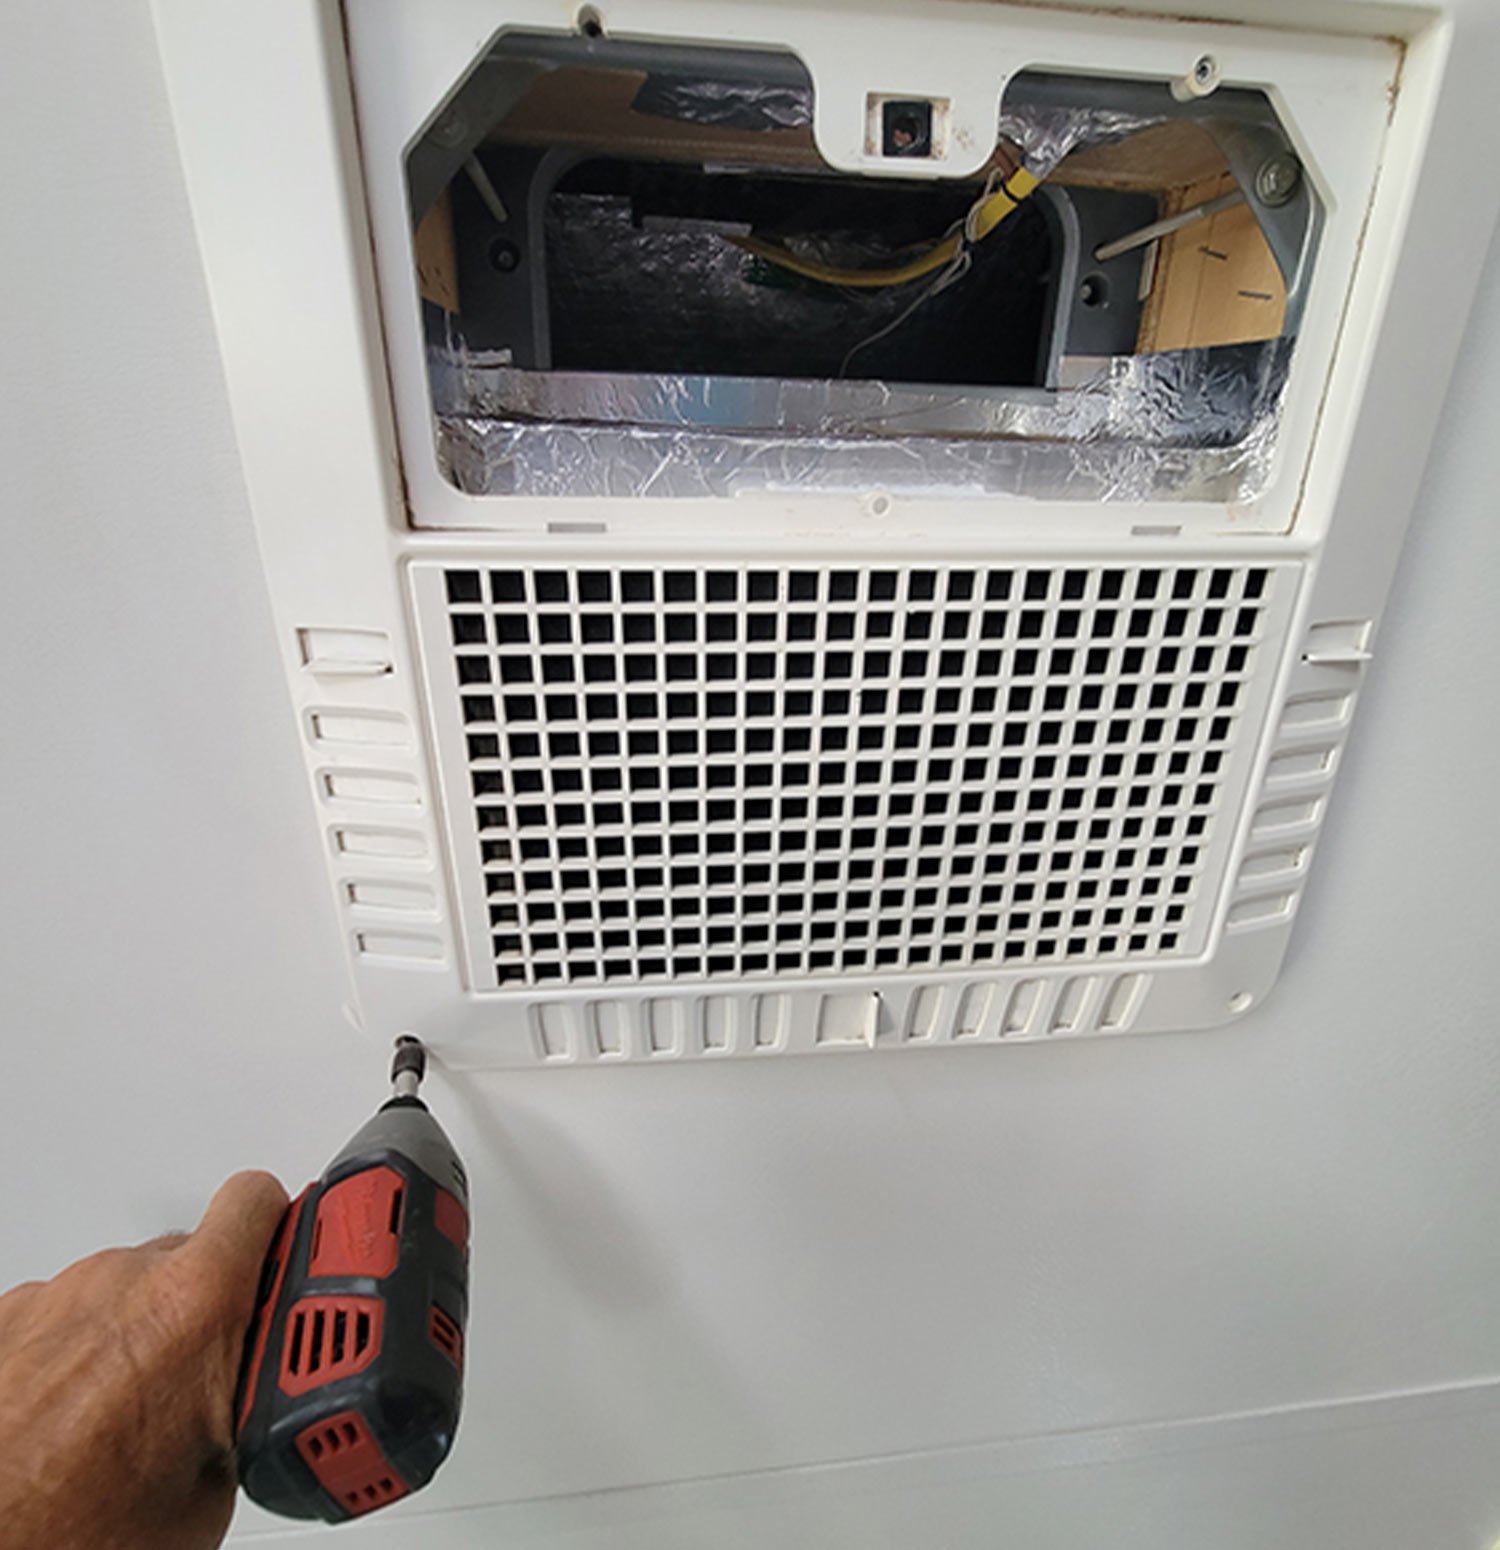
The return-air filter is removed from the access panel and washed in the sink with soap and water. Make sure it is dry before reinstalling to prevent moisture gathering in the evaporator. In dusty areas, or when the air-conditioner is run most days, this filter should be cleaned at least once a week. Remove the filter from the return-air access panel so it can be washed with soap and water in the sink.

Once inside, remove the filter and the plastic inside shroud assembly; this will vary depending on the A/C model. (Some RVs have a remote air return with its own filter, rather than an ADB. With this type of system, it’s much more difficult to clean the evaporator.) After removing the standard-type ADB, use a bright flashlight and look up inside the return air cavity and you’ll see the evaporator. The cleaning process can be as simple as removing a little bit of debris from the coil/fins with a soft bristled brush or it may need to be cleaned with an evaporator cleaner (available on the Internet). Be sure to follow the instructions and be very careful; the evaporator is delicate and can be easily damaged. Be sure also to not remove the sensor that is inserted loosely into most evaporators; if it falls out, make sure it’s in the same spot after cleaning.

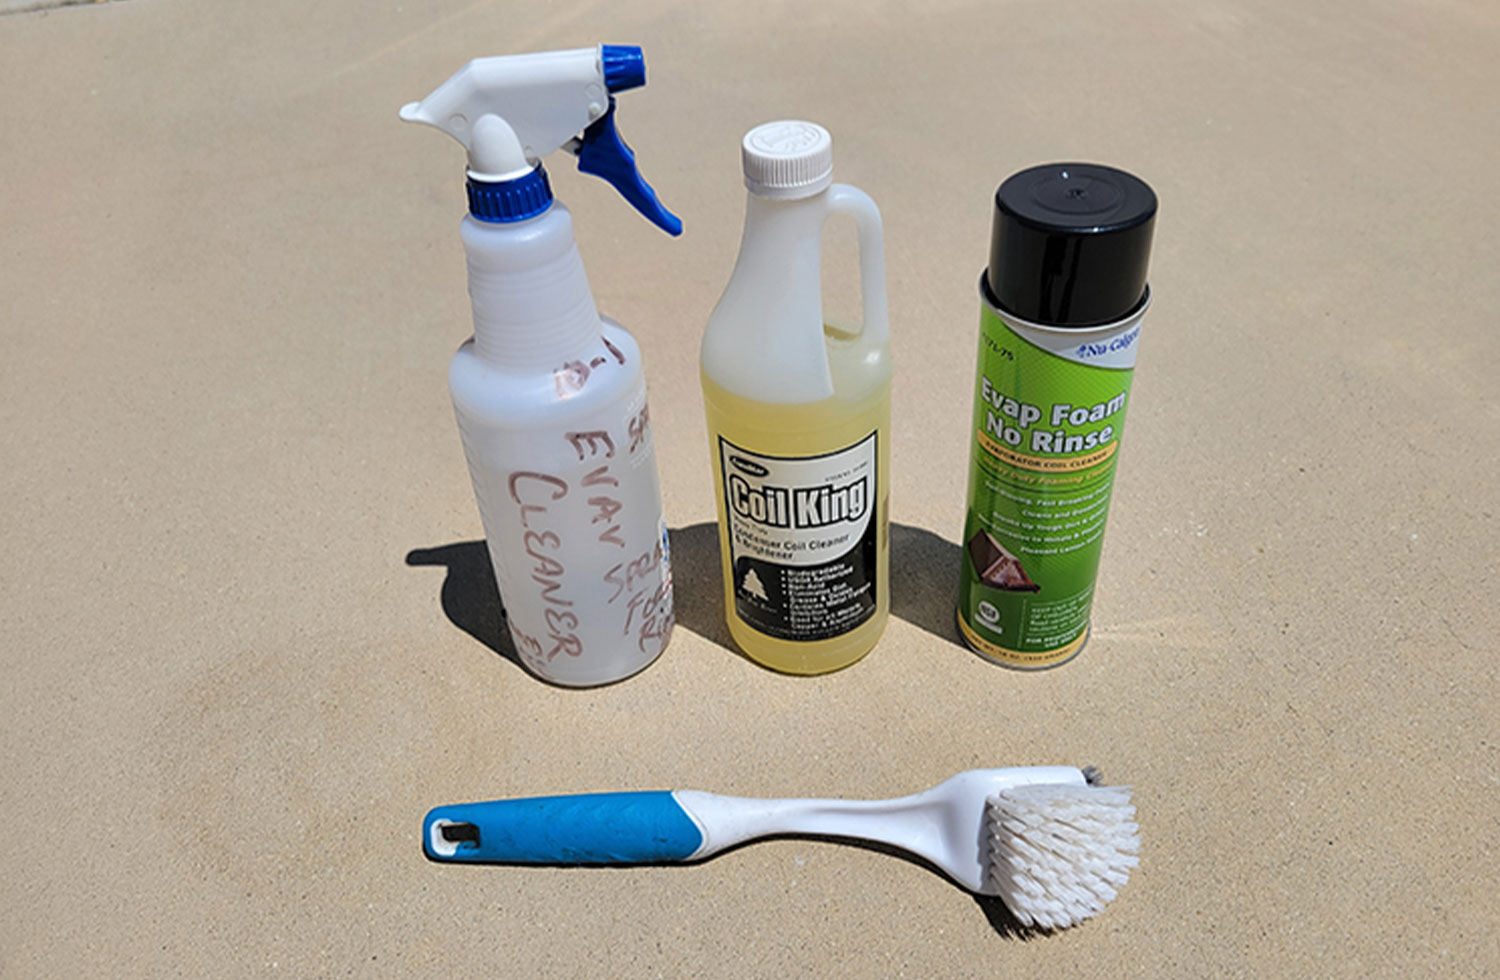
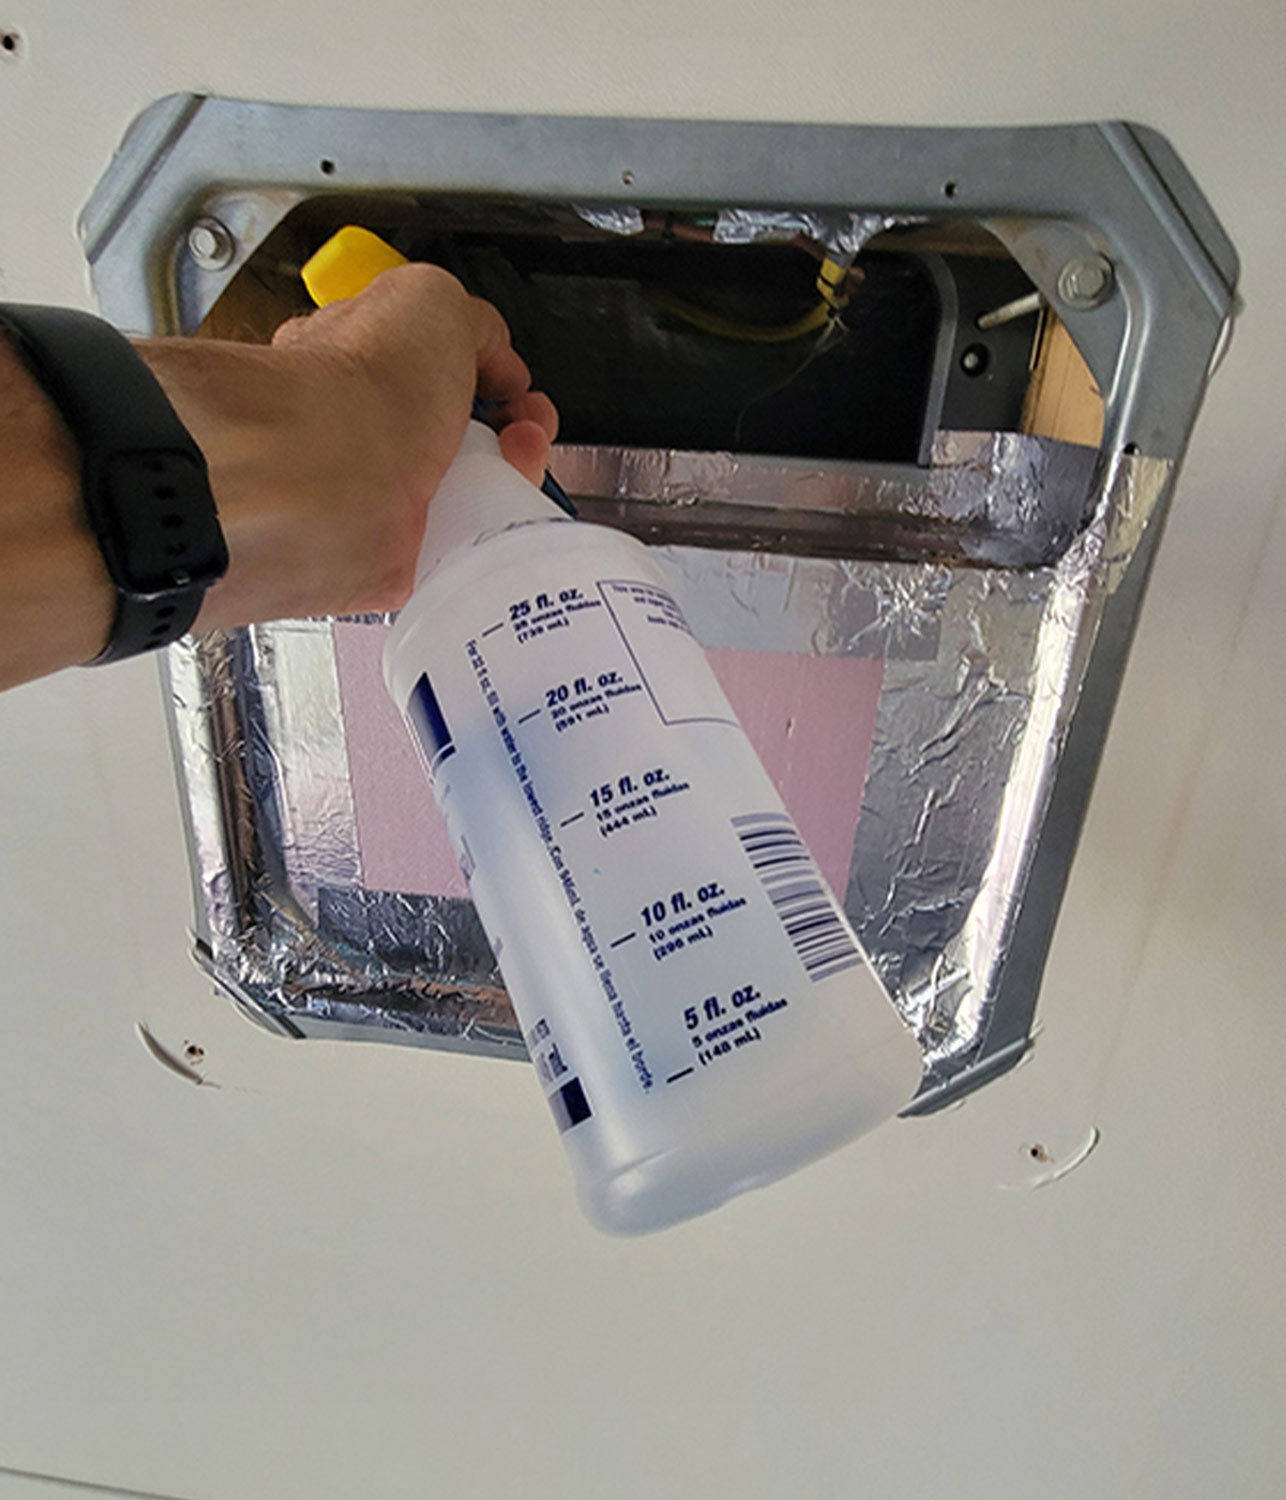
Newer formulations such as Nu-Calgon’s Evap Foam No Rinse Evaporator Coil Cleaner are self-rinsing; if you use an older formulation, be sure to rinse it thoroughly (all residue is gone) with a spray bottle filled with water. The water and cleaner will exit through the drain and down the side or back of the RV.

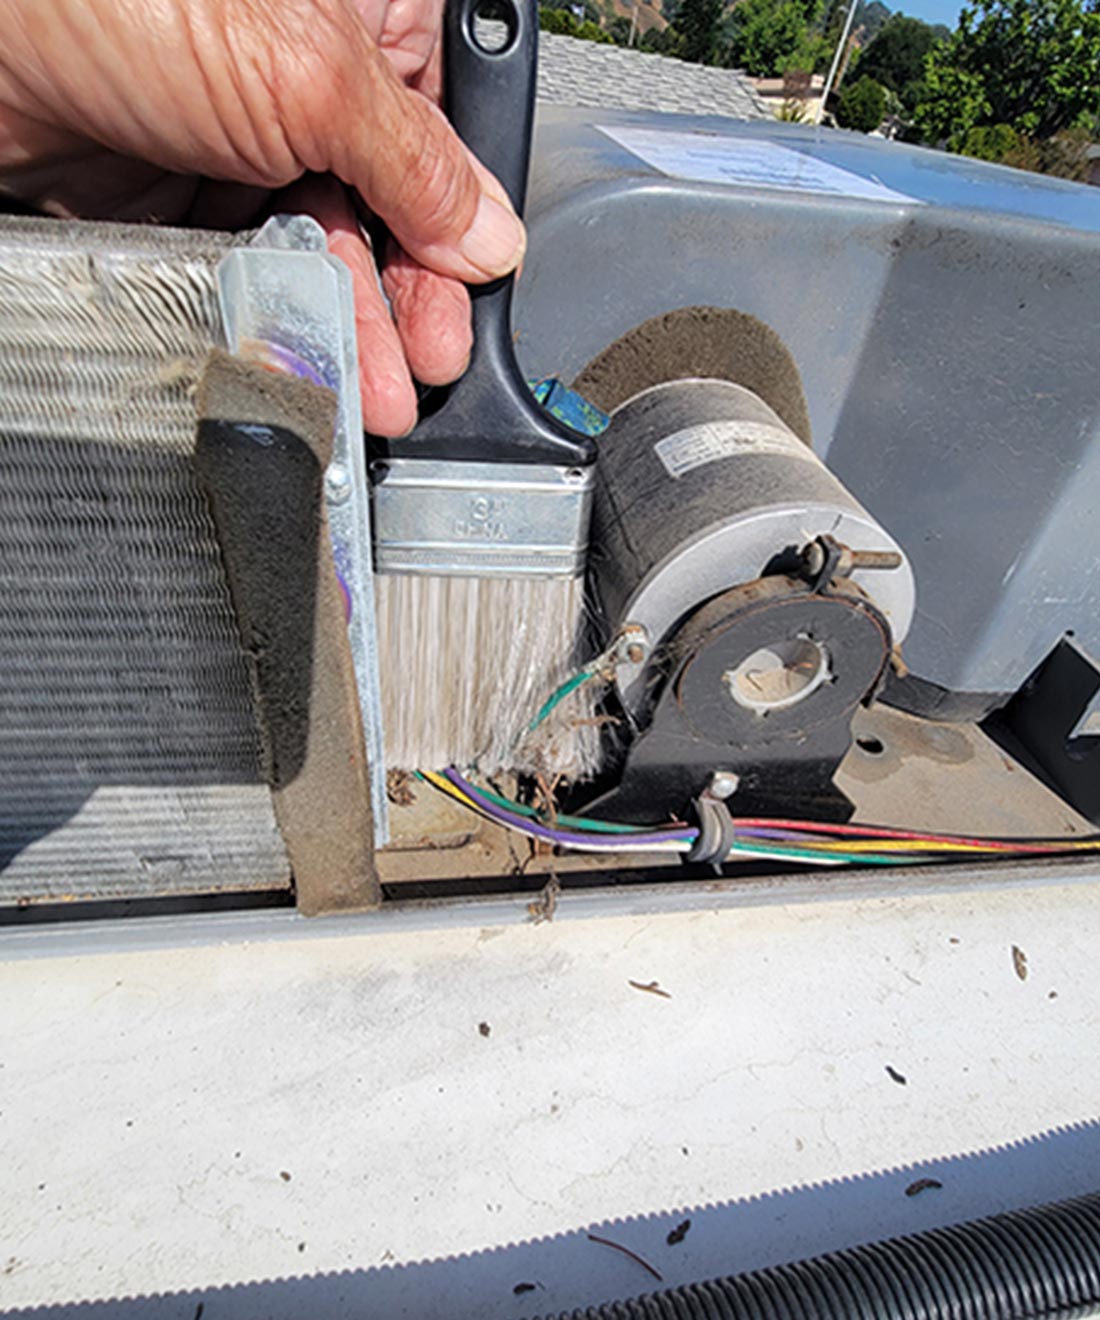
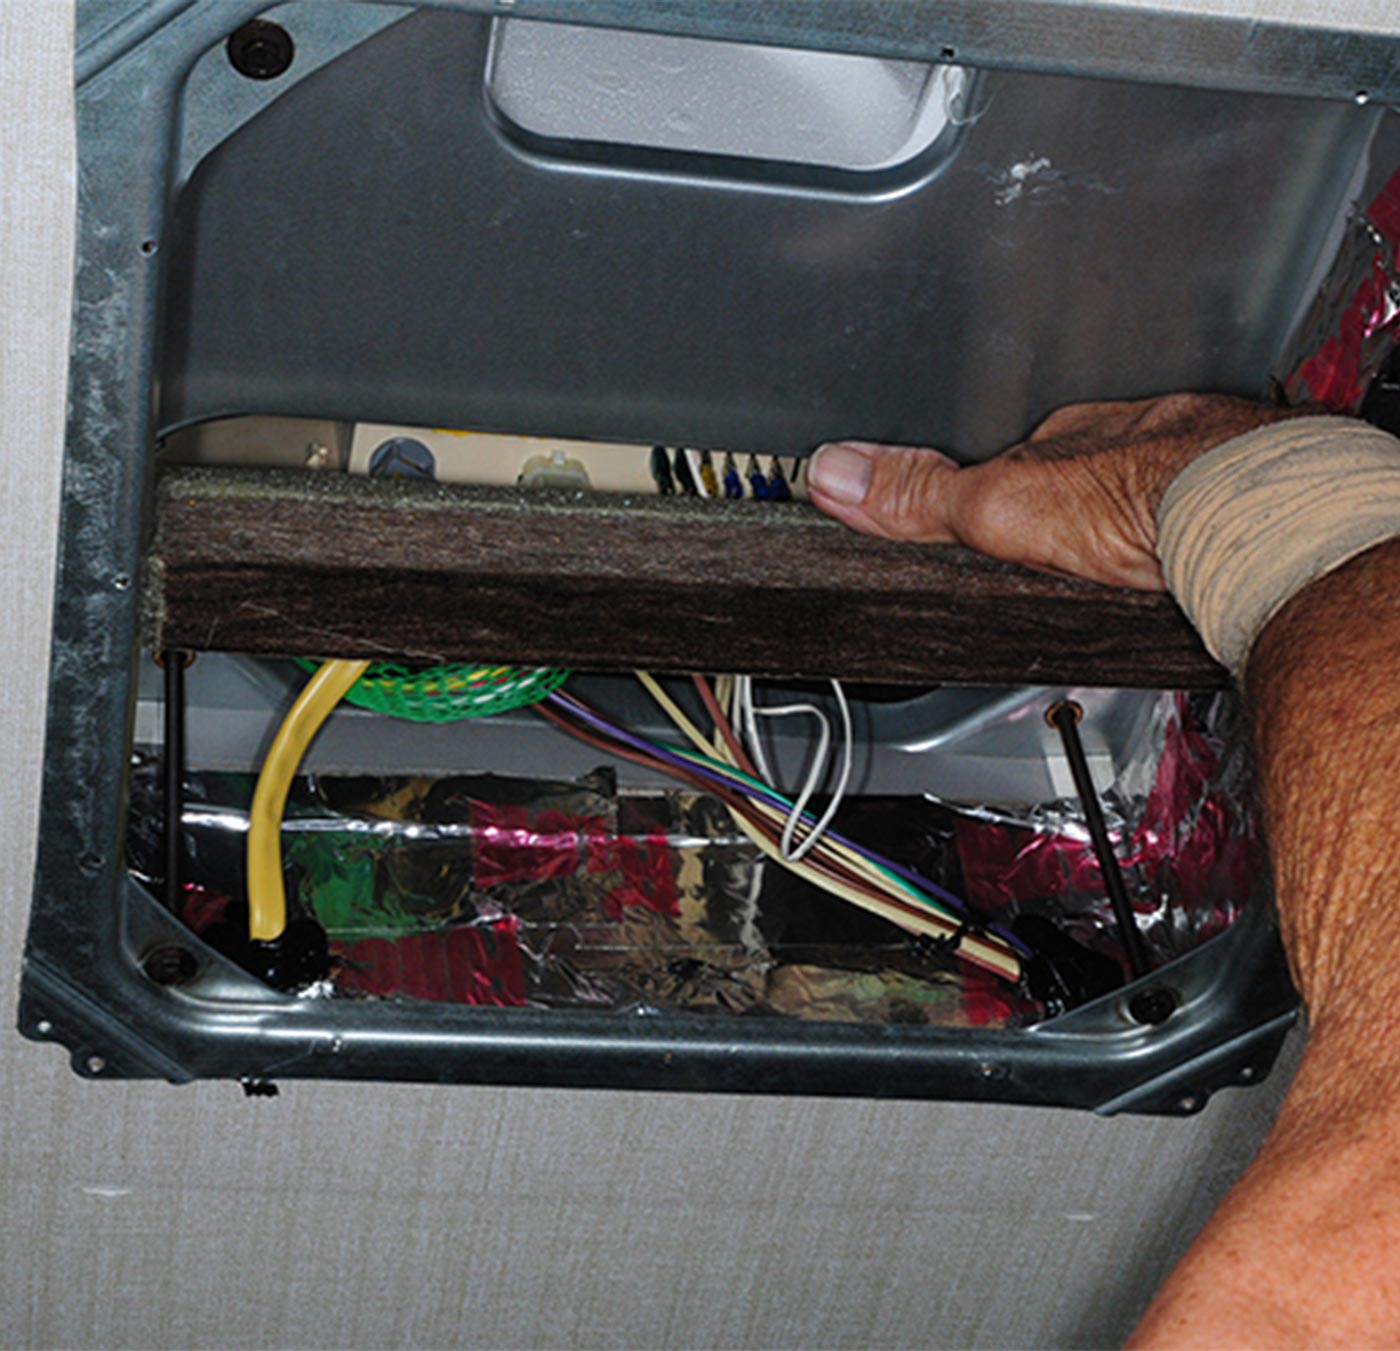
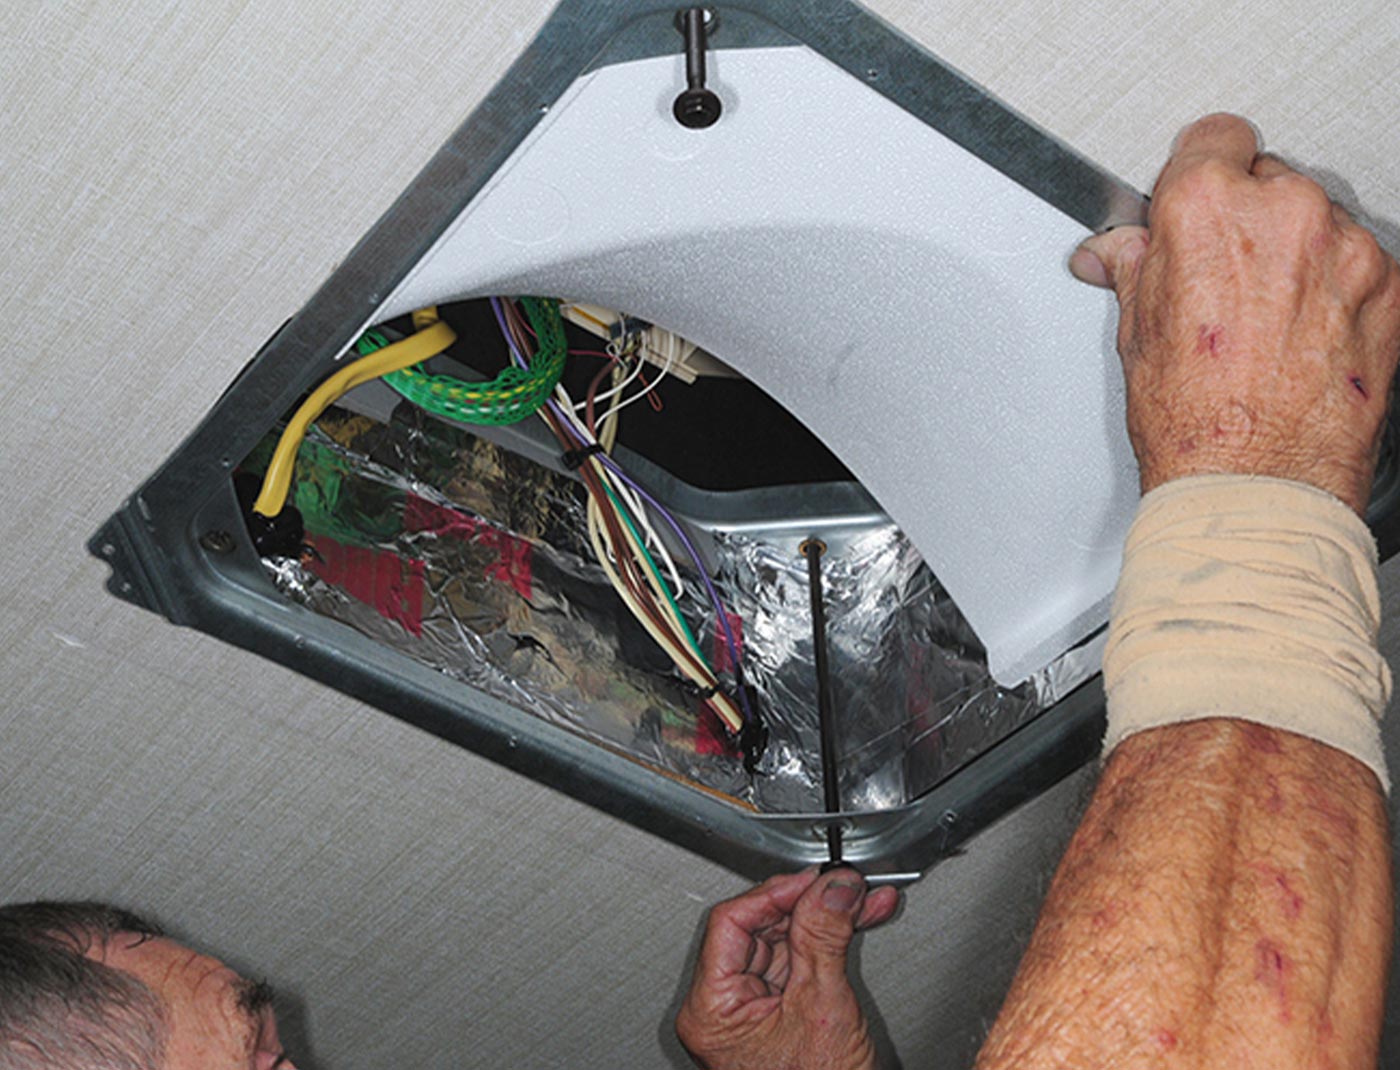
Next, you will need compressed air. Look up into the plenum cavity and you’ll see the fan; it may or may not be covered in dirt and dust. Don safety glasses and blow the compressed air on the “squirrel cage” or fan, dislodging any dust and/or debris. (A buildup here can actually cause the fan to be out of balance.) Inspect all the wiring, which includes the 120-volt AC Romex wires, thermostat and/or furnace control wires and the temperature sensors. Make sure that everything is intact; now would be a good time to clean up the wiring, if necessary, using cable ties or other restraining method. In many cases, builders leave everything loosely hanging around up in there.

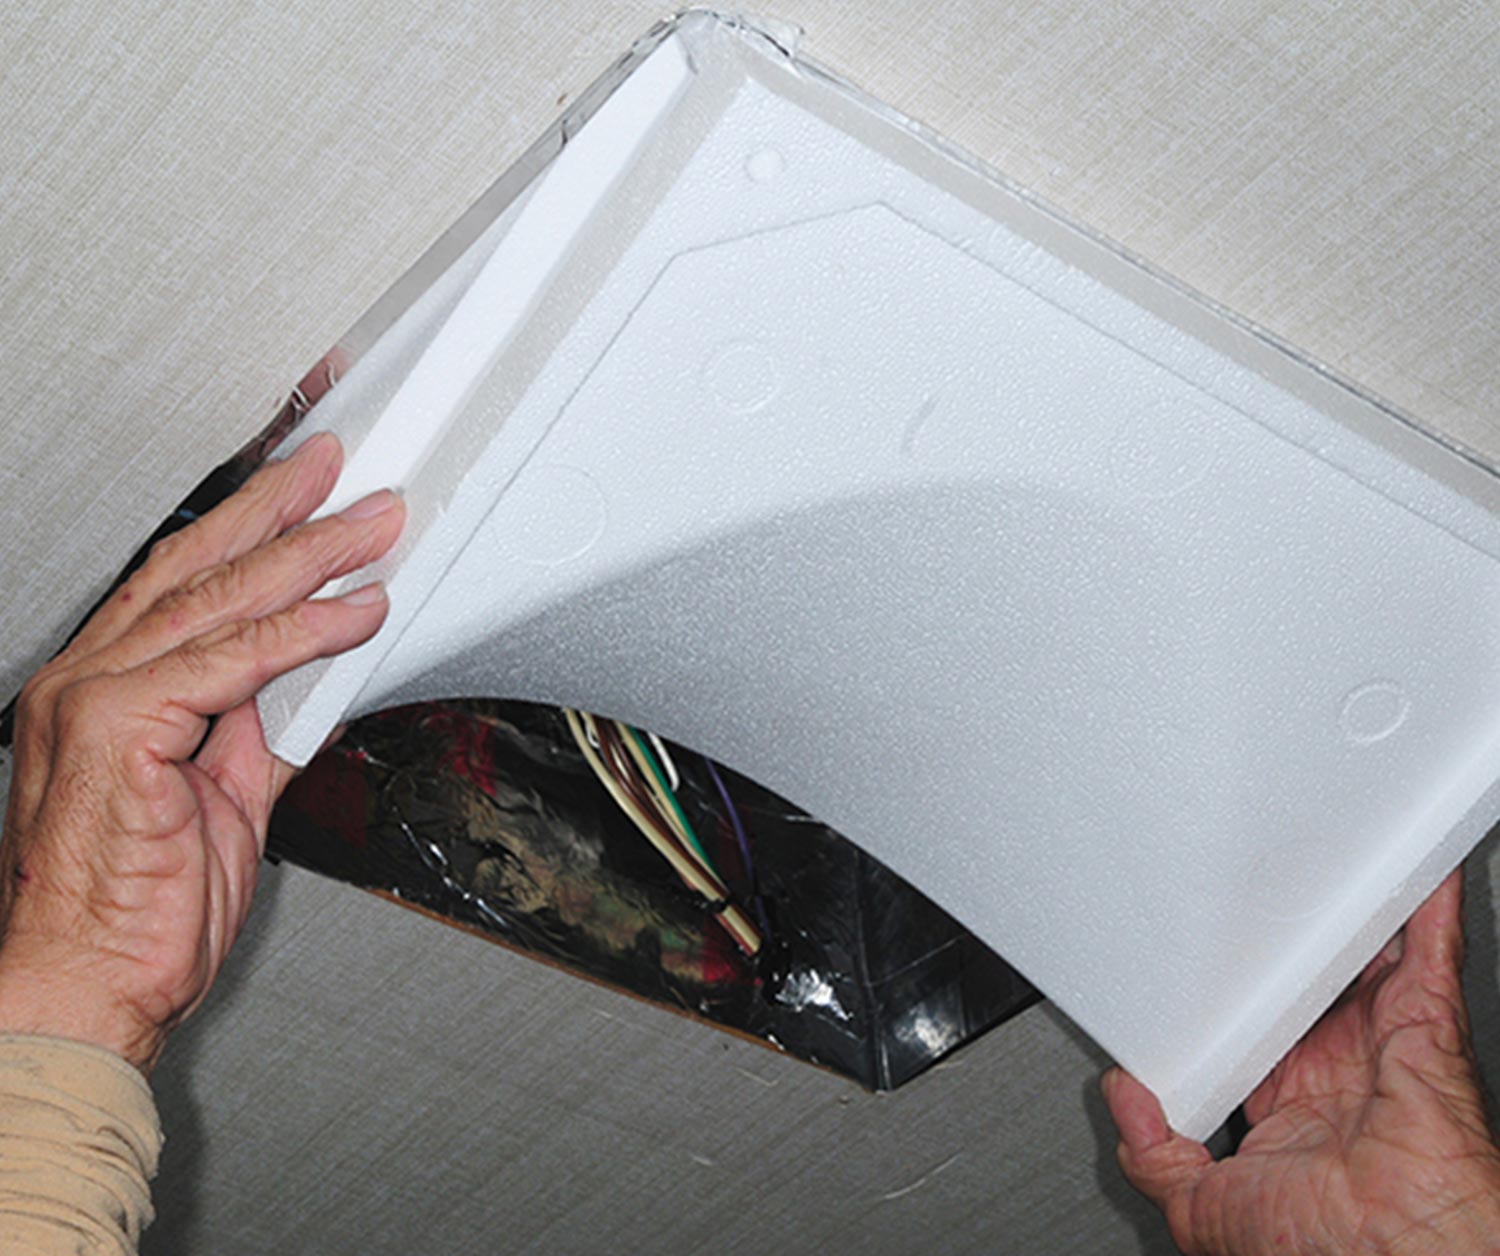
Inspect the ducting inlet if you have ceiling-mounted registers and make sure that the separator — the piece of material between the plenum and the return air — is intact. If the separator is not sealed, cold air will be sucked right into the return air making the A/C far less efficient. In any case, as the air-conditioner ages, it’s probably going to be a little less efficient. You might think about upgrading the system with an RV Airflow kit that can improve efficiency by 30% to 40% (see “Rapid Cooling” in the April 2023 issue of RV Enthusiast — magazine). It’s fairly easy to install and a big benefit is a sizable decrease in noise. The kit directs the air through the plenum directly into the ducting, eliminating cavitating and swirling inside of a cavity.

an RV air conditioner ceiling assembly screw is removed using a drill gun
the ceiling assembly is pulled to get access to the evaporator
The ceiling assembly is pulled to get access for cleaning the evaporator. Normally, there are four to six screws holding it in place. It can be on the heavy side, depending on the model. This model has a steel plate, which adds to the weight. You don’t want to drop and damage this ceiling assembly because the replacement cost is expensive.
Low voltage can also create serious operational problems. Not only will the A/C perform less efficiently, but it can also damage the compressor. The lower the voltage, the higher the amperage draw on the compressor — creating excess heat. Over a period of time, the compressor can fail prematurely and, of course, it is not replaceable — so the air-conditioner will need to be replaced. I have an electrical management system (EMS) so I can monitor the voltage and the amperage draw of all appliances. The EMS will shed power to appliances (in order of programming) one at a time when the voltage gets too low, protecting your appliances. At the very least, get a high-quality digital voltmeter and plug it into one of your outlets to monitor the voltage while the air-conditioner is running. Air-conditioners will start overheating at 106 volts AC or less; most units these days have voltage protection circuits.

A Few Final Thoughts
Another key to efficiency is to make sure that all the ducted ceiling registers are open. Closing off several of them will put pressure back into the plenum, causing more cavitation of the air that’s forced into the ducting. If you need to close some of the ceiling registers for one reason or another, you can open the air dump at the bottom of the ADB (if so equipped) slightly to alleviate some of the pressure.

Because the air-conditioner is a sealed unit, the freon is not replaceable; there’s no port to install the freon nor do these units use a receiver dryer, which is necessary for recharging. Over the years, I’ve talked to air-conditioner technicians who have installed a port in their system and recharged it — only to find out it’s leaked again.

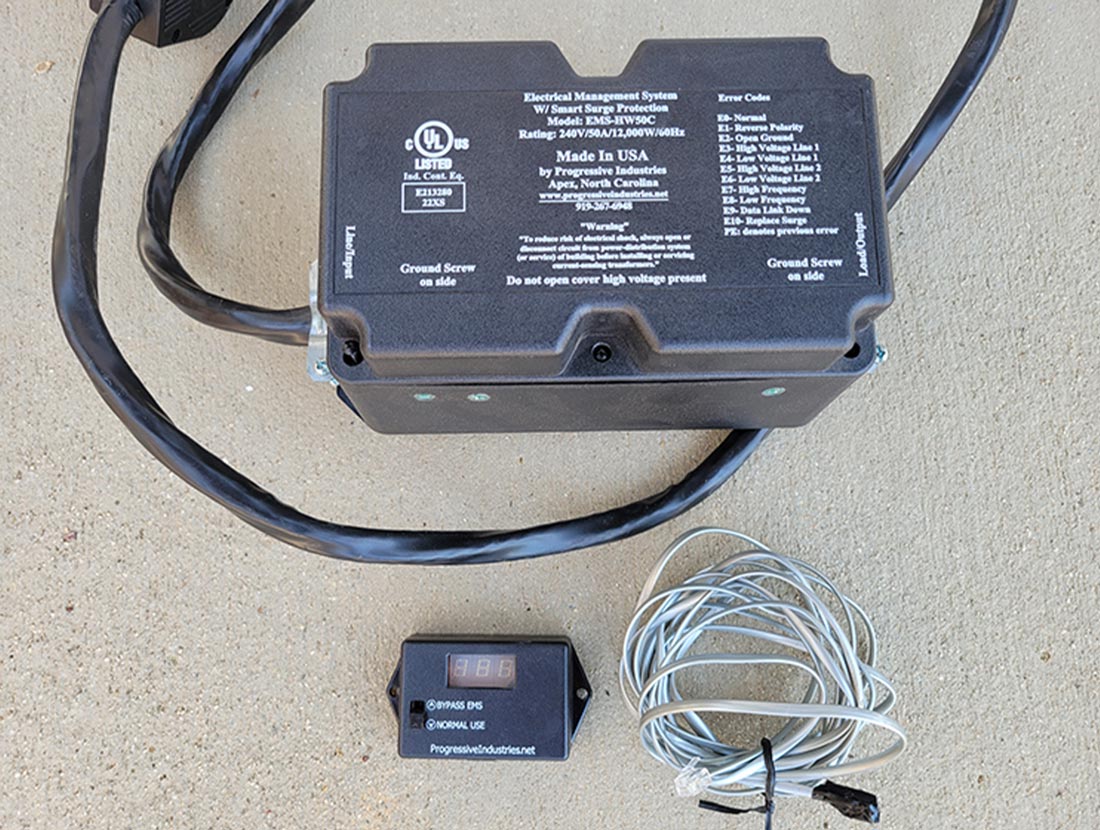
All air-conditioners have a start- and run-capacitor and most modern air-conditioners have a control board. Any diagnosing and/or repair of the electrical system should only be done by a qualified technician. That said, staying on top of maintenance that can be accomplished by owners will yield big benefits — and keep the sweat away in hot weather.

the ceiling assembly is wiped down with a microfiber towel
While the ceiling assembly is removed for servicing the air-conditioner, take the time to wipe it down with a microfiber towel.
the Nu-Calgon foam is sprayed up into the return-air cavity to reach the evaporator
The Nu-Calgon foam is sprayed up into the return-air cavity to reach the evaporator. No rinsing is required, which makes almost no mess. Condensation while running the air-conditioner cleans off the foam.
Coil King Condenser Coil cleaner in an generic spray bottle is sprayed up into the return-air cavity to reach the evaporator

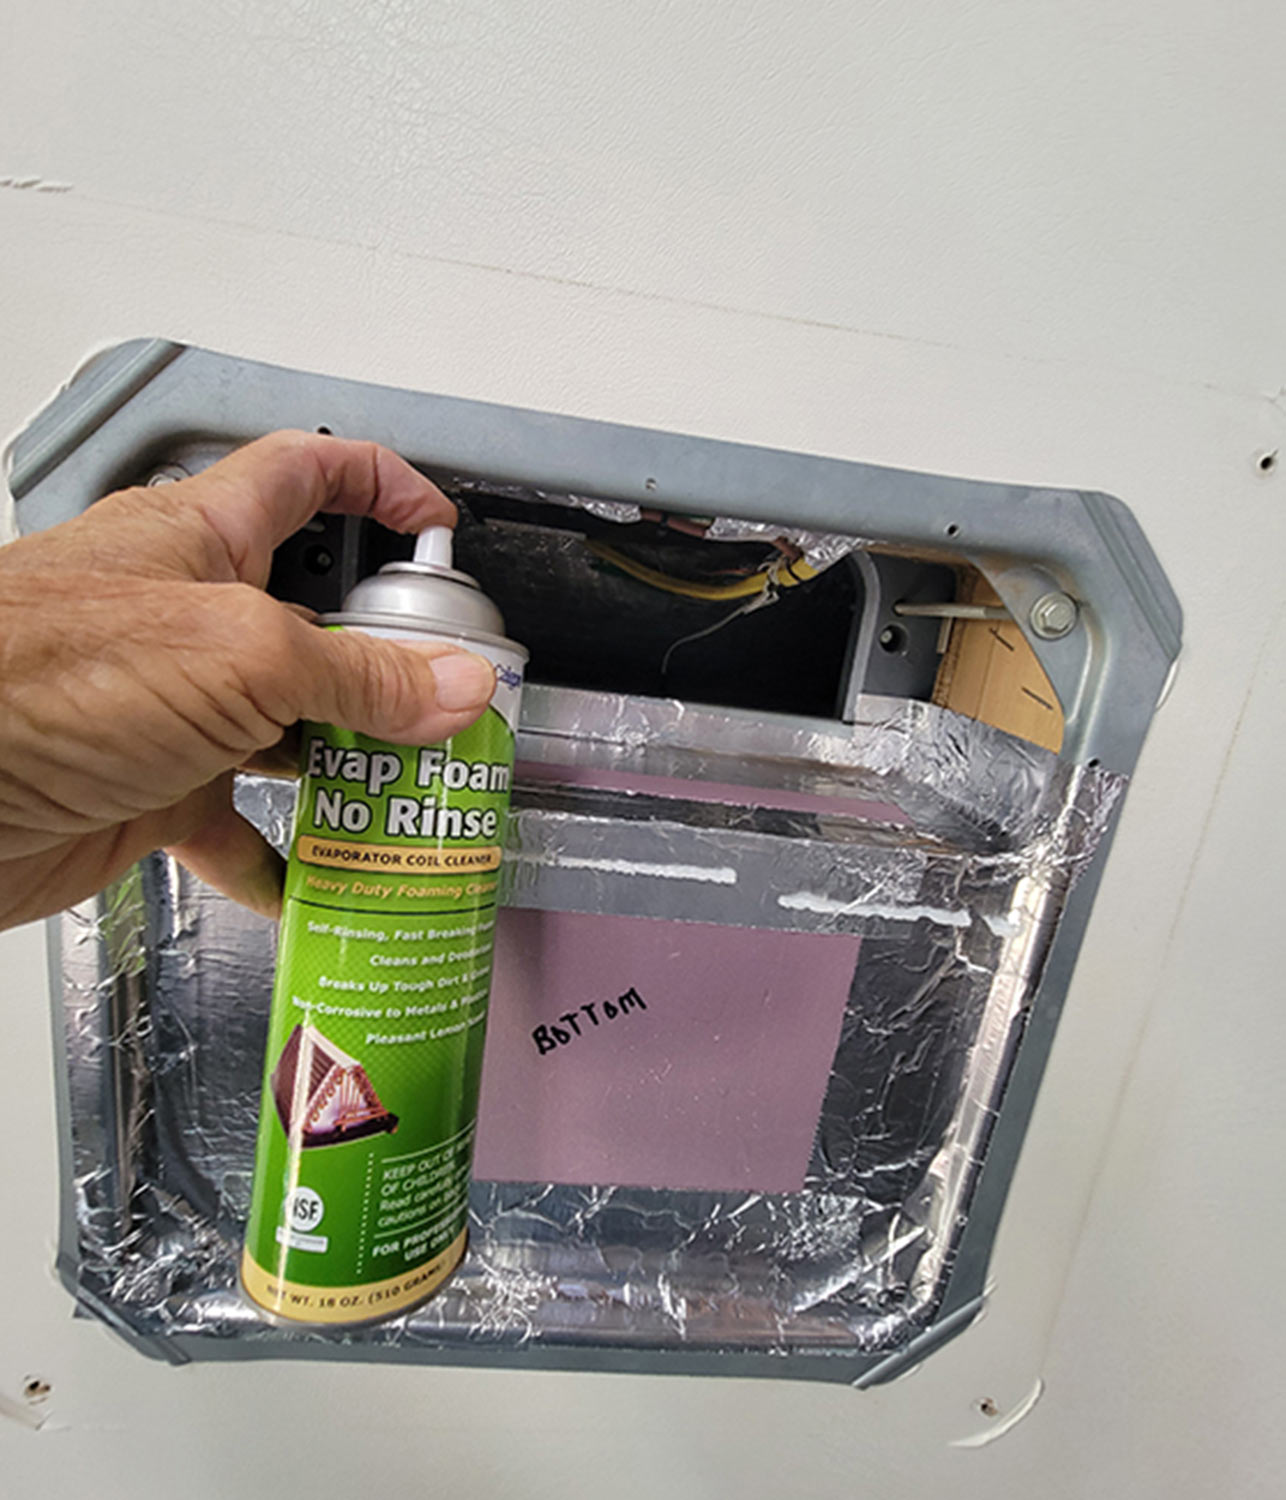
If the no-rinse foam is not handy, you can use Coil King Condenser Coil cleaner, which is available at home improvement stores. Clean water must be sprayed onto the evaporator or condenser to rinse off this liquid product. It must be allowed to dry before running the air-conditioner.

four bolts are removed from the top of the air-conditioner shroud using a drill gun
with the bolts removed a man lifts the air-conditioner shroud while standing atop the RV
Four bolts are removed from the top of the air-conditioner shroud, which is lifted off the roof. Some models have several screws around the skirt, which must be removed.
close view of the dirt and debris collected at the top of the condenser
The design of this particular shroud allows the top of the condenser to collect excess dirt and debris, which must be cleaned off.
top view of the AC system showing the debris that has collected between the motor and wiring harness
Debris is collected between the motor and wiring harness. This pile of pine needles, twigs and dirt must be cleaned without dislodging the wiring.
close up of a large circuit of cobwebs between the AC systems parts and components
Spiders love the dark environment under the shroud where dirt and debris will collect. Over time the cobwebs will become thick and difficult to blow out with compressed air. If the RV has been subjected to severe dust storms, makes sure you add a cleaning session to your schedule.
a basic utility brush is used to lightly remove debris from the condenser
A basic utility brush, available at any home improvement store, is used to remove debris from the condenser. Apply light pressure to avoid damaging the delicate fins.
with the bulk of debris is removed, compressed air through an air gun is directed to the condenser coils (no closer than 8-10 inches) to blow away the remaining dust and dirt
a clean paint brush is used to remove debris in delicate areas
Once the bulk of debris is removed, compressed air through an air gun is directed to the condenser coils (no closer than 8-10 inches) to blow away the remaining dust and dirt. Keep pressure below 110 psi to avoid damaging the fins. A clean paint brush comes in handy for removing debris in delicate areas.
condenser fins are straightened with the help of a dull knife
Condenser fins will likely suffer some damage over time. A commercial straightening tool is best for fixing damaged condenser fins, but if one is not available a dull knife will suffice. Cleaning the fins will restore peak efficiency, but it takes time get the job done.
a hand grasps the the separator between the plenum and the return air
If the separator, the piece of material between the plenum and the return air, is not sealed, cold air will be sucked into the return air making the A/C far less efficient, which will get worse over time.
a foam part is installed to the AC vent opening
Upgrading your system with an RV Airflow kit can improve efficiency by 30 to 40%. It’s fairly easy to install this system and a big benefit is a sizable decrease in noise. The kit directs the air through the plenum directly into the ducting, eliminating cavitating and swirling inside of a cavity.
parts of an electrical management system (EMS) displayed on a surface
Low voltage can lead to a damaged compressor and operational problems. The lower the voltage the higher the amperage draw on the compressor, creating excess heat. An electrical management system (EMS) allows you to monitor the voltage and the amperage draw of all appliances and shed other appliances (or another air-conditioner) when necessary. If nothing else, have a high-quality meter connected to the system so voltage can be read at a glance (not shown).

When it Rains, Does it Pour – Inside?

If your air-conditioner drips into the RV during a rainstorm, a simple change of the roof gasket can alleviate the issue. The process is fairly simple: here are a few guidelines.

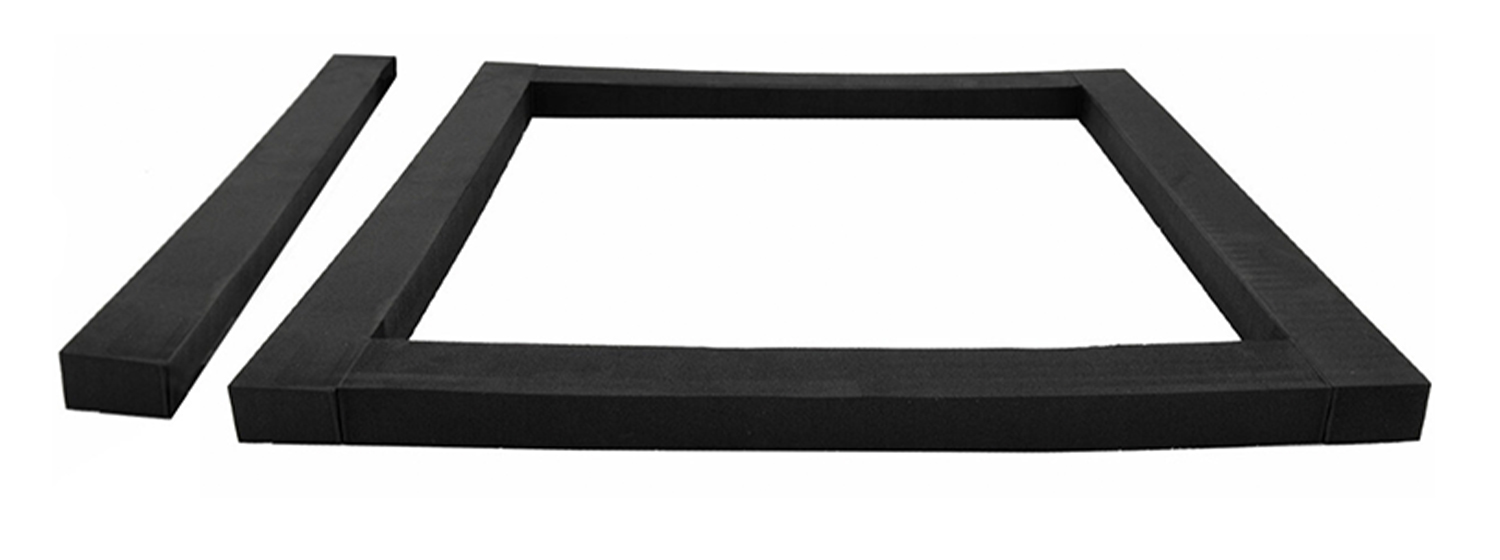
There are two different size air-conditioner gaskets — one is 14 x 14 inches and the other is 14 x 16 inches — so you will need to measure before ordering the gasket. Be sure to get a high-quality gasket so it will last a long time and not continue to compress as the weight of the air-conditioner bears down on it over time. Remove the ADB to expose the four bolts that keep the upper unit of the air-conditioner tight to the roof. You will need to scrape the gasket from the upper unit; don’t be afraid to set the air-conditioner on its side for a short period of time to gain access (it’s not going to affect the freon). Using a sharp putty knife, scrape the gasket from the air-conditioner and clean the area with alcohol to make sure there’s no oil on the surface. Then, peel the self-stick paper from the new gasket and press it into place.

an RV air-conditioner gasket
A leaking air-conditioner gasket can create major RV body structure issues. If it drips, the gasket needs to be replaced. Be sure to get a high-quality gasket so it will last and not continue to compress over time.
a man adjusts one of four, long hold-down bolts on an RV overhead AC vent opening
Make sure the four, long hold-down bolts are not overtightened. The general rule of thumb is to tighten to 25-30 in.-lb. or about a ¼-inch of gasket compression, which relates to about five or six rotations of a wrench.
Set the air-conditioner back on the opening in the roof while a helper inside watches to ensure it’s centered and the four bolts can be returned without restriction. Although it seems logical that the tighter the bolts, the better chance to avoid leakage, that’s not the case — some air-conditioners (such as the Coleman-Mach Series) have tabs on the upper unit that will indicate when the bolts are tight enough (when the tabs are right at the top of the roof).

The general rule of thumb is to tighten to 25-30 in.-lb., or about a ¼-inch of gasket compression. This relates to about five or six rotations of a wrench. After the initial installation, double-check the torque and/or the compression of the gasket after one or two trips on the road.

If for some reason you do have to pull the upper unit from the roof for maintenance or for repair when re-installing, you will need to compress the gasket about another ¼-inch from the thickness of the gasket at that time.

Get Updates
Subscribe today and never miss an issue!
Get all the latest tips and news to keep you moving on that open road!
RV Enthusiast January/March 2024 Issue
Current Issue
January/March 2024
Spring is back in bloom and with it we are proud to present our latest issue of RV Enthusiast! The January/March issue covers furnace failures and how to fix them, the best batteries for boondocking, quick and easy weekend projects, PLUS so much more!

Already a Subscriber? Click here for Access to the Full Issues.

Share This