Tanks a Lot - RV Enthusiast Magazine

Tanks a Lot

by | Jul 22, 2021 | Appliances, Plumbing, Repairs and Upkeep, RV/Motorhome

The RV water heater is something we sometimes take for granted. By performing basic maintenance before and after each travel season, you can ensure that it will work when you need it
It’s hard to imagine life on the road without a water heater. From washing hands to bathing and doing dishes, it is one of the key appliances that makes life in an RV comfortable.

Until it doesn’t work.

RV tank storage hot water systems are not complicated devices, and in fact are much like the units found in most residences, albeit smaller. The fact that they have not changed much through the years is testament to their reliability; the bulk of RVs on the market today still use 6- or 10-gallon units manufactured by either Atwood or Suburban, and they can last for years if they’re properly maintained. However, if they’re stored for months outside without being maintained or were not properly drained before the end of the season, you could be repaid this spring by a water heater that won’t fire or produces water that smells like rotten eggs. The good news is, these problems are easy to repair yourself, even if you’re new to RVing.
dirt, dust and spider webs
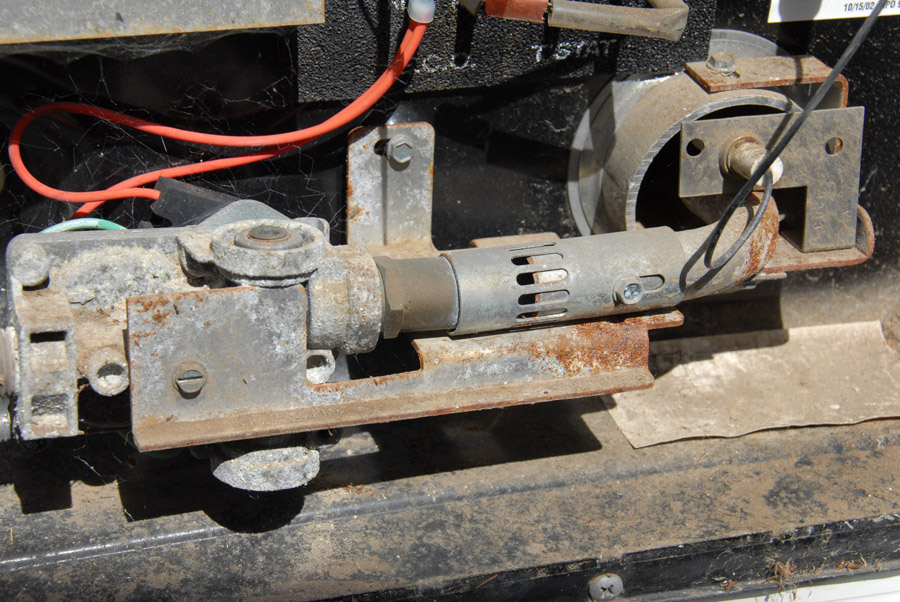
If your RV has been in storage for a season or more, this is likely what you’ll find when you remove the cover — dirt, dust and spider webs.
showing the dirty water heater
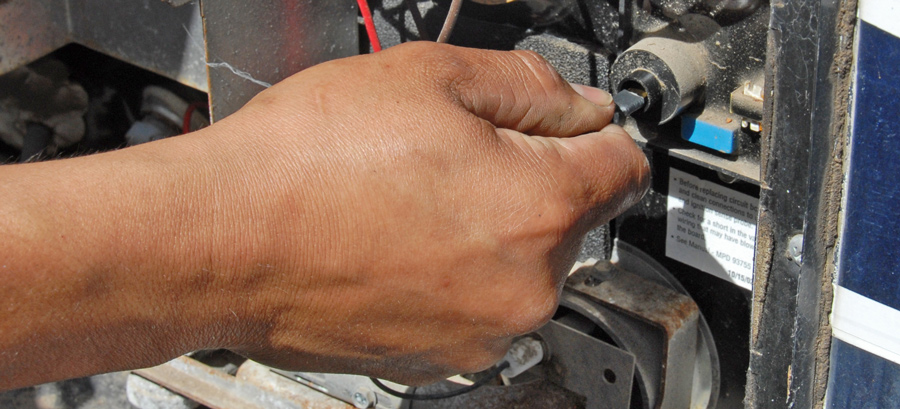
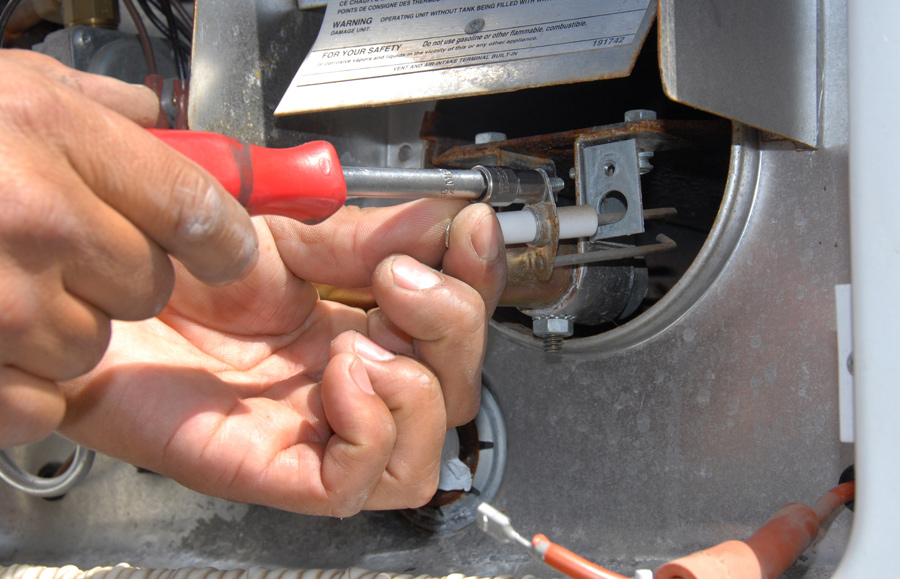
While dirt and other debris in the water heater enclosure aren’t attractive, they don’t necessarily do any harm. However, spiders and other critters love to build their homes in the burner tube (they are attracted to the smell of propane for some reason), and that can reduce or obstruct the flow of LP-gas to the burner. If you have access to compressed air, blow out the burner tube to clear any spider webs or other debris (after removing the ignitor assembly, as seen in the following photos). If compressed air isn’t available, you can go with canned compressed air (used for cleaning electronics like computer keyboards) or remove the slotted burner tube cover (held in place with one screw) and carefully run a flexible brush through the burner tube. Once finished, re-install the ignitor assembly and plug it back in.
The main difference between Atwood and Suburban water heaters has to do with the tank design: Atwood uses an aluminum-clad tank that does not require an anode rod, while Suburban models are porcelain-lined steel and do use an anode rod. Atwood claims that the aluminum tank lining acts as the anode and the metals in the water serve as the cathode, so an anode rod isn’t required. Suburban uses an anode rod to draw the harmful electrolytic process away from the water heater tank lining, focusing corrosion on the anode rod and sparing the tank walls. Both systems work — it’s just a difference of engineering philosophies.
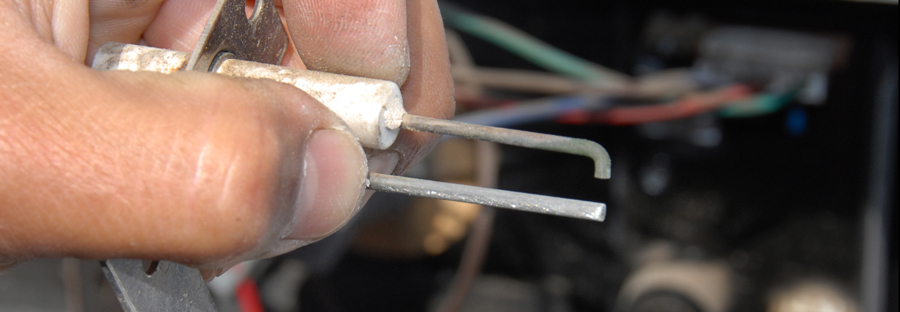
oxidized igniter/ground
 the bracket in place is removed
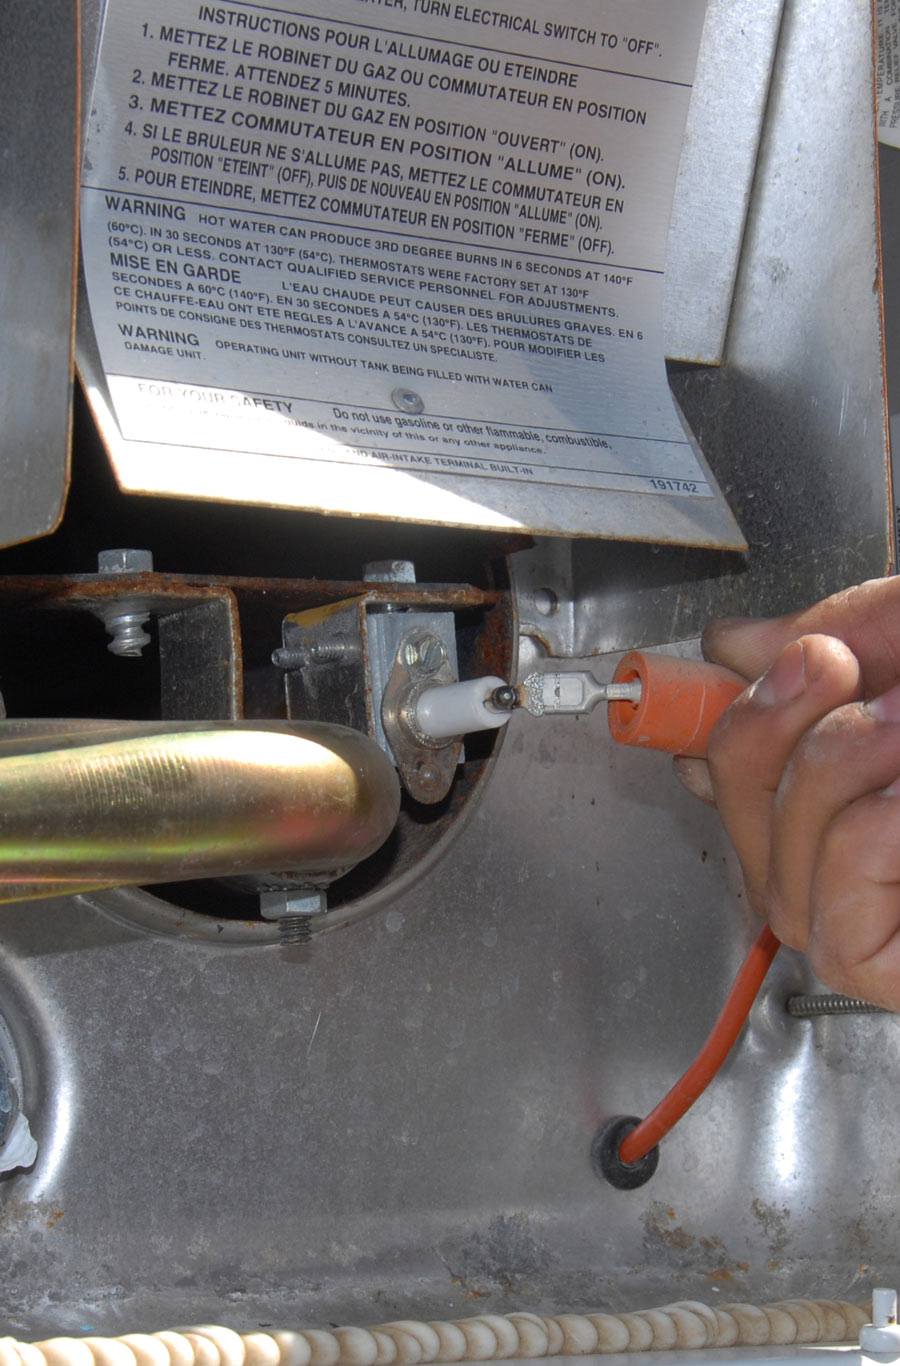
Another reason a water heater may not fire can be traced to an oxidized igniter/ground. On this Atwood water heater, the unit igniter is unplugged, then the single screw that holds the bracket in place is removed.
Both types should be drained and flushed at the end of every season. If you live in an area where winter temperatures drop below freezing, a full water heater tank can rupture — and we don’t need to tell you that will require a trip to the RV repair shop and a fistful of hundred dollar bills. But even if you live in a warmer climate and put your rig away at the end of the travel season, you should still drain the tank; otherwise, the stagnant water can lead to unpleasant odor. Typical city water supplies contain naturally occurring sulfate, which in small amounts poses no risk to human health. However, certain bacteria feed off the sulfates in water, reducing them to hydrogen sulfide — and that’s where you get that rotten egg smell. Another possible cause is a corroded anode rod, mentioned earlier. That’s why it’s so important to completely drain and flush the water heater tank at the beginning and end of each travel season.
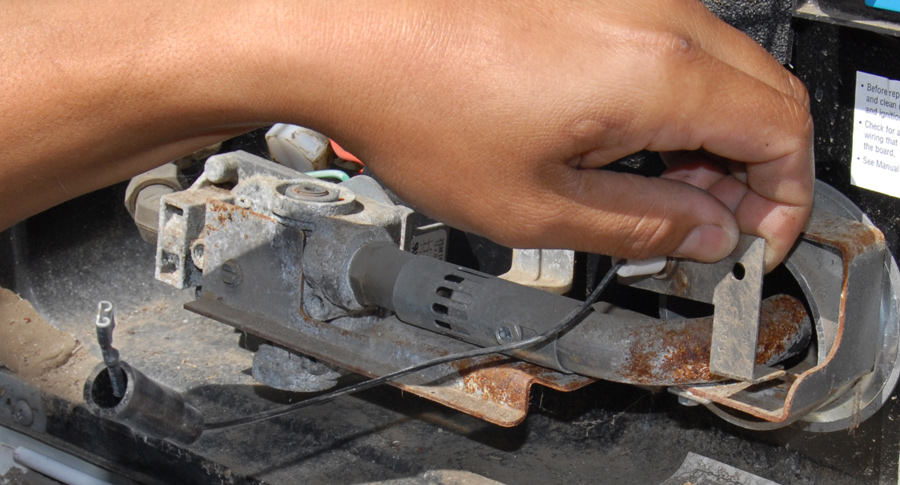
the ignitor bracket assembly can be lifted out of the way
With the screw removed, the ignitor bracket assembly can be lifted out of the way.
check the emergency relief valve
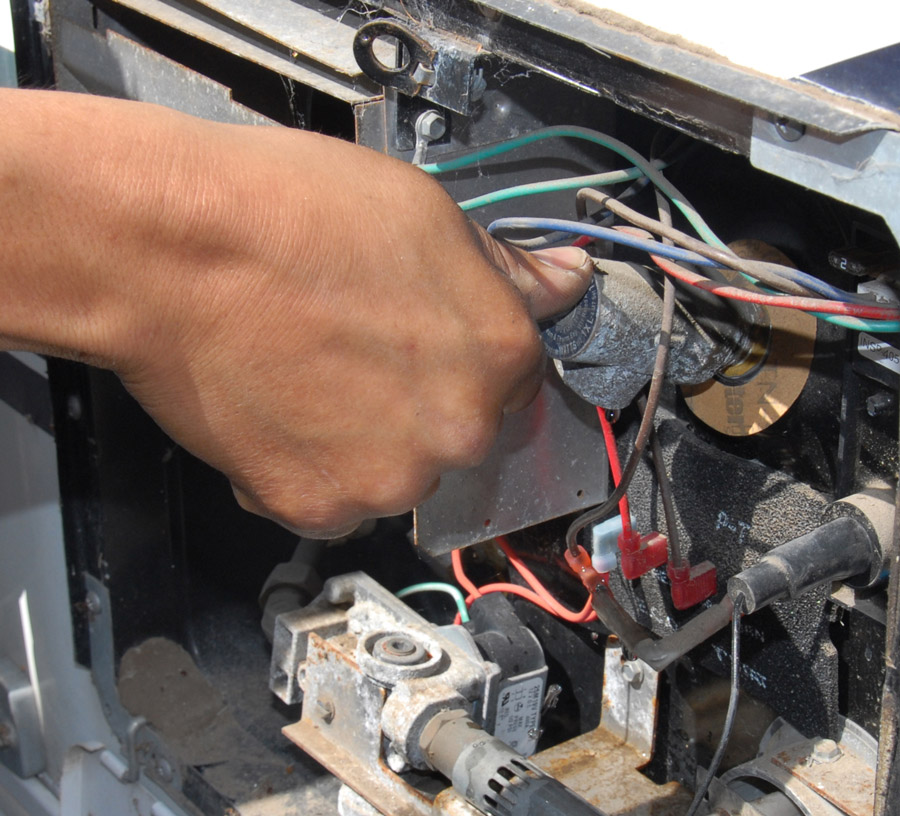
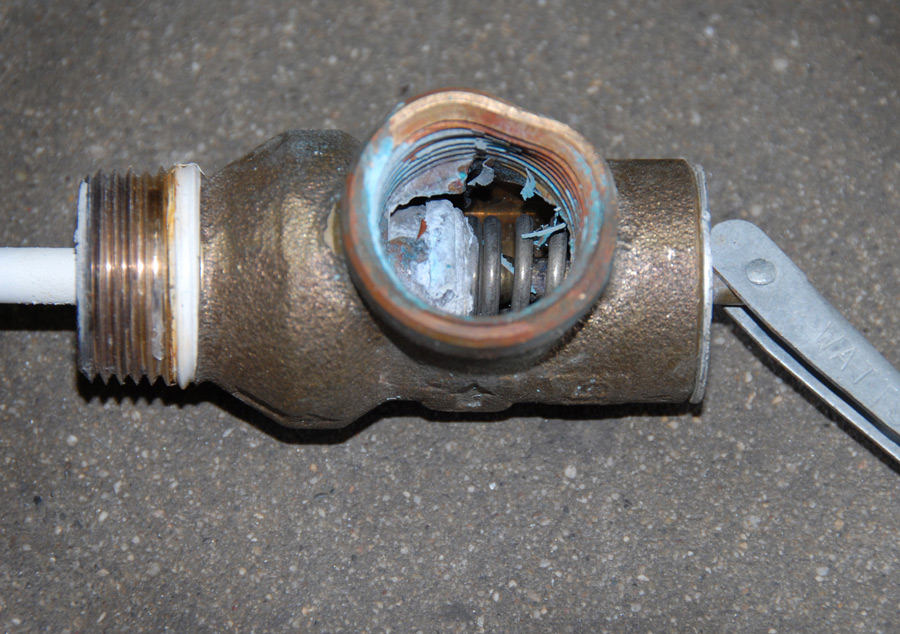
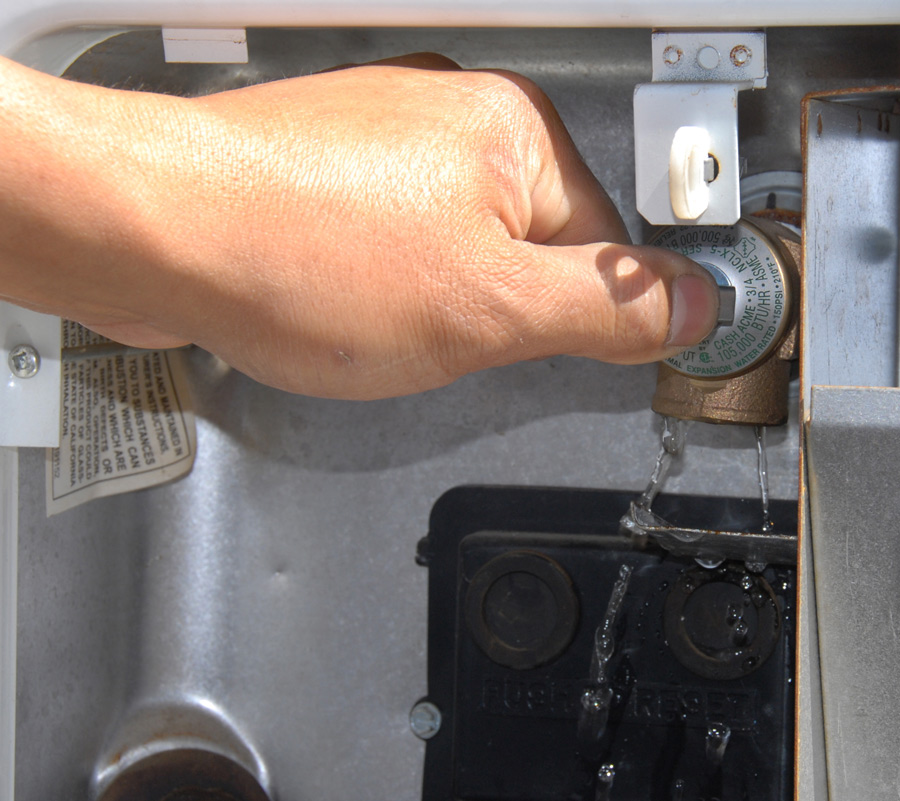
After blowing out the burner tube, check the emergency relief valve by pulling up on the handle. Water from the tank should start to trickle out of the valve if it is working properly. If the valve is sticky or won’t move, it must be removed with a pipe wrench and replaced.
a good example of a frozen emergency relief valve
Here is a good example of a frozen emergency relief valve. Note the calcium deposits and rust that eventually prevented the valve from functioning.
Regardless of brand or how the RV is stored, another common problem is a water heater that just won’t fire; you turn it on and hear that familiar, “tick, tick, tick” but nothing happens. This could be because the burner tube is blocked by debris (like a bug’s home), the igniter electrode is oxidized and no longer makes good contact with the ground, or there is insufficient power and/or gas to the appliance. It’s pretty simple stuff — it takes both fuel and spark to make a fire.
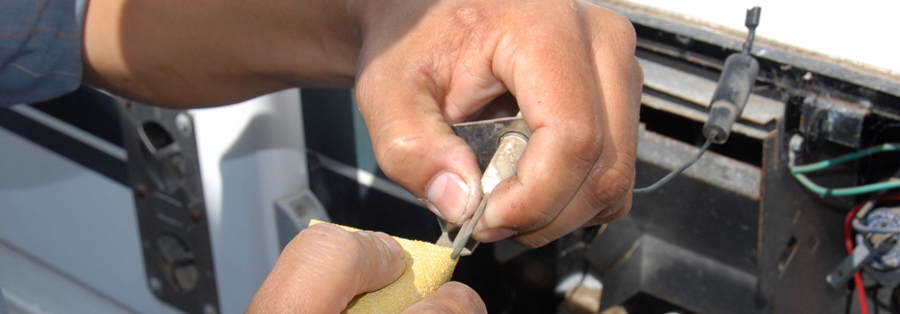
the igniter electrode and ground wires
Use a piece of sandpaper (120 grit will do) or emery cloth to clean
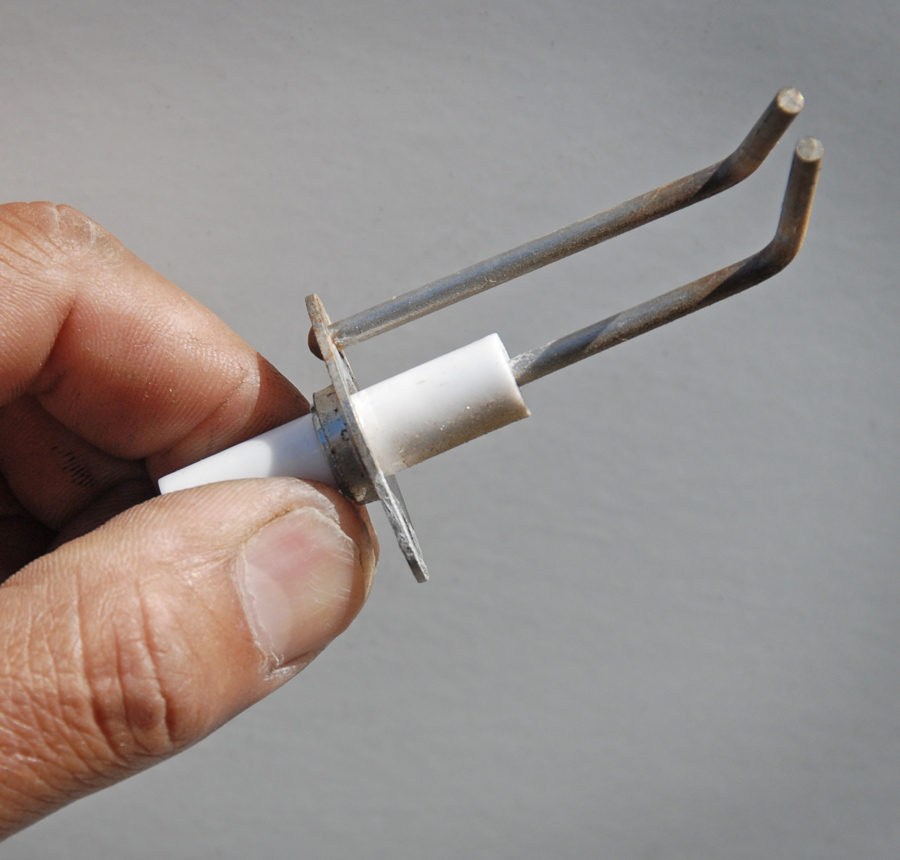
Use a piece of sandpaper (120 grit will do) or emery cloth to clean the igniter electrode and ground wires. Make sure to hold the igniter assembly by the two wires as shown, not by the white porcelain, as this can crack if you’re not careful. For the purpose of comparison, we cleaned just the bottom ground wire; compare it to the electrode, which has a greenish brown appearance. It’s still in good shape, but further oxidation could cause future problems.
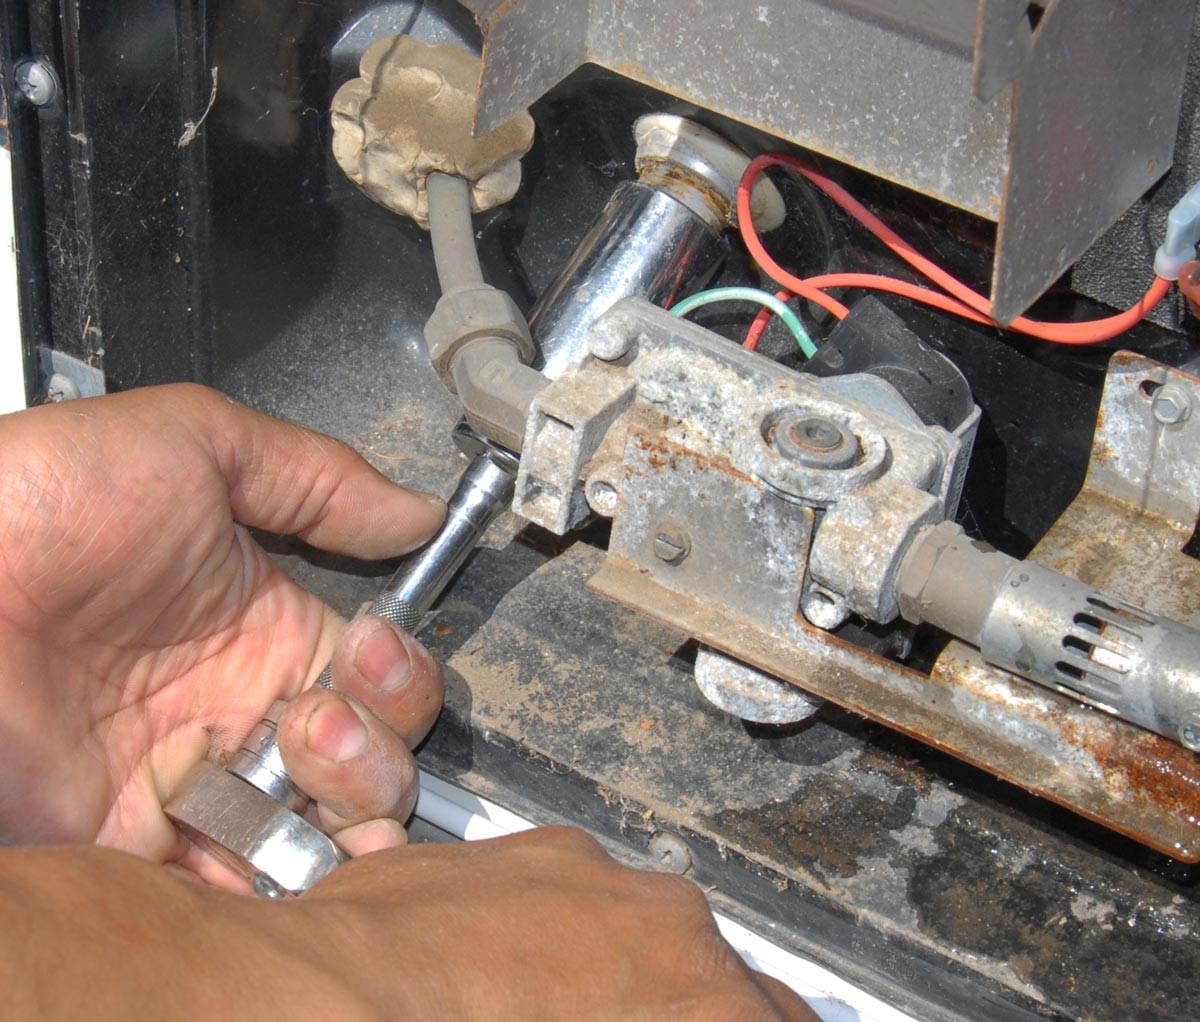
water heater drained
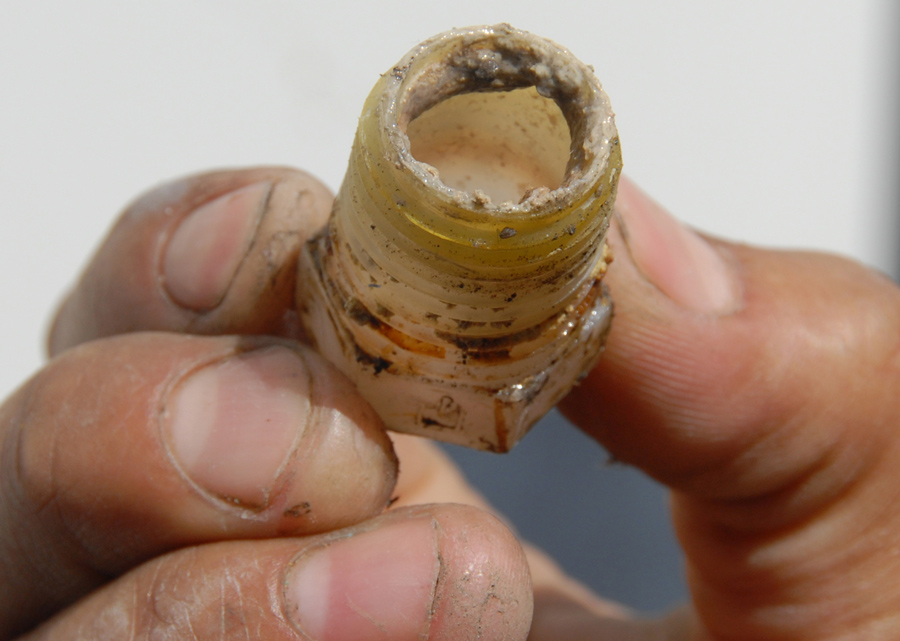
plastic plug
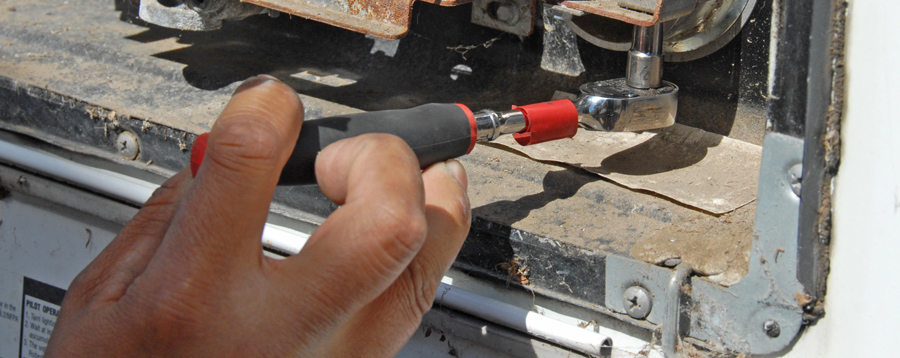
The water heater should be drained at the end of every season. Atwood water heaters use a plastic plug that is easily accessed using a ratchet, extension and appropriate socket. This plastic drain plug from an Atwood unit is several years old — note the silt residue caused by water tank corrosion and infrequent maintenance.
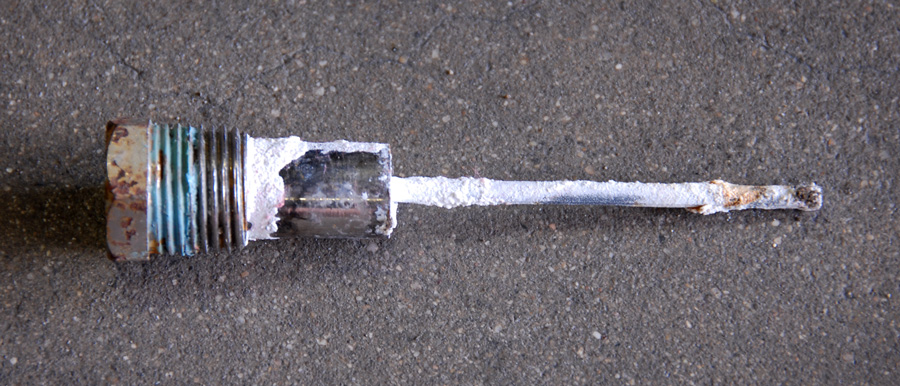
anode rod
All of the magnesium on this anode rod from a Suburban tank has been eaten away by corrosion, leaving only the metal core. Obviously, you shouldn’t wait this long to replace the anode rod; it should be checked twice a season for signs of corrosion and replaced when it has lost 50-75% of its material. Be sure to apply anti-seize or Teflon tape when replacing the anode in the water heater.
the electrode wire
Although it looks different, servicing a Suburban water heater is a similar process. First, unplug the electrode wire, as shown.
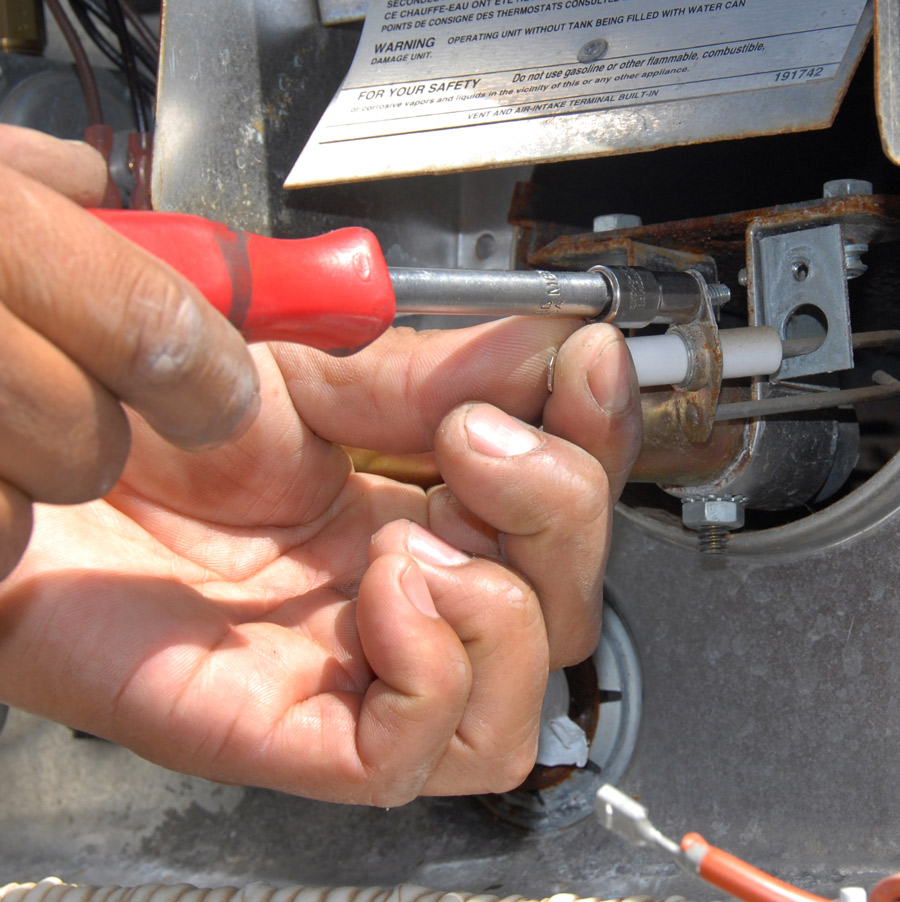
secured with one screw
Suburban electrode
The electrode assembly is secured with one screw. The Suburban electrode assembly is cleaned in the same manner as the Atwood. A few passes with a piece of sandpaper and it will be good as new.
Fortunately, solving these common problems is easy in most instances. To see how it’s done, we visited C&S RV Service Center in Oxnard, California, and watched as its technicians performed routine pre-season maintenance on a 6-gallon Atwood and a 10-gallon Suburban. With proper maintenance and basic knowledge of RV water heater function, you can ensure your water heater will work properly when you need it.
Checking the pressure/temperature relief valve
Checking the pressure/temperature relief valve involves operating the valve lever and allowing water to flush the valve. A leaky valve may need replacement. Be sure to get an exact replacement. The biggest difference between the Atwood and the Suburban is that the Suburban comes with an anode rod drain plug from the factory. The plastic plug that Atwood uses is intentional as a safety and anti-corrosion concern; do not replace with a metal plug.
Camco Water Heater Tank Rinser
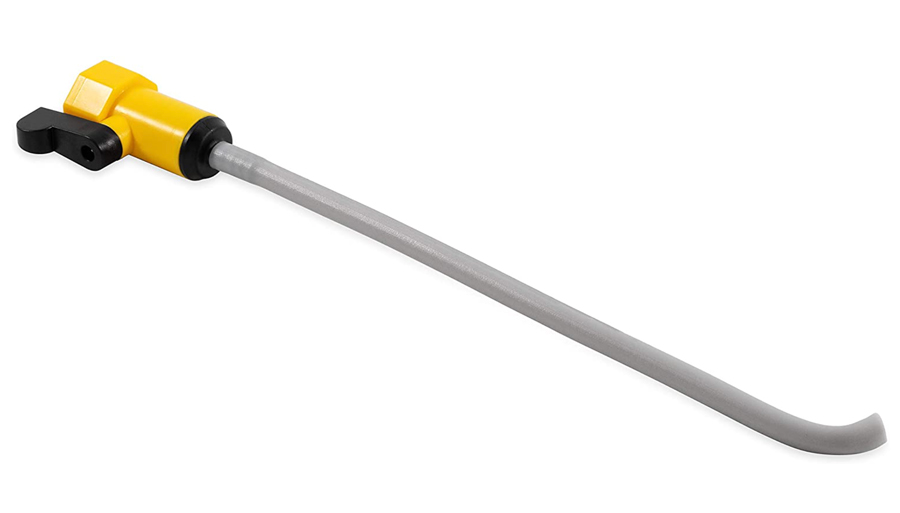
The Camco Water Heater Tank Rinser is an inexpensive and easy way to mitigate a build-up of harmful sediments that can accumulate below the drain plug line. After opening the pressure relief valve on the water heater, remove the drain plug and attach the tank rinser to a garden hose. The tank-rinser wand is then directed into the tank to remove any deposits, which are flushed around the wand.
Sources:

Airxcel, Inc.-Suburban Div.
(423) 775-2131
www.airxcel.com/suburban

C&S RV Service Center
(805) 982-9900
www.candsrv.com

Camco
(800) 334-2004
www.camco.net

Dometic
800-Dometic
www.dometic.com/en-us

Get Updates
Subscribe today and never miss an issue!
Get all the latest tips and news to keep you moving on that open road!
RV Enthusiast July/August 2024 cover mockup
Current Issue
July/August 2024
As the summer days linger on, escape the heat with the newest edition of RV Enthusiast! The July/August issue covers Improving RV A/C Efficiency, Rear- and Side-View Cameras, Truck shock Repair, PLUS so much more!

Already a Subscriber? Click here for Access to the Full Issues.

Share This