Locked When Loaded
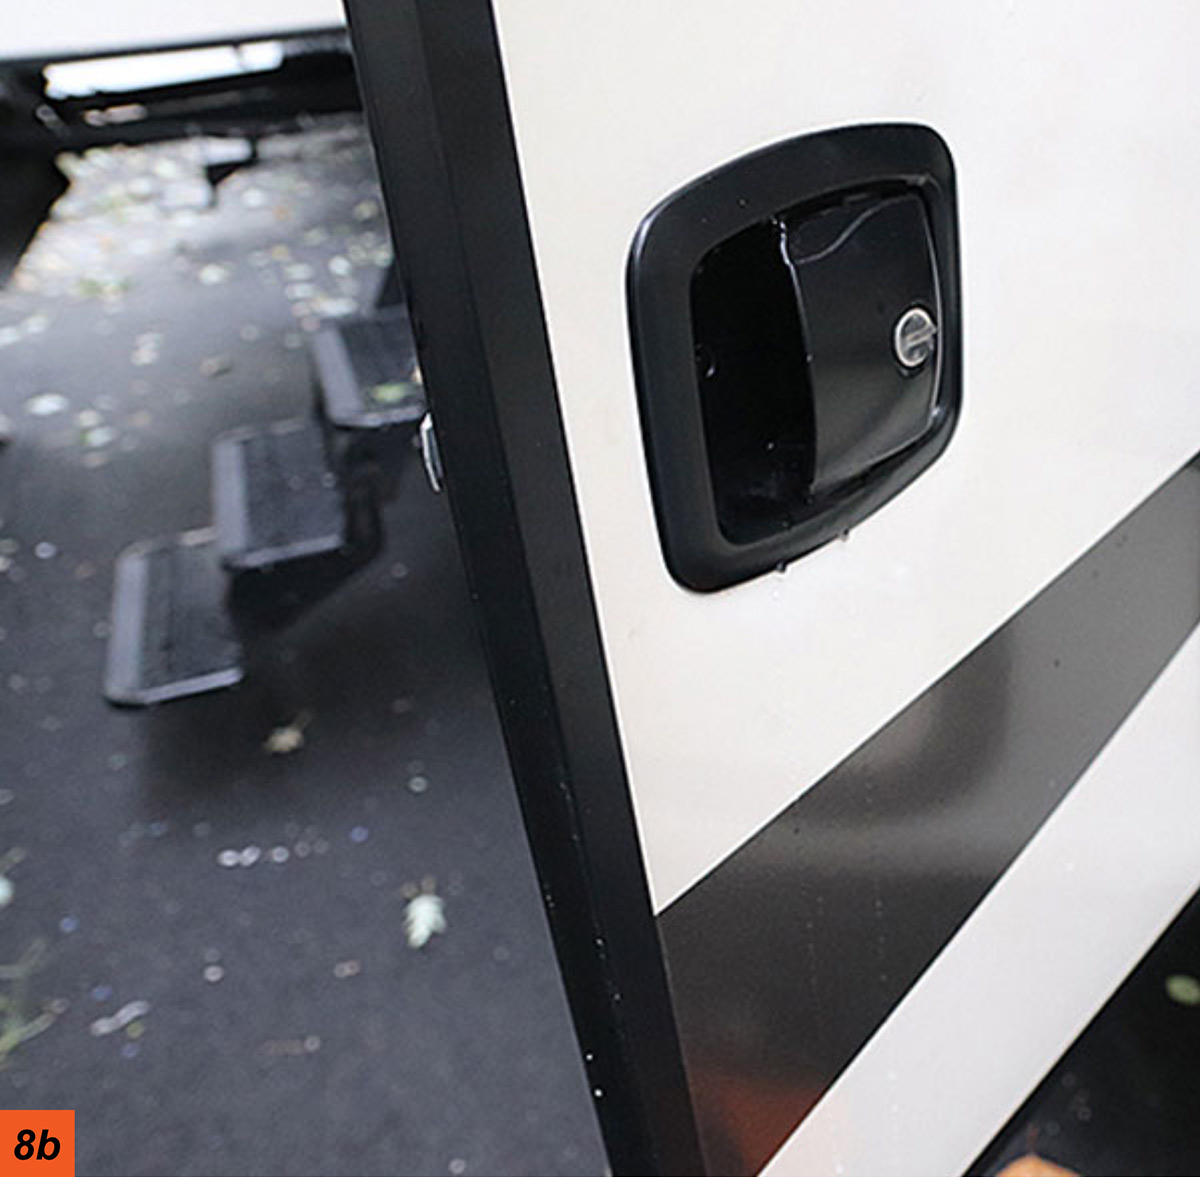
There are two locking features for just about all entry doors: one that locks the handle and the other that engages a deadbolt for maximum security. However, many of these handle locks are stamped with an “M” — which means dealer personnel (and others) can use a master key to open them. At first blush, this seems like a sound idea; it allows dealership employees to quickly open and close inventory for potential buyers without handling separate keys for each model. Unfortunately, master keys aren’t all that difficult to obtain. Literally thousands of sales and service departments have them — heck, so do most transport companies, for that matter. They are really a necessity for many people to get their jobs done. That said, their prevalence is just one more reason why owners should always use the deadbolt along with the handle lock when securing their RVs; master keys — which also are compatible with some aftermarket door locks — will not open the deadbolt portion of the lockset.
And then, of course, there is the infamous CH751. Overwhelmingly, the RV industry supplies locks that use the same key, CH751, to “lock” baggage doors. However, they have been around for 50 years, and just about everyone has one. If you want your baggage door lock to offer more protection than simply preventing things from falling out, these definitely need to be upgraded.
RVLocksandMore.com, the retail segment for Global Link, which produces locks for RVs under the Creative Products Group (CPG) branding, offers a variety of locks for RV manufacturers and consumers via aftermarket distribution. What got our attention was the ability to key alike the entryway and all compartment locks among its keyless options.
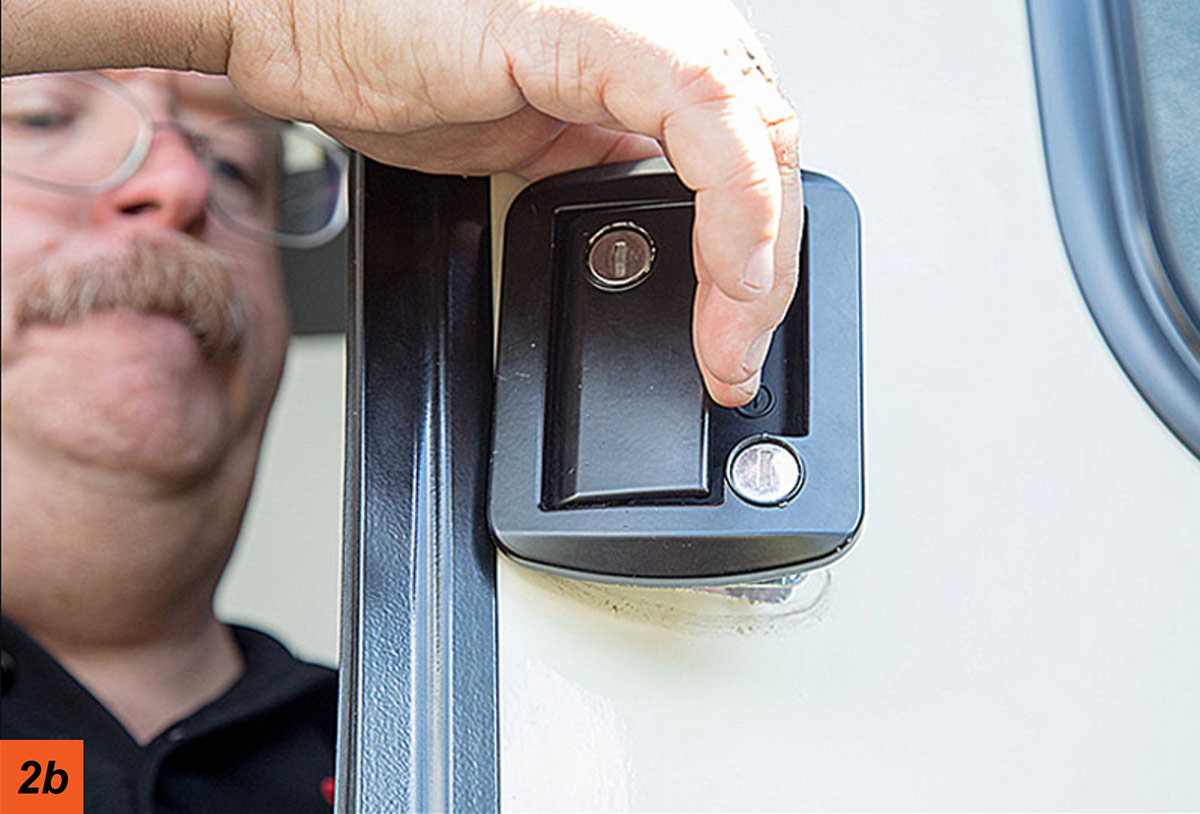
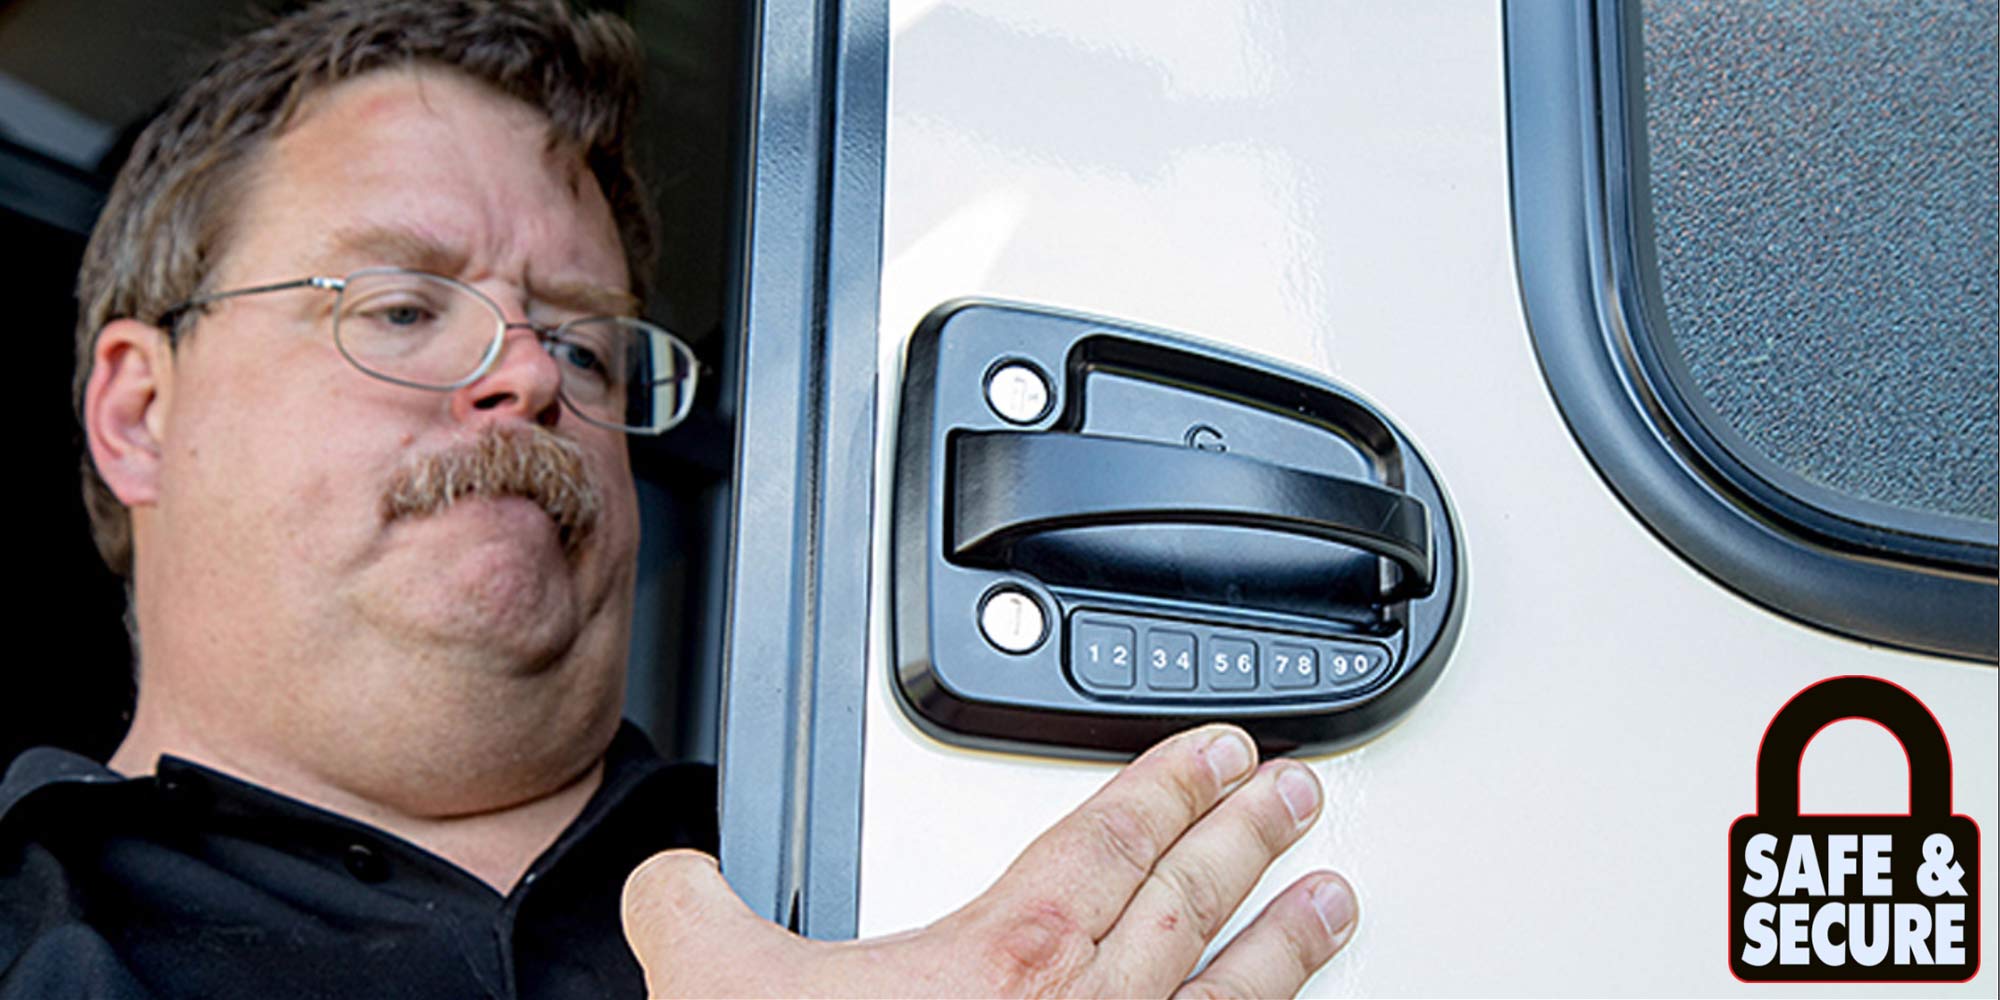
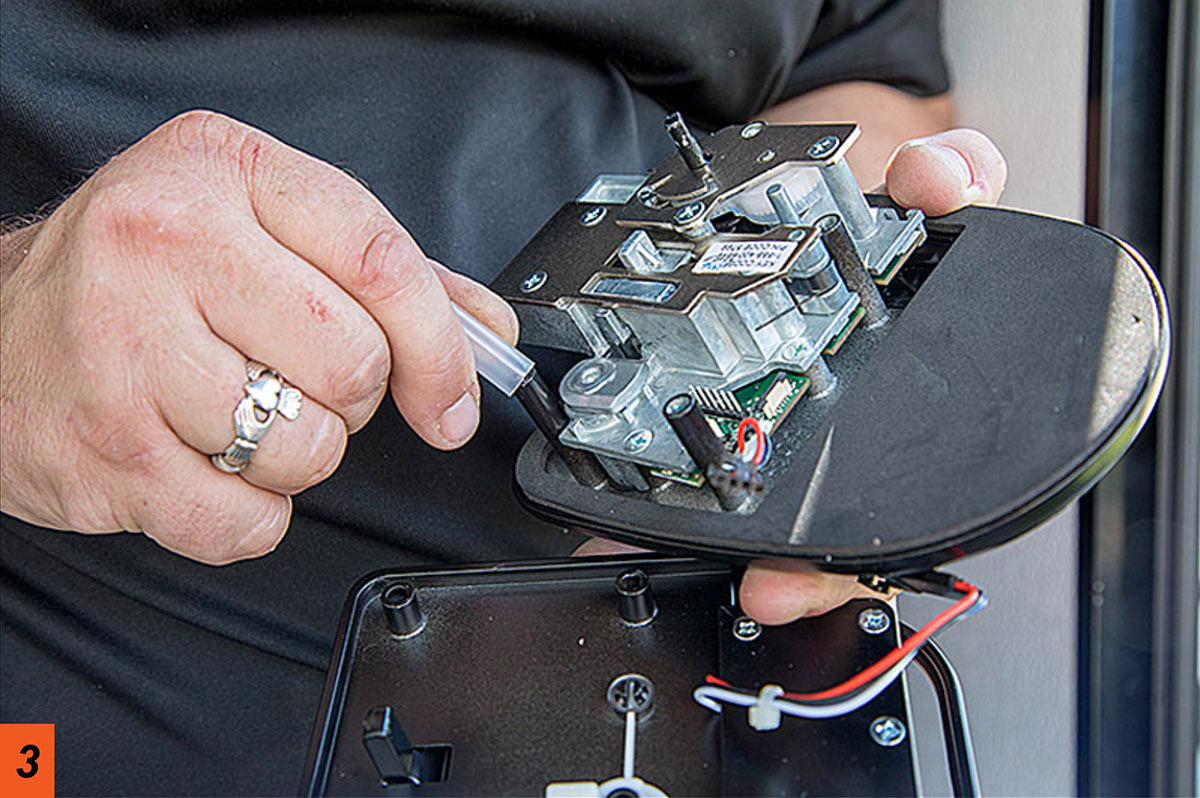
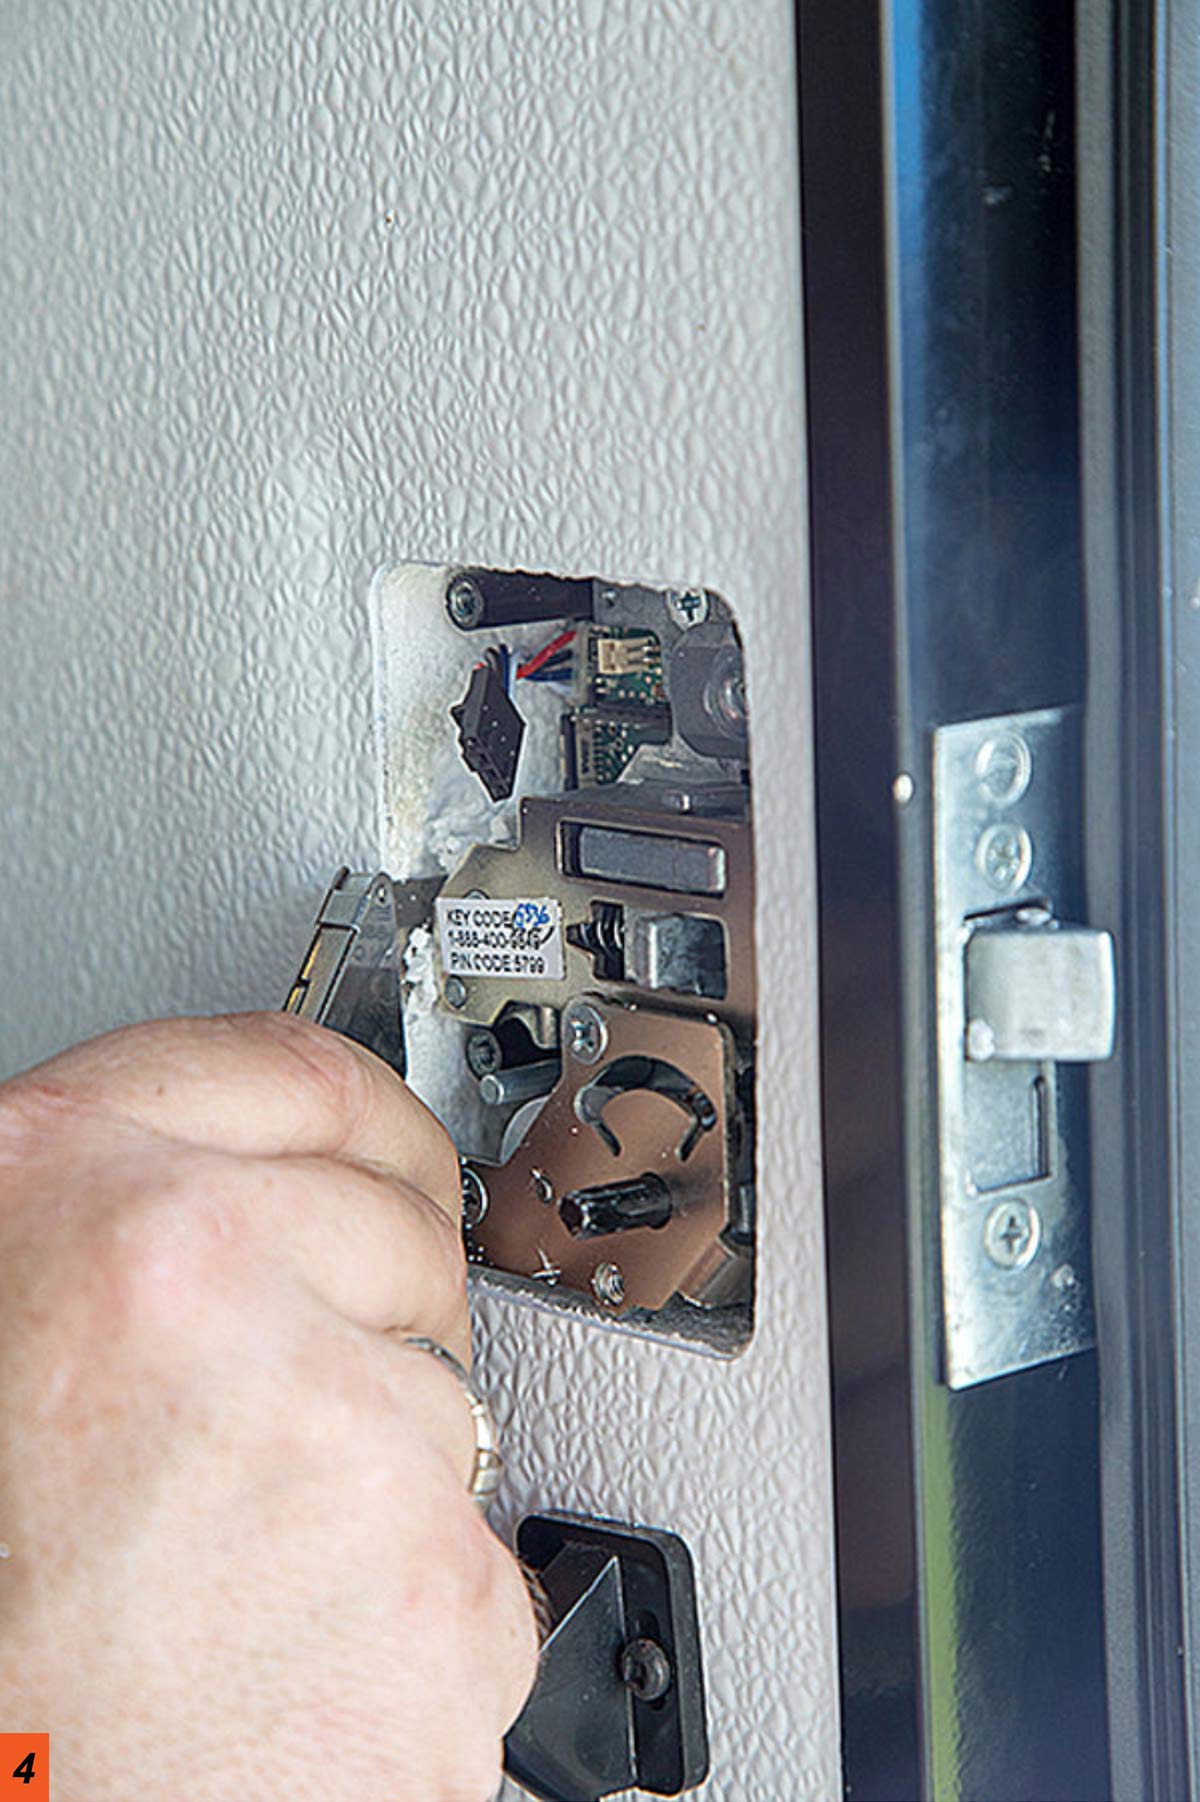
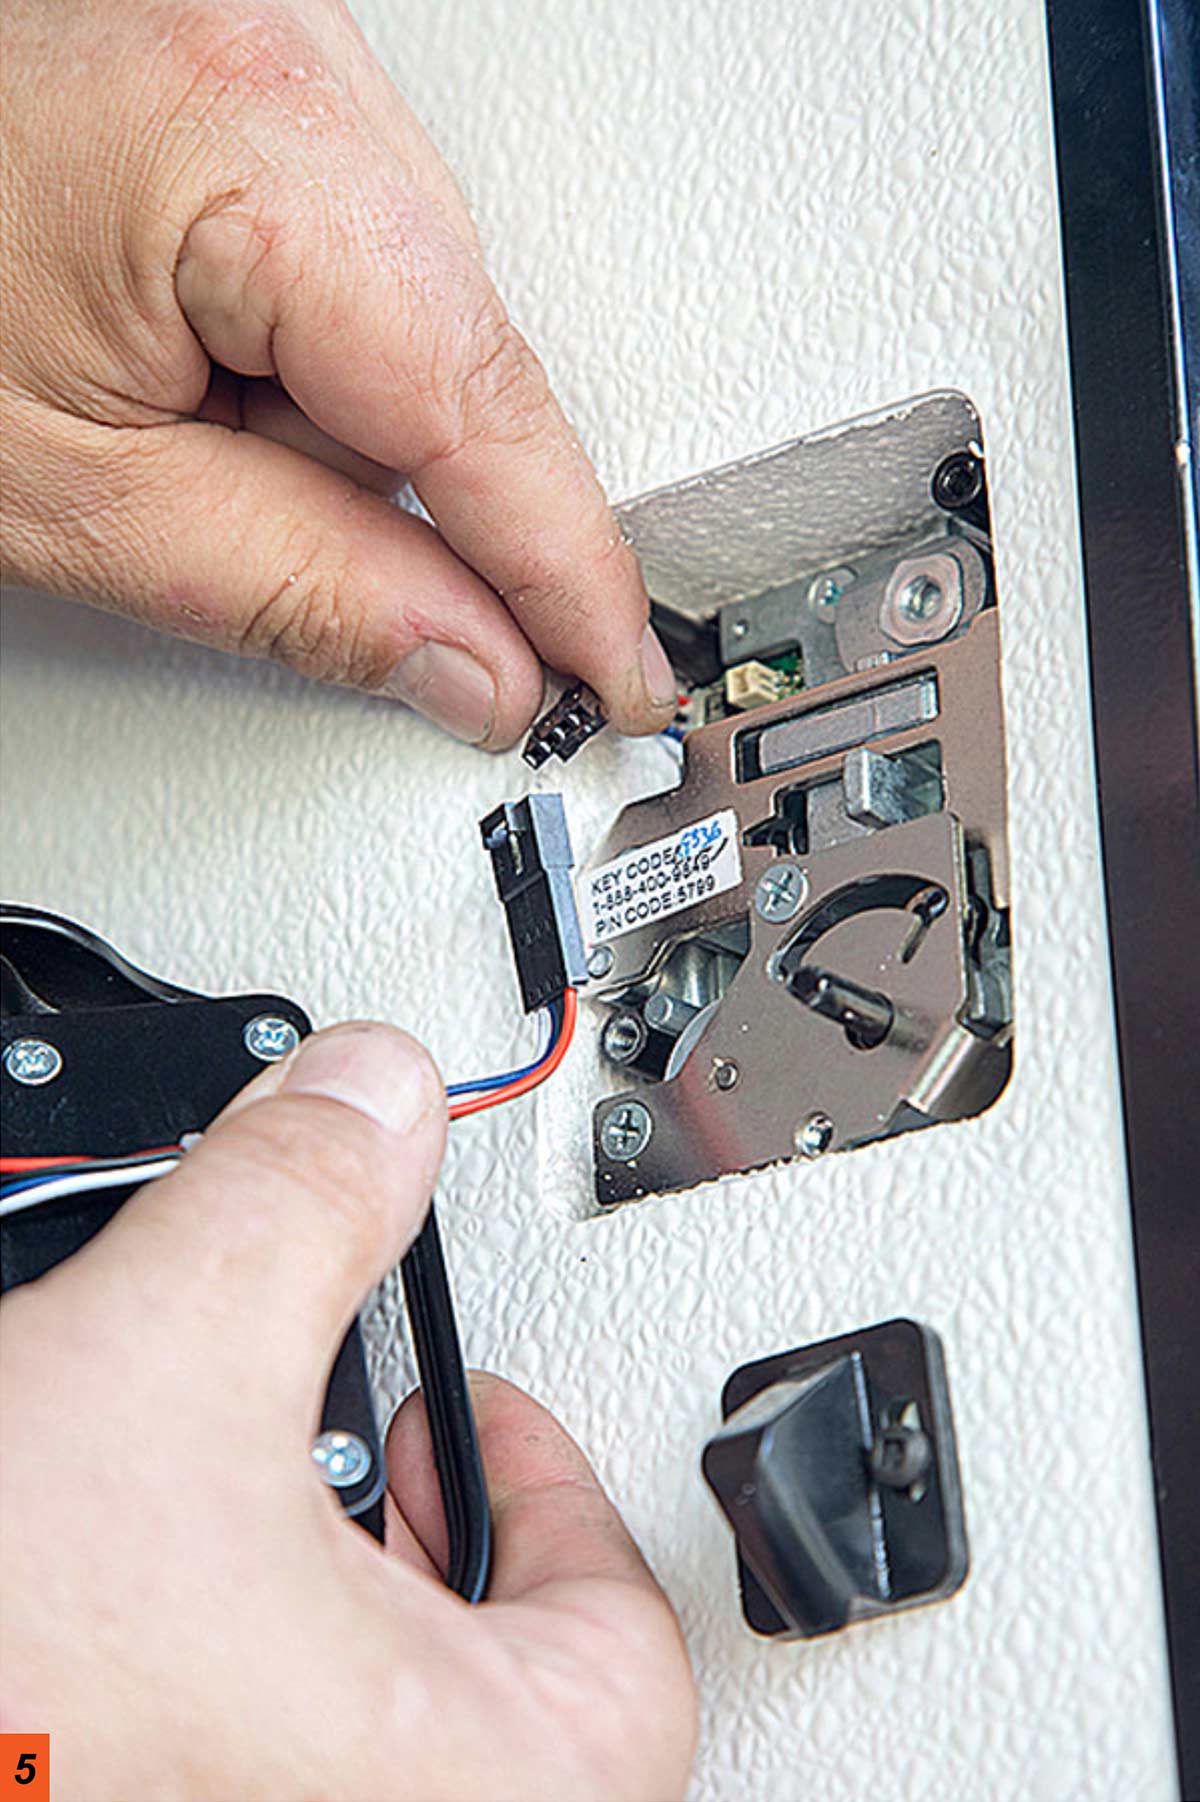
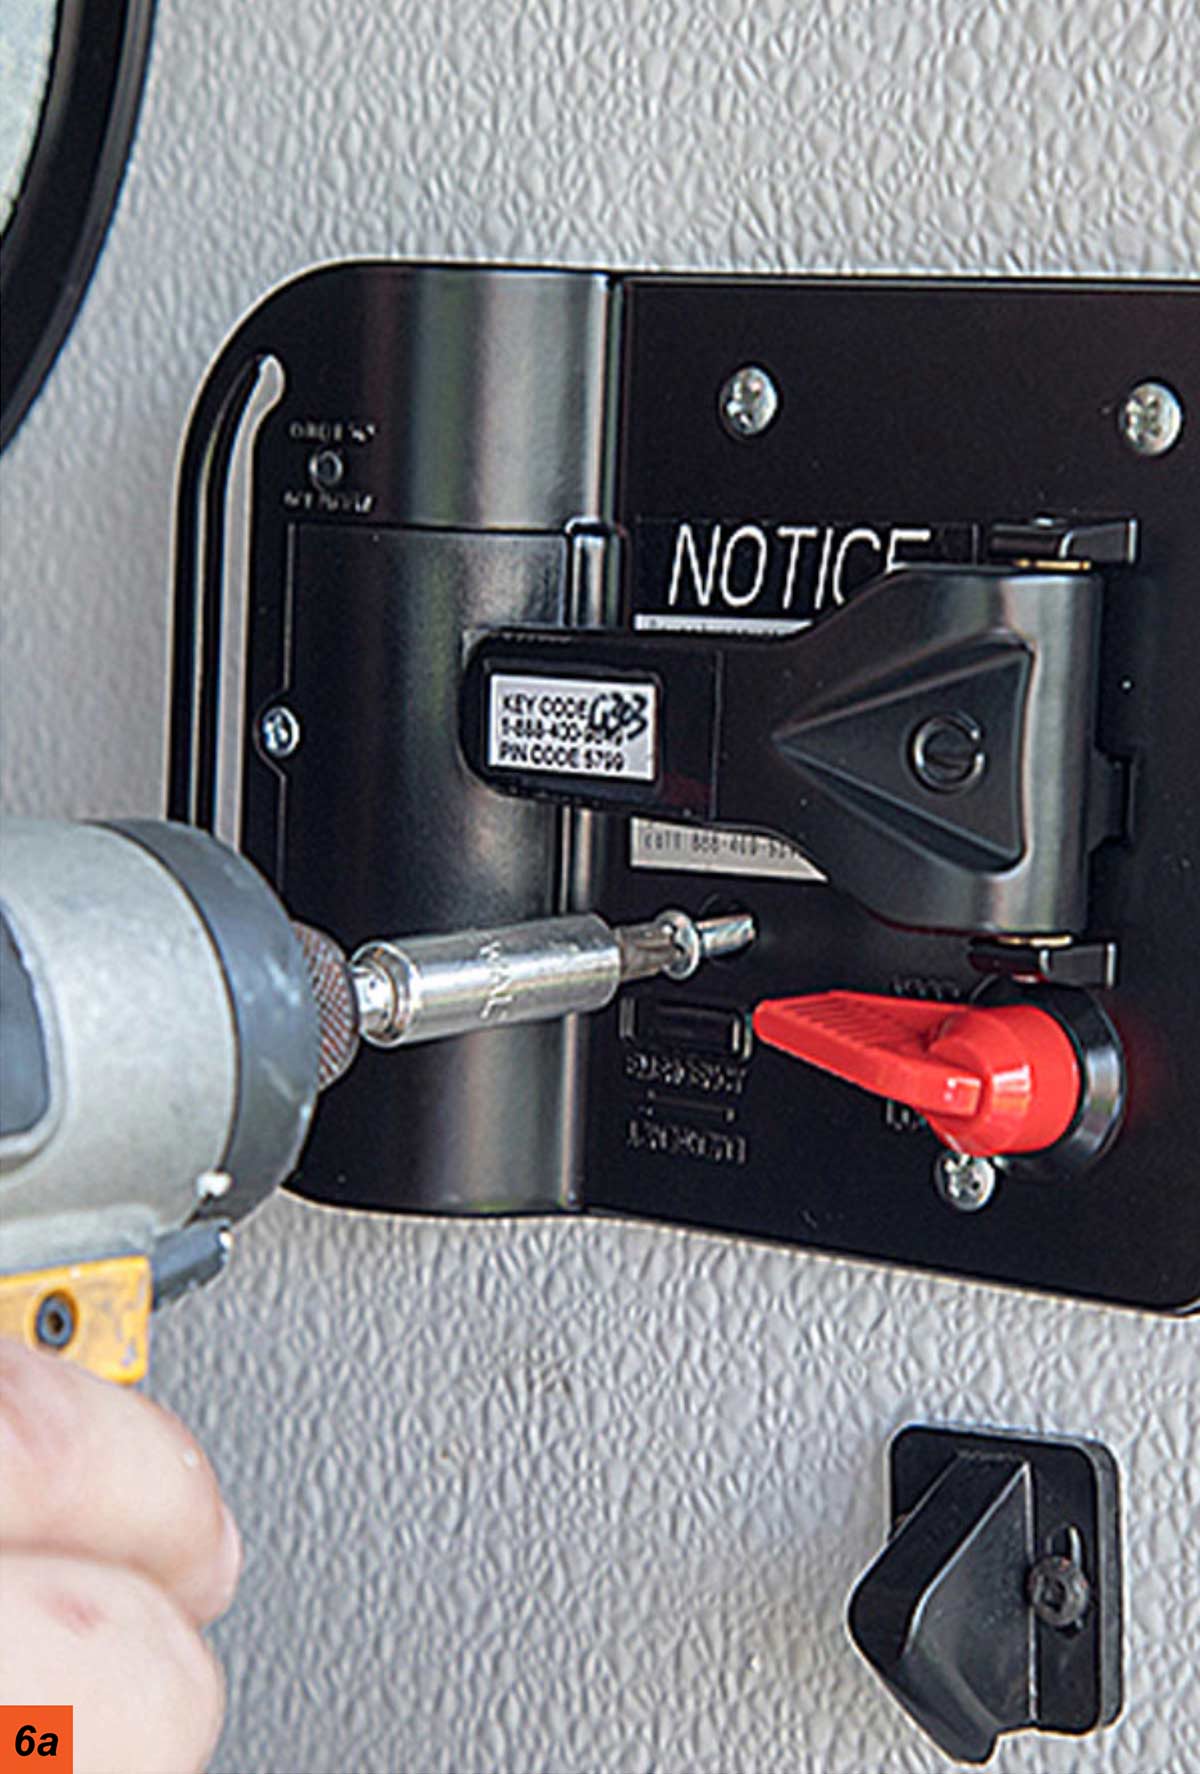
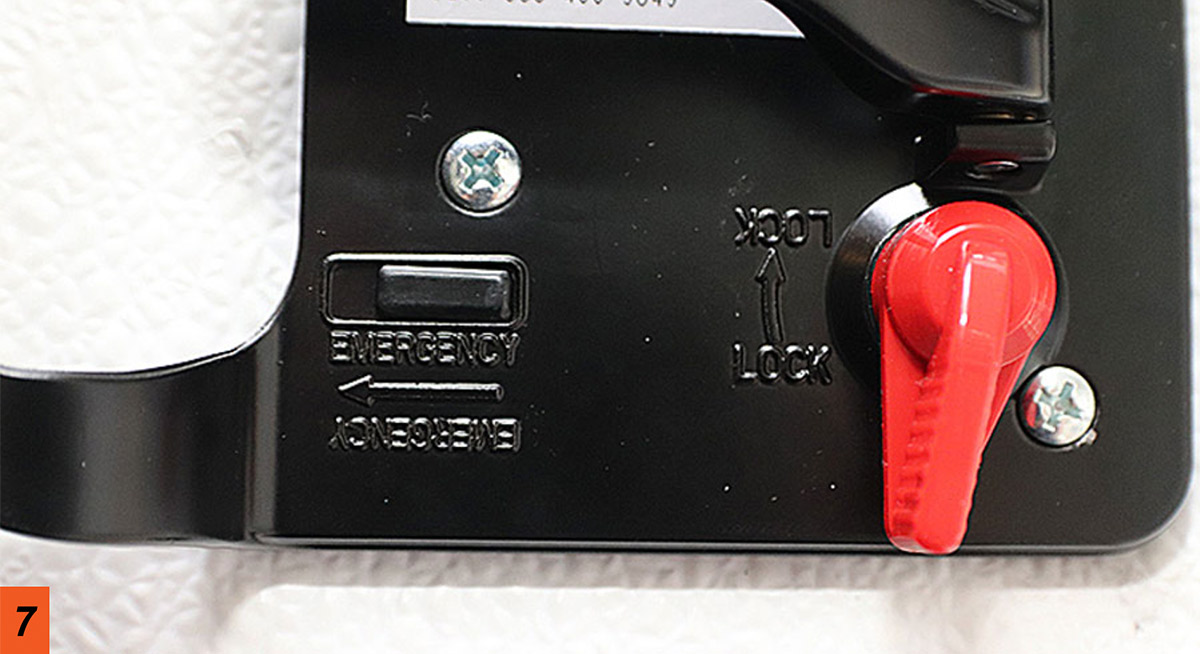
An even better solution is the company’s Ultra E Pro Electronic Lock ($185) keyless lockset for entry doors. By using a four-digit code, owners can rest assured that the deadbolt will always be engaged and not accessible to master keys. Dealers can still use a master key or set their own code for use on sales lots with units so equipped, but once the owners change the code, access by unauthorized individuals is no longer possible. The deadbolt works differently than the standard lockset used by the majority of RV manufacturers in that it doesn’t throw a metal rod or square “bolt” into a strike plate; the GPC model uses a mechanism that locks the door internally. Personal codes are entered on the LED keyboard built into the lockset housing and the mechanism is powered by a single C123 lithium battery. The lockset is covered by a one-year warranty.
A subsequent introduction since our installation is the Ultra ES Pro Smart Lock, which adds a secure encrypted connection to a smartphone or tablet to control the lock. The smartphone can lock or unlock the door, has a provision for changing the passcode and informs the owner of battery life — all within a 120-foot range, according to the company. Up to eight users can program their smartphones to control multiple locksets.
Once you experience the convenience of a keyless entry, you’ll never look back at physical keys, except to hide one somewhere in the RV in case of a failure (which is most often caused by a dead battery). The Smart Lock feature adds the Bluetooth element to the process, and just about everyone these days has a smartphone.
Entry-way locksets from the company are also available without the keyless option, and for both products the handle has a unique mechanism that allows the user to pull the door at the same time as releasing the latch bolt, providing a more secure grip when opening the door. This configuration works well, once the user gets the knack of how it works — only one side of the handle pulls out at an angle. Acclimation does come quickly, but you’ll have to instruct visitors not familiar with the mechanism how to use it to prevent adverse strain on the lockset.
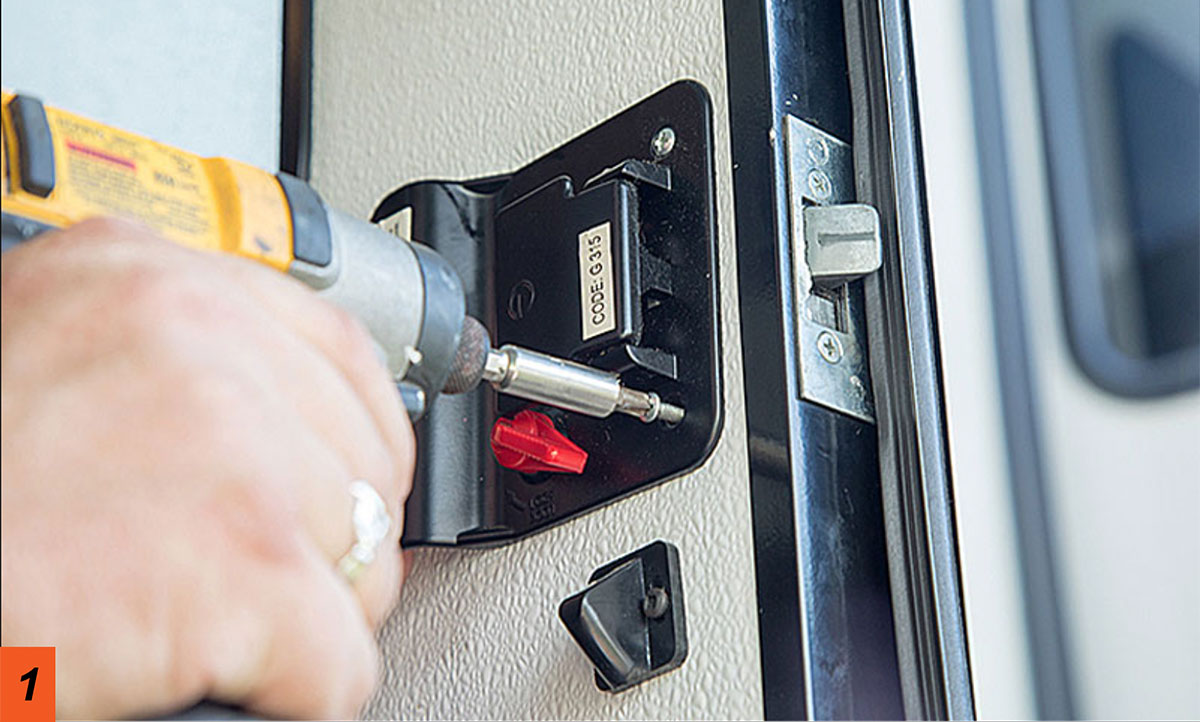
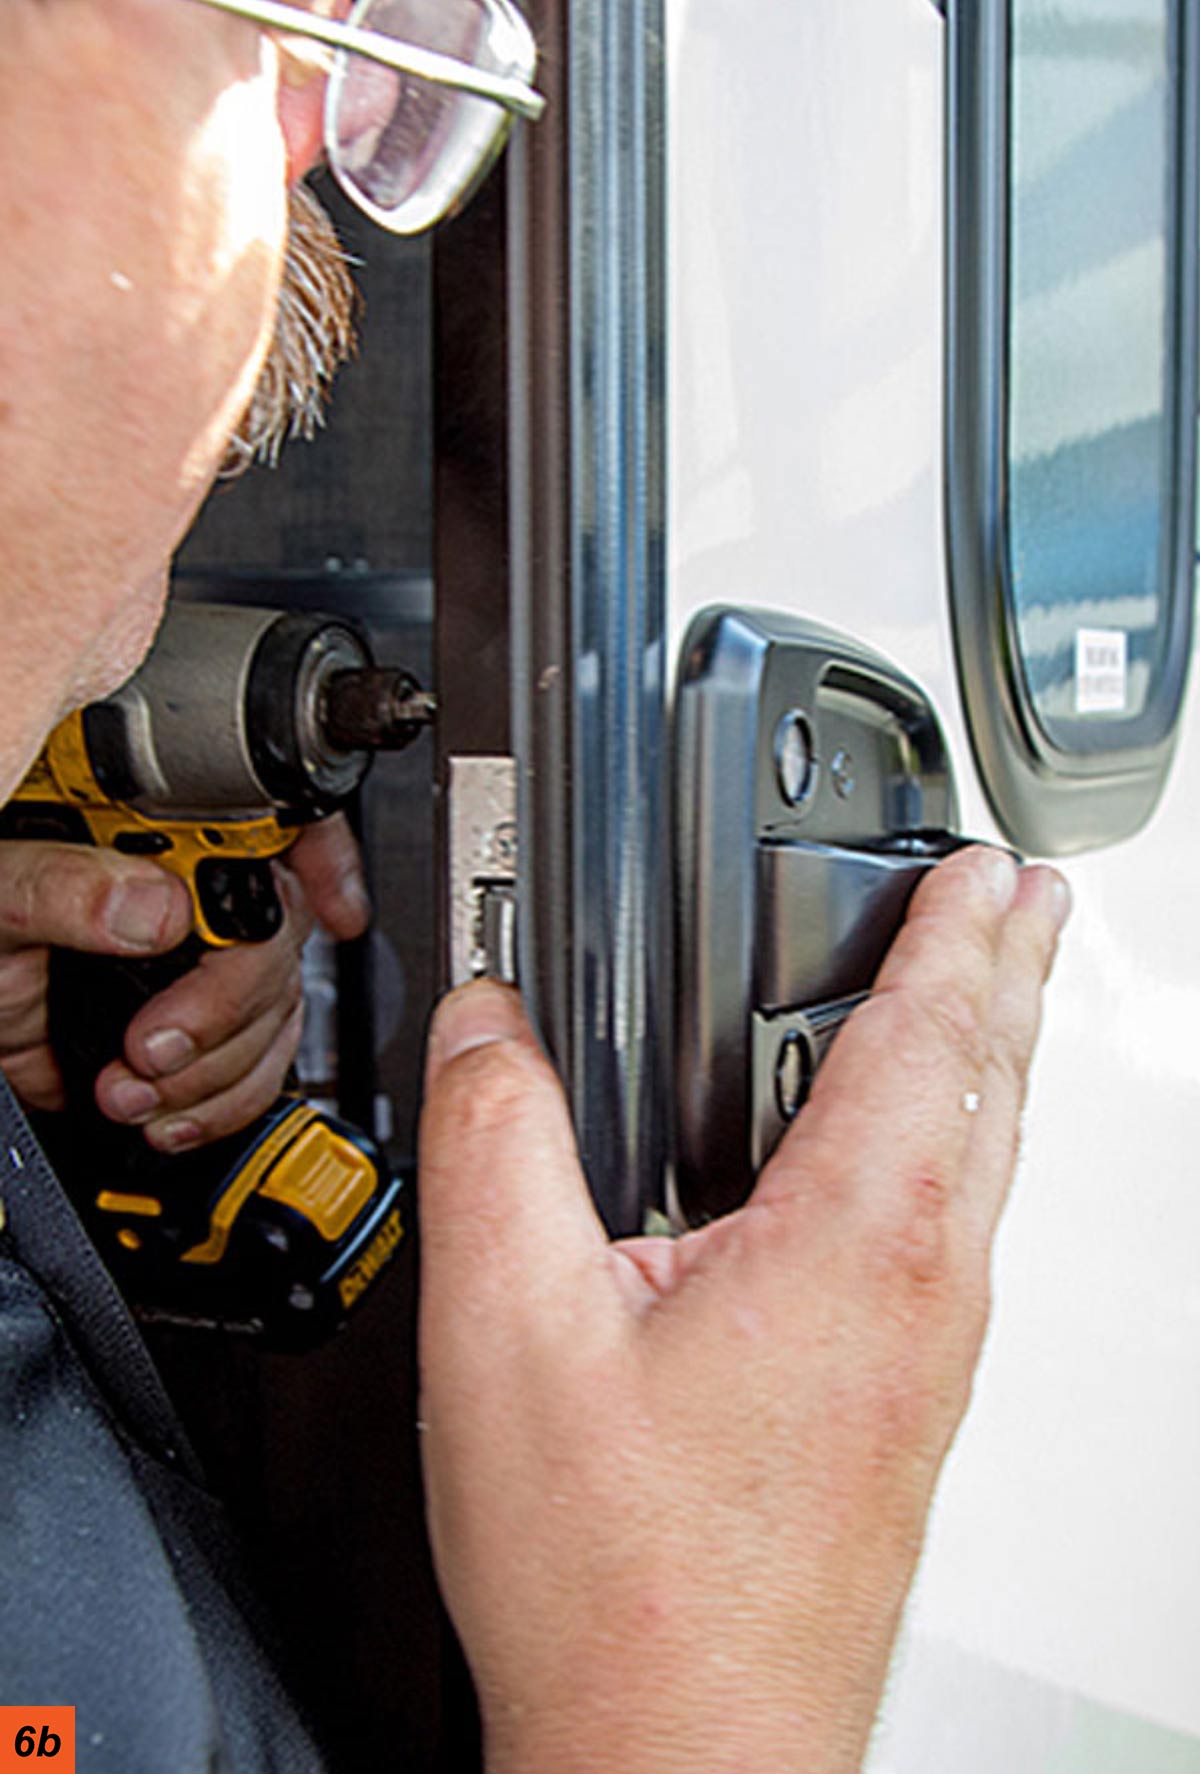
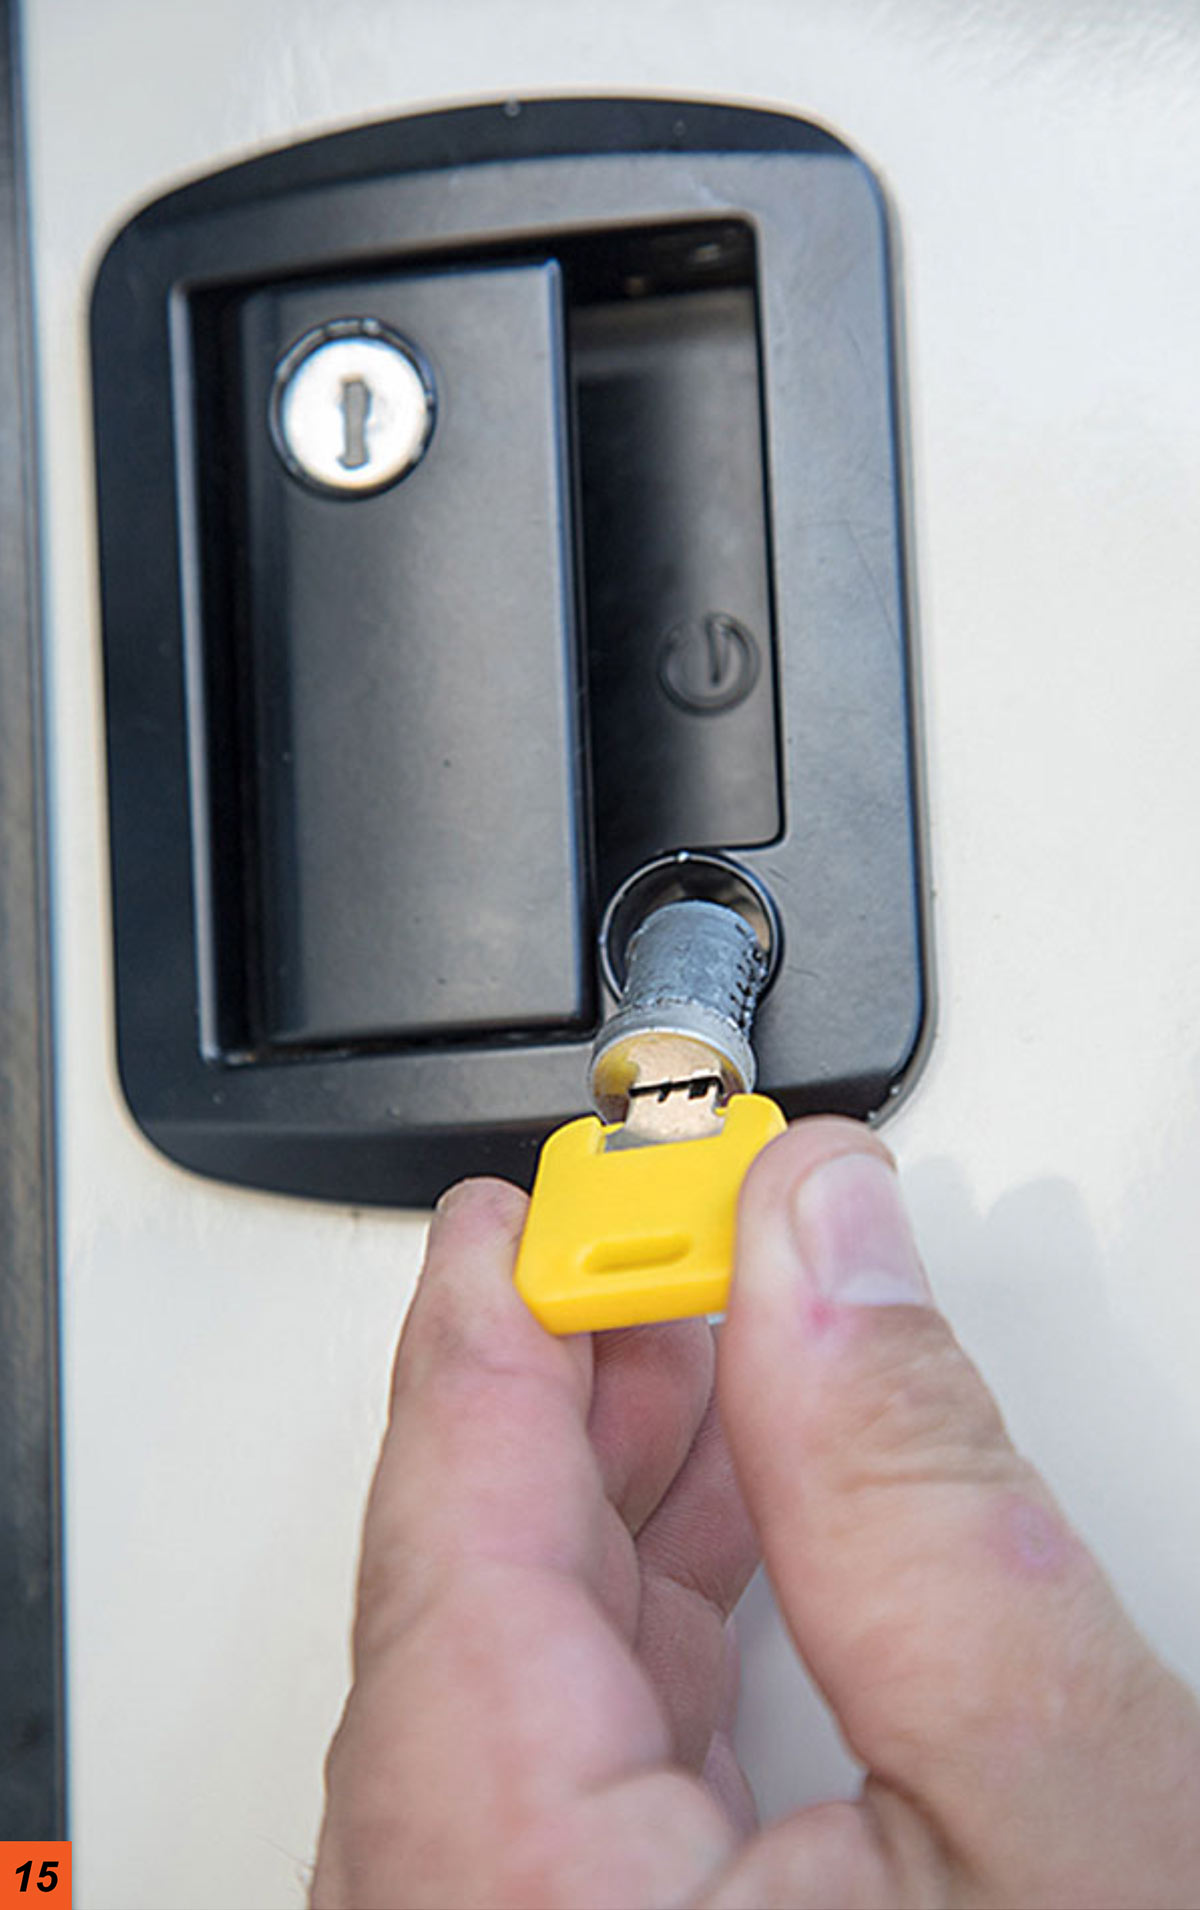
For our purposes, we installed the Ultra E Pro keyless version on the main door leading into the living area of a fifth wheel and a second, standard Ultra M Pro Lock model on the entry door into the rear bedroom. And, since the main exterior storage compartments were fitted with slam-latch handles and another with cam locks, we changed all the hardware to accommodate a keyed-alike system.
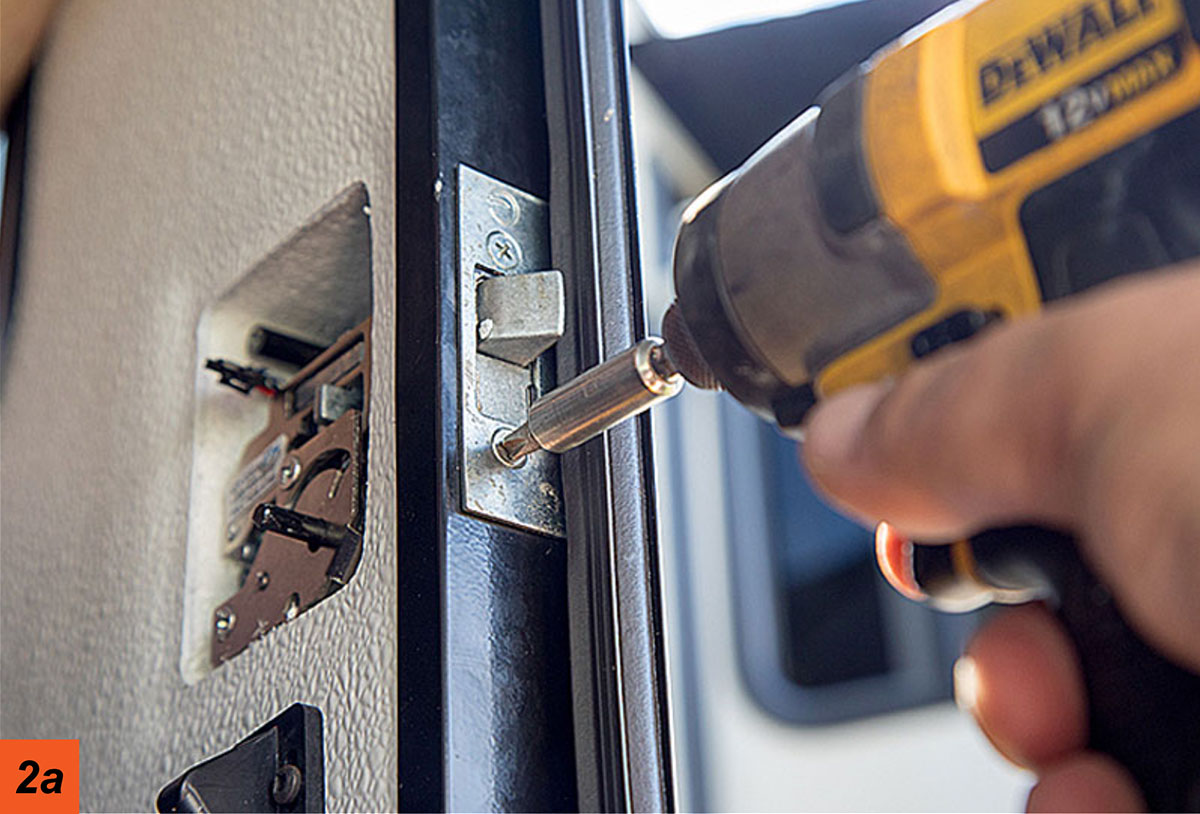
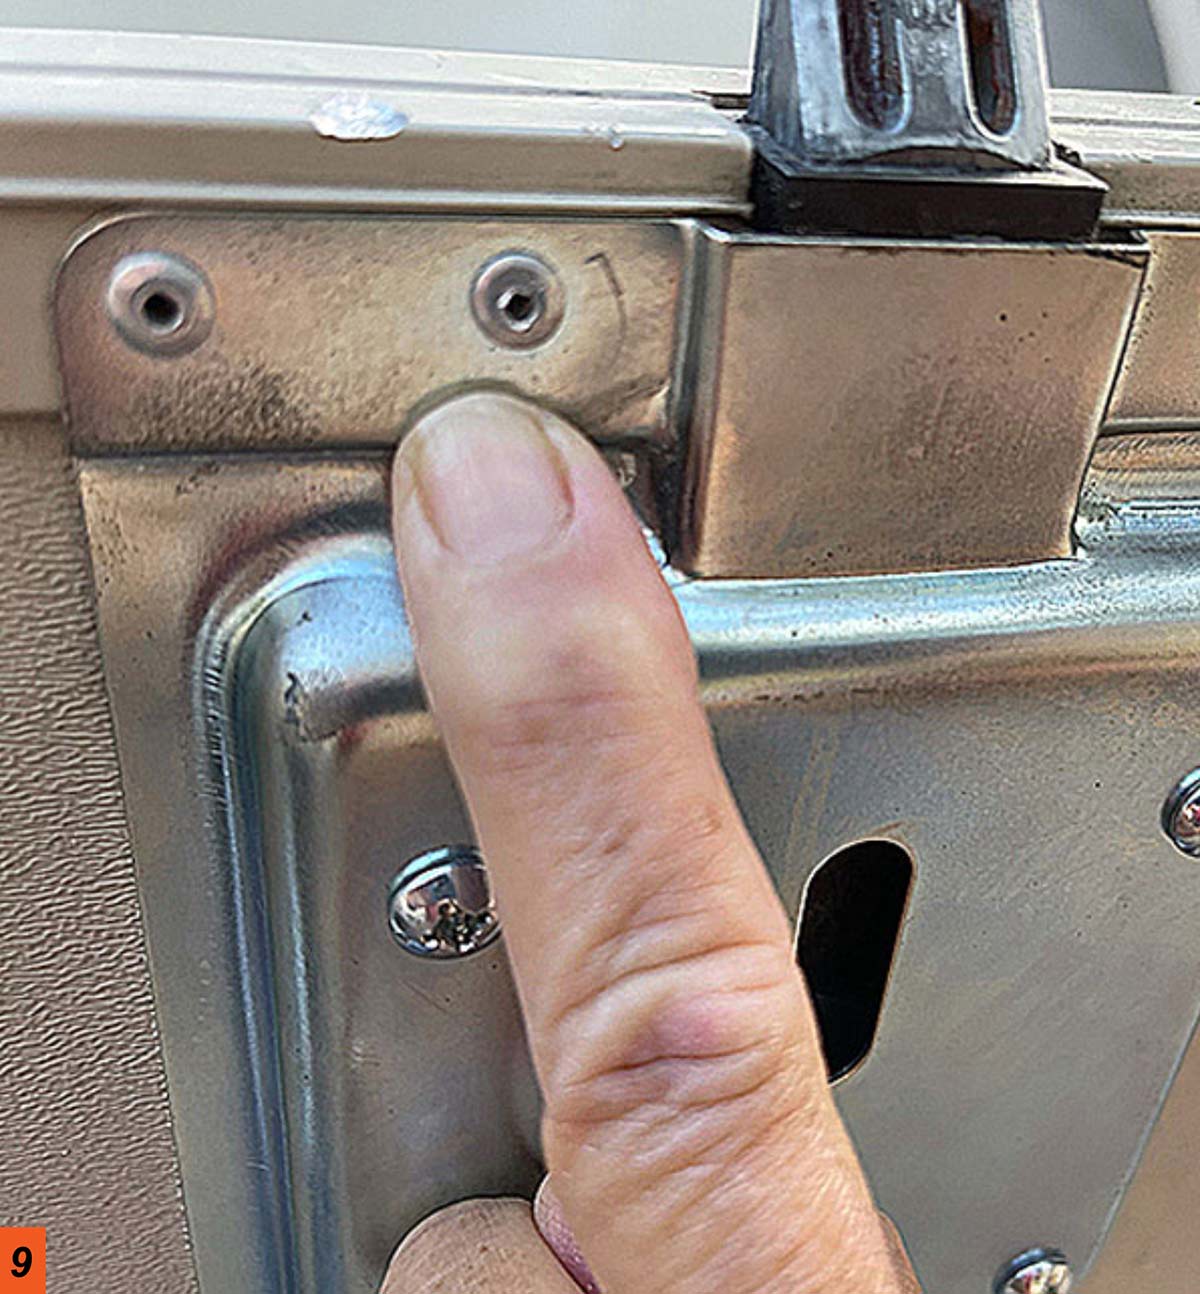
Installing both locksets should be an easy project by anyone using basic hand tools, especially since the chances are good that the opening (once the old lockset is removed) will be compatible without modifications. In our case, the opening was a little tight to allow the mechanism to operate freely, so we simply employed a razor knife to cut away some of the polystyrene insulation and increase the opening tolerances, which only took a few minutes.
Slam Shut Case
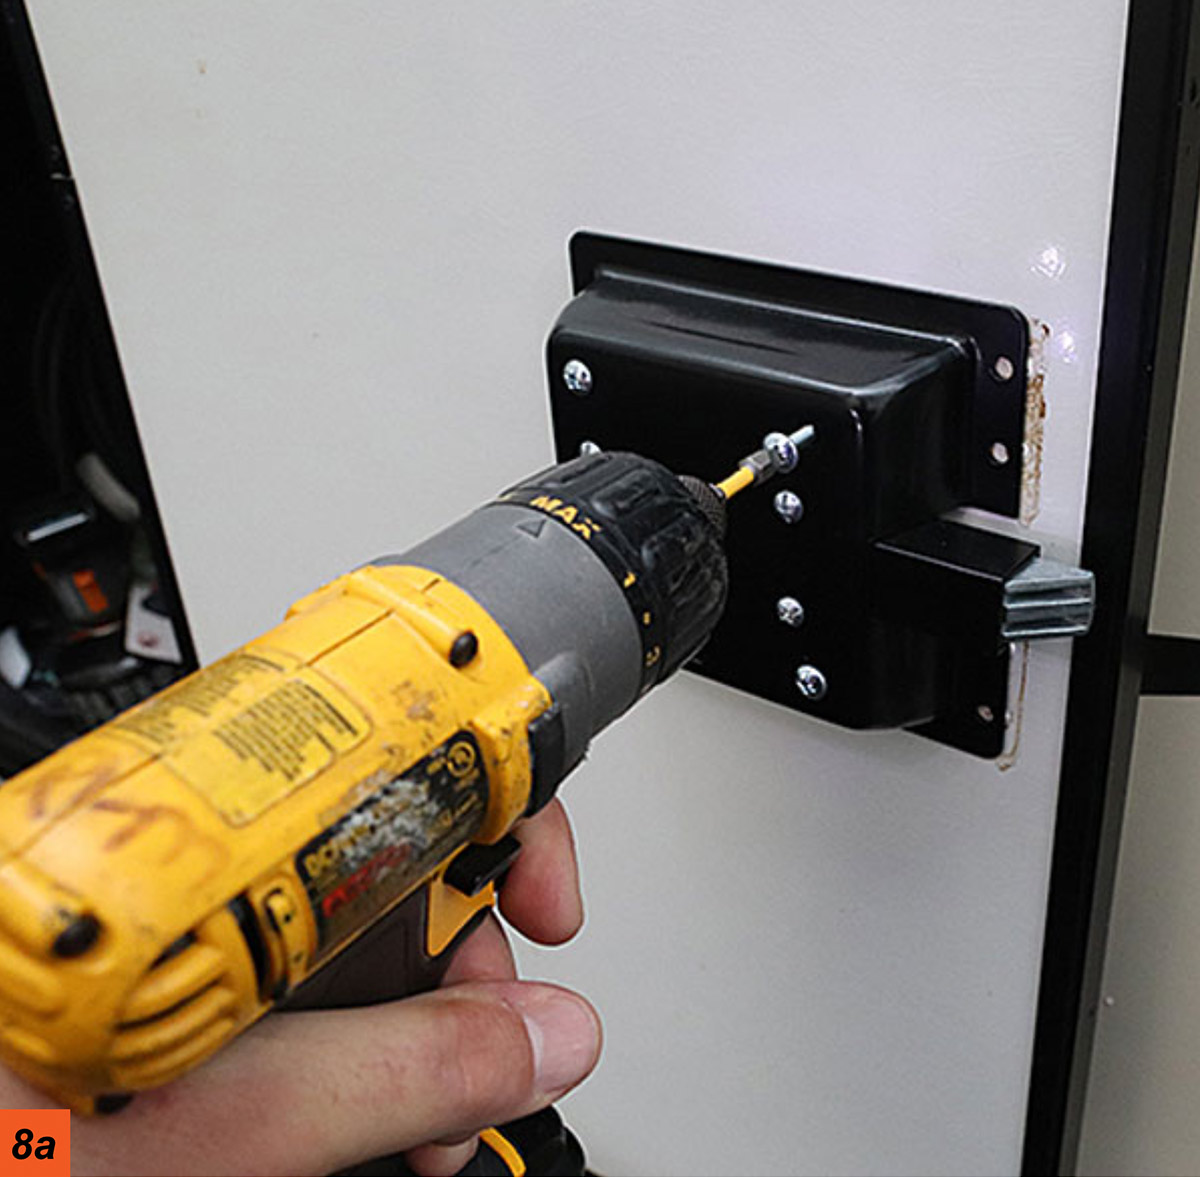
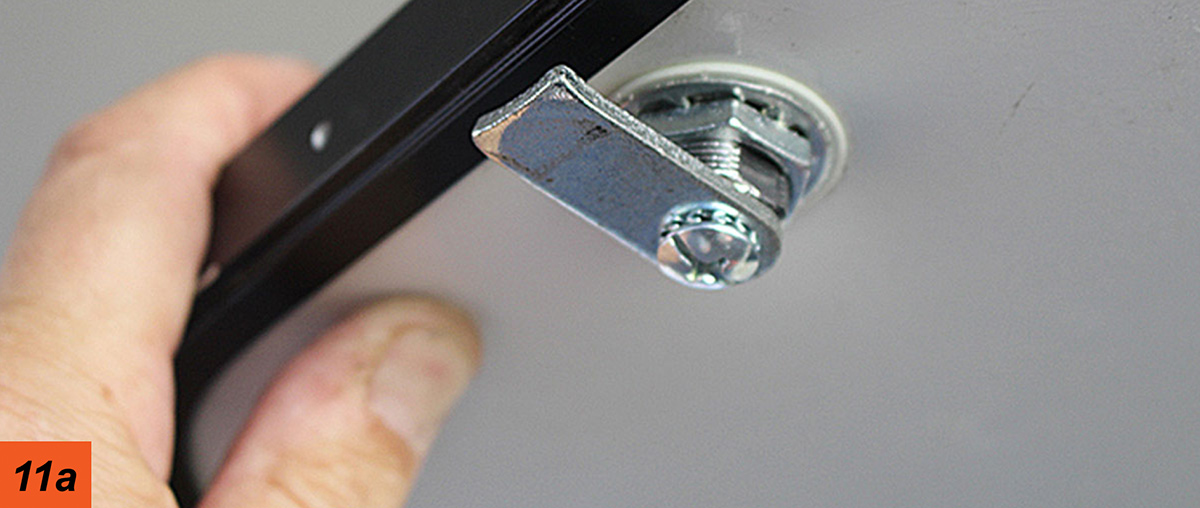
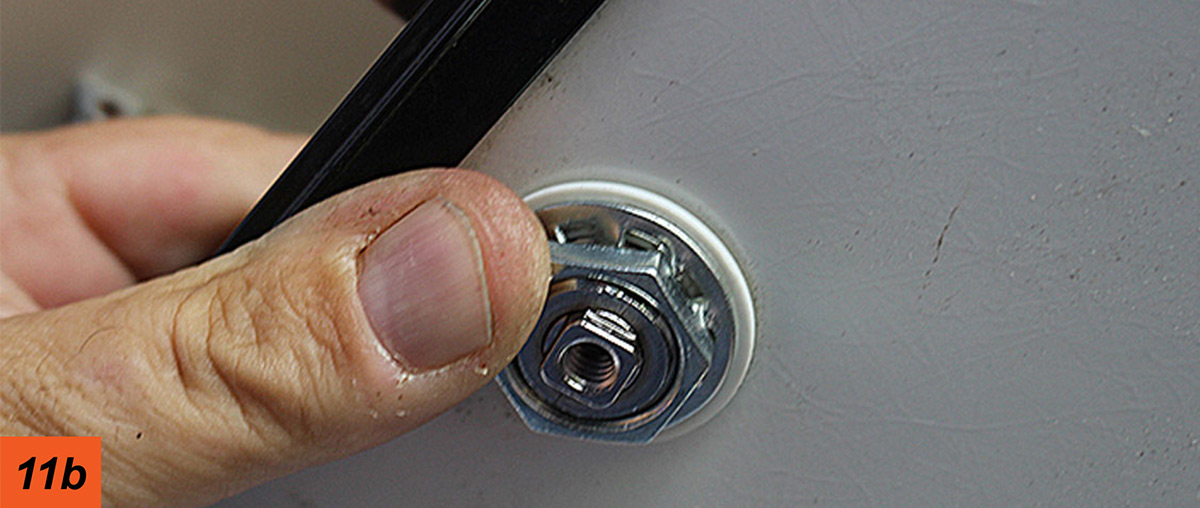
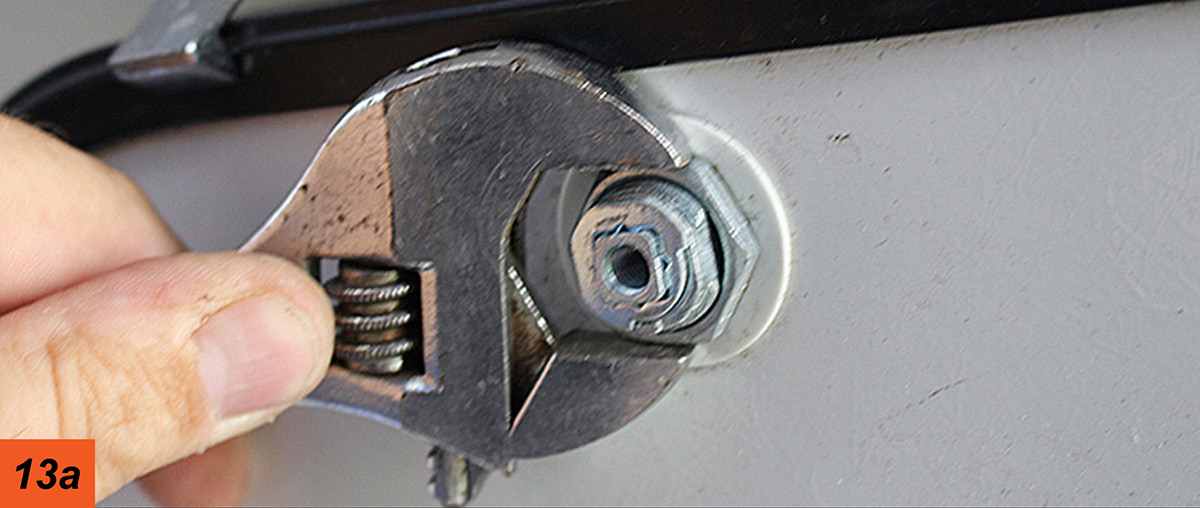
Most fifth wheels these days use slam-latch paddle locks on the exterior storage compartment doors and we replaced those with CPG’s counterparts to enable the tumblers to be keyed alike. The slam-latch paddle locks ($47.73) used for this project were direct replacements for the original Kenco hardware. Locks for other OEM models are available; it’s best to seek professional advice if you are not familiar with the standard locks on your trailer or fifth wheel.
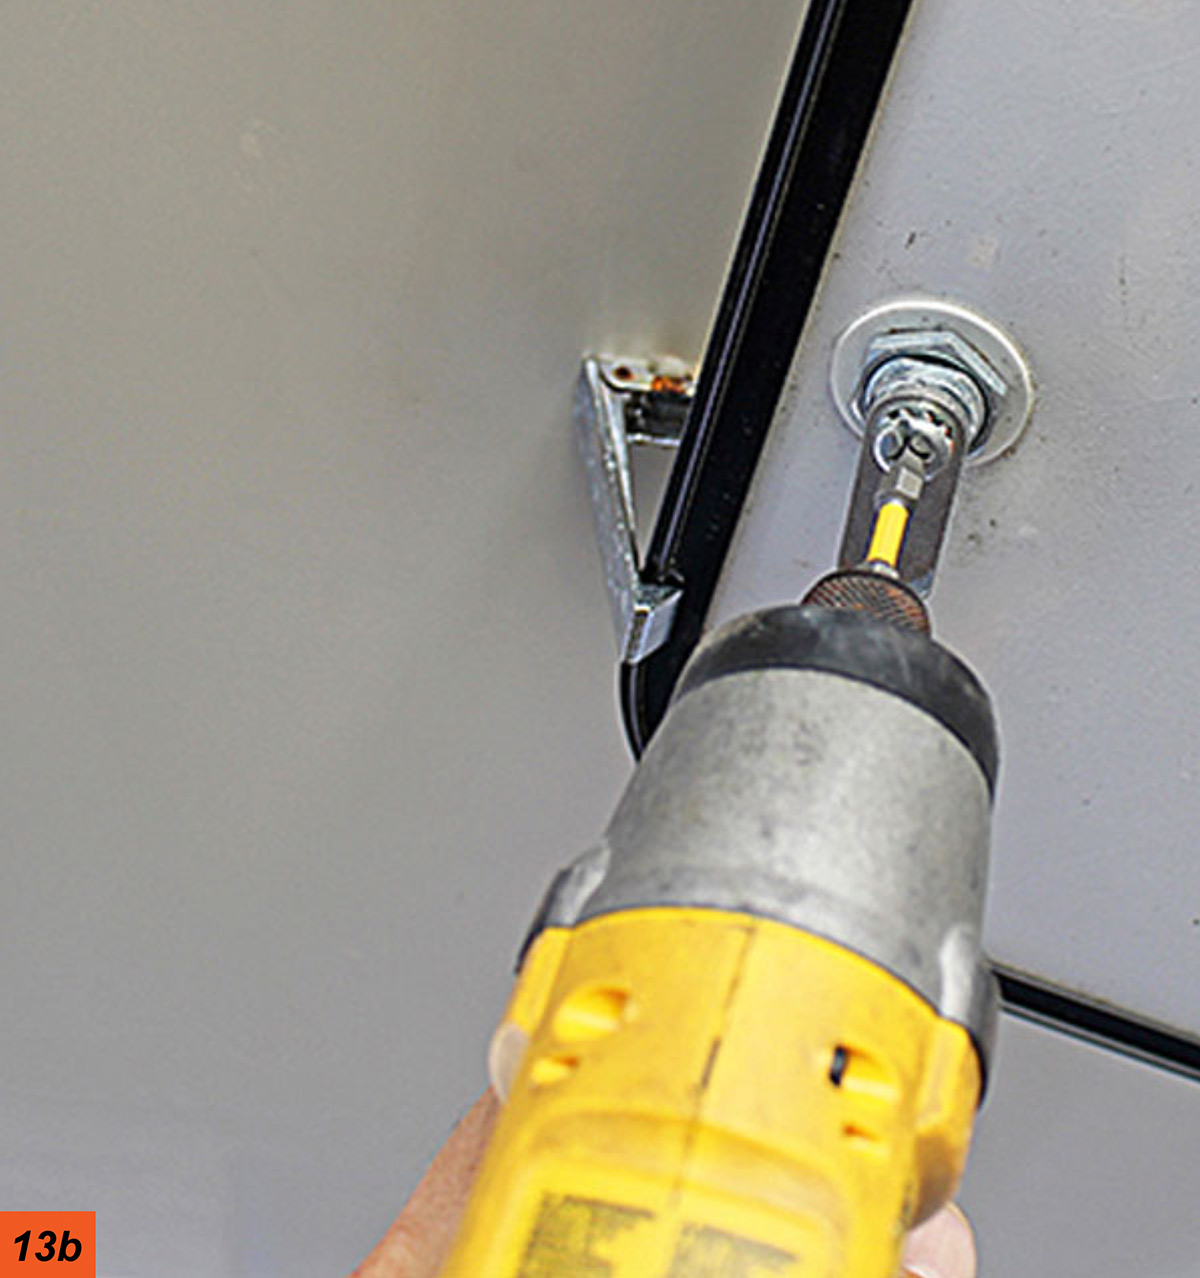
The process is straightforward, meaning you unscrew one lockset and replace it with the CPG slam latch hardware. Some models may require drilling out rivets inside the compartment door; we found that necessary on a second fifth wheel solicited for a concurrent project. A special removal tool will make short work of drilling out the rivets, although a drill bit large enough to release the rivet collar will work fine. Once the new latch brackets are riveted in place, it’s just a matter of mounting the paddle with a screwdriver. However, it’s also possible that you will have to realign the strike plate, which can take some patience.
While the compartment latches work smoothly, we found that a thin coating of a silicone paste, applied about once a month (for heavy usage) facilitates easier opening and closing.
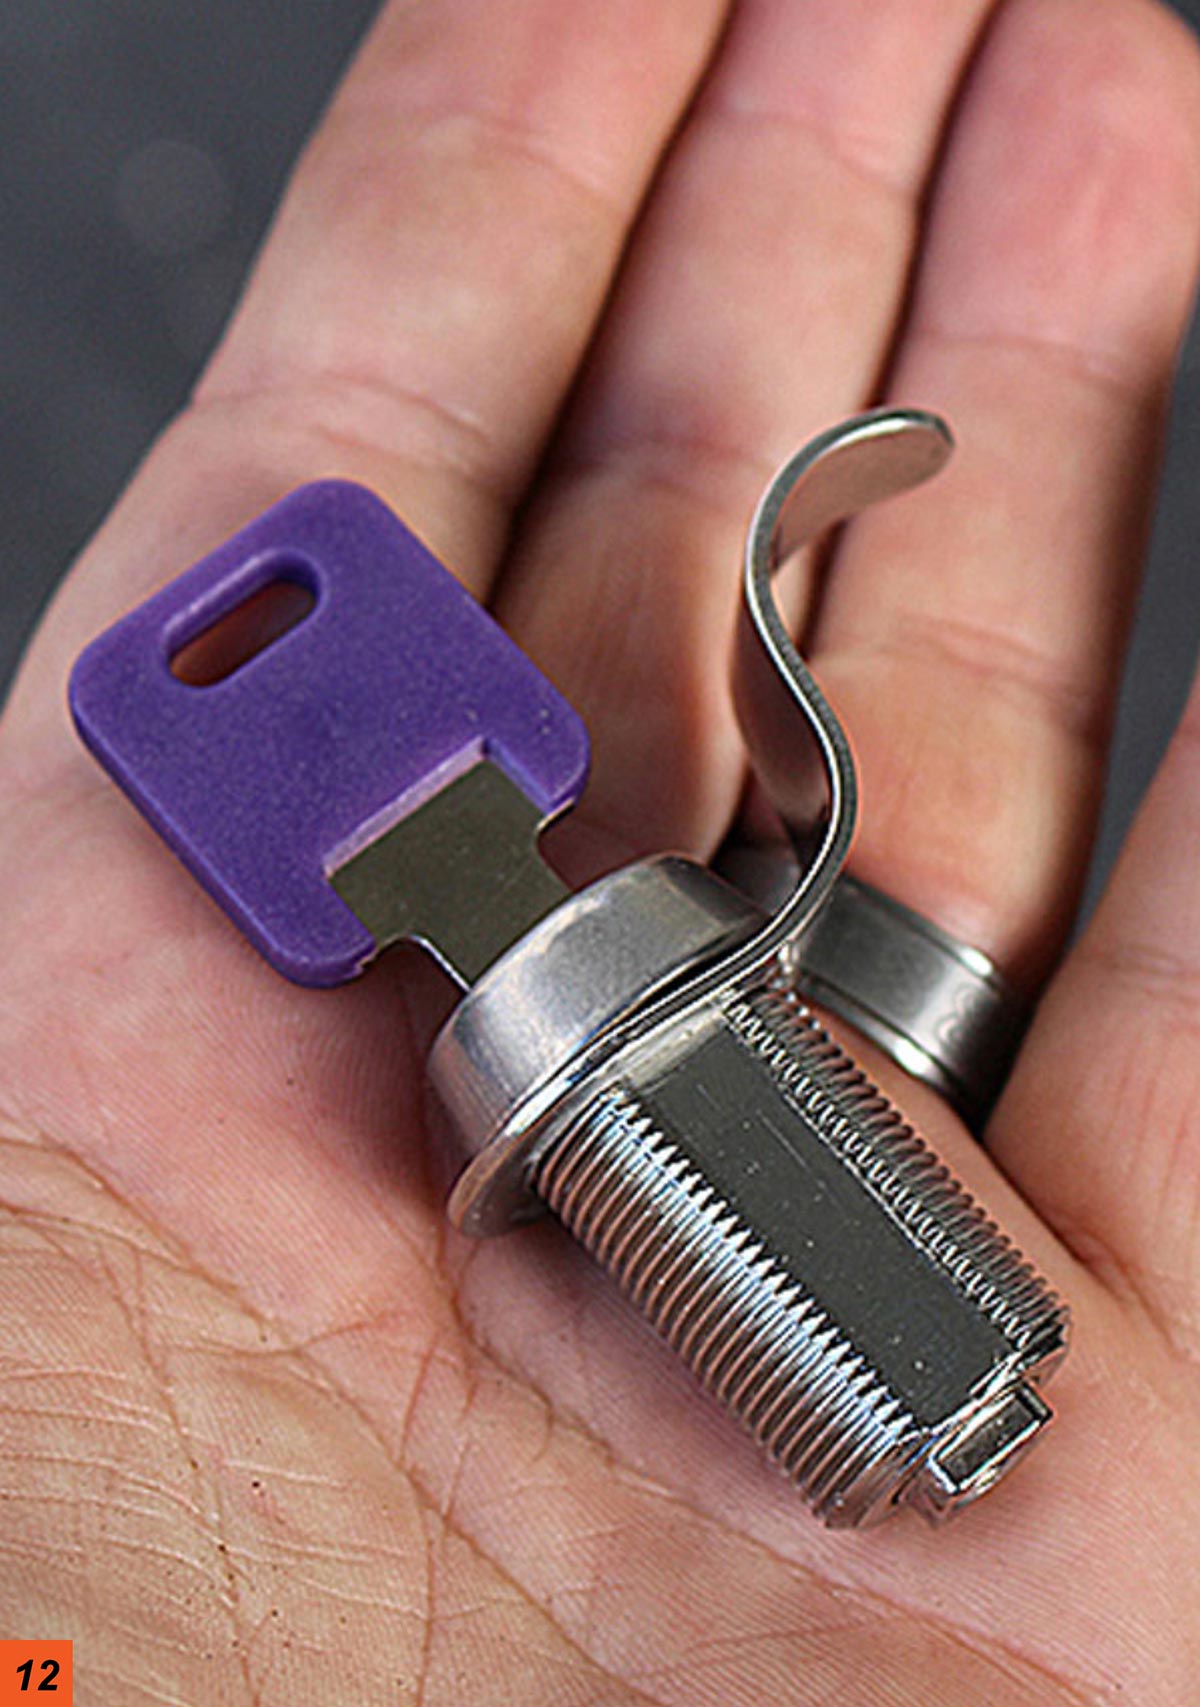
The last phase of this lock transformation project was replacing two CH751 cam locks on one of the storage compartment doors. These locks are nothing more than latches to keep the compartment door closed; the prevalence of the CH751 by many manufacturers means there’s hardly any security offered — your next-door-neighbor at the campground probably has locks on his rig using the same key. CPG offers cam locks for just about any compartment door where the cylinder will fit; 5/8-inch diameter cam locks are available in short- or long-arm versions. The only caveat in using these cam locks is that they may not work in access doors (think outside shower, leveling controller or gravity water fill, for example) that have shallow locks, but there’s nothing worth stealing there. Careful measurement and test fitting will help.
Cam locks sell for around $12 (two keys are provided) and can be fitted with offset latches to fit the compartment-door configuration. The big benefit of using the CPG cam and slam latches is that they can be keyed alike to the entry-way lockset, which happily renders the CH751 key useless.
Owners can order all the locksets with alike keys, including those that cannot be opened with a pass key; we like that feature. There are 90 key combinations available, which makes it pretty difficult to find someone with a key that will fit your locks. Owners can also change the tumblers in existing locks, which requires the use of a change key. This key is not universally available, which is a good thing, but most RV dealers have one or it can be rented from CPG for $50; $40 will be credited when the key is returned. While this is done for security reasons, it’s still possible for a crook to buy a key, but the chances of that are slim. And, if the lock is in the locked position, the change key won’t work anyway.
The process for replacing the tumbler is simple: Insert the change key into the lock, turn and remove the tumbler. Put the key in the new tumbler and secure in the cylinder. It takes less than a minute. In fact, it only required about two hours to complete the entire job. This is one project that raises the convenience factor dramatically by going keyless to enter the RV — and only having to carry one key to access all the storage compartments — while still offering enhanced security against unauthorized entry.


RVlocksandmore.com
(888) 400-9849
rvlocksandmore.com

Already a Subscriber? Click here for Access to the Full Issues.