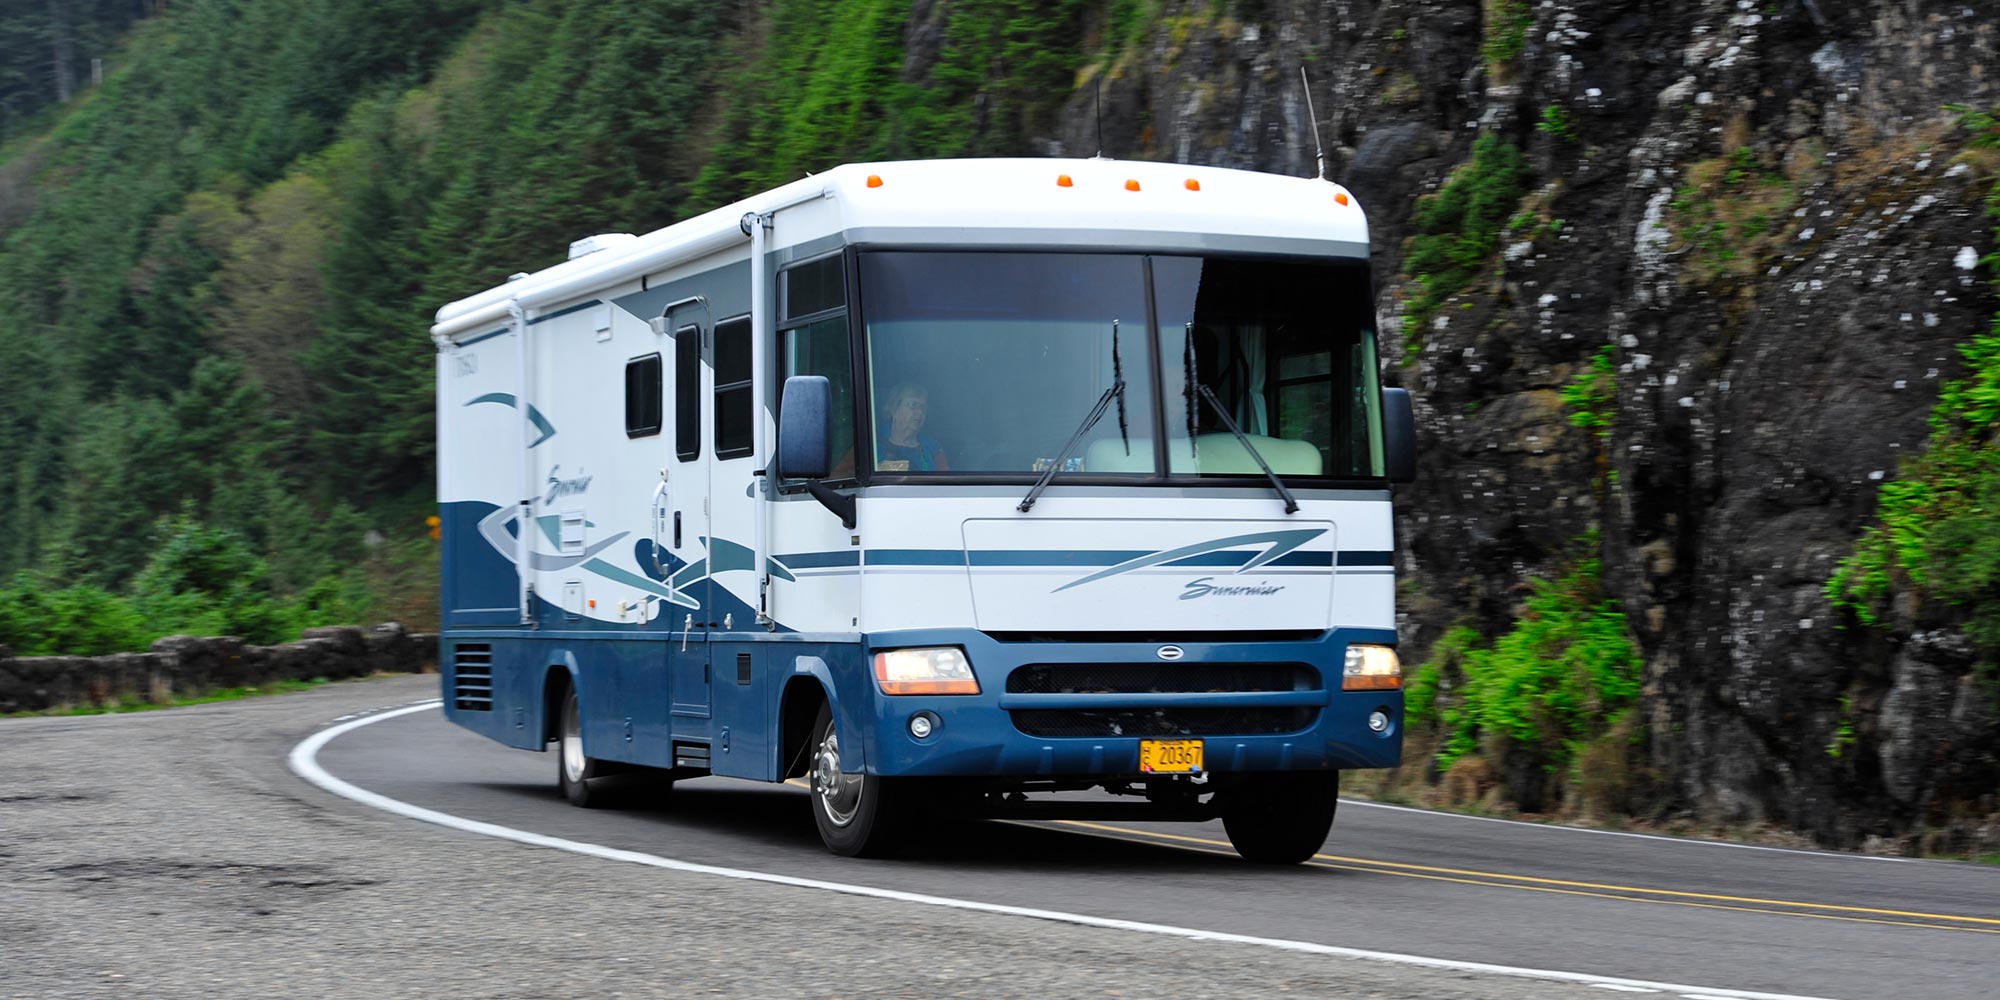
Playtime is Over - RV Enthusiast Magazine

Playtime is Over

by | Jan 26, 2021 | Suspension

SuperSteer Radius Rods tighten steering and improve handling on the Ford F-53 motor home chassis
One of the most common complaints from drivers of motorhomes is loose, vague steering that requires constant sawing of the steering wheel. This, in turn, leads to driver fatigue and a constant rocking motion inside the coach that also impacts passenger comfort.

The majority of motorhome owners attribute such steering “play” to the steering system, either a steering box that’s going bad or looseness in the steering linkage. In actuality, the steering components are usually not the culprit on motorhomes based on the popular Ford F-53 Class A motor home chassis. It’s an issue with movement in the front leaf springs.
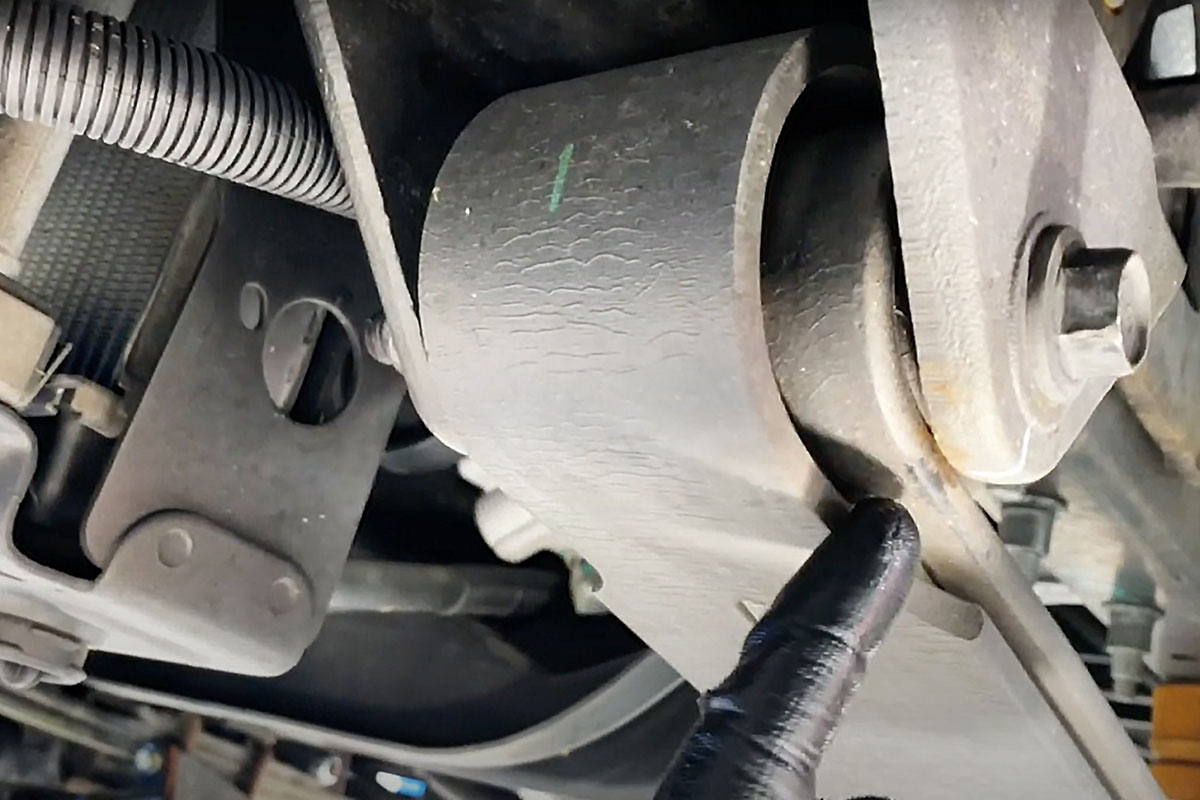
The OEM spring eye bushings on 2010-present Ford F-53 motorhome chassis allow fore-aft movement, and some torsional flex of the springs themselves. This movement contributes to loose, vague steering.
“Suspensions are a system, and every part of the system, at some point in time, has a role to play in the overall handling of a motorhome,” explained Robert Henderson, CEO of Henderson’s Line-up in Grants Pass, Oregon. “One component in that system can complement another, or one can aggravate another. That’s precisely what happens in the steering of motorhomes on the 2010-newer Ford F-53 platforms.”
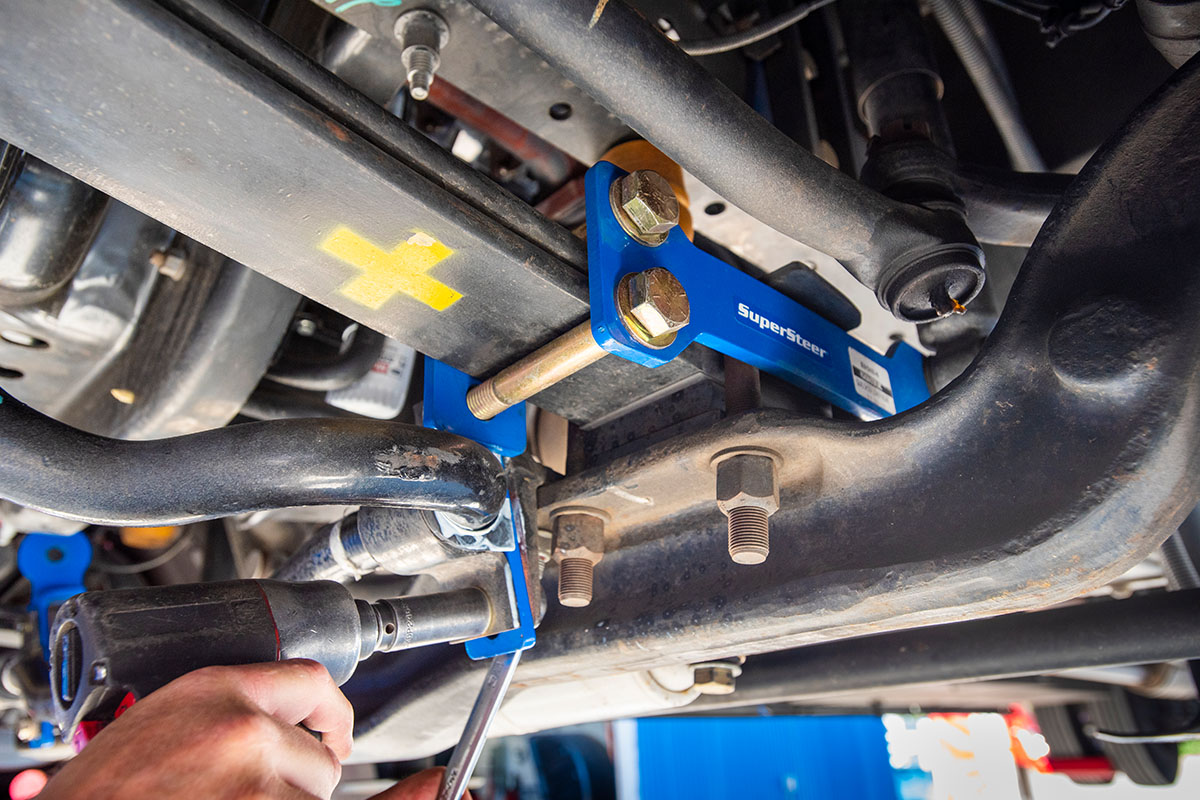
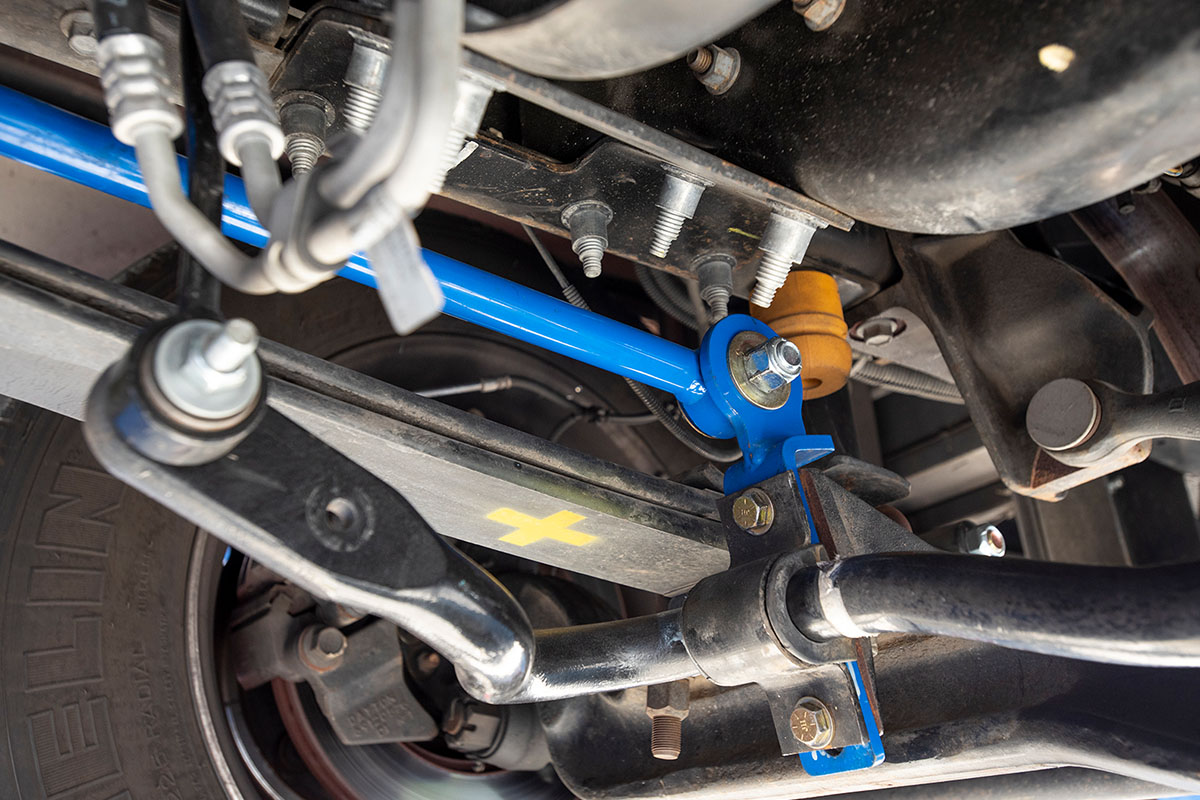
SuperSteer Radius Rod kit installed on a late-model F-53 motorhome chassis.
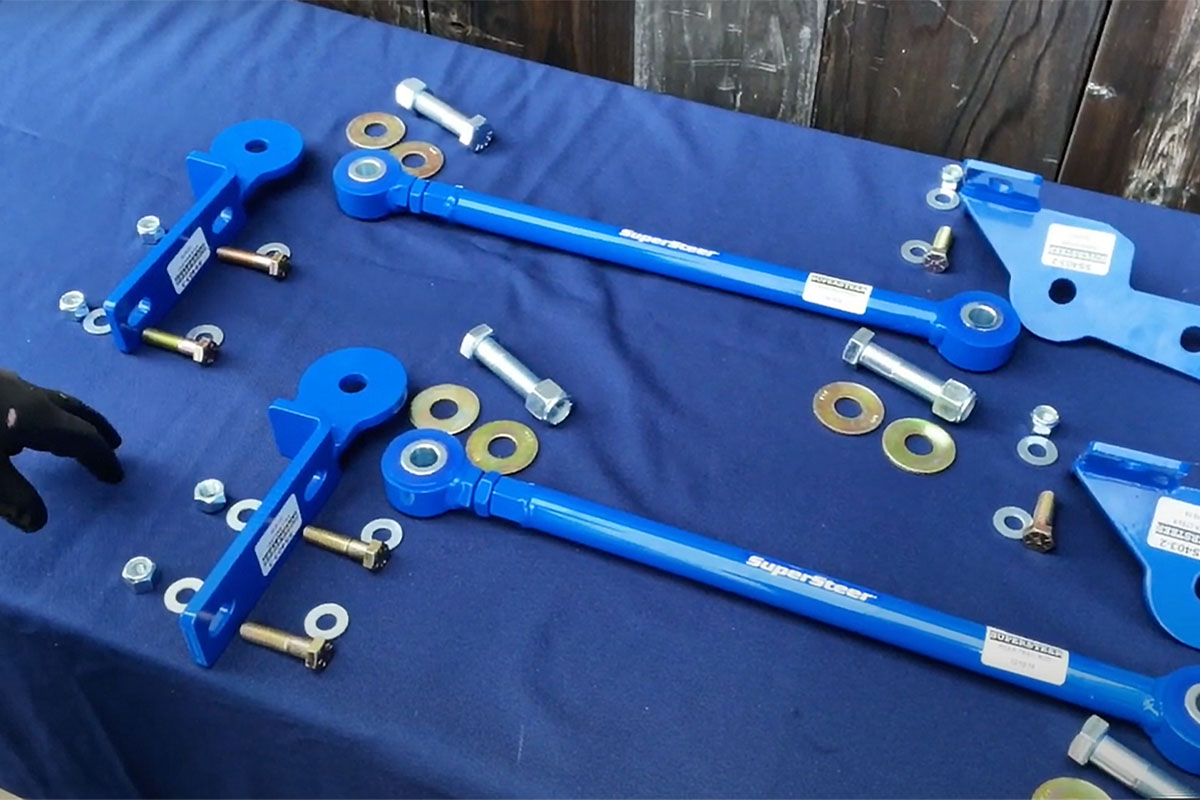
The SuperSteer Radius Rod kit (p/n SS403RR) consists of two radius rods, the front/rear mounting brackets, mounting hardware, and complete instructions. There’s also a YouTube video that details the installation for DIYers.
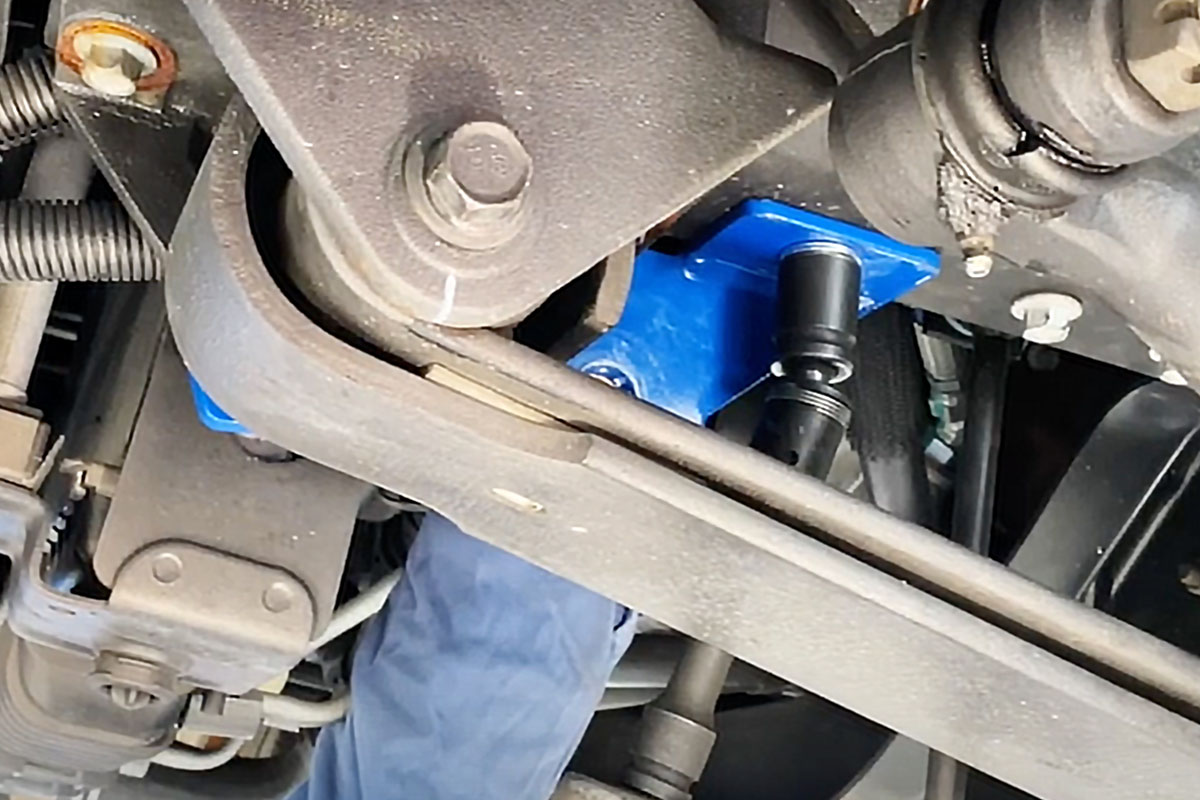
The installation begins with removal of the (15/16”) nut from the front spring eye bolt on each side. The nuts are re-used. The SS403-2 frame bracket is placed with the flat crossplate towards the rear facing up, over the spring eye bolt. One of the supplied ½”x1.5” frame bolts, along with a nut and flat washer, is used to loosely bolt the crossplate to the frame. Then the nut on the front spring eye bolt is replaced (use thread locker on both the new bolt and the spring eye bolt nut.)
Henderson, who has decades of experience in motorhome chassis diagnostics and repair, praises the F-53 steering box and linkage as one of the best on the market. But he says the movement of the tapered-leaf spring eyes on the OEM rubber bushings, combined with the leaf-spring packs twisting and wrapping under heavier steering and braking loads, is another story.
Suspensions are a system, and every part of the system, at some point in time, has a role to play in the overall handling of a motorhome.
Such movement, as small as it may be even on brand new coaches, has a direct effect on the steering, causing slow response, road wander and even excessive nose-dive under hard braking, says Henderson. That’s why the company’s motorhome suspension/chassis aftermarket division, SuperSteer RV Products, has developed the SS403RR Radius Rods (MSRP $625). These Radius Rods attach to each front spring pack and to the front axle of 2010-newer Ford F-53 chassis. This prevents the unwanted fore-aft movement of the front suspension.
The spring eye nuts are torqed to 120-140 lbs.-ft., and the new rear bolts to 75-80 lbs.-ft. The rear bracket mounting bolts are torqued to the same 75-80 lbs.-ft.
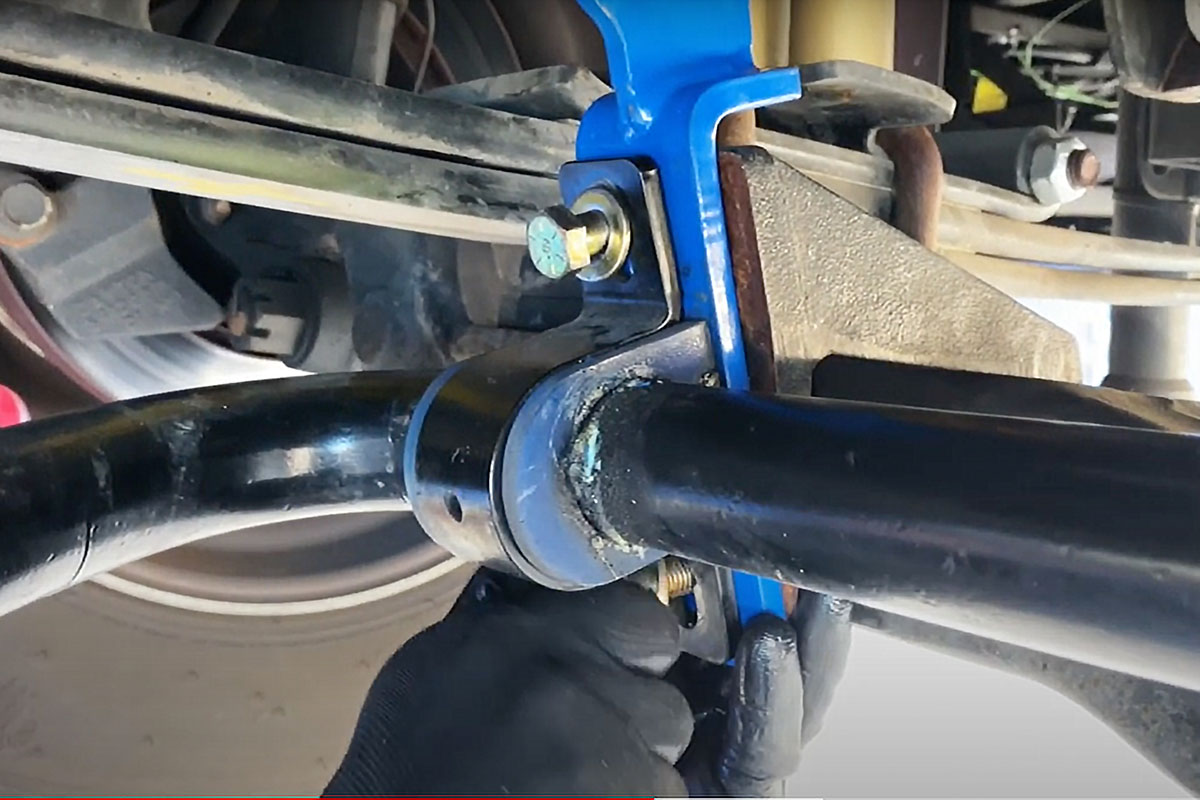
The four bolts that hold the front sway bar saddle bracket are loosened, then two on one side are removed
The four bolts that hold the front sway bar saddle bracket are loosened, then two on one side are removed.
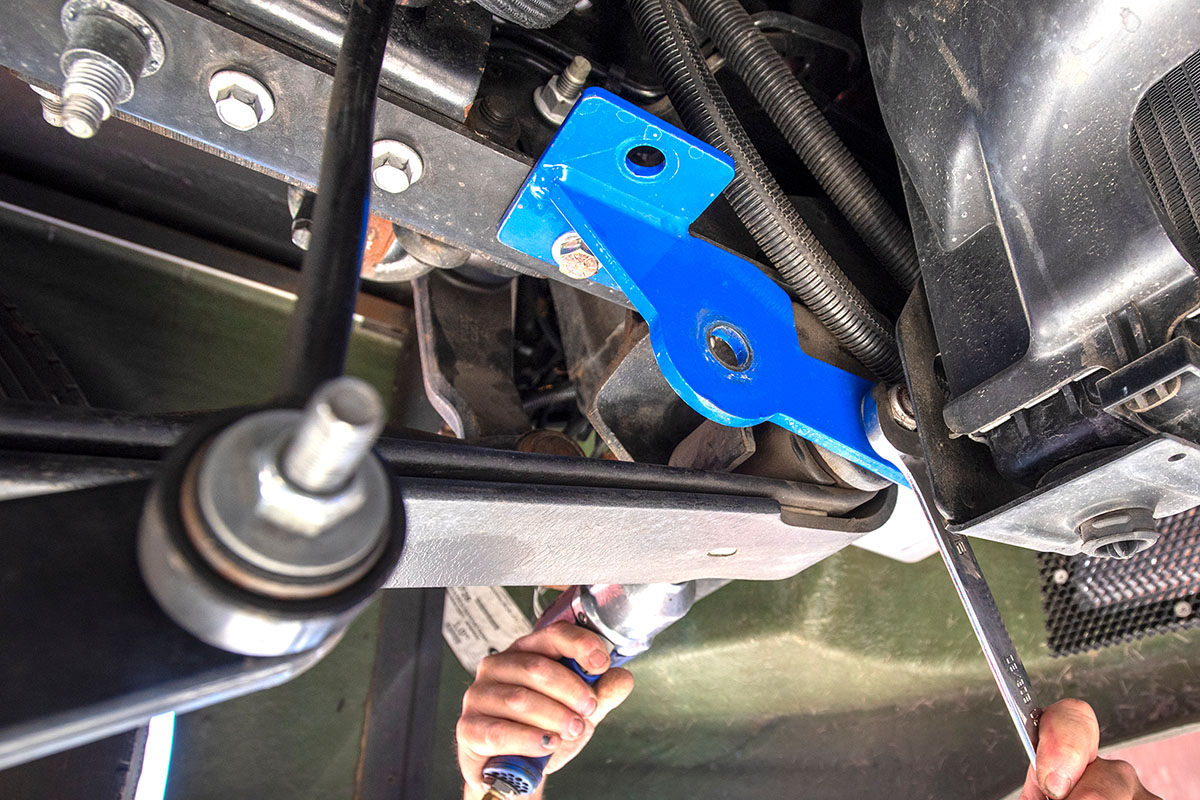
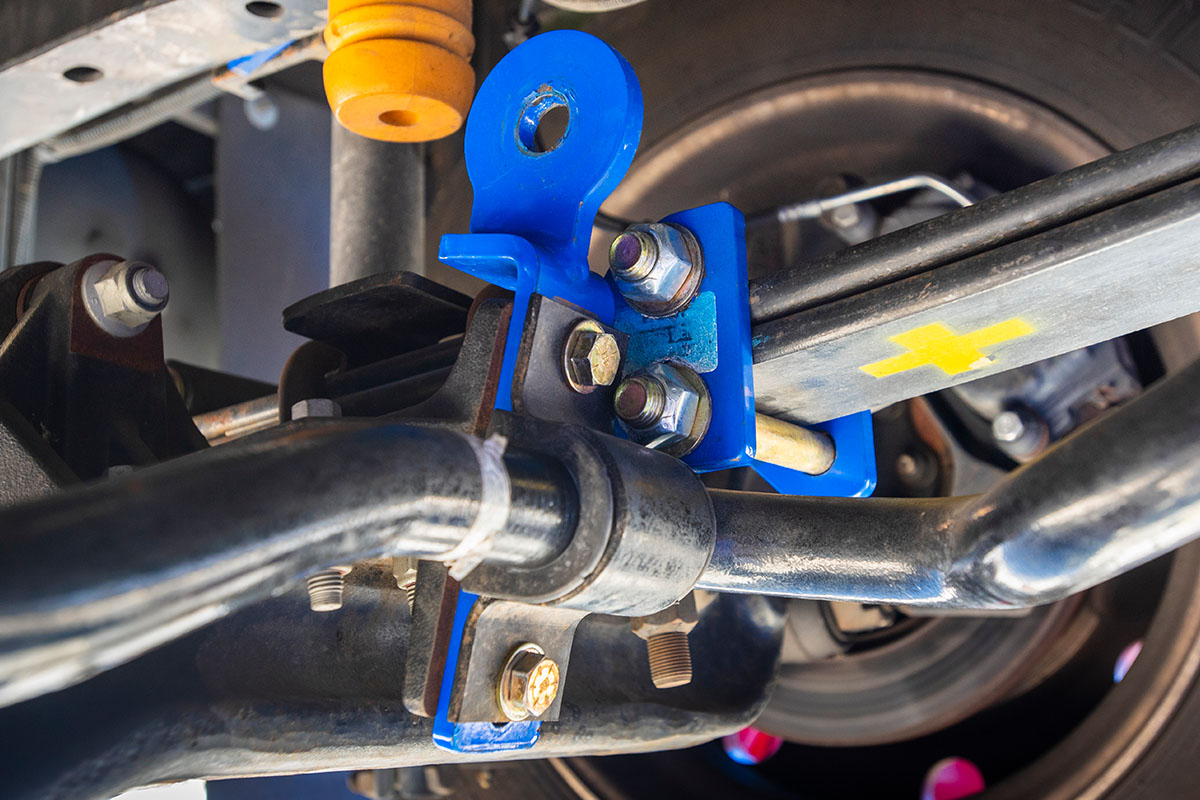
 The SS403-3 axle bracket is installed between the axle and the saddle bracket with the round end facing up and the curved portion pointing toward the rear of the coach
The SS403-3 axle bracket is installed between the axle and the saddle bracket with the round end facing up and the curved portion pointing toward the rear of the coach.
A dab of thread locker is used on the new bolts—but they are left slightly loose until the bracket on other side is bolted on. When both sides are in place, the nuts are torqued to 75-80 lbs.-ft.
The new ½ x 2” bolts, flat washer and lock nuts are used to bolt the axle bracket between the axle and sway bar saddle bracket. A dab of thread locker is used on the new bolts—but they are left slightly loose until the bracket on other side is bolted on. When both sides are in place, the nuts are torqued to 75-80 lbs.-ft.
Installation of the Radius Rods is relatively easy, and can make a significant improvement in how the motorhome drives and handles. In our brief test drive, we found that the Radius Rods nearly eliminated “sawing” at the steering wheel in sweeping turns or along off-camber sections of roadways. The product can also help improve stability during wind buffeting and cross-winds, according to Henderson.

“Every F-53 motorhome owner that’s had their coach upgraded with the new SuperSteer Radius Rod kit has nothing but praise for the improvement in steering,” said Henderson. “The driver is more confident behind the wheel, and everyone in the coach is just a lot more comfortable.”
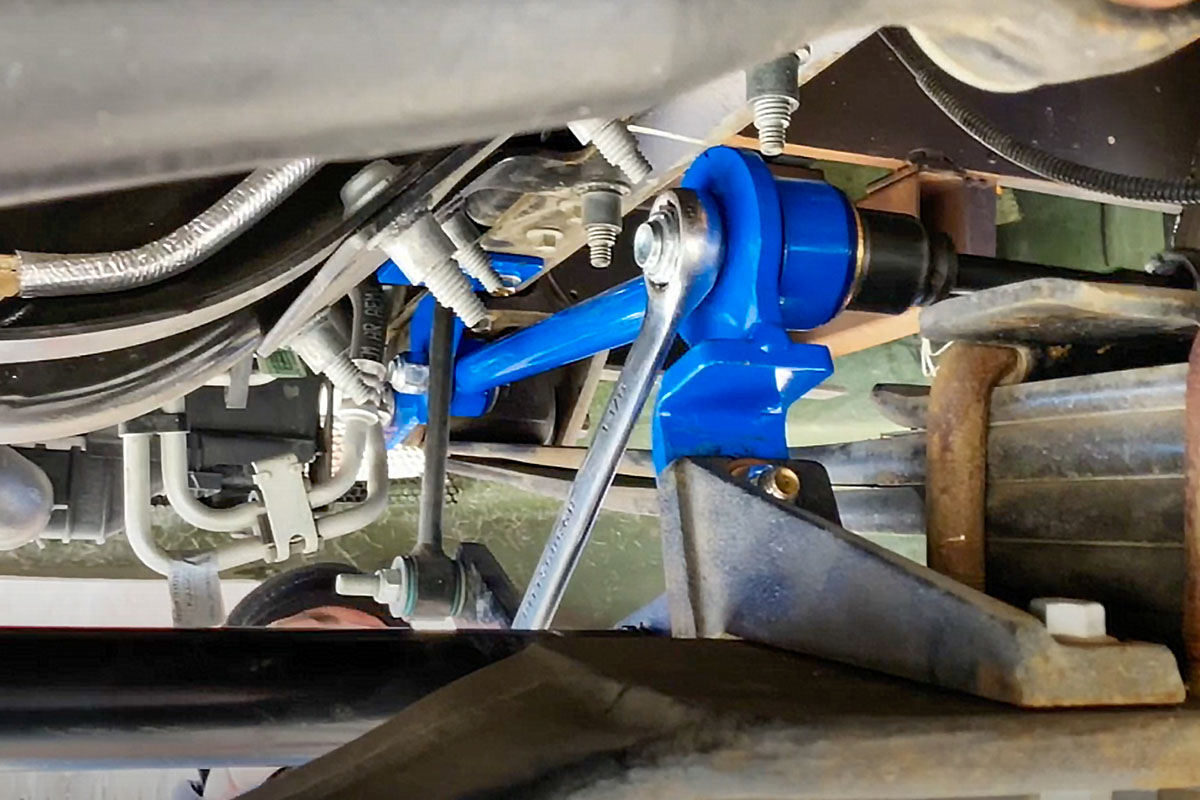
One radius rod is adjusted so that the eye and the mounting holes in the new brackets line up. The adjustable eye on the radius rod is turned to make the adjustment. The rods are installed on the outside of the bracket, placing flat washers between the bushings and bracket to protect the bushings. Here again, threadlocker is on threads.  The nuts are left loose until the other side is installed, then the bolts are torqued to 120 lbs.-ft.
One radius rod is adjusted so that the eye and the mounting holes in the new brackets line up. The adjustable eye on the radius rod is turned to make the adjustment. The rods are installed on the outside of the bracket, placing flat washers between the bushings and bracket to protect the bushings. Here again, threadlocker is on threads. The nuts are left loose until the other side is installed, then the bolts are torqued to 120 lbs.-ft.
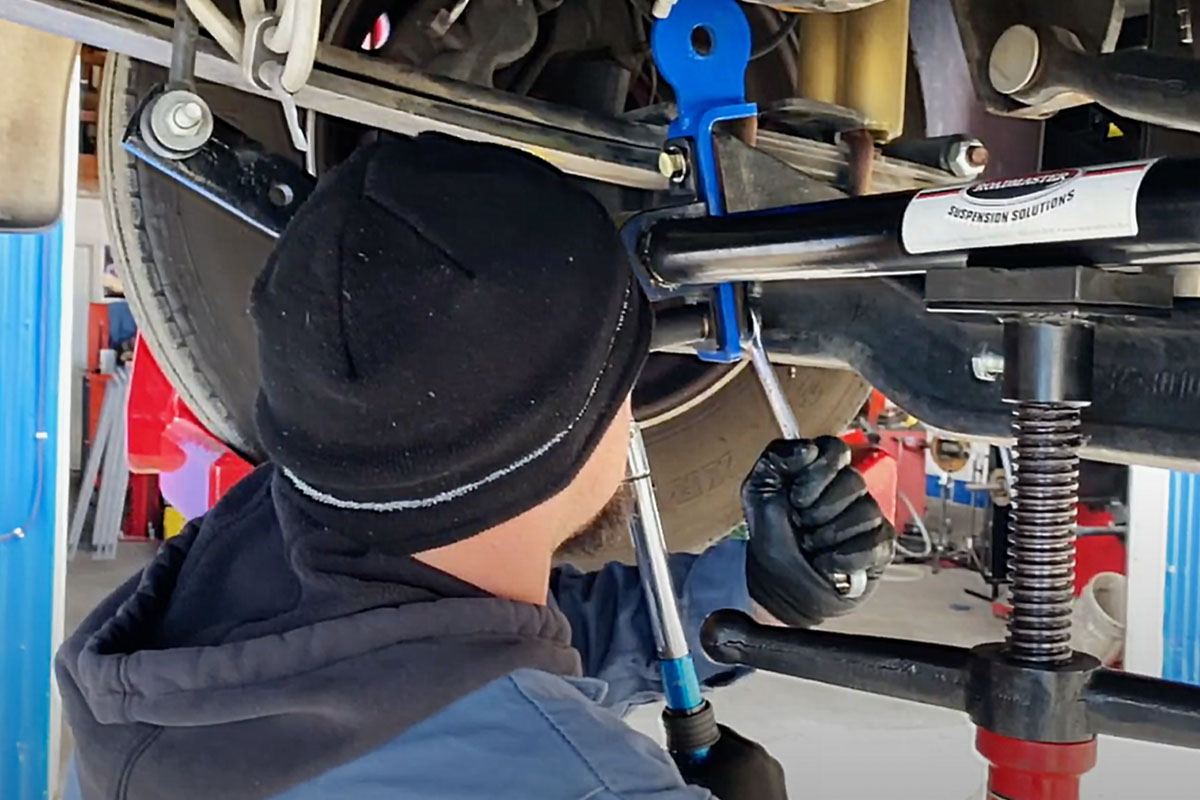
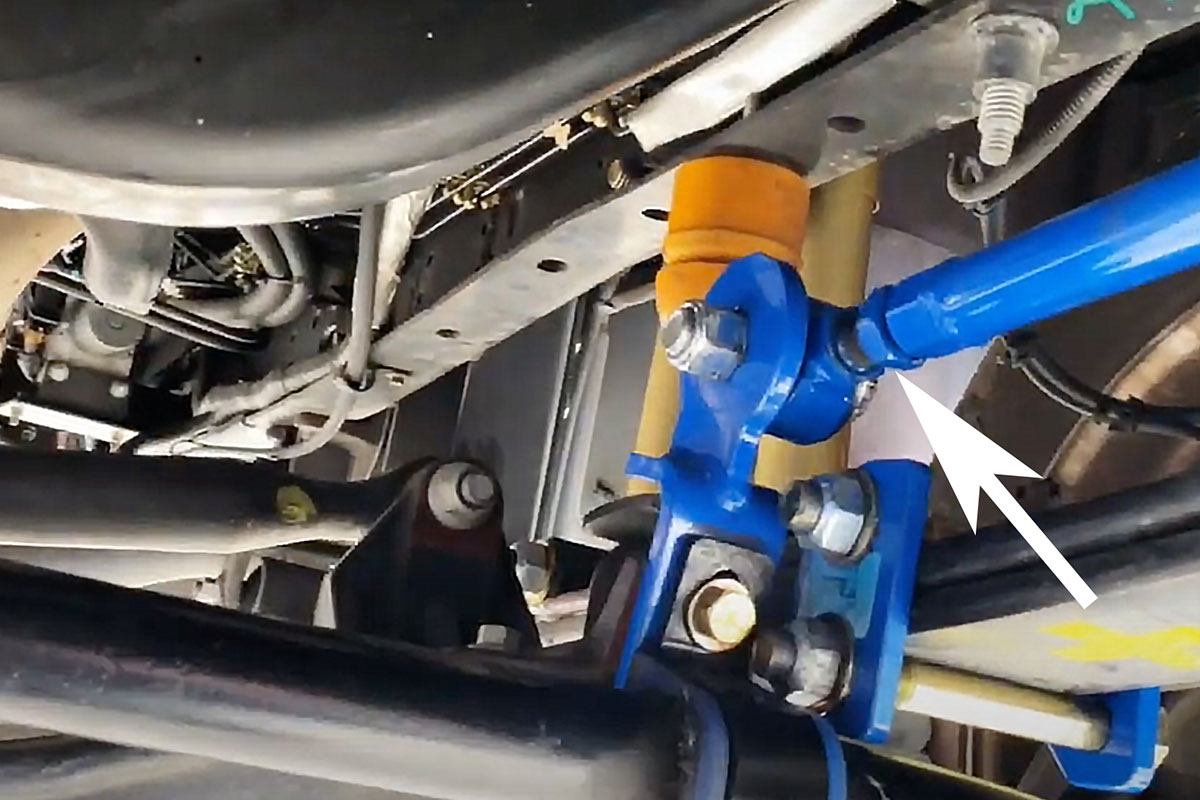
The last step is to tighten the locking nut (arrow) on each radius rod. Put a drop of Loctite on the threads, then use a wrench to snug the nut down. Double-check the brackets, nut torque, and that the radius rods are mounted on the outside of the brackets to clear the sway bar uplinks.
Sources:

SuperSteer
888-898-3281
www.supersteerparts.com

Henderson’s Line-Up
541-955-0769
www.hendersonslineup.com

Photos by author
Get Updates
Subscribe today and never miss an issue!
Get all the latest tips and news to keep you moving on that open road!
RV Enthusiast May/June 2024 Issue
Current Issue
May/June 2024

With the summer season in full swing we're proud to present our latest issue of RV Enthusiast! The May/June issue covers the Best Towable Suspension Upgrades, Absorption Refrigerator Tips & Tricks, Enhancing RV Shower Time, PLUS so much more!

Already a Subscriber? Click here for Access to the Full Issues.

Share This